


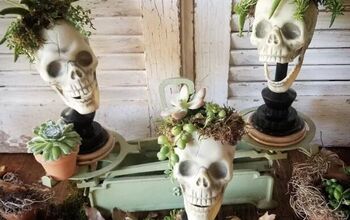
Halloween Flower Cauldron!
With the right color story and a little crafty know-how, wood flowers from Oh You're Lovely can be perfect for a tender representation of affection on Valentine's Day, an expression of love on a wedding day, or a slightly terrifying touch of gore on Halloween.
Wait – what??
It's true! Flowers don't have to be just for the squishier holidays. Today we're going to show you how wood flowers can be the perfect basis for an absolutely chilling Halloween piece. Follow along and let's get started!
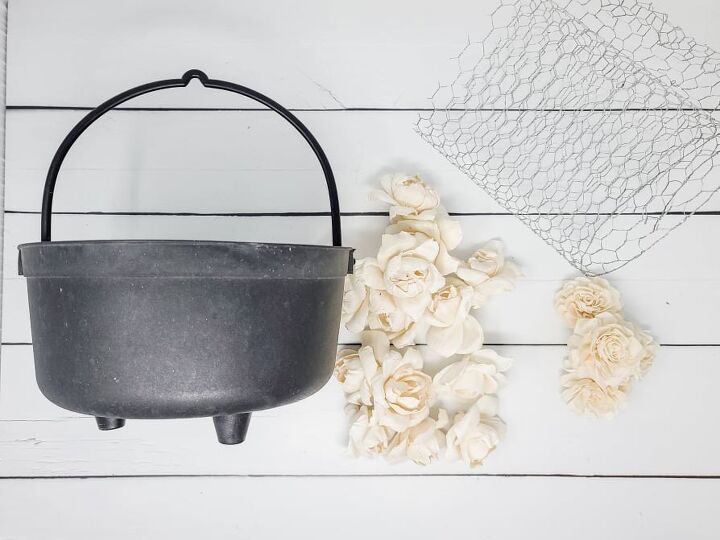
Here is what I used for this project:
- Plastic "cauldron" - this was actually a planter for a plant that I bought from my local grocery store last year!
- Chicken wire or craft foam
- Mature peonies (wood flowers from Oh You're Lovely)
- Carnations (wood flowers from Oh You're Lovely)
- Craft acrylic paint (Apple Barrel "Lime Tree" and FolkArt "Cardinal Red")
- Faux Ravens
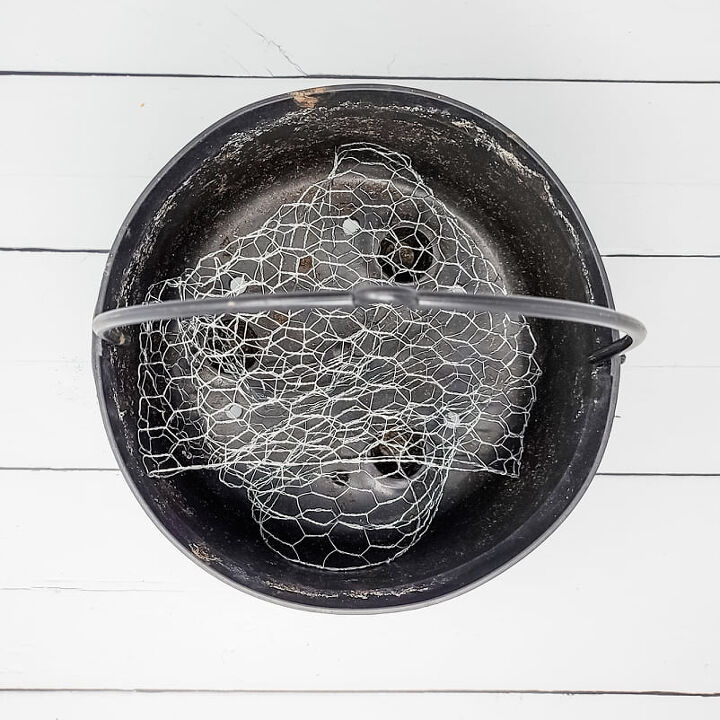
Halloween decor in my house changes every year so I wanted to use chicken wire for the base. That way, everything will be held in place for Halloween but can be easily removed if/when I decide to switch things out.
To create the chicken wire base, I cut a piece of it that was roughly two times the diameter of the cauldron and loosely (and carefully - chicken wire is sharp!) crumpled it into a ball shape.
You can also use a craft foam block and glue that down inside the cauldron if you want to make a more permanent piece!
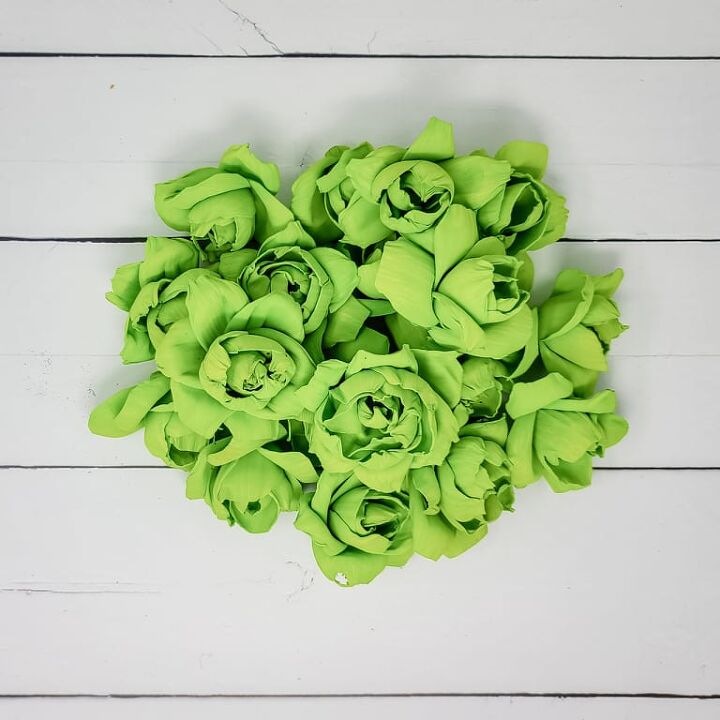
I wanted the flowers to create a bubbling witch's brew look and immediately thought of our mature peonies! They have a lot of movement from the folded petal centers and curled outer petals. You can also easily dye them using the dip dye method. For these, I used Apple Barrel "Lime Tree" craft acrylic paint.
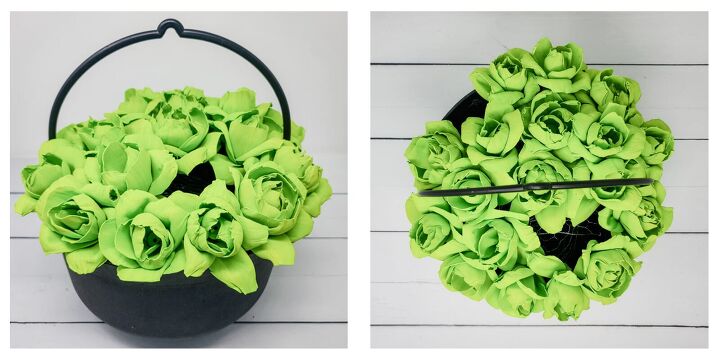
Once the flowers are dry, attach them to wire stems (18 gauge works great) with a dab of hot glue on the bottom of the flower. Cut the stems down to size and start adding your flowers to the cauldron! Don't worry if there are a few holes as we will be adding some different flowers next.
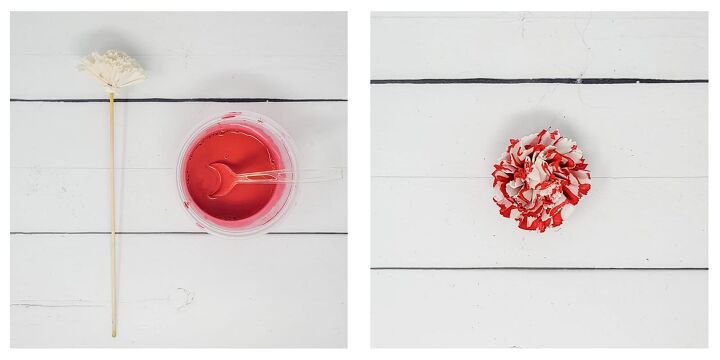
When it comes to Halloween decor, I love adding a little gore. To make the "brains" that will be adding to the witch's brew, I first mixed up FolkArt "Cardinal Red" with water (50% paint, 50% water). Next, I grabbed a few carnation wood flowers and dripped the paint/water mixture onto the flower with a spoon.
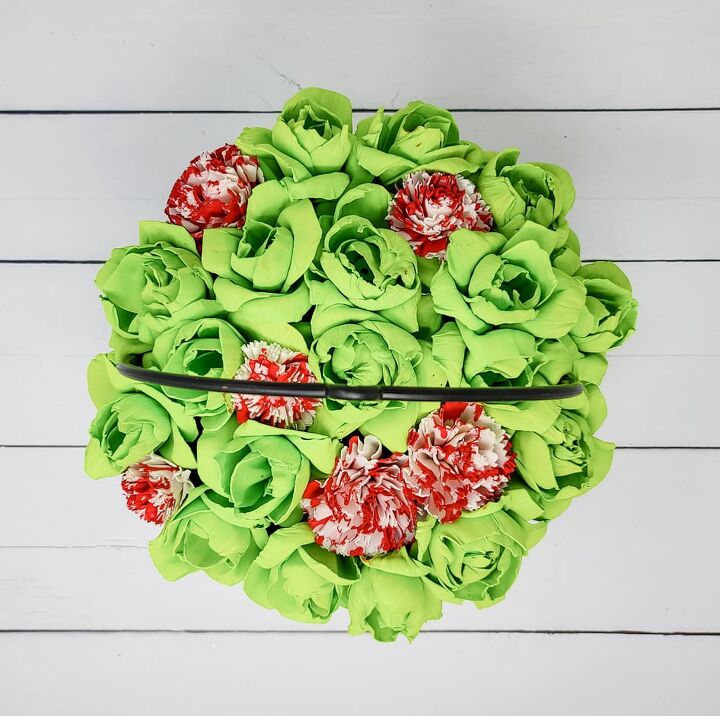
Once those flowers are dry, stem them onto floral wire (the same way you did for the mature peonies earlier) and pop them into the witch's brew in a few places!
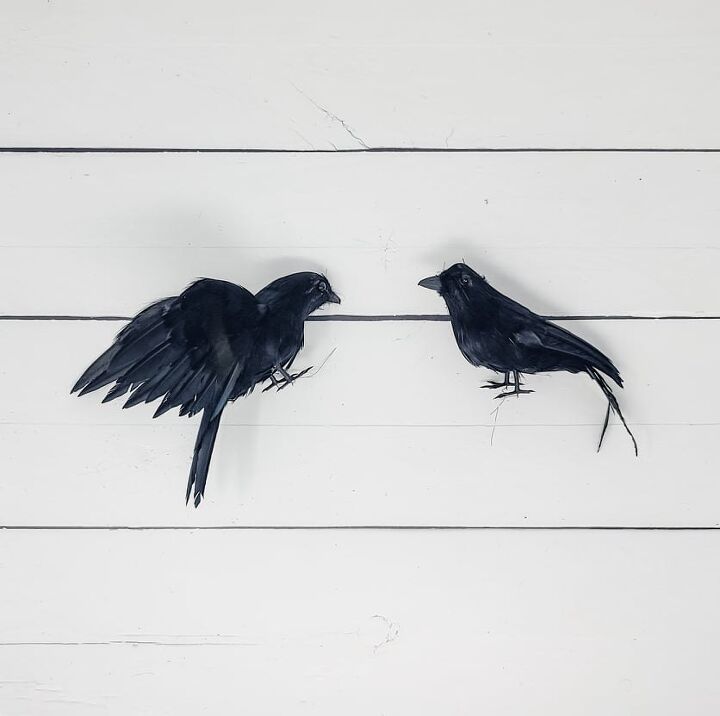
Every floral cauldron should have a couple of ravens hovering around! These came in a 4-pack on Amazon and are perfect to finish off this Halloween piece.
This raven balanced really well onto the flowers. There are thin metal wires that attach to the feet so if you want or need extra stability, you can twist those around a flower or stem to hold it in place.
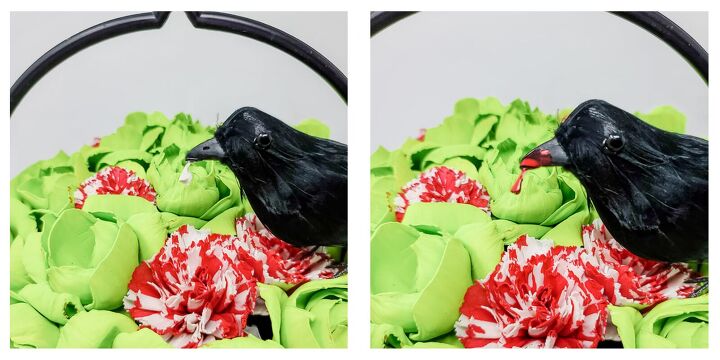
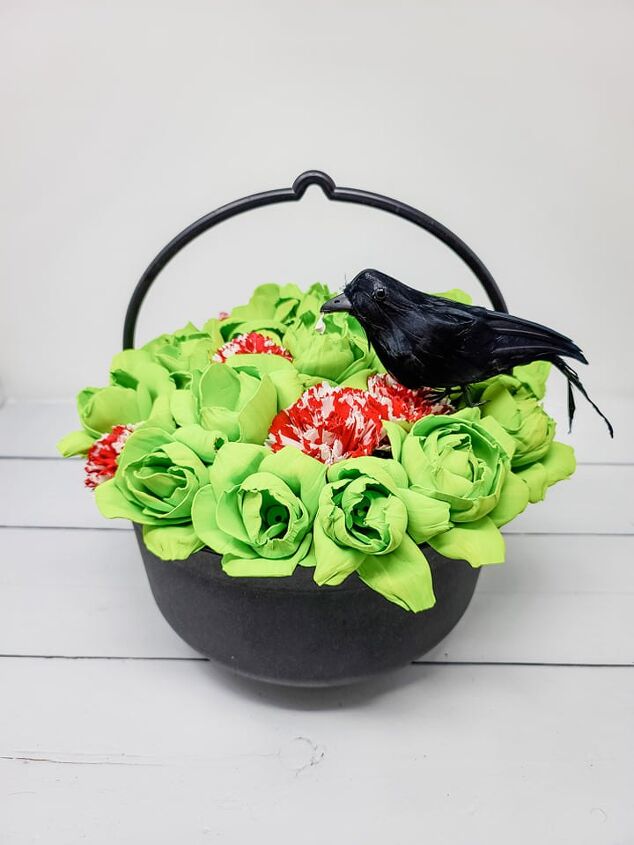
With raven #1 resting on a brain flower (and for a little extra gory detail), I wanted it to look like he was feasting on the witch's brew. I pulled a tiny bit of a carnation flower off and glued it to the beak. Then, I took a small amount of our red paint/water mixture onto a spoon and dripped it onto the beak.
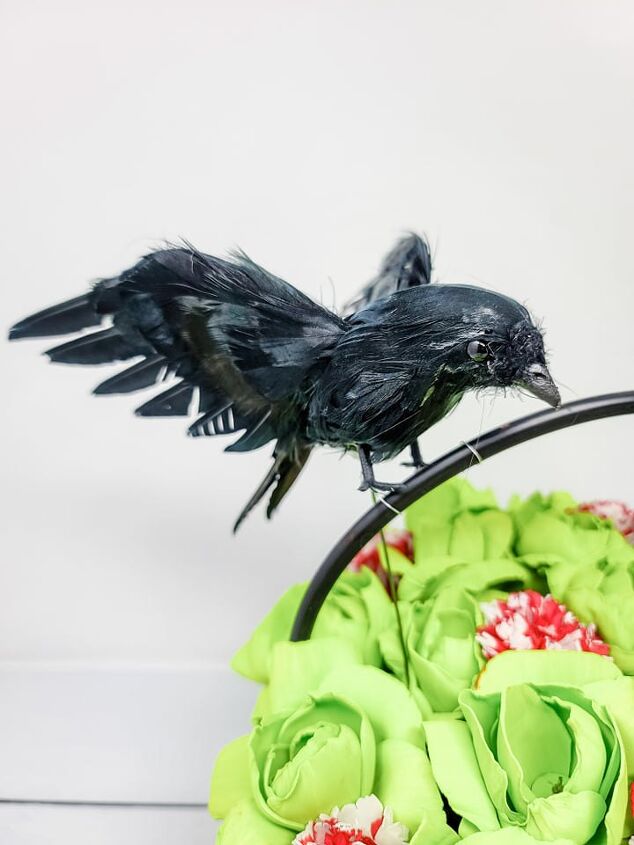
Adding this raven was slightly more challenging because the thin wire stems at the bottom of the claws did not hold on the smooth cauldron handle. It kept sliding down. Instead, I hot glued a longer piece of 18 gauge floral wire to the raven's belly and placed that into the chicken wire base in the cauldron. I then wrapped the thin metal wire from the raven around the handle of the cauldron to help secure the bird in place.
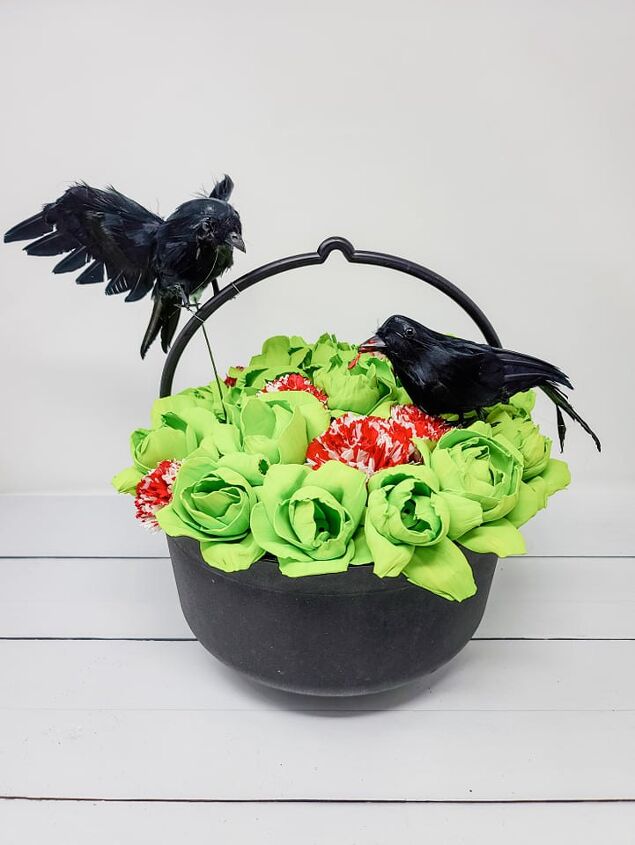
Faster than you can say "double double toil and trouble" – you're done!
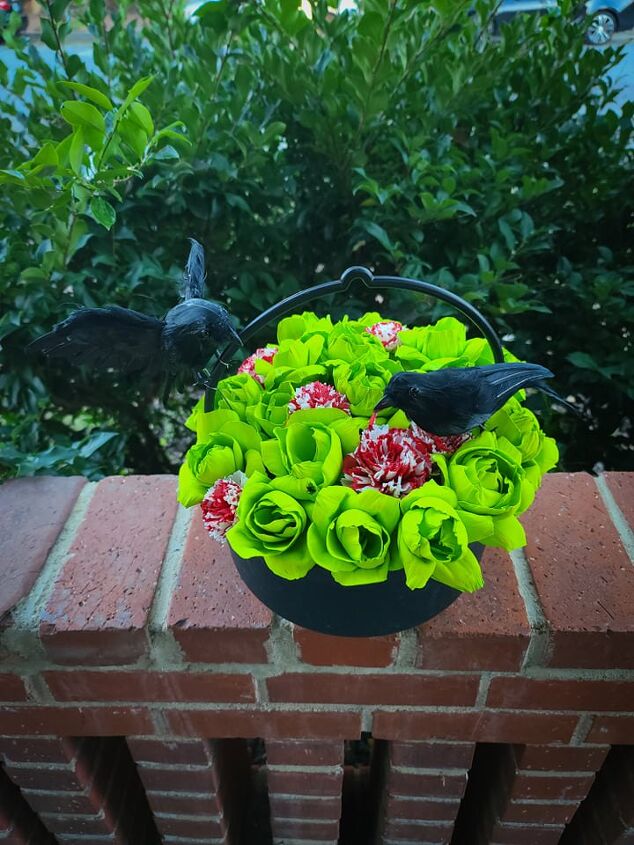
I think this floral cauldron will be great to have on my porch as a complement to the rest of my truly spooky decor. Enjoy – and happy Halloween!
Resources for this project:
See all materials


Frequently asked questions
Have a question about this project?