


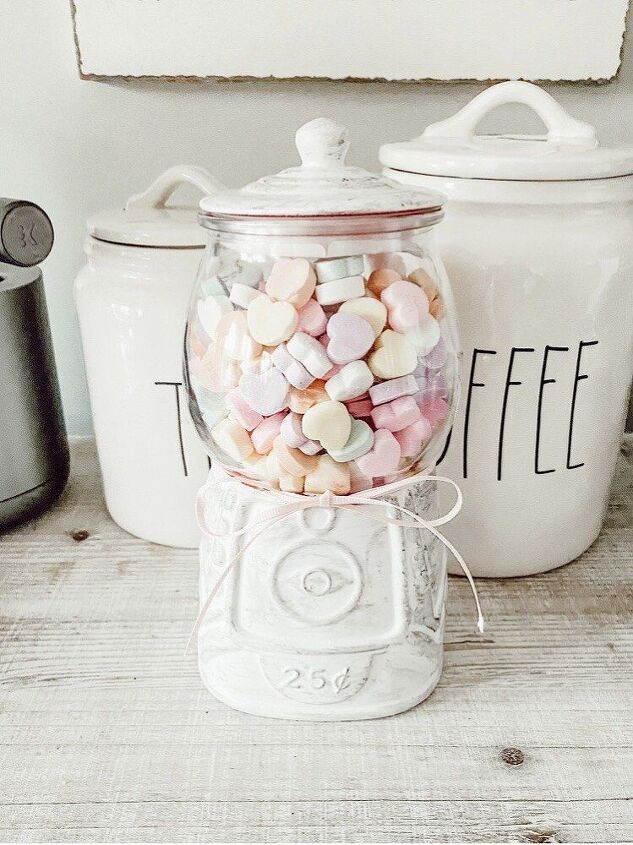
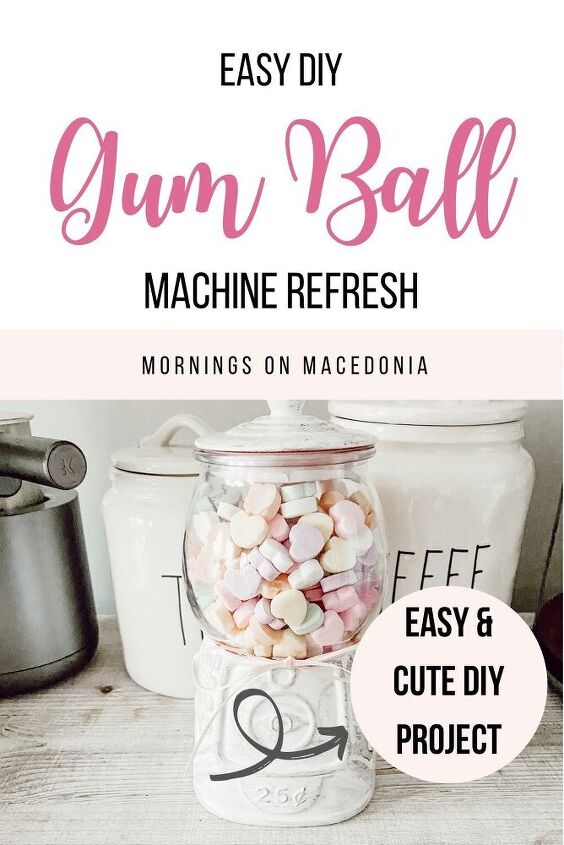
DIY Gum Ball Machine Refresh

If you stalk the Target Dollar Spot like I do, then you know there’s this really cute, glass gum ball machine circulating around for only $3. I think its absolutely adorable for Valentine’s Day and I’ve been seeing around how people are painting it and turning it into something different entirely. So I thought I would try my hand at it and see how it turned out. This DIY gum ball machine refresh was such an easy project and only took a few hours and a few materials to complete! If you’re lucky enough to come across one of these, you should definitely get it, even if you don’t like the color. A little spray paint can do a lot of magic and I will show you just how I transformed this little piece!
This post contains affiliate links. Click here to read my disclosure policy.
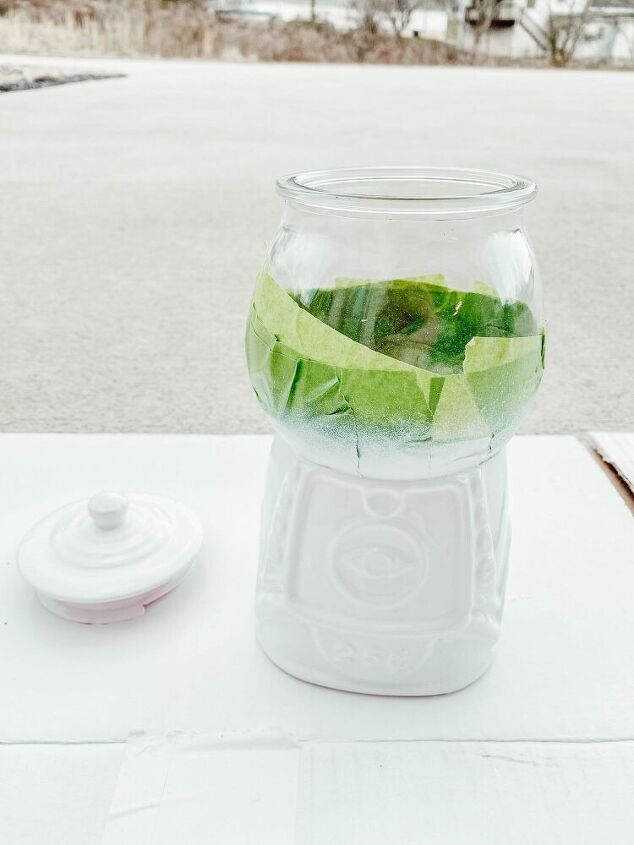
- Gum ball machine (doesn’t have to be the exact Target Dollar Spot one, but I would assume that is probably the cheapest one you can get if you find it).
- Spray Paint (I used Rust-Oleum 2x Ultra Cover Matte White Spray Paint and Primer in 1. I would highly recommend getting one that already has a primer in it no matter what color you end up choosing)
- Frog Tape
- Antiquing Glaze (optional)

The first thing I did for this DIY gum ball machine refresh project, was to apply Frog Tape around the glass part of the machine. I didn’t apply it all the way up to save time, I just did about halfway up. I did get a slight amount of overspray above where I taped it, but you could easily scrape that off with a razor blade.
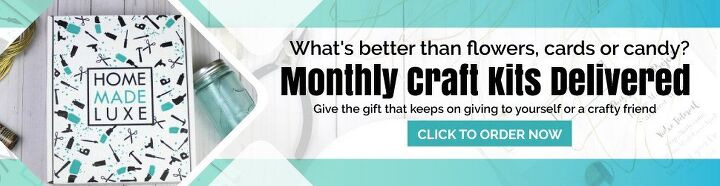
You technically don’t have to tape it, if you wanted to just scrape off the overspray after it dried, you could definitely do that. I just thought this would save me a step at the end and it didn’t take me long to tape it. Since it is a circular piece, I couldn’t just place one piece of tape all around it. I ended up tearing off little strips and overlaying them to cover the glass. The line wasn’t exactly perfect when I pulled it all off, but it was close enough. I also knew I wanted to add in a ribbon there so that would hide any imperfections so I wasn’t too worried about it.
After you have securely applied the Frog Tape, now you can easily apply the spray paint. It took me about two coats total and I let the coats dry for about an hour in between. It’s easiest to just apply the spray paint in one swift motion, otherwise you will get a little dripping effect. There was a slight dripping effect to the very front of mine but it is hardly noticeable. Just be sure to not be too heavy handed when applying the spray paint and you will be just fine! After applying two full coats of spray paint, I let it dry completely overnight.
This step is totally optional, but I decided I wanted mine to look more worn and distressed. If you like the bright white color, then you definitely don’t have to do this step. But, if you like old vintage things like I do, then you may want to apply some antiquing glaze after the gum ball machine has dried completely. If you remember from my DIY Painted mirror, I used this antiquing glaze for that project as well.
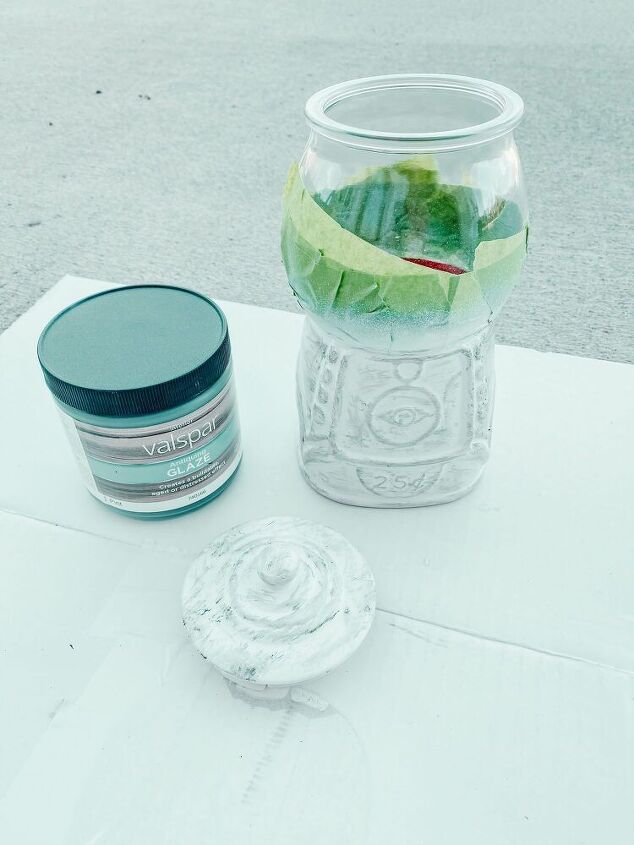
To apply the antiquing glaze, I just dipped an old rag into the can and barely applied it onto the gum ball machine. A little goes a long way with this. I didn’t want it to be too dark so I worked slowly and carefully when applying it. Don’t worry if you do accidentally put too much on it, you can always rub it off if need be with a clean dry cloth. I just applied it in several different directions to make it look old and worn. I love the way it turned out and it fits in more with all my vintage pieces after applying this antiquing glaze to it.

I let the gum ball machine dry after the antiquing glaze for a few hours. It didn’t need too much at all so it didn’t take long to dry fully. Once it was dry, I added in some candy. I decided on adding the classic conversation hearts for Valentine’s Day. Another thing I also added in was a cute little soft pink ribbon as well. I love how perfect it looks for Valentine’s Day! I regionally thought about spray painting it a soft pink, but I figured if I did it white, I could use it for multiple seasons. For example, I am planning on putting it some jelly beans for Easter and some candy corn for Halloween! Really the possibilities are endless with this and it will be so much fun to decorate and change it up from season to season!


Frequently asked questions
Have a question about this project?