


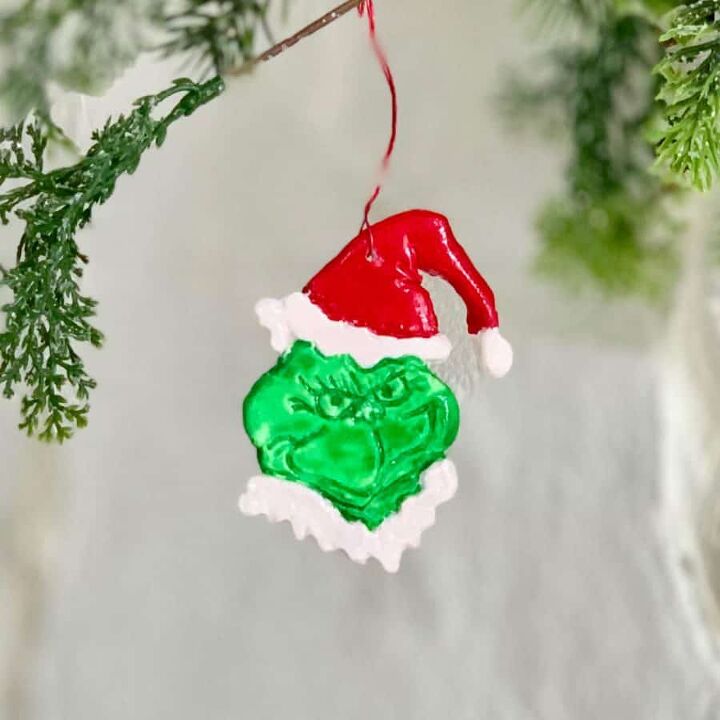
Easy DIY Grinch Ornament Using Clay
If you didn’t know, I’m all about The Grinch. If it’s Christmastime, then I’m thinking up Grinch things to make like this DIY Grinch ornament.
Last year I made the DIY Grinch Concrete Wall Christmas Decor and the year before, I made the full-sized Grinch String Art Decoration.
Before starting this Grinch Christmas tree decoration, I wasn’t sure it was going to work.
Then again, I’m often not sure, it really is lots of trial and error.
For this clay DIY Grinch ornament, I took the design that I had created for the resin and cement wall art Grinch I made, and modified it so that it would work better for carving clay.
For glazing the Grinch, I had to do a little research to see how that was done and on other sites, I had read that mixing clear glue with clear polish, water and acrylic paint was the method.
Mixing acrylic (a water based paint) with a lacquer (oil based) polish didn’t make sense to me and when I tried, the results weren’t great.
Instead, I found that straight colored and clear nail polish (or top coat) works much better than messing with the clear glue, clear polish, water and acrylic paint formula.
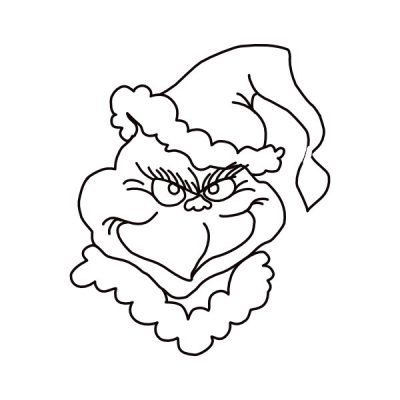
First, use the form below to download the Grinch printable. I have four of these Grinch head designs on one piece of paper in case you want to make more than one, that way you won’t need to print multiple pieces of paper.
You only have to fill out the design download form once. Once you have filled it out, within a couple of minutes, you will receive an email with the password and link to get in.
I am unable to add the download in directly to Hometalk, but if you click here, you'll have access to all design downloads I are in the design library. Get the Grinch design download…
After printing the Grinch, cut out his head. Leave a little space around it.
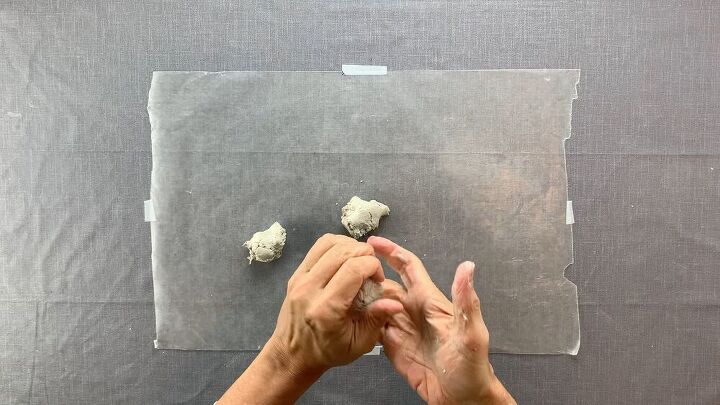
STEP 2 | PREPARE THE AIR DRY CLAY
First, knead the clay to warm it up and soften. Do this for 3-4 minutes.
Now, roll out the clay to a ⅛” thickness.
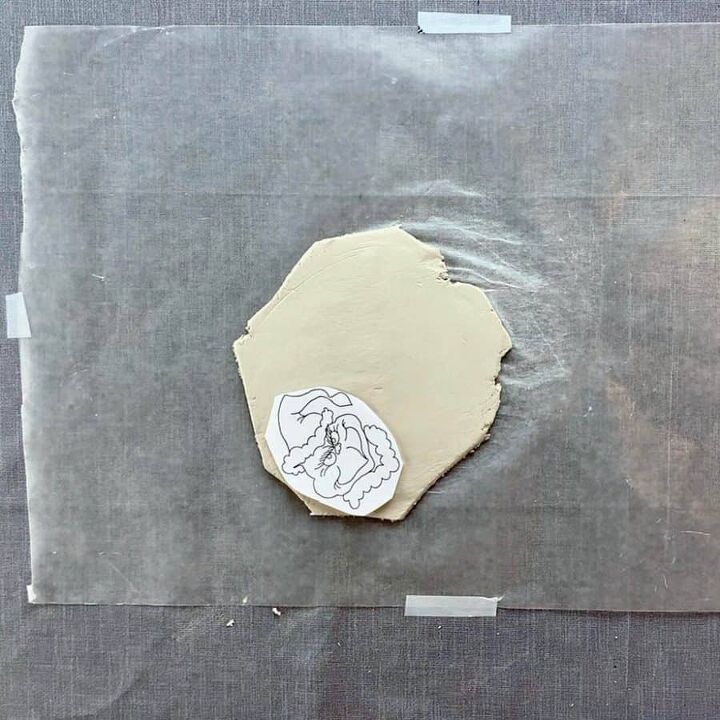
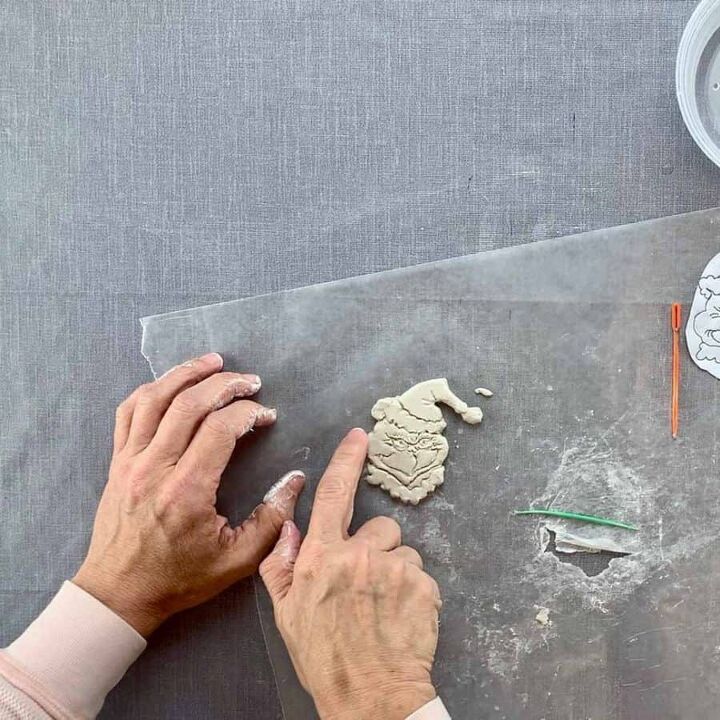
STEP 3 | TRACE THE GRINCH TO TRANSFER THE DESIGN TO THE CLAY
Place the print-out onto the clay, with the printed side facing you.
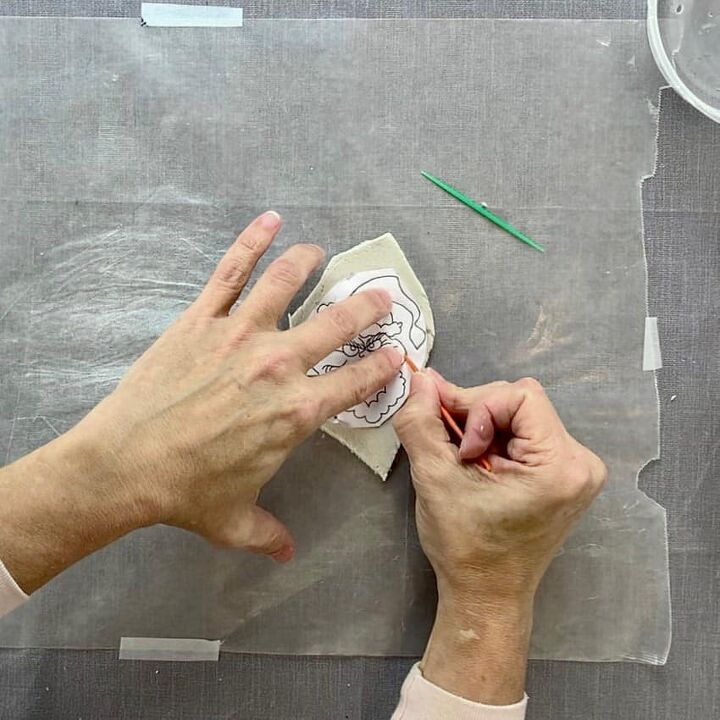
Now use the plastic yarn needle to trace the Grinch onto the clay. While doing this, try not to puncture the paper, just sort of press and pull.
When you get to the more intricate details like the face and parts of the white fur, I recommend using the plastic toothpick. It’s smaller and will work better for that.
Right now, you only need the traced outlines to be deep enough that you can see them when the paper is removed.
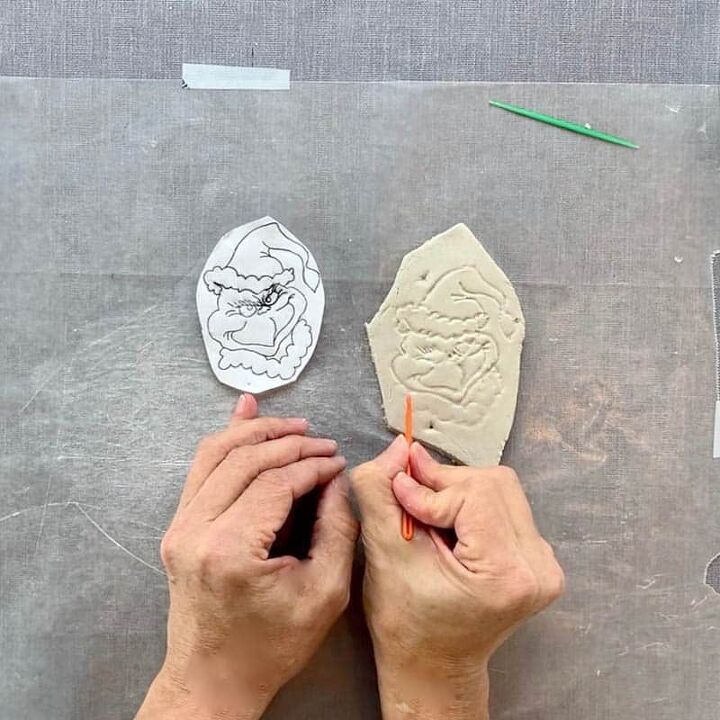
STEP 4 | EMPHASIZE THE DETAILS OF THE GRINCH
Remove the paper and then deepen the lines by starting in one area of the Grinch at a time. Work on this in about 1” x 1” sections.
Wet your finger and dab the clay, or dip the toothpick or yarn needle into a shallow bowl of water to avoid pulling the clay so that it gets fuzzy, as well as to avoid cracks.
Do the same as you did with the paper on and wet one area at a time and retrace to make deeper outlines.
Press smoothly, rather than pulling so you don’t get little tear marks.
Continue dampening a small 1” area at a time and deepen the grooves until it looks the way you want.
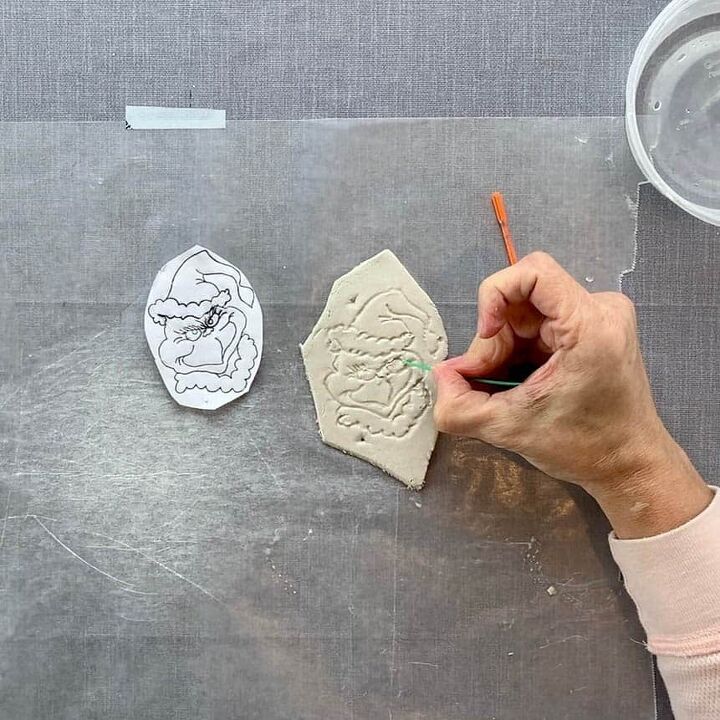
And again, the toothpick is better for fine details.
To give you a sense of timing, I tend to go a little overboard with details and so it took me about 25-30 minutes from the start of tracing to setting the ornament aside to dry.
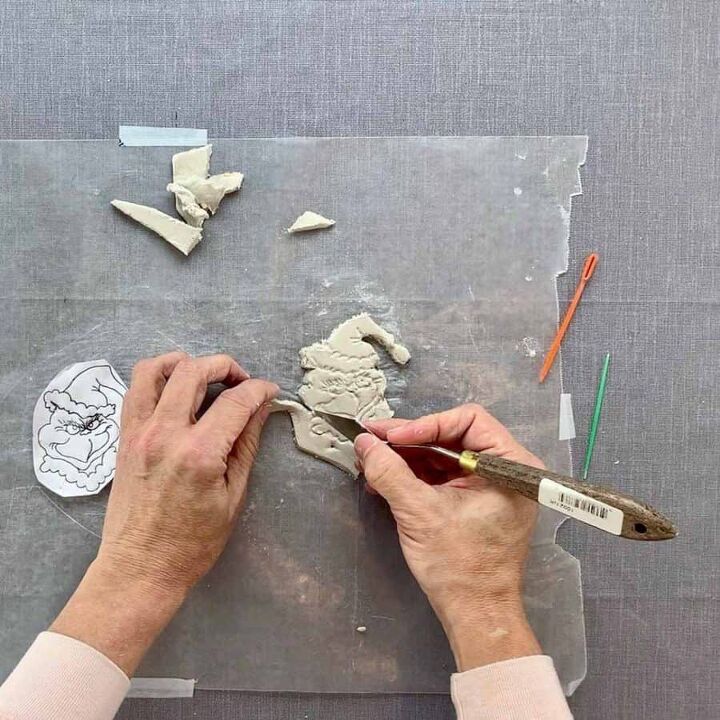
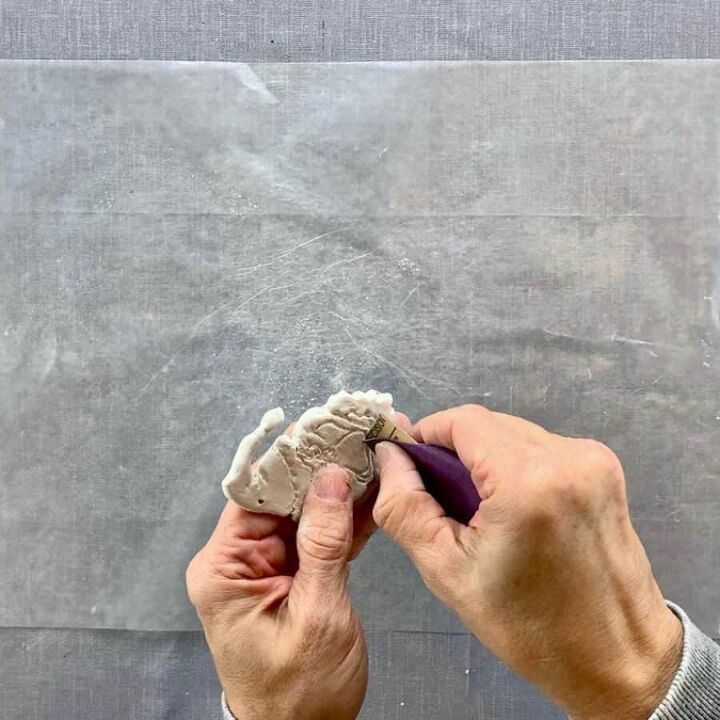
STEP 5 | REMOVE THE EXCESS AIR DRY CLAY
To remove the Grinch face from the excess clay, use either a paint palette knife or a craft knife.
Be sure to press the knife up and down and slice, rather than pulling at it.
In some areas, you may need to use the toothpick or yarn needle to cut away the clay.
STEP 6 | SMOOTH AND ROUND OVER THE EDGES
Round over the top edges and wet your fingers as needed until it’s smooth.
You can make your round bevels slight, or really sculpt it to make the Grinch ornament more three dimensional.
Flip the grinch over and carefully round over the backside as well.
Before letting this dry, create a hole for the hanging wire by pressing the toothpick into the hat.
The Grinch ornament will be more balanced and hang straighter if the hole is near the location that I placed it, rather than right at the top of the hat.
I didn’t get it perfect, but it’s close.
STEP 7 | SET ASIDE THE DIY GRINCH ORNAMENT TO DRY
Let the clay ornament dry. This will take one to two days, but you can speed up the process with a space heater or using an oven at 200 degrees.
I used a space heater for about a total of 7 hours and kept flipping the Grinch over every hour or two.
I haven’t used an oven to cure air dry clay, so check it periodically. It probably cures it faster than the space heater does.
Before applying the glaze to the clay, make sure the piece is fully dry.
You will know it’s completely dry if the whole piece is uniformly white.
If it’s still damp, it will have white edges and be beige in the middle.
STEP 8 | SAND THE AIR DRY CLAY EDGES
Now sand off any rough spots, fuzzy parts or burrs.
To get any burrs out that are in the grooves, fold the sand paper and run that the edge through the groove.
If you have and fingerprints or other surface marks, just lightly sand those out too.
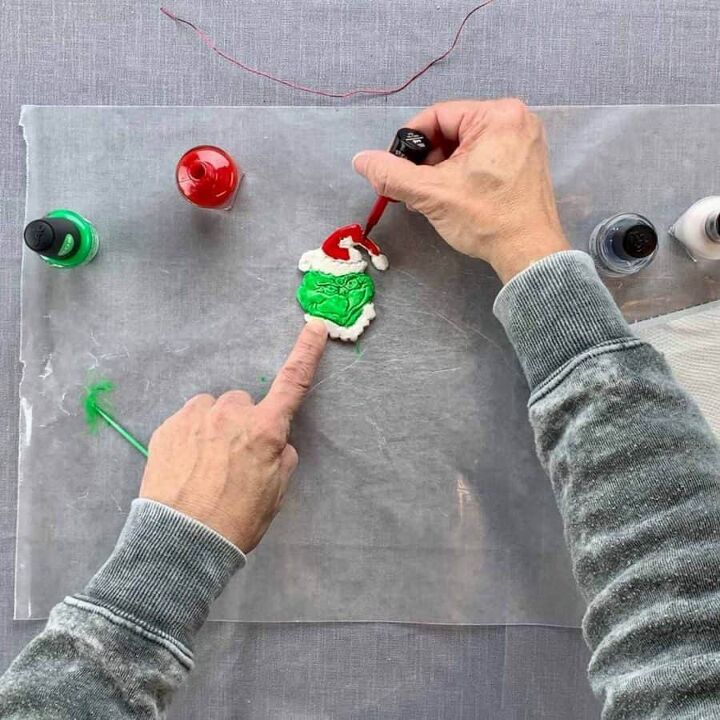
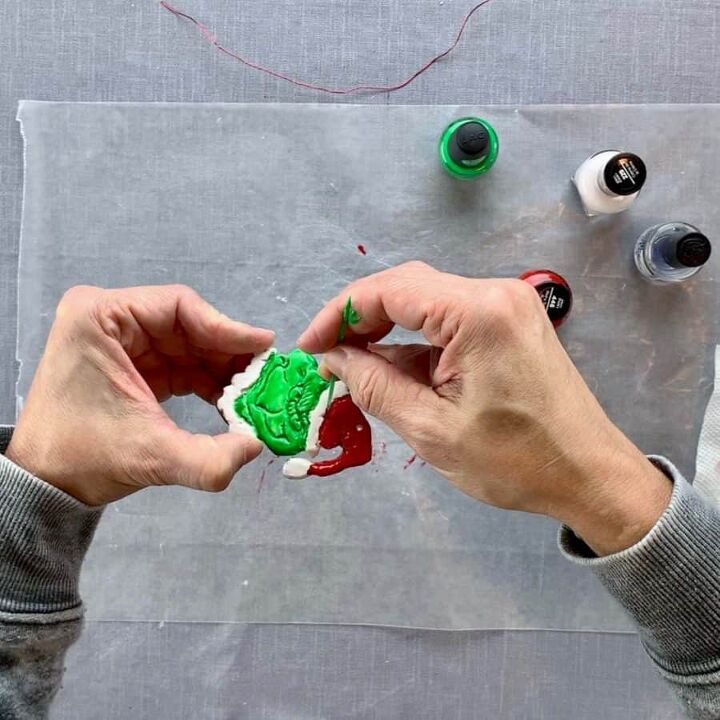
STEP 9 | PAINT THE CLAY GRINCH HEAD
Once the air dry clay is completely dry, use nail polish to color in the DIY Grinch ornament.
Just use the brush that comes with the nail polish to paint most of the Grinch.
However, to get in between the tiny spaces, you’ll find it helpful to use a plastic toothpick, especially where the lines are that separate the colors.
To use the toothpick, just take the polish brush and dip it into the bottle and then touch the wax paper with the brush to get a drop of polish.
Now dip the toothpick into the polish and carefully dab it into the grooves.
When painting the Grinch ornament, I found it easiest to start with painting his face, and then his hat.
With the two parts of his face being separated, you will make fewer mistakes.
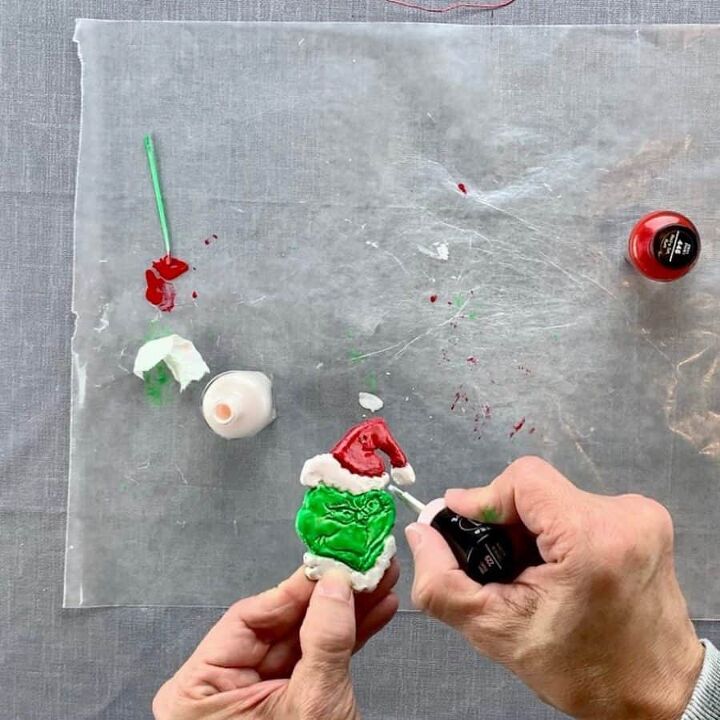
Once they dry, add the clear nail polish to the red and green before painting the fur.
This makes it easier to paint the fur.
Especially because if you make a mistake, you’ll be able to easily wipe off the nail polish if it gets on the red or green, using your finger or fingernail.

After the white is on and dry, go ahead and add a clear coat to that as well.
If you’d like, you may want to paint the back of the ornament since ornaments sometimes tend to twist themselves around on a Christmas tree branch.
If you don’t paint it, then you will need to seal it.
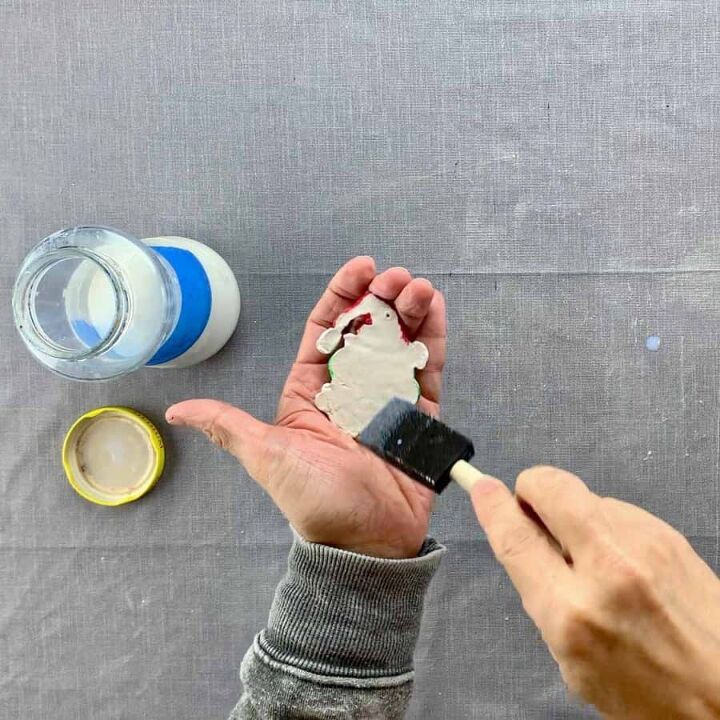
STEP 10 | SEAL THE CLAY GRINCH ORNAMENT
Brush sealer onto the back using either a varnish, an acrylic sealer or acrylic concrete sealer and let dry.
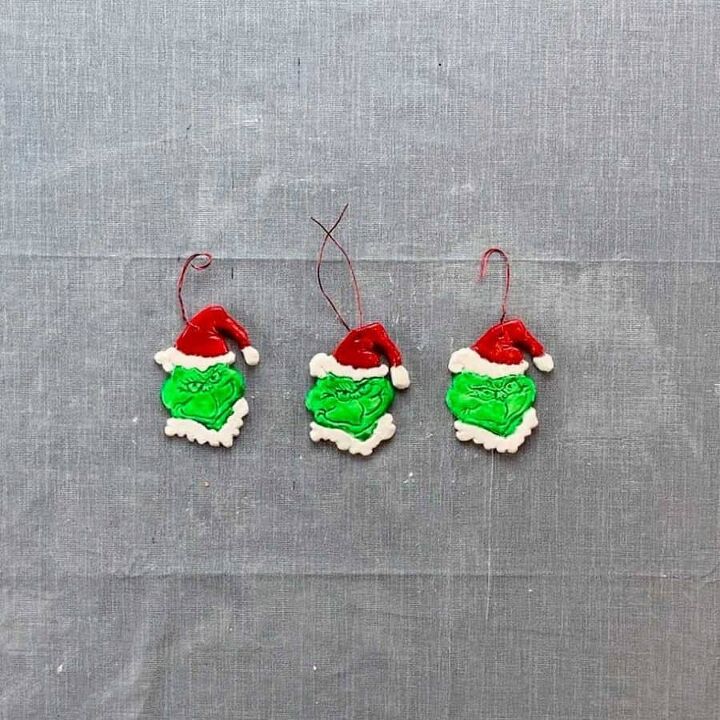
FINAL STEP | CREATE THE CHRISTMAS TREE ORNAMENT HOOK
Once this dries, go ahead and string the wire through the hanging hole.
You can form the wire to look like a curly hook, but threading the wire through and twisting it near the hat and again at the top and using your finger, curl it in.
Instead, you can make a regular hook the same way, just don’t curl it fully in, or just can leave it open and then tie it around the Christmas tree branch.
If you are looking for other Christmas things to make, you may want to see my DIY Cement Ornaments.
Resources for this project:
See all materials


Comments
Join the conversation
-
This is amazing. Looks so professional. Great share and instructions


Frequently asked questions
Have a question about this project?