


DIY Pet Waste Disposal System
Please take a minute to click here to sign up for the Mother Daughter Projects weekly newsletter. You'll get notification about our new projects and what is up and coming.
If you have a dog, you deal with waste! You pick it up from your backyard, your neighbor's yard, and on your walks. Do you immediately throw it in the trash or do you hold it until you have a container full?
Well, with the addition of Mac the greyhound, Steph has had to deal with a lot of doggy doo doo. (Can I say that on Hometalk?) She has been using a Pet Genie to collect it and throws it in the garbage on pick up day.
The Pet Genie has been a good system, but you have to purchase additional bags. She decided to come up with a way to DIY a waste storage system using a five gallon bucket. Take a look!
You can find the Fast DIY at the 5:04 mark. The laser level and measure can be found at 0:19 and the Field Trip is at 8:42.
Oh, and you'll find our exclusive Wall Control discount code at the end of the video. Wall Control is the metal pegboard we use in our garages and laundry rooms. It's pretty cool stuff. You can find a wall control project here on Hometalk.
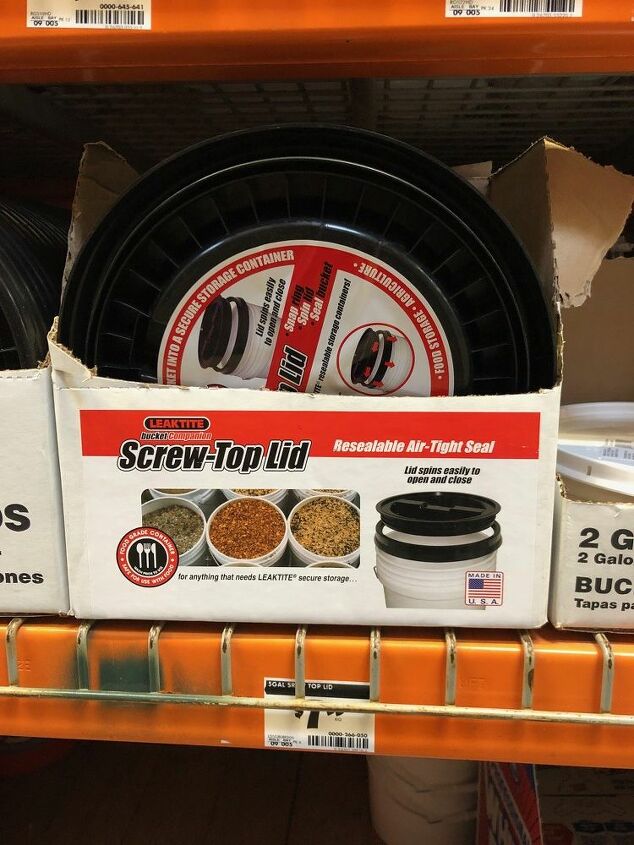
You'll need a screw on lid and five-gallon bucket. If you're buying at The Home Depot, you find both these things where the buckets are sold. If you don't have a rubber mallet, pick up one of those as well.
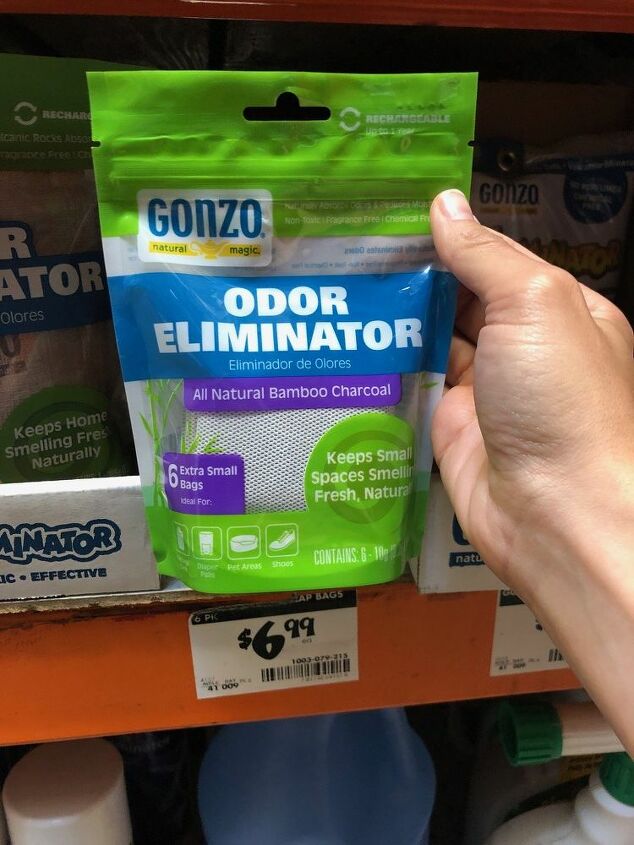
You'll also need some of these because, you know, it smells! These can be recharged once they stop being effective by simply placing them in the full sun for a couple of hours.
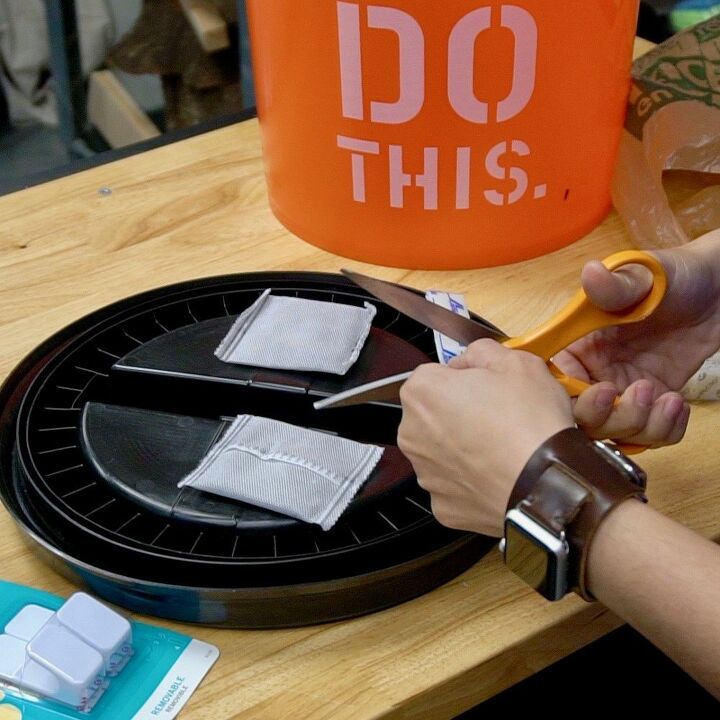
Put a couple of the odor eliminators into the bottom of the bucket. Cut velcro to size and attach these to the underside of the lid.
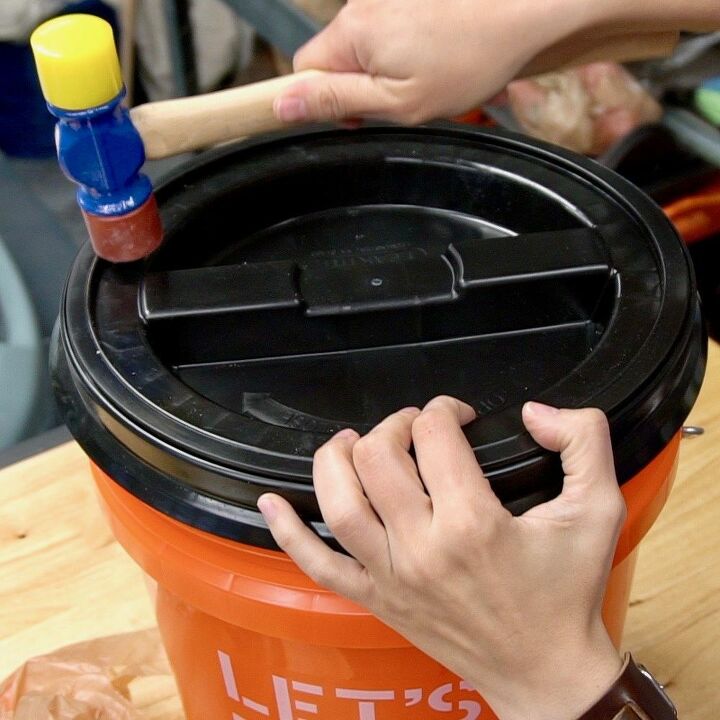
Use the rubber mallet to gently secure the lid to the top of the bucket. The lid is two pieces. The outer ring attaches to the bucket and the center part screws on and off. (Note: we also use a bucket with this lid to store Mac's treats. They are easy to access and Mac can not get to them.)
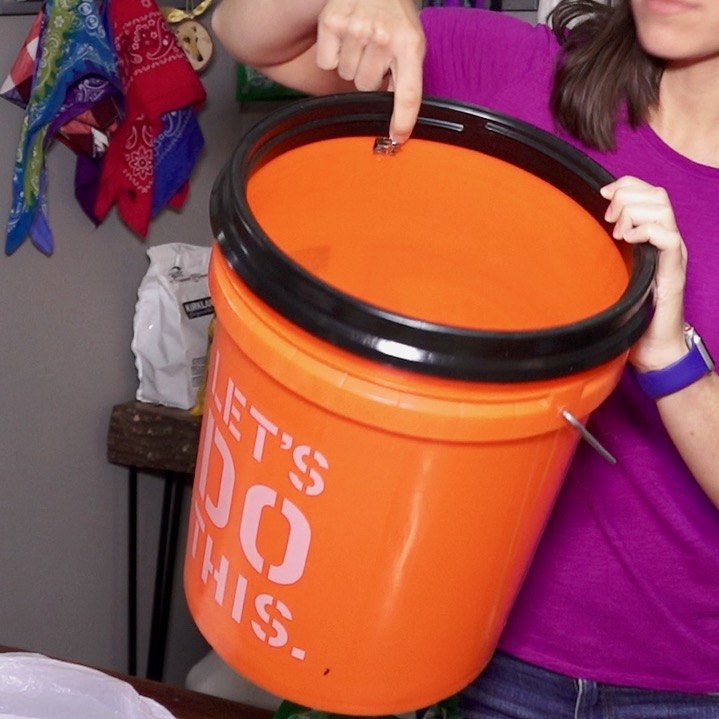
Hot glue (or use your favorite gluing method) to secure two small binder clips opposite each other at the top of the bucket. These will hold the plastic bag you fit into the bucket. It could be used without a liner, but Steph finds it easier to lift the entire bag out for disposal.
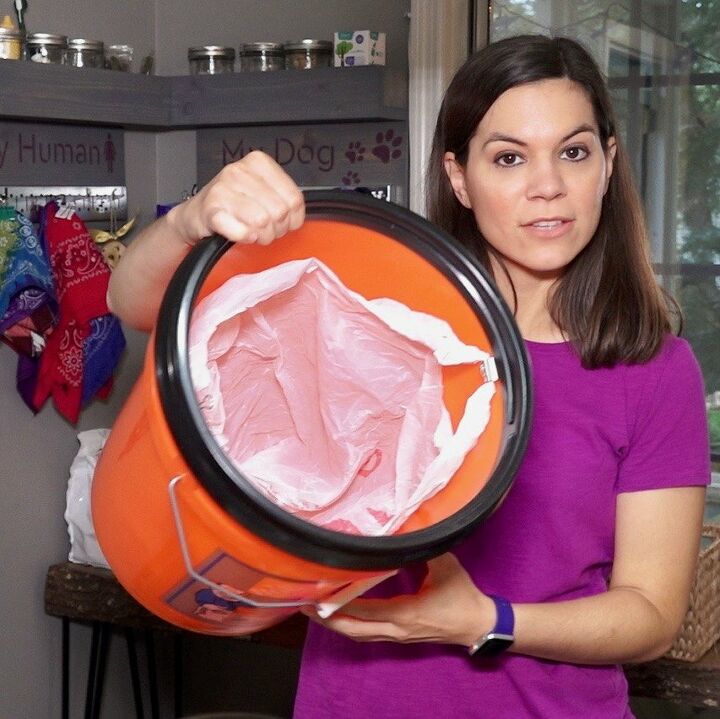
This is how the bag attaches inside. Note that the center of the lid is removed fully to access the bucket. The black ring is permanently attached to the bucket top.
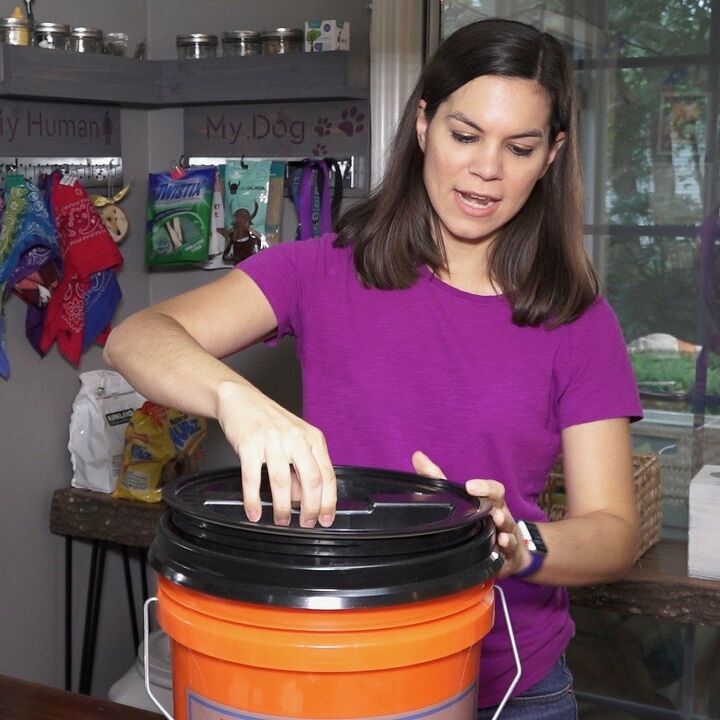
Put the top in place and it's ready to store filled waste bags until you're ready to put it in the trash. Note: Steph leaves her DIY storage container outside on her porch because, just like the Pet Genie, there can be odor.
Please head to our website post (link below) for the exact products we used in this project.
Resources for this project:
See all materials


Comments
Join the conversation
-
Great Idea! Nice little project too. =)
-
Nice idea. Thank you for sharing. I use a small stainless steel flip top trash can with a lift out bucket inside. I use the plastic grocery bags inside the lift out bucket to hold my cats movements. The only thing I dislike is the smell and I thank you for the tip on the Gonzo Odor Eliminators :)


Frequently asked questions
Have a question about this project?
Does this smell or does it do good at keeping the odor in? Does it really cost $120 to make?