


DIY Pumpkin Wall Art
Add a fall or Thanksgiving touch to your home with this easy burlap pumpkin wall art. This pumpkin wall decor is made with burlap fabric and embroidery floss. Super easy to do.
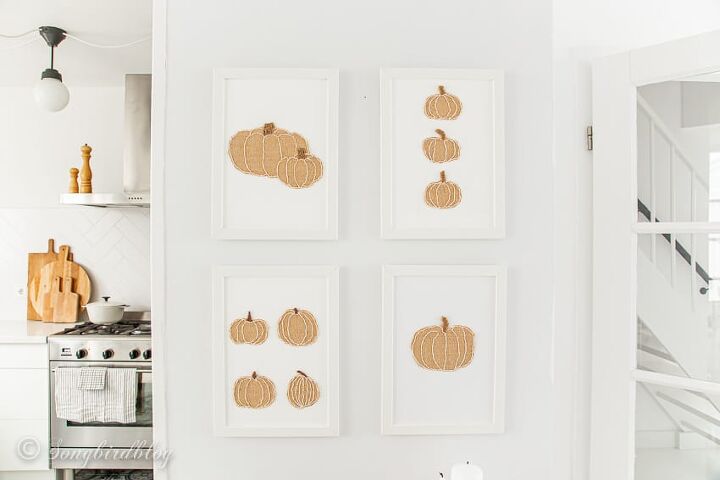
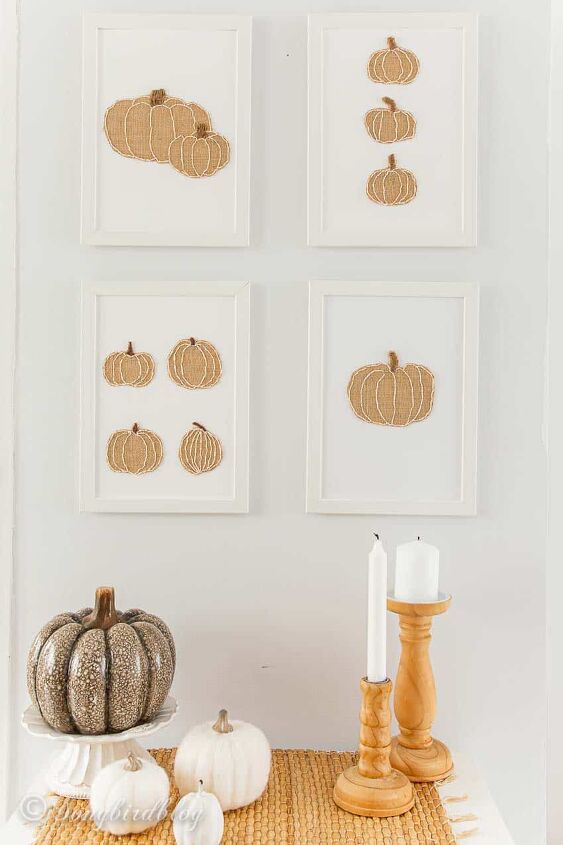
I created a little wall decor for our living room featuring pumpkins, and I love it.
This was such a fun project to do. Usually, I am the biggest fan of the ‘big steps, cut a few corners, get to the finish line fast’ kind of projects. This was not such a project. It took a bit more time, required a bit of patience, and needed a bit of refinement.
But not too much of any of that, it is still an easy craft project that only involves a few materials and not a whole lot of concentration to do it (suitable for watching English detectives in the background).
You only need a bit of time, and a few art supplies to make this DIY burlap pumpkin wall art.
Fall Burlap Wall Decor Project Supplies
- A piece of (leftover) burlap fabric
- Embroidery floss in white and brown (for the stem)
- Embroidery needle
- Embroidery hoop (optional, comes in handy, not a necessity)
- Fusible interfacing and a hot iron
- Double sided sticky tape
- Fabric scissors
- Set of four Picture frames
- White cardstock
You might have all the supplies already in your craft room. If you don’t have these exact things there are some substitutions you could make. Instead of burlap, any kind of loose weave fabric would work, instead of embroidery floss, you can use a fine yarn or a thin twine. If you don’t have interfacing you could glue or stitch some fabric to the back. And instead of double-sided sticky tape, a very small amount of hot glue could work too.
In short, use what you have and make it work. All is good, this is a simple craft project that you can do in any way that fits your time and your supplies at hand.
Making Burlap Pumpkins Wall art Steps
There are a few easy steps involved in making this DIY fall decoration.
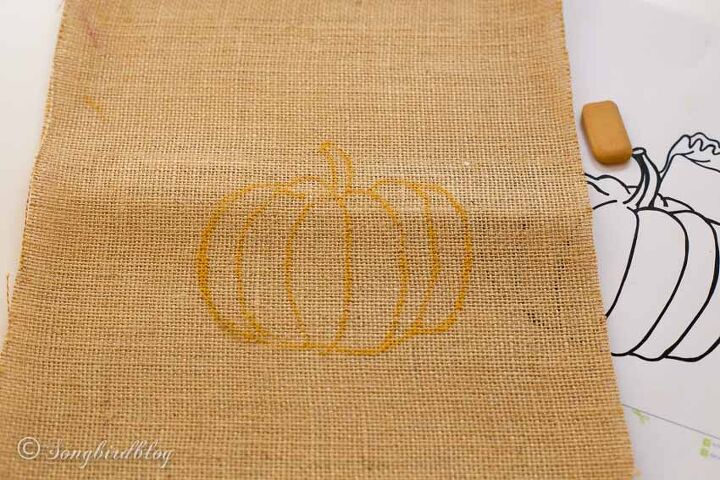
- The first step involves getting some pumpkin shapes that are easy to embroider. I googled ‘pumpkin clip art’ and selected a variety of pumpkin shapes that I thought would work.
- I used Photoshop to place my pumpkin shapes on an A4 canvas (because that was the size of the IKEA frames I had) and printed them.
- I experimented a bit with different options to figure out how to print my pumpkin shapes onto the jute fabric. I found that if I emphasized the black outline on the paper with a thick sharpie it was visible when layered under the burlap, so I could trace it. Several options would work for tracing the outline like a pencil, (disappearing) ink pen, or a thin sharpie. I happened to have an orange-colored bit of tailors’ chalk that was perfect because it disappeared under my stitching. (to make things simpler I did not trace the leaves on some of the pumpkin images, just the stems)
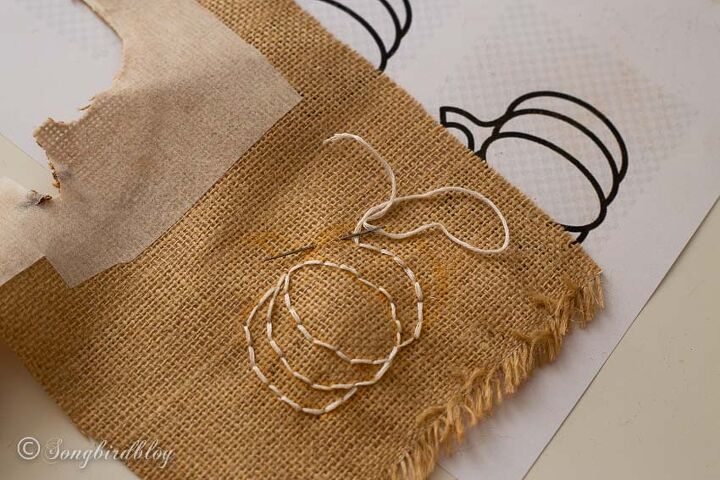
Embroidering the pumpkins onto the burlap took the most time but also was the most fun. I used a single strand of embroidery floss and a simple backstitch to create the lines. For the pumpkin stem, I used brown embroidery floss and some back and forth stitching.
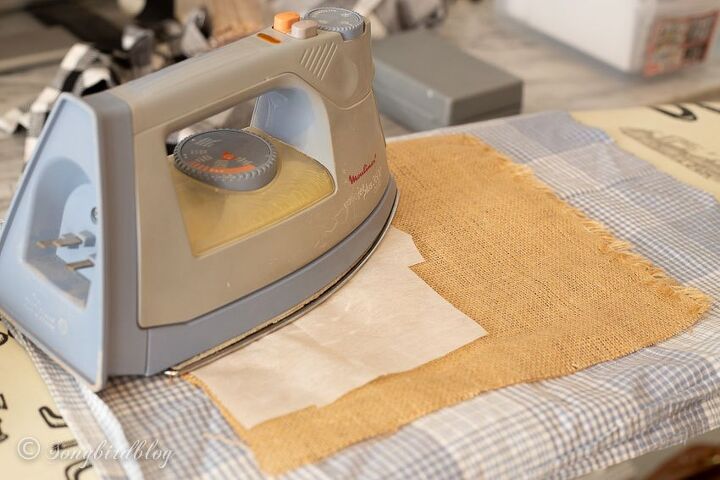
I knew I wanted to cut out my pumpkin shapes, and knowing that burlap can fray easily into a big mess I opted for the use of iron-on-interfacing. I ironed on a generous piece of fusible interfacing before cutting it into shape.
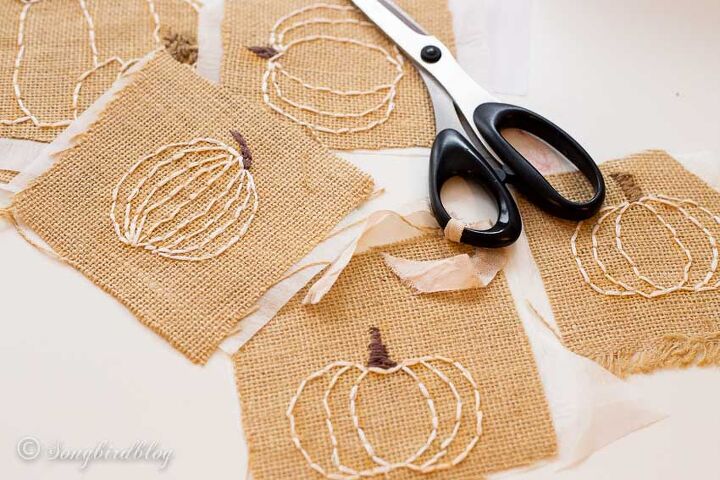
With the added stiffness of the interfacing fabric it was easy to carefully cut out all my pumpkins with a pair of sharp fabric scissors
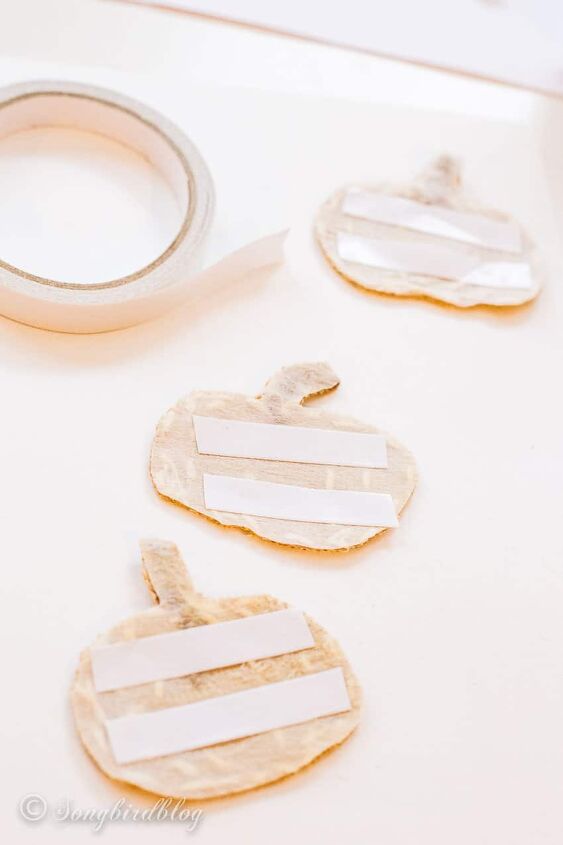
Some time ago I created a little gallery wall with botanical prints in cheap IKEA picture frames. I reused both of them for this project. I simply turned over the prints so the blank back could act as my backing (white cardstock would work too, but this was quicker).
I glued the pumpkins to the paper with some strips of double-sided sticky tape. I opted not to use my hot glue gun for this because I feared the glue would be visible at the front. The sticky tape was nice and quick and clean to use.
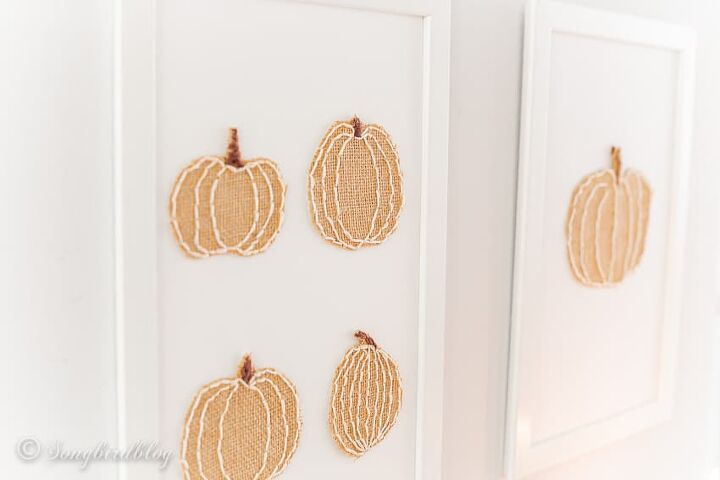
I rehung my frames in the same place they were before (but left off the glass cover), and decorated my little side table underneath. A little collection of pumpkin art frames like this I a perfect bit of home decor for over a mantel. But alas I have no mantel so they are shining above my little side table in my own home.
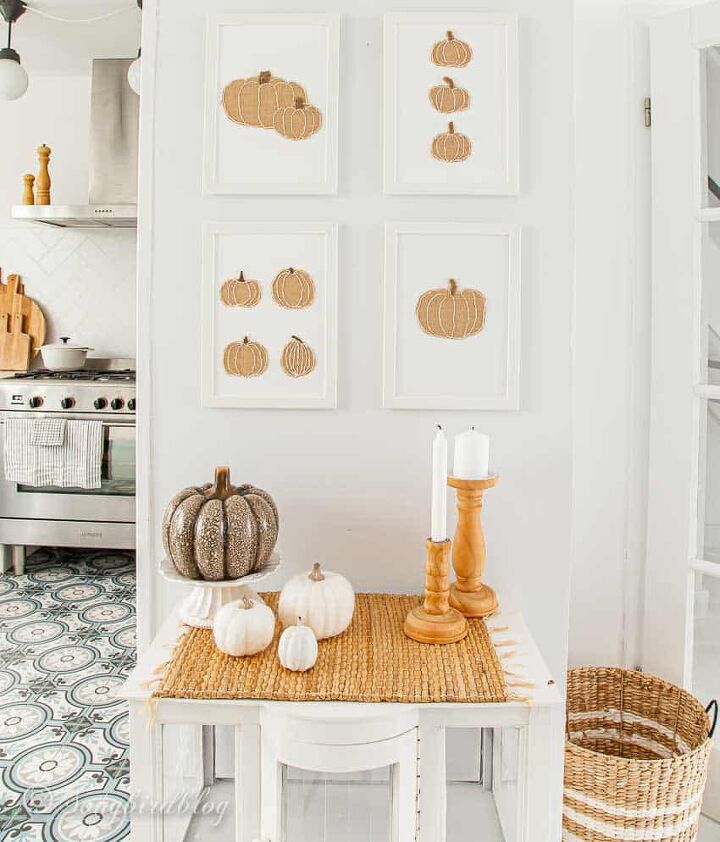
My homemade fall decor was ready!
If you like my burlap pumpkin wall decor, you might like my burlap Christmas ornaments too. Check them out!
Resources for this project:
See all materials


Comments
Join the conversation
-
These are so darn cute!!!🥰😍
-
Quite lovely.


Frequently asked questions
Have a question about this project?