


How to Make a Moss Floral Wreath!
Mother's Day is coming and as a florist and crafter, it has been a tradition to make my mom a spring wreath as a gift each year! She has quite the collection now (grapevine, metal hoop, wood round, etc.) so I wanted to try something different. This moss/wood base was under $5 to make and then I added extra greenery, filler and wood flowers to make it super unique!
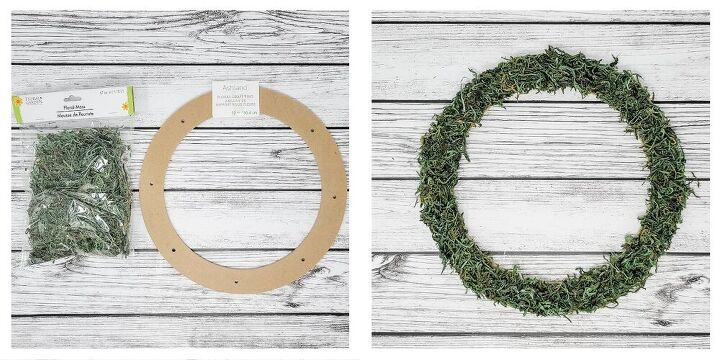
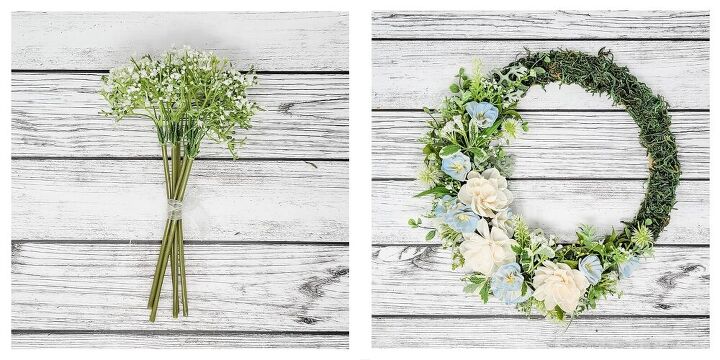
Creating the moss wreath base is really messy but super easy! For mine, I used a 12" mdf board from Michaels and one bag of green moss from the dollar store. Add hot glue to the board (I like doing this is 2" sections) and put your moss down on top of the glue.
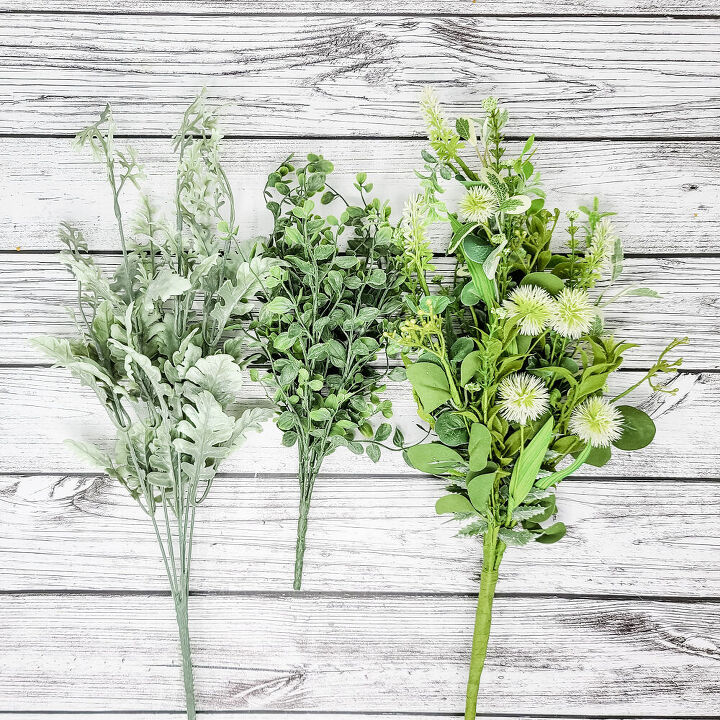
We got a lot of new greenery and mixed pick styles in the shop this season and I really wanted to bring a lot of variety into this piece so I chose dusty miller, angel vine and a summer dreams mix to add in!
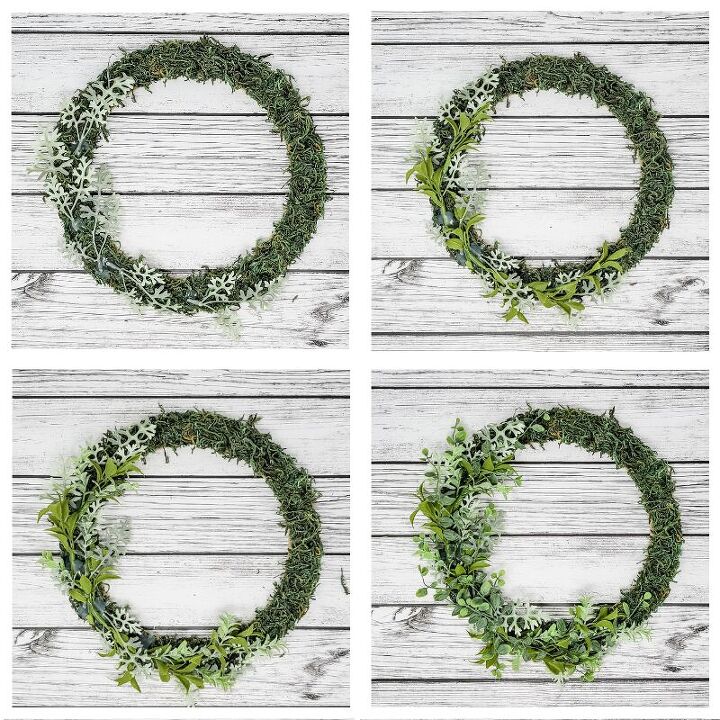
I started with my largest leaves (top left photo) which were the super wispy pieces from the dusty miller. Even though they are wispy and have a lot of gaps, they take up the most space making them the top choice for the bottom layer of greenery. I wanted to create a crescent shape with the greenery overall so I picked a focal point near the bottom left of the wreath and had the dusty miller above that point facing up and away with the dusty miller below it, going down and out.
Next, I added in brighter green small leaf bunches from the summer dreams mix (top right photo). Those clusters have a good amount of volume so I wanted to pop them in second to make sure we had enough room! I kept my focal point the same and worked with the natural flow of the wreath.
It is a little harder to see what I added in the bottom left photo but there were small spiral eucalyptus pieces in the summer mix. They were a perfect shade of flocked green to connect the blue undertones of the dusty miller with the yellow undertones of the brighter green leaves! I just layered those in throughout the rest of the greenery.
The last type of greenery I added to this base was the angel vine (bottom right)! Since we made the dusty miller wispy pieces a bit more fixed in place and stiff by gluing the other layers on top, I wanted to bring in more movement. I added the angel vine and wove in through some of the other fillers to make sure everything looked natural and connected.
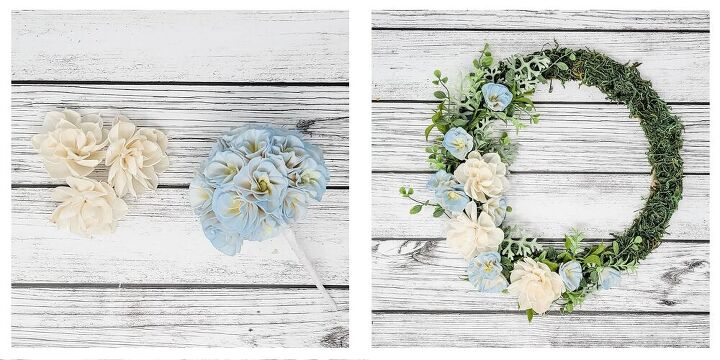
Time for the pretty flowers to come and play! Since the goal for this wreath was light and airy, I kept the mature dahlias raw and painted the hydrangeas a soft blue on the edges with a subtle yellow center.
I then glued the 3 mature peonies onto the wreath (the largest in the focal point we created earlier with our greenery base) and cut down the hydrangea* stem into smaller clusters and individual flowers. Next, I glued down the hydrangea bundles, keeping the larger clusters near our focal point and fanning out from there with the bunches and flowers getting smaller the closer they get to our crescent edge.
*The hydrangea bunch shown in the left picture contains 25 small flowers that are individually wired and stemmed together to create the bunch. These can be easily pulled apart and created into different sized bunches!

I wanted to include a ton of texture and dimension (think spring wild garden) and this mixed pick was perfect for that! I cut out small pieces of the different fillers, popped a little glue on the end and snuggled them into any holes around and in between the flowers and any areas where I wanted to bring in some variation.
I thought I was going to be done with the piece after adding in all those bits and bobs from the mixed filler pick but after taking a photo, I saw that the wreath needed a few more pops of white to connect the unpainted flowers to the ends of our crescent. Faux baby's breath to the rescue! Once again, I cut that into smaller pieces and glued them into any gaps or spots that needed to be brightened.
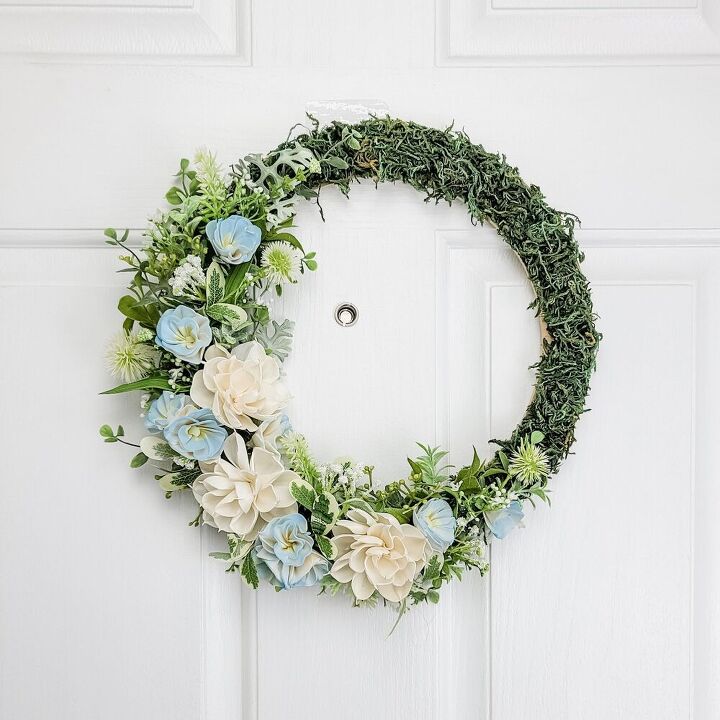
And now the question is - give as a gift or keep for your own home?! Let us know which in the comments! 💕
Resources for this project:
See all materials


Comments
Join the conversation
-
I love the pop of blue from the flowers.
-
Pretty pretty!!!!!


Frequently asked questions
Have a question about this project?