


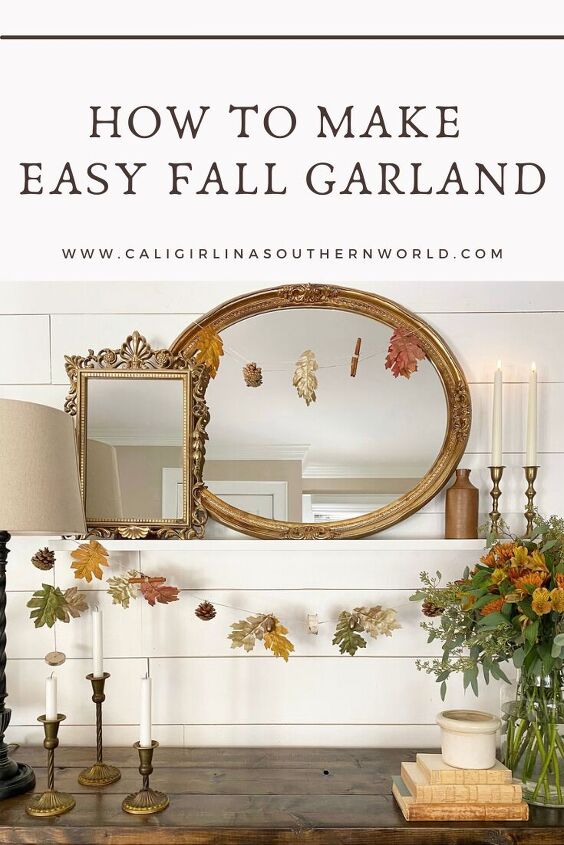
How to Make Easy Fall Garland
Wait until you see how easy fall garland is to make! With a few simple and inexpensive items from the craft store and things found in nature right outside your front door, you can make this beautiful, rustic, and festive garland. It’s perfect for Fall!
Gorgeous Garland
Don’t you just love garland!? Oftentimes, people only think about decorating with it at Christmastime. Christmas garland is beautiful, but I also love to decorate with garland at other times of the year. Last year, for the first time I made dried orange garland. It was so easy to make! Dried orange garland was a wonderful way to transition my Fall decor to Christmas. Also, the process of drying the oranges made the farmhouse smell AH-MAZING! If you’ve never tried making it, you must.
Time to Make Easy Fall Garland
September 1 marks the day for bloggers that it’s “Game on!” when it comes to decorating for Fall. I know, I know, it seems too early… That’s because it IS too early! Believe me, I completely understand. However, as a blogger, my goal is to inspire you early so that when you are ready to start decorating you’ve got some ideas.
As much as I loved the DIY dried orange garland from last year, this year I wanted to come up with a new, beautiful, and easy garland. It was important to me that the garland would again make the transition from my Fall decor to Christmas smooth and easy. Most of all, I didn’t want to spend a fortune to make it. I was so excited when I discovered that just about everything I needed I had in and around the farmhouse to make this easy Fall garland.
Use What You’ve Got
On August 30th, I went up to the attic to do an inventory of the Fall bins. I was pleasantly surprised when I found a bunch of faux Fall leaves. Clearly, I bought them last season on clearance, because the bag wasn’t even open. Yahoo! That’s when it came to me, I was going to make an easy Fall garland with the faux leaves. I went to my craft room and discovered a treasure trove of metallic paints too. Lately, I have been crushing on warm metals including antique gold, copper, and bronze. My love for these warm metal tones became my inspiration for this year’s garland.
Just when I was all set to start making my garland, I found myself distracted. As I was scrolling through Instagram later that day, another Fall garland that I saw took my breath away. I was immediately inspired! My friend Emily at LeCulivateur, posted a photo of the garland she made years ago. The metallic leaves caught my eye first because they were the same leaves I planned to use in my garland. However, Emily added some wonderful pieces from nature that I loved too. It was then that I decided that I also wanted to add some of nature’s treasures to my garland.
I immediately put my boots on and headed out the front door. As I walked around the farm I gathered up a bunch of fallen branches, acorns, and pinecones. (Thankfully, we never have a shortage of pinecones being that North Carolina’s state tree is the pine.) Now, I was finally ready to start making my easy Fall garland.
What You Need to Make Easy Fall Garland
Materials:
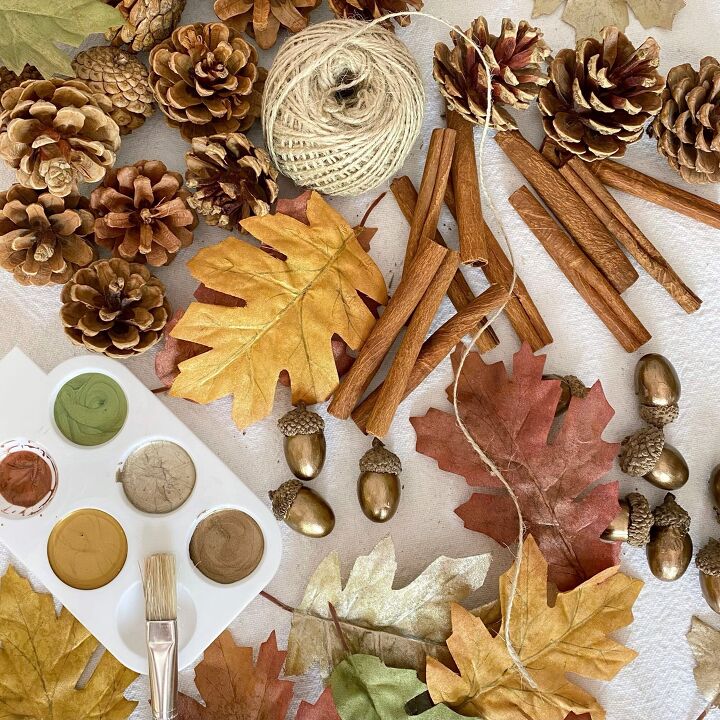
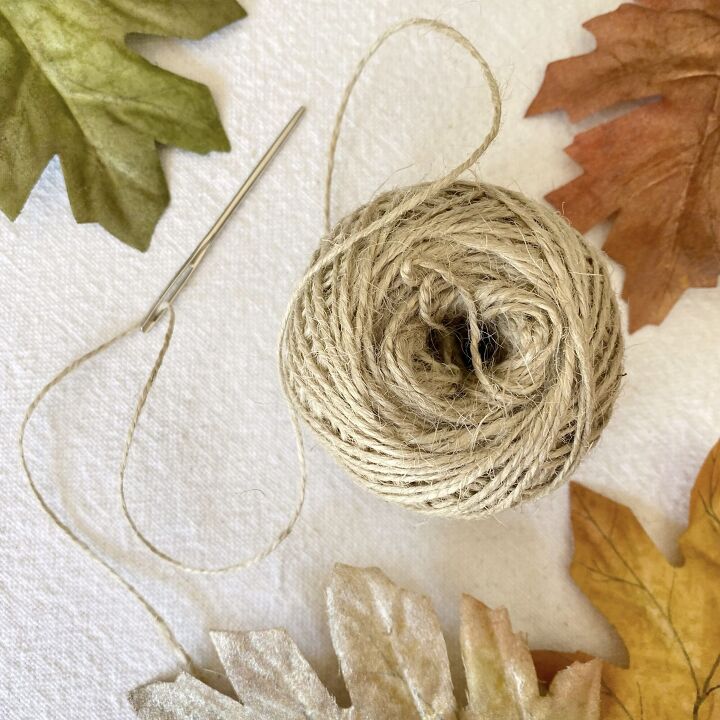
- Jute twine
- Pinecones
- Acorns
- Old branches cut into slices
- Faux Fall leaves from the craft store
- Cinnamon sticks
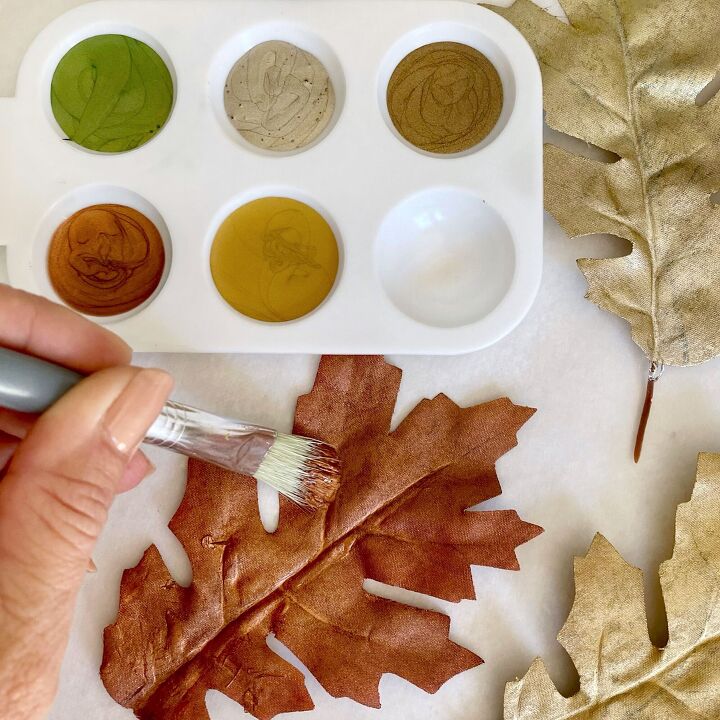
- Metallic acrylic paint in Fall hues (I used DecoArt: Rich Espresso, Splendid Gold, Champagne Gold, Worn Penny, and Festive Green)
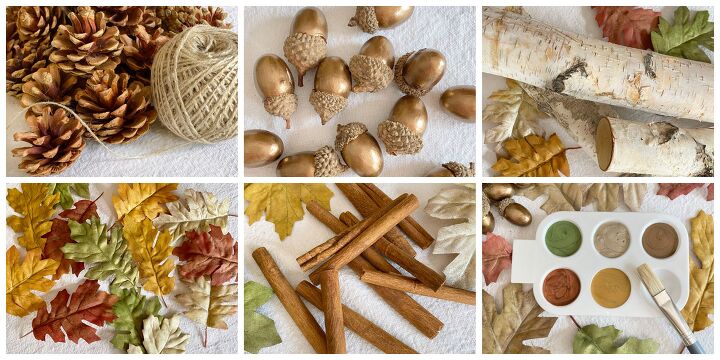
Tools:
- Small paintbrushes
- Quilting needle
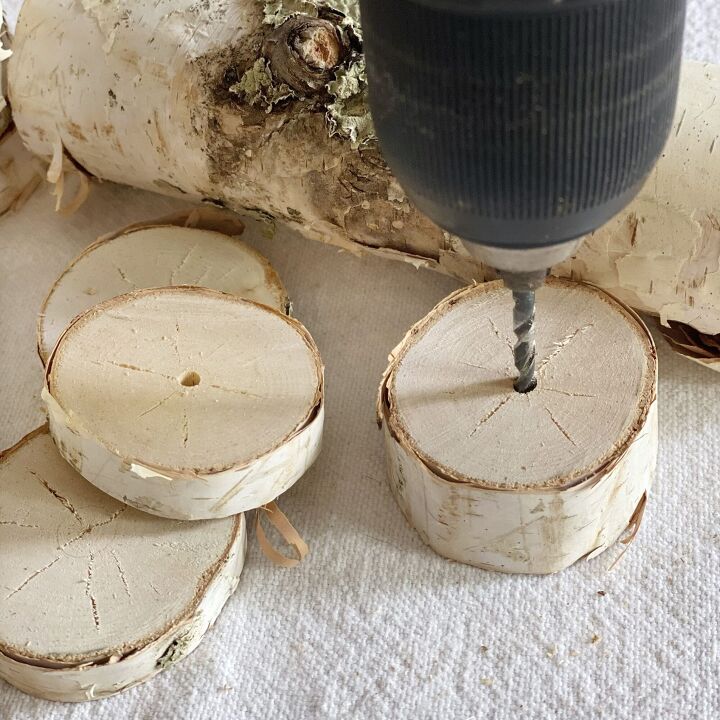
- Saw
- Drill and a small drill bit
How to Make Easy Fall Garland
Prepare the pieces.
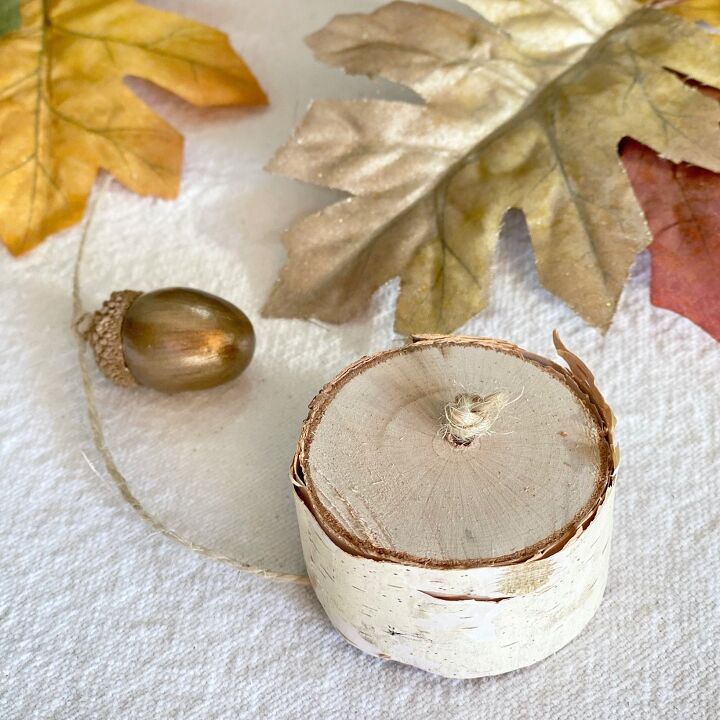
To begin, paint all the pieces you want to use for your garland. I painted the faux leaves in all different metallic colors (listed above). I also painted the nut of the acorn using ‘Rich Espresso.’ Allow the pieces to dry completely.
Next, cut the wood branches into thin slices, about a 1/2-inch thick, and drill a hole in the middle of them. Be sure that the hole is not too big. Why you ask? Thank you for asking. The wood slices will be secured on the garland by knots in the jute twine. If the holes are too wide, the knots will go through them and the wood slices will move up and down the garland.
Decide the length.
Now, it’s time to cut the twine to the desired length you want for your garland. Remember to leave about 12-24-inches extra so you have enough twine to secure all the pieces. For example, securing the cinnamon sticks and wood slices requires more twine than other pieces. I made my garland six feet long. Therefore, I cut the length of my twine to eight feet.
Determine the pattern, spacing, and ends.
Determine the pattern and spacing you want for the garland pieces. You may choose not to do a pattern with your pieces. You may decide to space the pieces out evenly or make the space between them random, it’s all up to you. This is where you can let your creativity run wild.
This is also the time to consider how you want either end of your garland to look. Do you want loops on each end to hang your garland or do you want each side to have a more finished look? The ends of your garland can be tied off with a slip knot in the twine. The loop created by the knot at either end will be the loop you use when you hang the garland off hooks or nails. The other option is finishing the ends off with one of the pieces. I chose to finish my ends with a wood slice which I knotted at either end. This is a great option if you plan on hanging the garland in such a way that the ends will be visible.
String the pieces.
Once you’ve determined your pattern, spacing, and ends, begin stringing your pieces on the twine using a quilting needle. I have ‘a thing’ about symmetry, so strung the pieces for my easy Fall garland in a pattern. I also spaced my pieces out about four inches in between one another and I doubled up on the leaves. That’s just me though. You can make your garland however you want. I encourage you to make it your own. It will be beautiful no matter what!
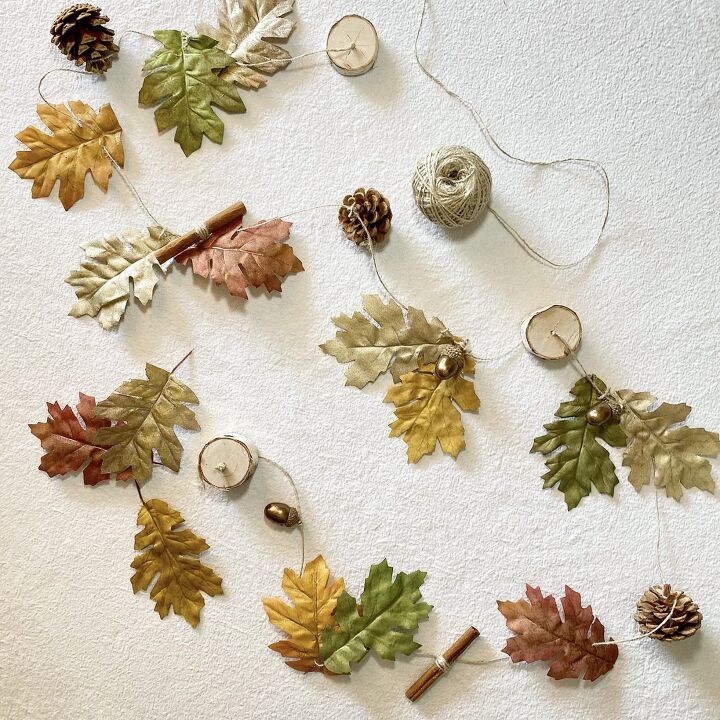
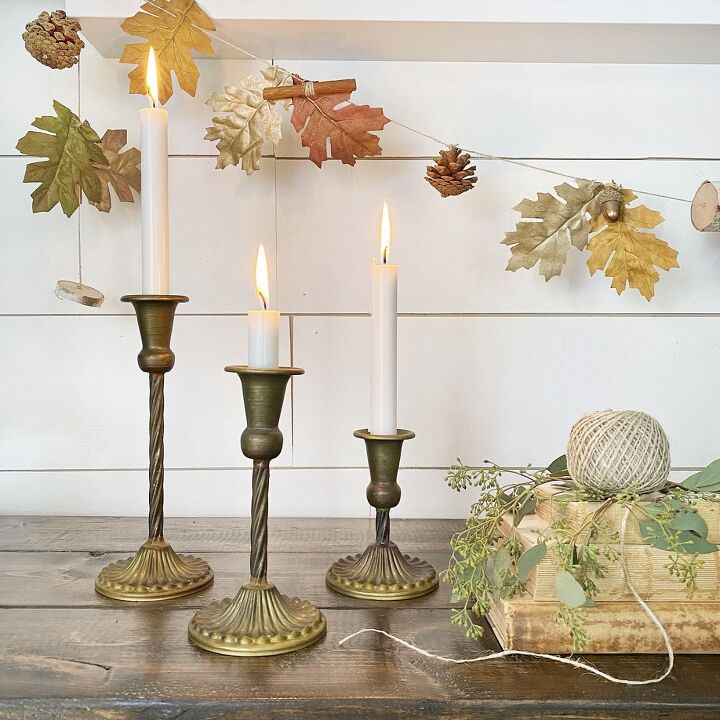
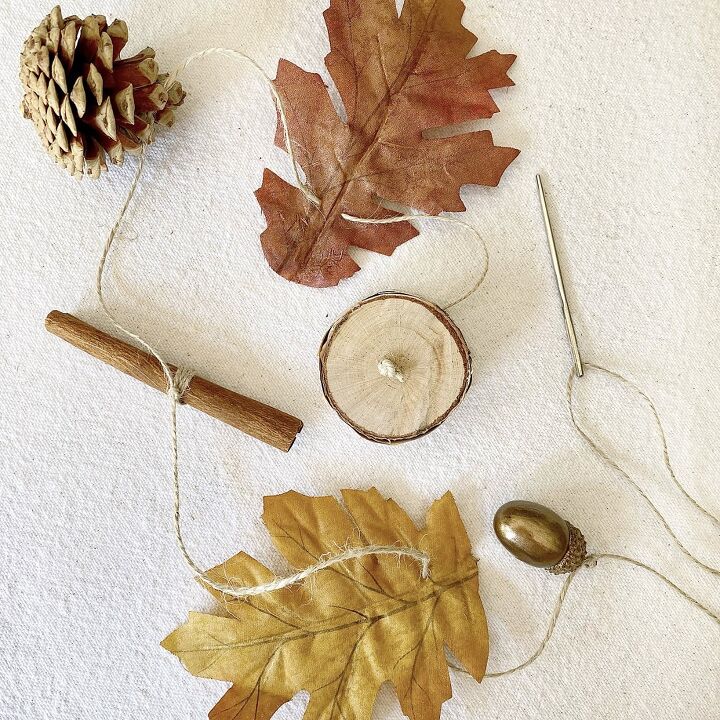
Pinecones: To attach the pinecones, I tied the twine around one of the pinecone scales and knotted it.
Acorns: To attach the acorns, I tied the twine in a knot around the stem.
Wood slices: To attach the wood slices, I tied a few slip knots in the twine and strung the wood onto the twine. Then, I tied a few more slip knots on the opposite side of the wood in the twine. By tying knots on either side of the wood, it ensures that it will stay in place.
Faux leaves: To attach the faux leaves, I used a quilting needle to poke a hole (or two) in the leaves to string them on the twine.
Cinnamon sticks: To attach the cinnamon sticks, I wrapped the twine around it a few times and then knotted it off.
Tie off the end.
Now that all the pieces are strung onto your twine, it’s time to tie it off. Tie another slip knot at the end of your garland, just like you did when you began. That’s it, your easy Fall garland is finished!
Time to hang your easy Fall garland.
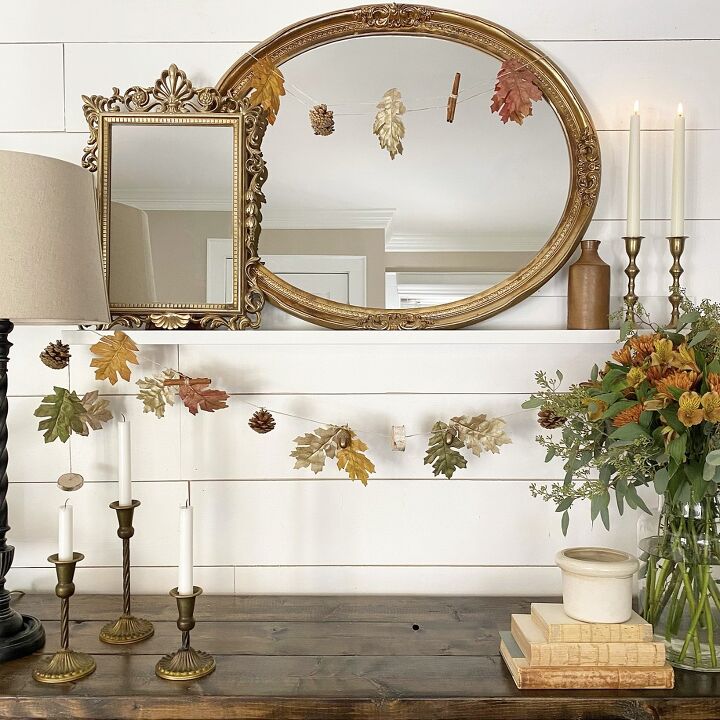
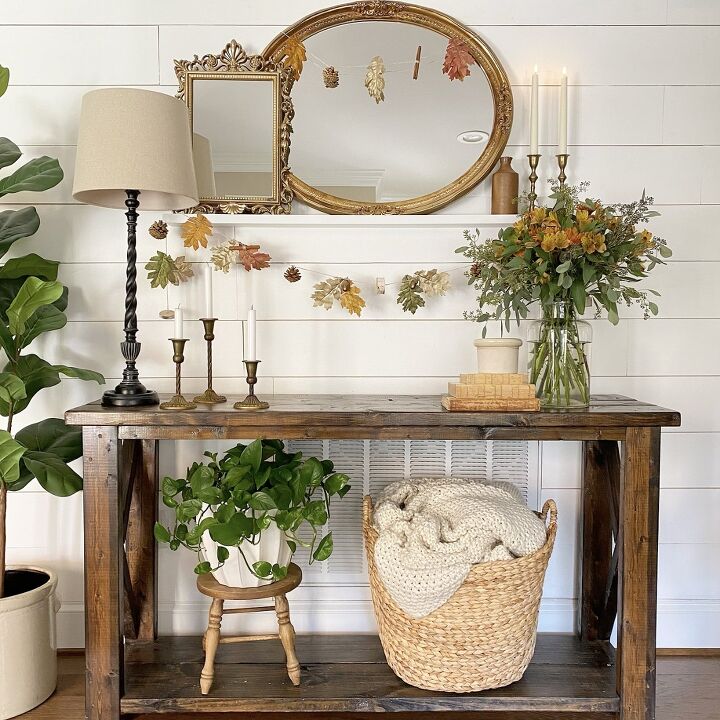
Find the perfect spot in your home to hang the garland. It will look gorgeous hanging from the fireplace mantel, the kitchen hood, from a collection of layered mirrors, or a shelf.
What Else Can You Use to Make Easy Fall Garland?
Beautiful and easy Fall garland doesn’t have to be hard to make or expensive. Fall is a wonderful season. This time of year, nature gives us so many gifts. When out hiking, keep your eyes peeled for treasures from nature. This is also a great family activity in the Fall! Take a hike, collect a bunch of things in nature, and bring them home to make a garland for your home that the whole family can admire and enjoy. Things like leaves, feathers, berries, and seedpods are all perfect for making garland.
Also, don’t forget about the kitchen pantry. Walnut shells, bay leaves, and stars of anise are also great additions for making garland.
I look forward to sharing lots more Fall inspiration with you over the next several weeks. Join me on Instagram and Pinterest too for more Fall decorating ideas, recipes, and DIYs. Happy September, y’all!
Resources for this project:
See all materials


Comments
Join the conversation
-
Stunning! Love the whole look with the mirrors et al!!
-
Got any ideas on acorn substitutes. They are an East Coast item. They don't exist on the east slope of the Rockies.


Frequently asked questions
Have a question about this project?