


Fall Door Decorating: How to Create Stunning DIY Garlands
As the seasons shift, and the leaves begin their beautiful transformation, the inspiration for fall door decorating couldn't be more timely.
Join me as I show you how you can replicate this creative autumn display.
This post was transcribed by a member of the Hometalk editorial team from the original HometalkTV episode.
Tools and Materials:
Six-foot pieces of lightweight wood trim
Fall garland
Assorted fall leaves, foliage, and decorative picks
Faux fruits and nuts
Steel pick machine (optional)
Hometalk may receive a small affiliate commission from purchases made via Amazon links in this article but at no cost to you.
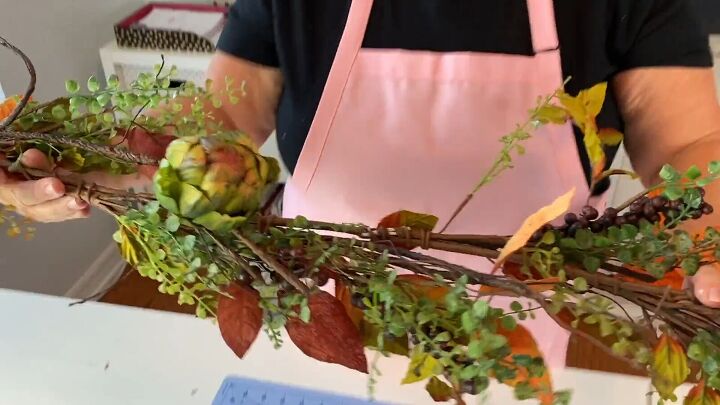
I found some stunning fall garlands, but they didn't quite meet my vision of a truly impressive display. Knowing there was untapped potential, I set out to enhance them, crafting the ideal DIY fall garland to grace my door this season.
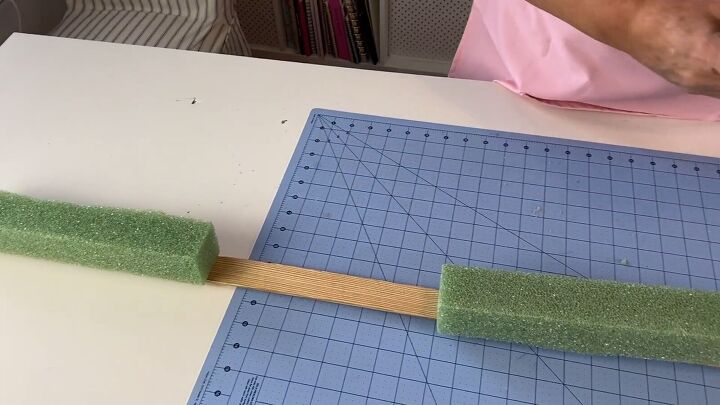
1. Preparing the Foundation
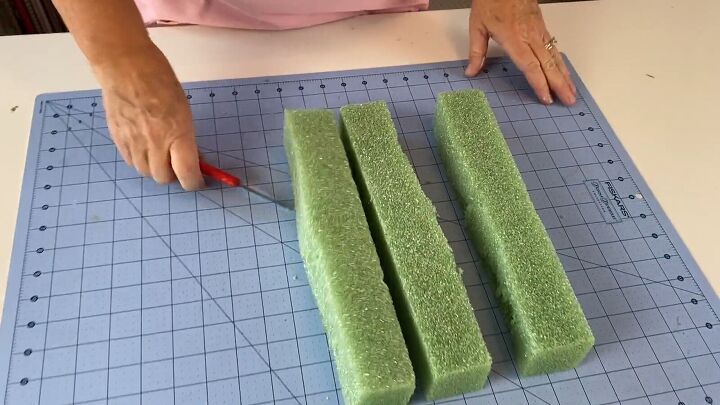
Begin by cutting the styrofoam pieces vertically into halves, resulting in six pieces in total.
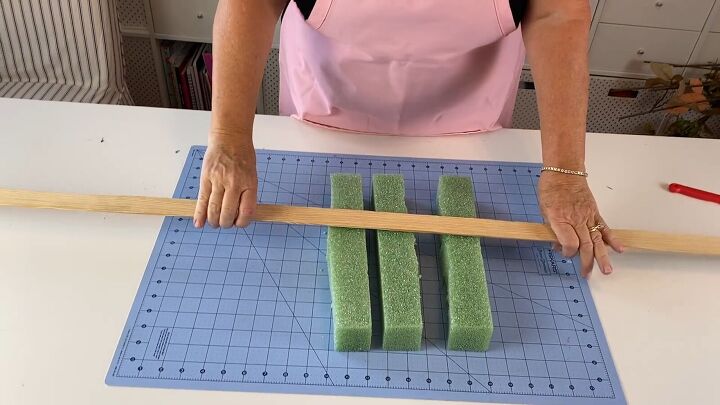
Then, choose two lightweight wood trim pieces, each six feet long.

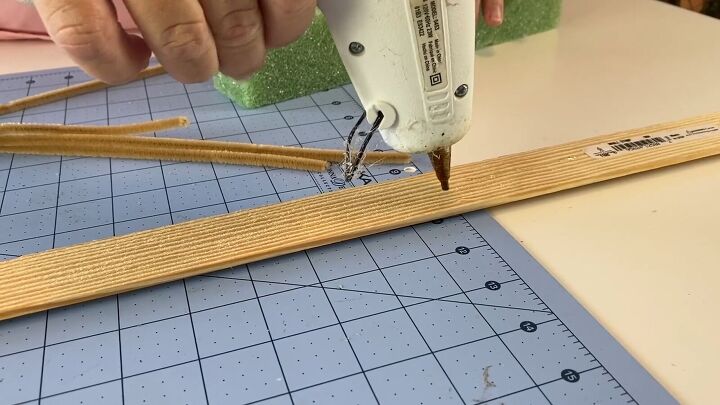
Drill holes approximately two and a half inches from one end of each wood trim piece.
Feed a pipe cleaner through each hole, securing them into loops. These loops will be used to hang your decor later, so make sure they are secure.
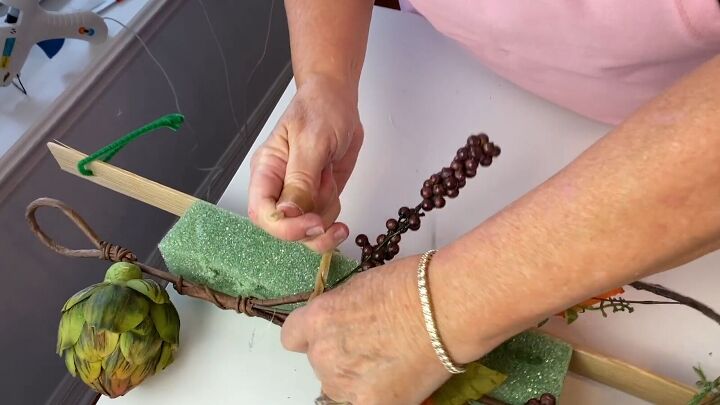
2. Attaching Styrofoam Blocks
Use your low-temperature glue gun to add glue to the wood trim pieces, then attach the styrofoam halves evenly along the boards.
Leave about 10 inches of space between each piece of foam. This forms the foundation for your fall front door decor.
3. Building the Garland Base
Lay your project on a table to work comfortably. Place your Dollar Store garland on top of the wood and Styrofoam.
Attach two pipe cleaners together and use these to secure the garland to the styrofoam and wood.
Ensure the pipe cleaners are wrapped around all three components. The garland and wood will prevent the wire from the pipe cleaners from cutting through the Styrofoam.

This is what you have now, but we are going to add to this and make a really full and fantastic entryway decoration for our fall front door.

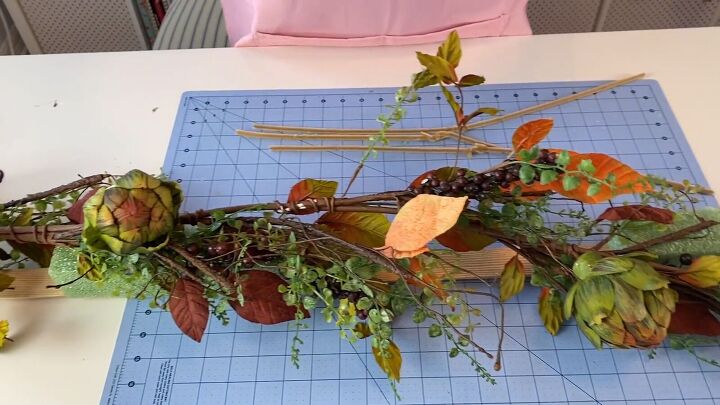
4. Adding Foliage and Decorations
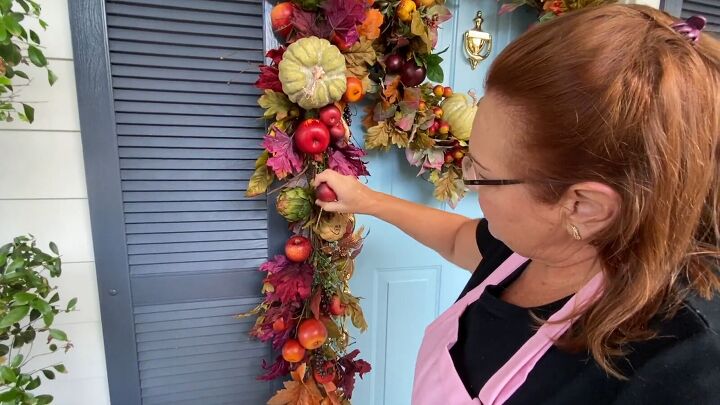
Get creative with fall leaves, fruits, nuts, and decorative picks.
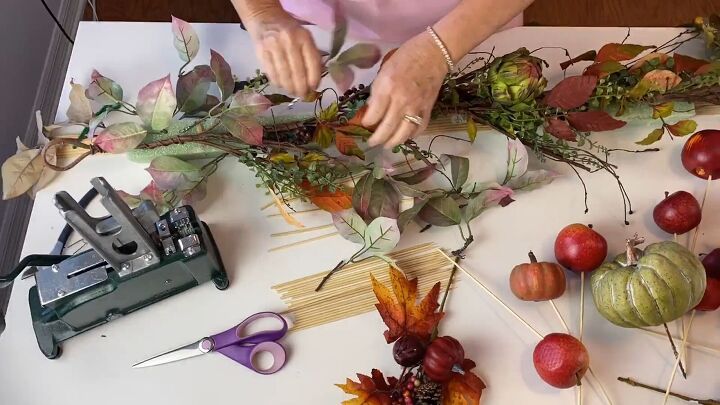
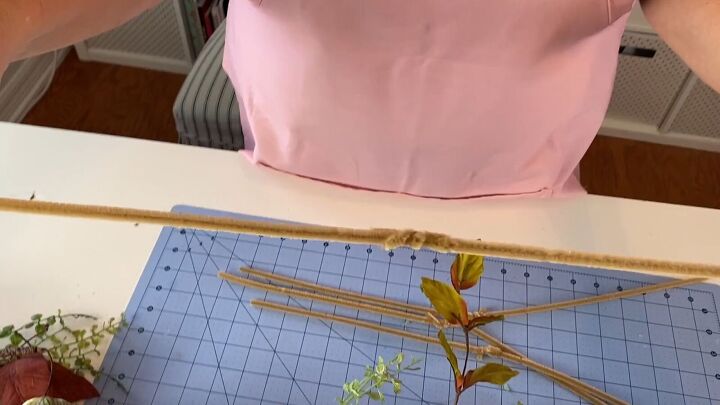
Start with your fall foliage, adding them to the styrofoam by pushing the stems into the foam.

For stems that aren't stiff enough, use a steel pick machine.
If you do not own a steel pick machine you could also attach the stems of the foliage to skewers to give them a stiff base that you can insert into the foam.

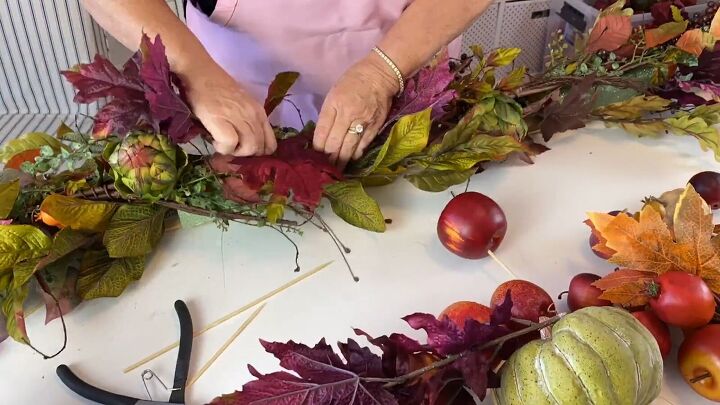
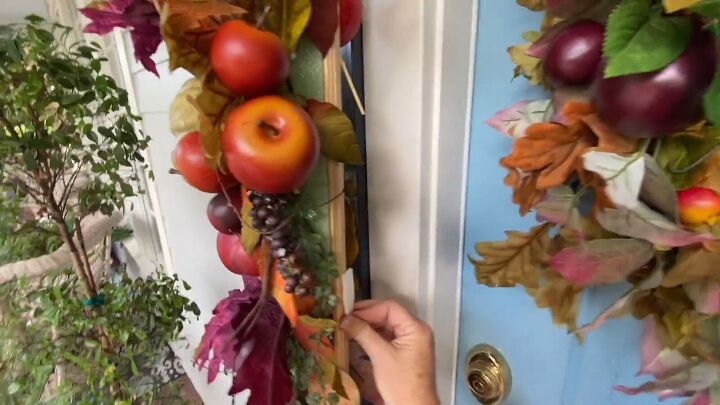
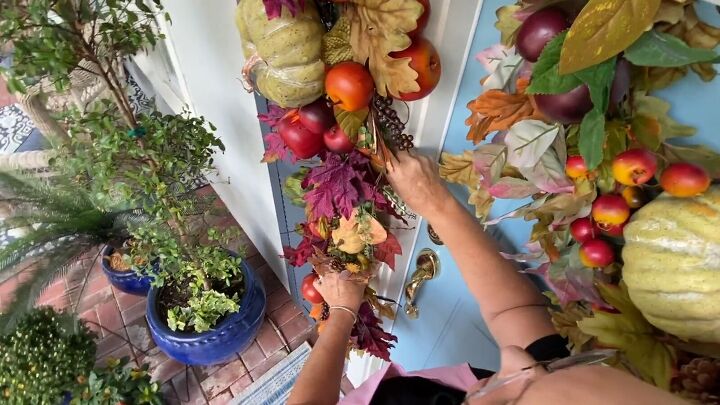
5. Creating a Lush Look
Continue by adding fruits, pumpkins, and other autumn decorations.
Cover up as much of the Styrofoam as possible and achieve a full and vibrant look for your fall door decoration.

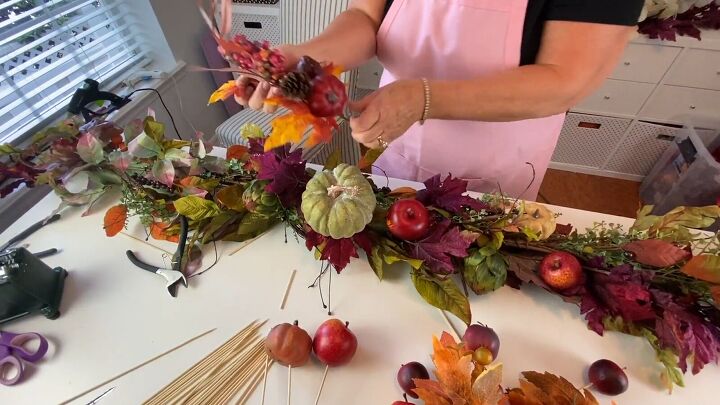
This is what the DIY garlands looks like before hanging.
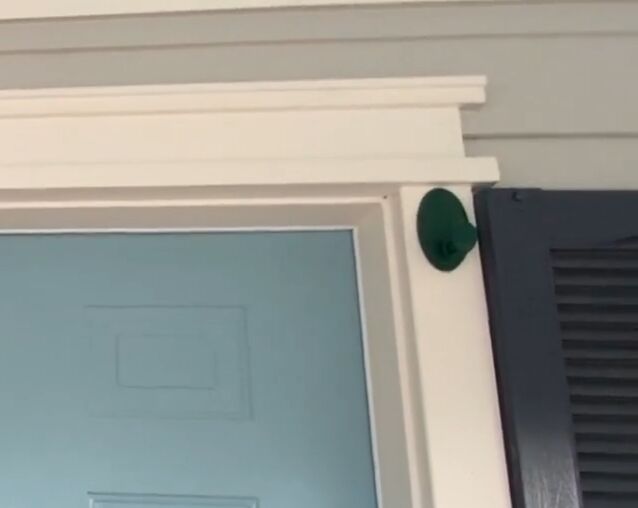
6. Hanging Your Creation
To hang your masterpiece, attach Command hooks to your door frame.
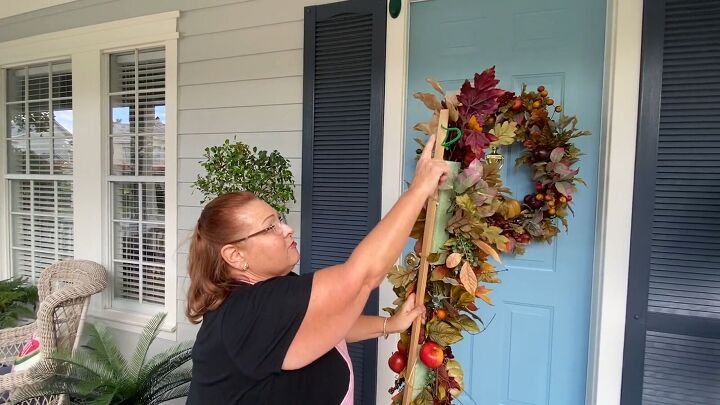
You are going to use the loop you added to the wood trim at the beginning, to hook the garlands to each side of your door.
To keep the garlands from swaying add Command strips to the back of the wood.
Stick it to the door frame ensuring you have a secure grip. This additional step keeps your decor secure, even in the wind.
Now you need to cover any areas of the foam that are still visible. Make sure to look at the sides of the garland as there will most likely be foam showing in these areas.
Fill up your garland until you are satisfied with the look.
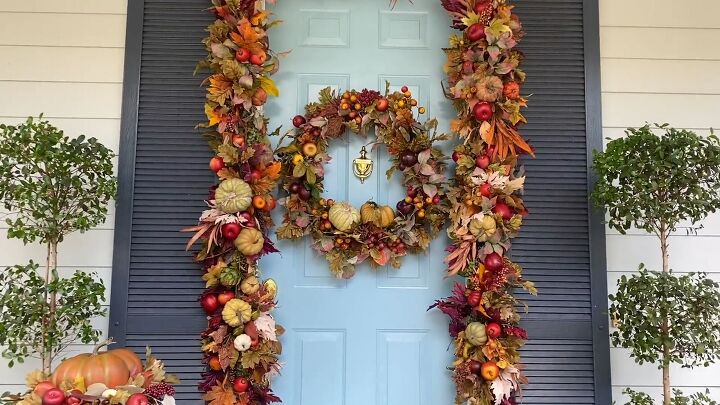
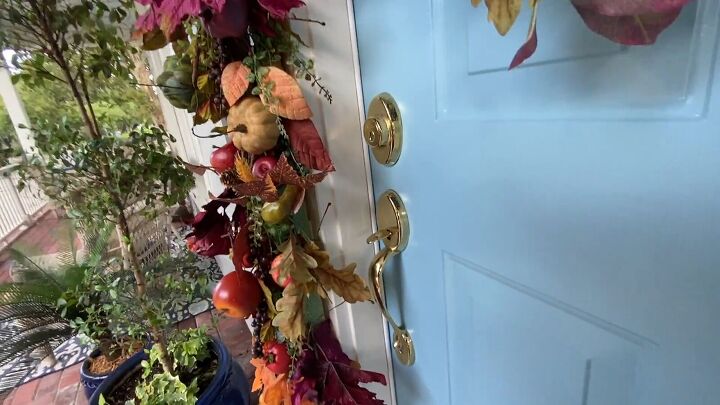
Fall Door Decorating Tutorial
Your front door is now dressed to impress for the fall season.
Combine these side pieces with a matching wreath and swag over the top of the door for the ultimate fall front door decor.
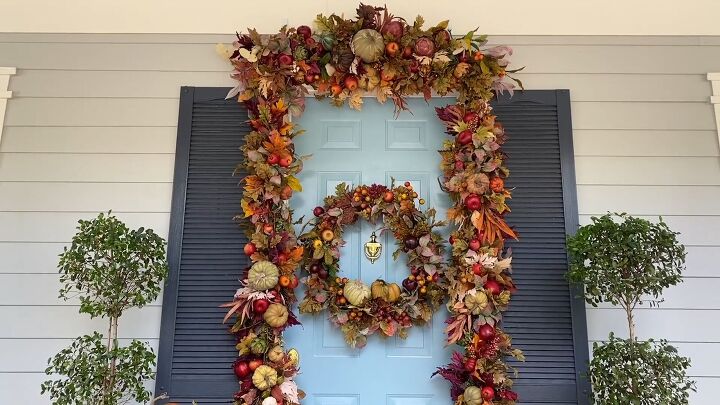
Your creative effort will be the talk of the town and provide a warm welcome to guests and passersby throughout the autumn season.
Feel free to share your thoughts in the comments below and let me know how your DIY fall door decorating project turned out.

Comments
Join the conversation
-
Looks great, I've 'fall'en in love with it. But it looks expensive to purchase all of the foliage and gourds even on sale, not possible on my budget, but it made me think....I'm already planning to go Garage sale-ing and start grabbing up supplies for next year and anything in between. Maybe I'll get lucky for this season. Enjoy your garlands.
-
It is pretty. Agree with others. It is to close to the door. Very expensive to do for the average person, then put it outside. That is like throwing money away.


Frequently asked questions
Have a question about this project?