


Luxurious Fall Swag for Your Front Door
Get ready to dress your door for fall with this luxurious front door swag full of fall leaves and flowers, pumpkins and gourds! Neighbors will be amazed when this is hanging on your front door!
Materials I used, All available here!
- Miscellaneous Fall Flowers (Amazon)
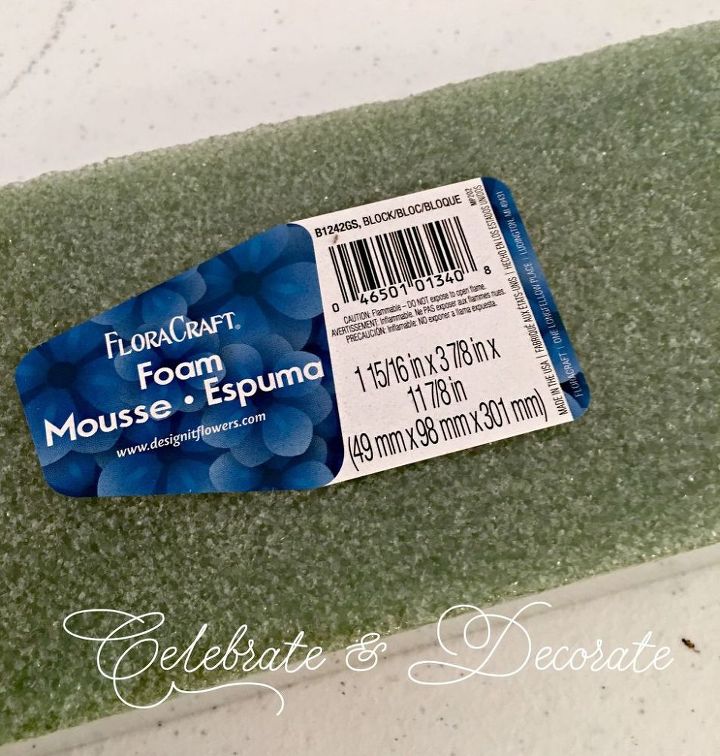
- Styrofoam rectangle (Amazon)
- Small pumpkins and gourds (Amazon)
- Floral wire - 18 gauge (Amazon)
- Pipe cleaners (Amazon)
Begin with a block of styrofoam that is about 2″ x 4″ x 11″. This will be the base for your swag.
If you want to buy this door swag "Out of the box" click here!
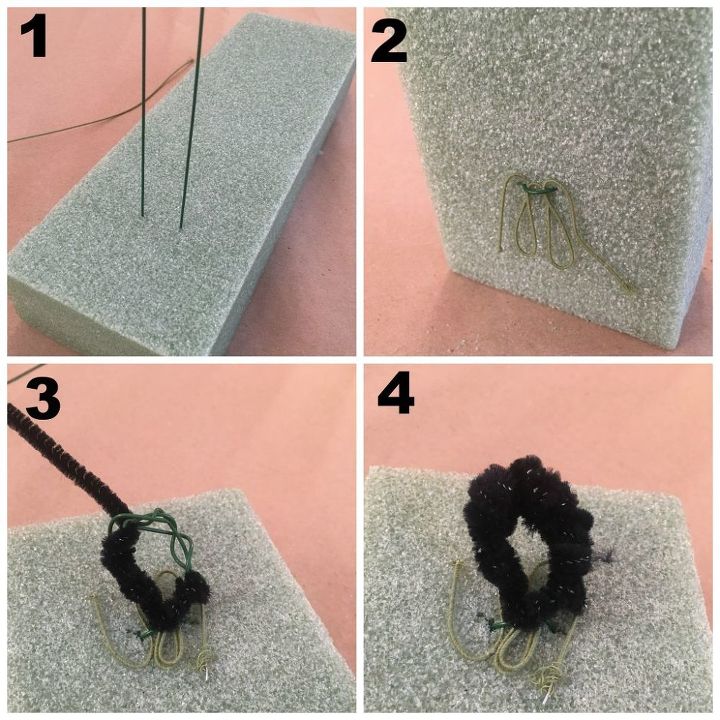
The first step to making your swag is to give yourself a hanger to hang it from the door where you will be displaying it. Using an 18 gauge floral wire, bend it in half and stick it through your piece of styrofoam. Before pulling it all the way through, you must secure the wire with something to keep it from cutting and being pulled all the way through your foam block. I like to use a piece of paper wrapped wire in a “W” or “M” pattern that will keep the wire from pulling through. On the back side of the foam, wind your wire into a circle to hang on your hook. To protect your door, wrap the wire in a pipe cleaner.
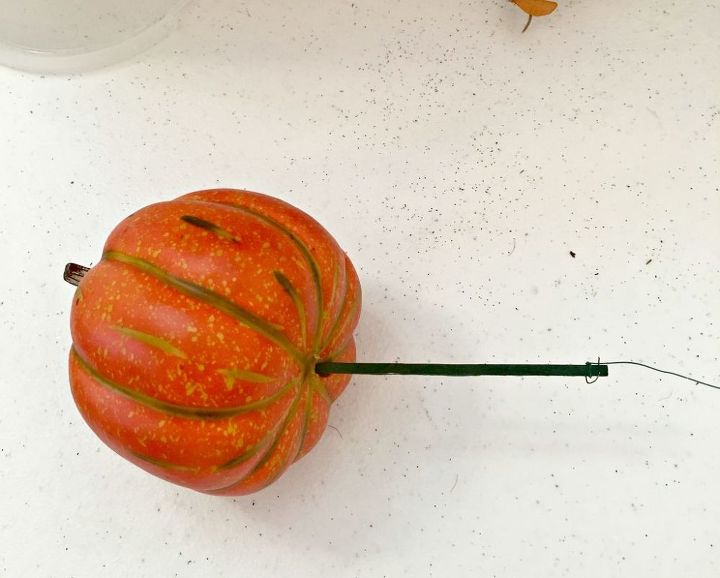
Using some small pumpkins and wood sticks, puncture the pumpkins and push the stick into the styrofoam.
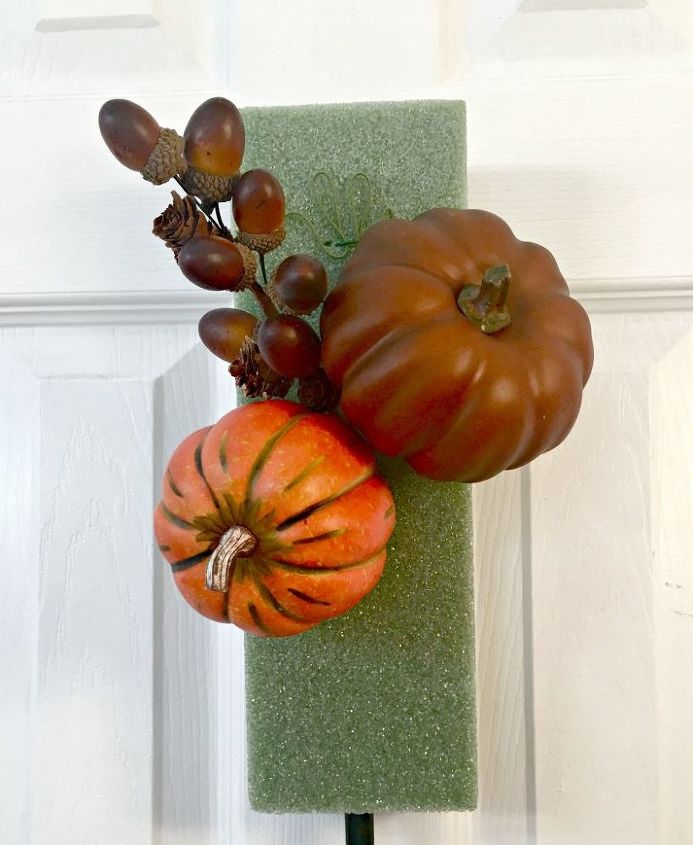
I repeated this with another pumpkin and a pick of faux acorns. This will be my focal point in the swag.
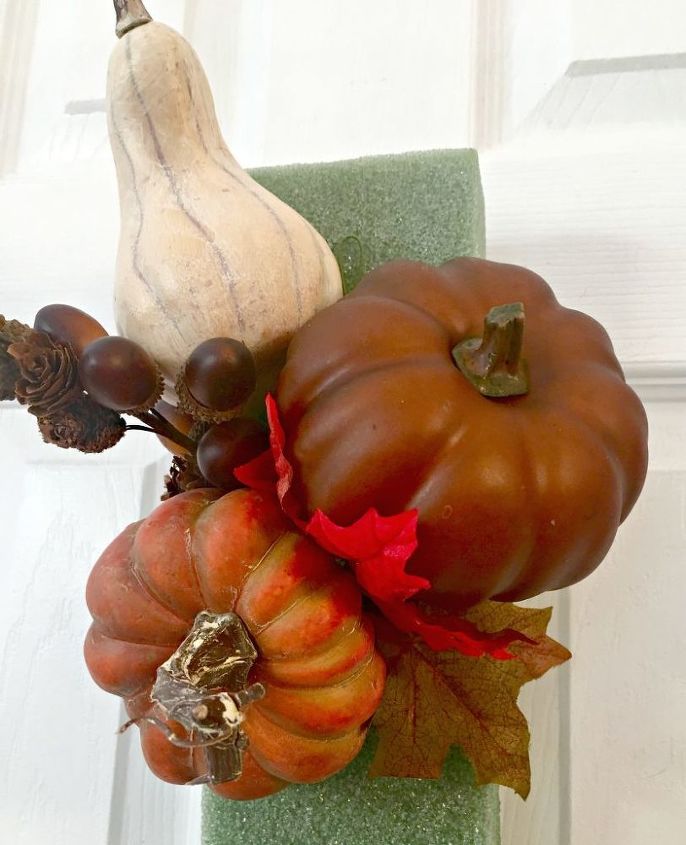
I added a gourd and began to tuck some fall leaves amongst my larger pieces. I used fall leaf picks from the Dollar Tree and cut them apart into individual stems.
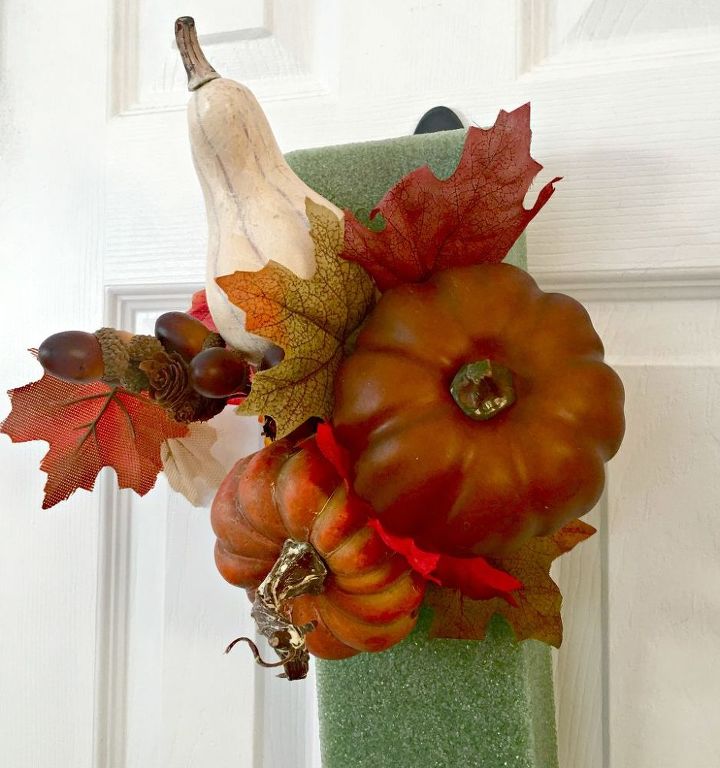
Continue to tuck leaves in all around the featured items on your swag.
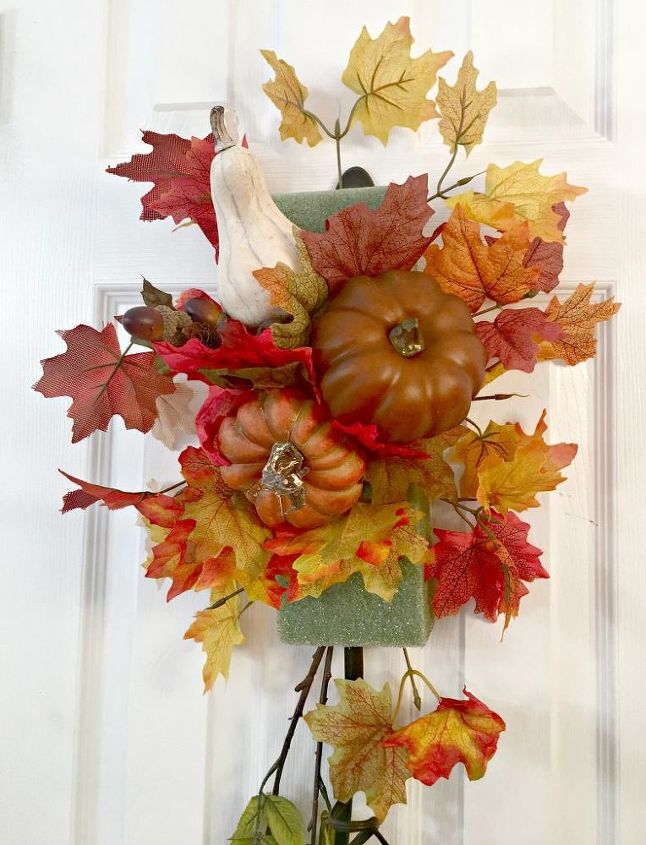
Continue to fill in the swag with fall leaves, you will save your fall flowers to top your swag.
Begin to add flowers, with longer blossoms first. I added some fall colored wisteria to hang down in my swag. For more pictures and details, check out my blog at Celebrate & Decorate.
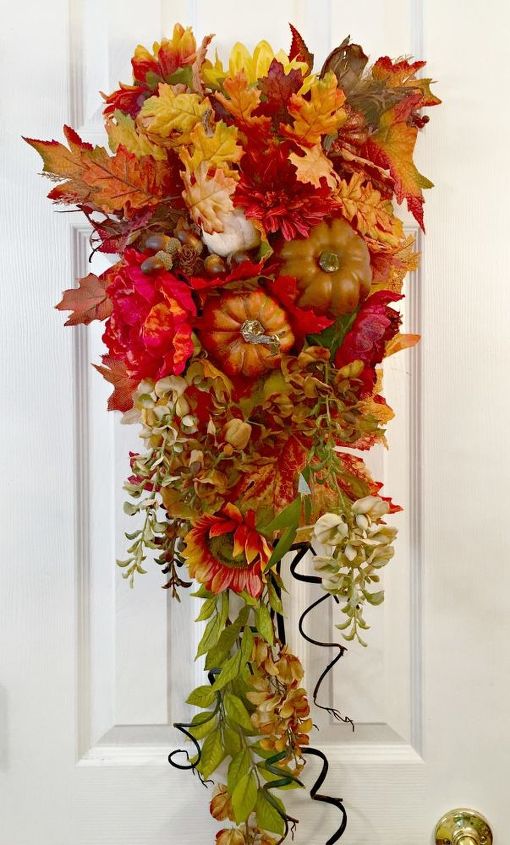
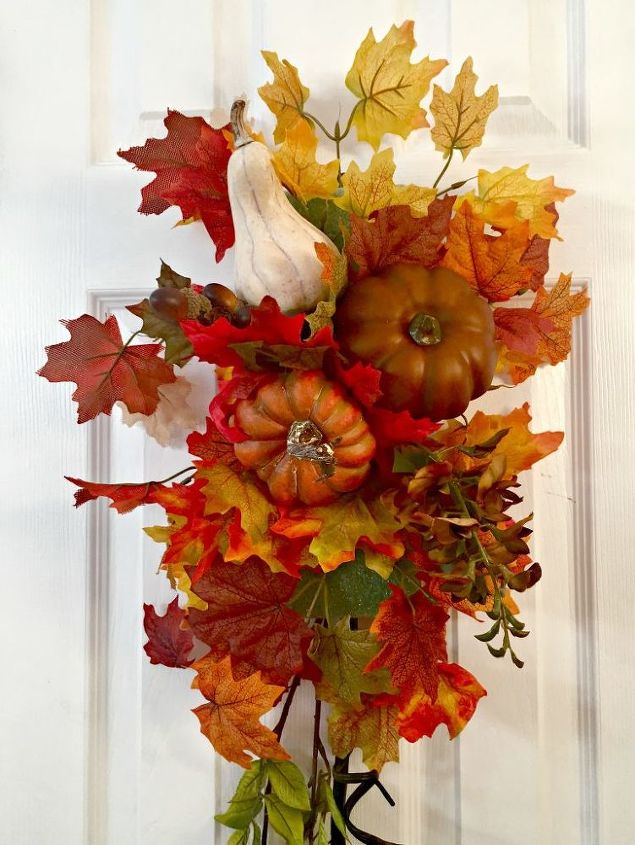
You can see the wisteria more in this photo. (Ignore the dark grapevines, I decided to remove them later.) The swag is almost complete with the addition of a number of fall faux blossoms. This shows the swag needs to be a little rounder at the top and I needed to remove the grapevines from the bottom.
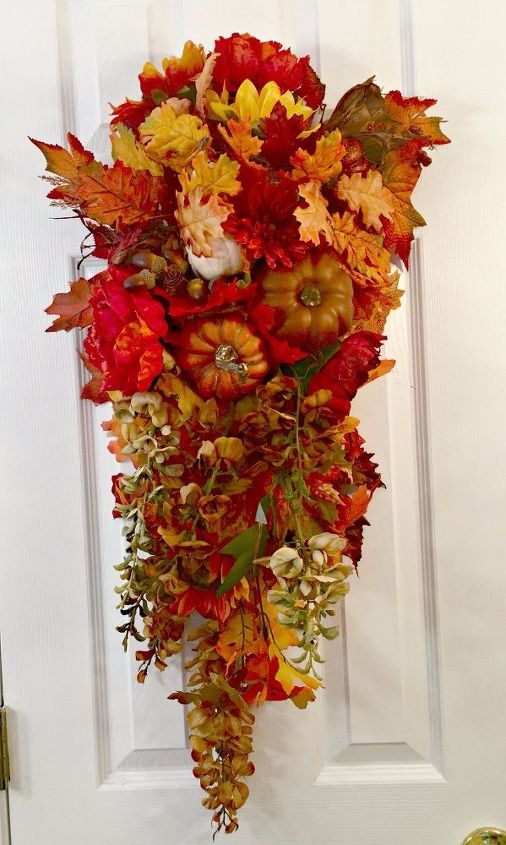
Here you can see how the top was rounded out with fall blooms and the bottom was shortened and the vines removed. Never hesitate to remove parts that are not pleasing to you and add more wherever you think you need to add.
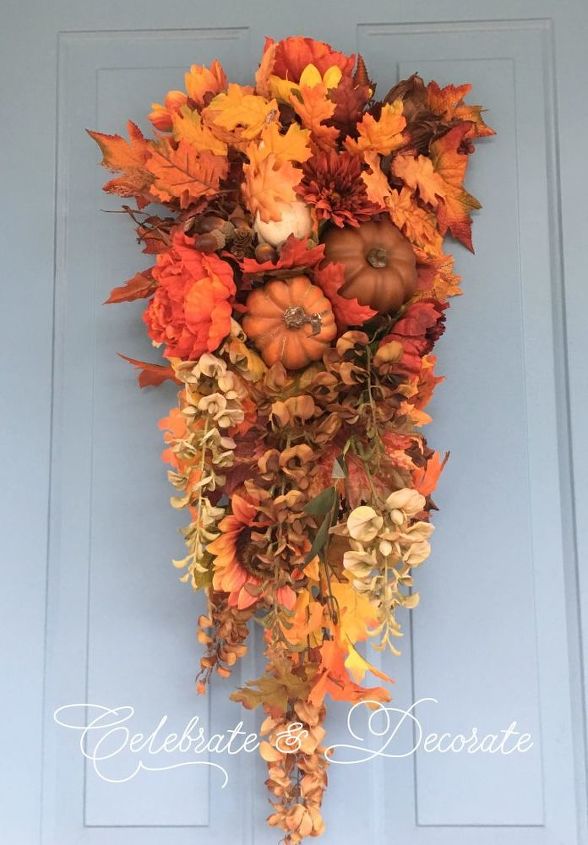
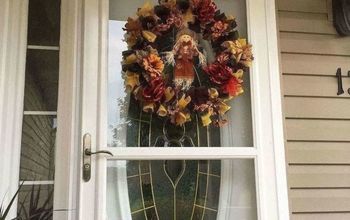
Your fall swag is ready to hang on your door and greet guests as they arrive!
DIY it or to buy a similar item click here!
DIY fall door decor
Resources for this project:
See all materials


Comments
Join the conversation
-
Thanks for a wonderful Fall door Idea !!!
-
Love your work. Fall colours are my favourite. I made a Halloween swag a few years ago but haven't tried one for another holiday yet. I really like your white pumpkin mantle and the pink skull Halloween one too.


Frequently asked questions
Have a question about this project?
How would you suggest doing this if you have a screen door and put wreaths in between the door and and screen door which has glass.
How would
You hang it on a wooden door
Looks like the stems on the pumpkins were painted gold. Has anyone tried this? Thanks