


How to Make a Fabric Wreath (Easy DIY)
Learn how to make a fabric wreath. It’s so simple; you just tie knots! In only a couple of hours, you’ll have a beautiful new wreath to decorate your front door or a special space in your home.

Fabric Wreath Overview
A fabric rag wreath is such an easy wreath to make. You can customize it for different holidays and seasons through your choice of fabric colors and patterns. The finished wreath is relatively flat so it’s perfect to hang between a door and a storm door.
Fabric Choices for the Wreath
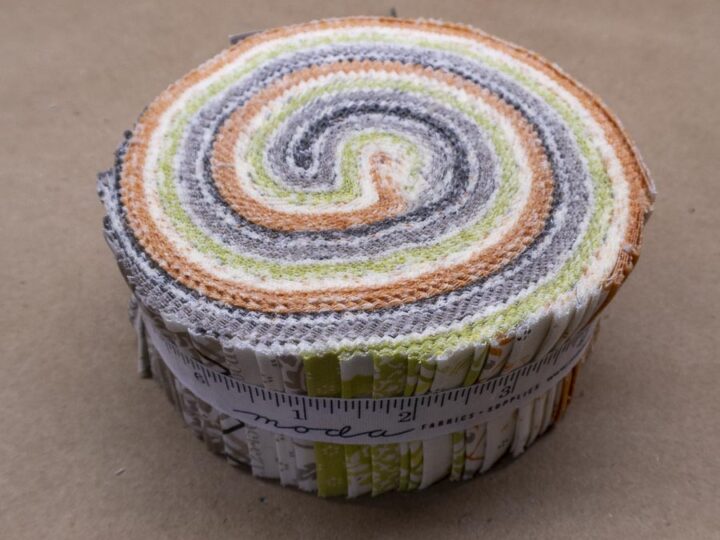
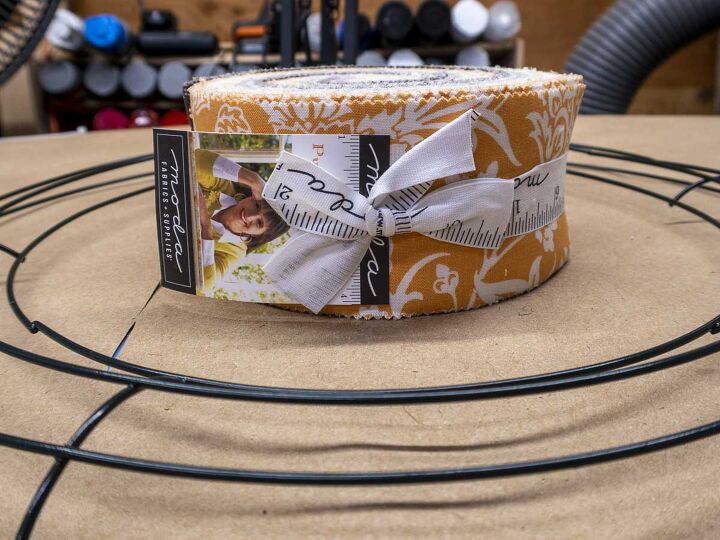
The sky’s the limit when it comes to your fabric choices. To make my choice easier, I decided to start with fabric jelly roll. What’s a jelly roll? It’s a bundle of pre-cut 2.5″ strips of fabric about 44″ in length. Because the fabric typically comes from a designer’s collection, the bundle contains coordinating colors and patterns. By using a jelly roll, you don’t need to spend time finding matching fabrics or cutting the fabric down into long strips.
What if you don’t have a jelly roll? No problem! You are not limited to fabric bundles. Head to the fabric store and find material that reflects your target holiday or season. JOANN’s, for example, has fun fabrics with seasonal patterns.
If you’re like me, you might have a large fabric stash in your craft room. Fabric wreaths are a great way to make use of the fabric scraps in your stash.
Fabric wreaths are also called fabric rag wreaths. Instead of using new material, you can repurpose old clothes or linens to make this wreath too. Do you have any old jeans, a red tablecloth, and a white t-shirt? Don’t throw them away. Make a 4th of July wreath instead. You get the idea.
Cutting the Fabric
Because the jelly roll contained 44″-long fabric strips, I needed to cut them down into smaller pieces. I cut over 200 2.5″ by 8″ rectangles to be more specific.
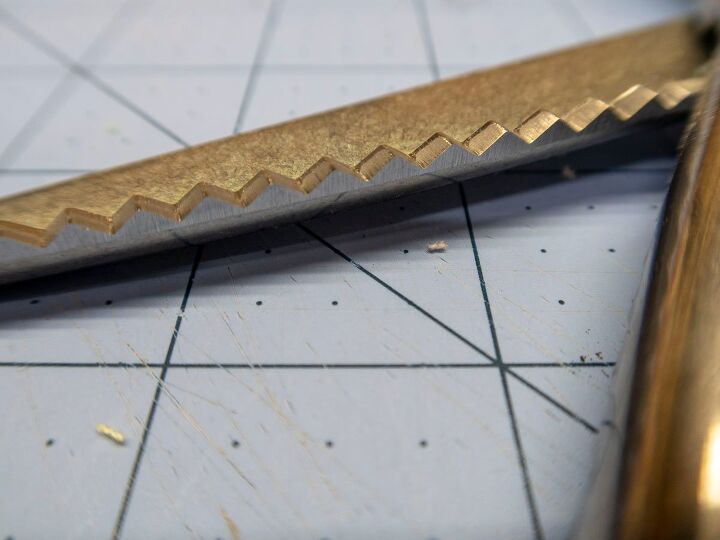
I used pinking shears to cut the fabric, but regular scissors or a rotary cutter also work. A pinking blade has serrated teeth for cutting a zig-zag or sawtooth pattern in the fabric. This sawtooth pattern minimizes fabric fraying. In addition, the pattern on the fabric strip adds another dimension to the finished wreath.
Putting the Wreath Together
Assembling the wreath is the easiest part. Fold the rectangle of fabric in half length-wise. Then use a simple overhand knot to tie the fabric to the frame (this is the knot you use to tie your shoes).
I originally started with a larger frame, but determined a 12″ frame would result in the desired fullness given the amount of fabric in my jelly roll. If you use a larger frame size, you’ll need to use more fabric. A smaller frame will need less fabric. You can find 12″ wreath forms on Amazon or at crafts stores.
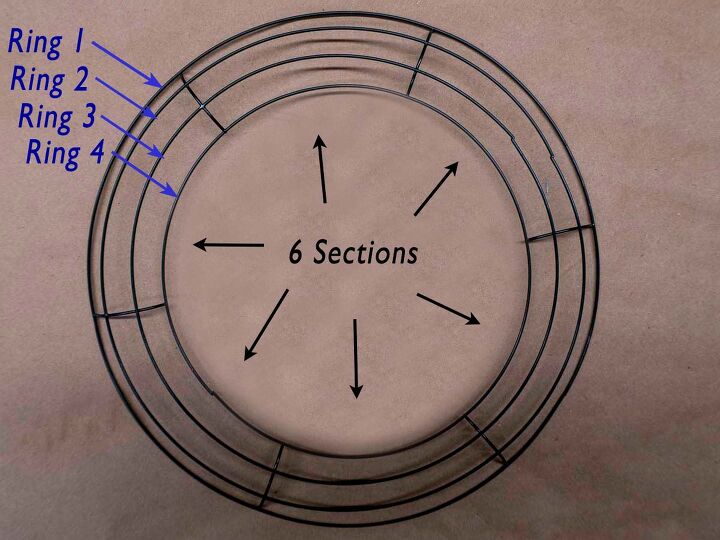
My 12″ frame had 4 rings and 6 sections. To help with the instructions, I’ve numbered the rings 1-4 starting with the outer ring as #1 to the inner ring #4. The number of sections doesn’t matter for this project.

I tied 3 rows of knots on this frame, with each knot formed over two rings (see image above).
- For the outer row of fabric knots, I tied the knots over rings 1 & 2.
- The knots in the middle row were tied over rings 2 & 3.
- The inner row of knots were tied over rings 3 & 4.
You’re going to tie a lot of knots when making this wreath. Fortunately, tying knots doesn’t require a lot of attention. You may want to listen to music, a podcast or an audiobook. This is a perfect project to do in front of the TV too.

Instructions for Making a Fabric Wreath
Here’s What I Used
Materials
- 12″ wire wreath frame
- Fabric Jelly Roll (or strips of fabric)
- Bow
Tools
- Pinking shears (or rotary cutter or scissors)
- Ruler
Select fabric
Select fabric in a variety of complementary colors and patterns. Using a jelly roll of coordinated fabrics is an easy way to accomplish this. I chose Pumpkins and Blossoms, designed by Fig Trig & Co.
Cut fabric into strips (if not using pre-cut fabric)
If you are not starting with pre-cut strips of fabric, use scissors or a rotary cutter to cut fabric into strips that are 2.5″ wide.

Trim ends
If needed, trim the ends of the fabric strips with pinking shears so that you have a clean edge. Regular scissors or a rotary cutter also can be used, but pinking shears will help minimize fraying.
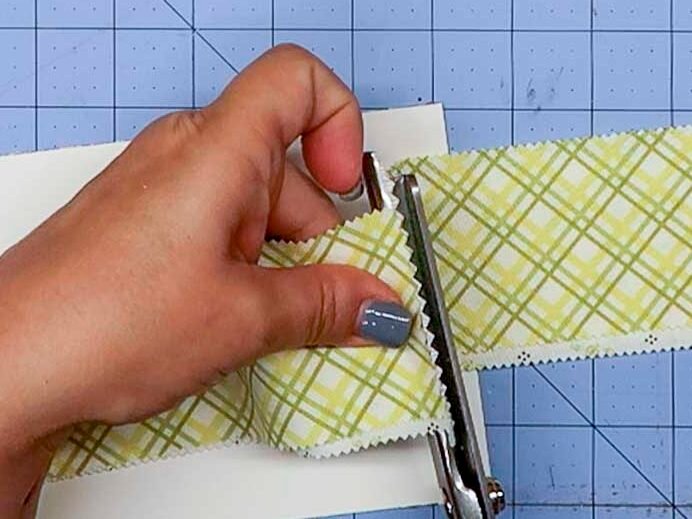
I found that I could cut a stack of 4-5 pieces at the same time with my shears. Stack cutting helps speed up the process by reducing the total number of cuts.
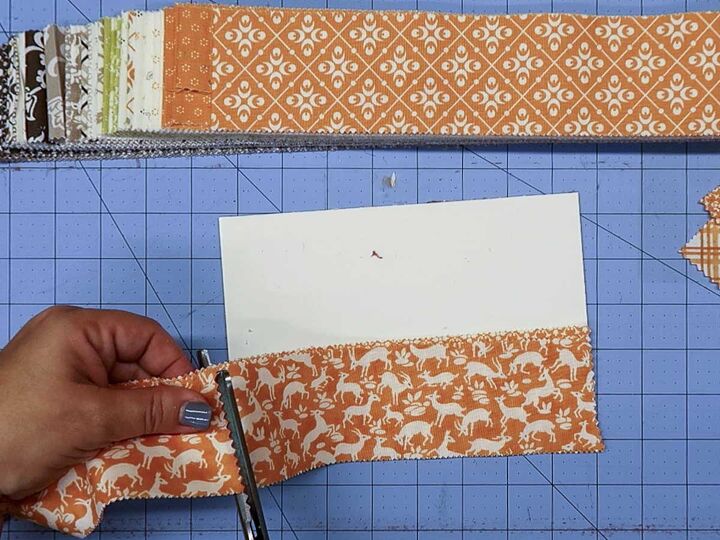
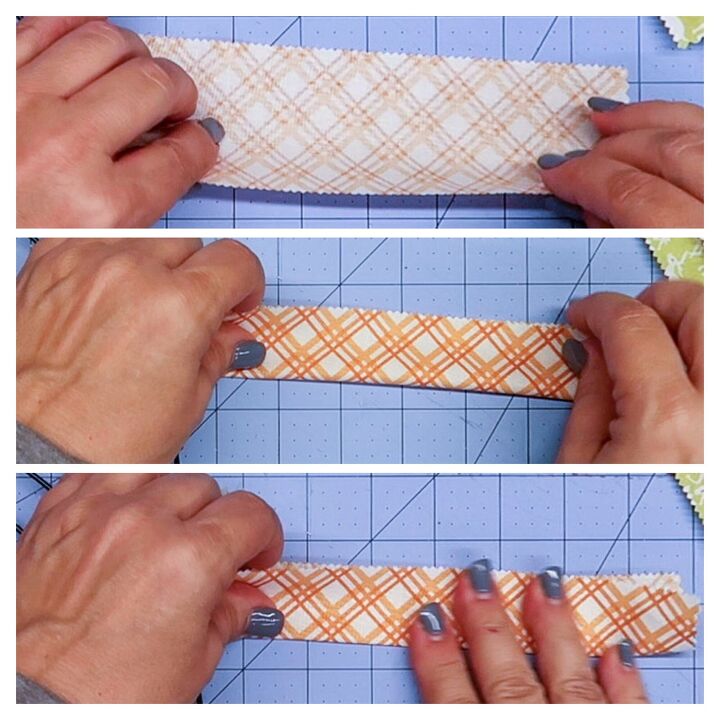
Cut fabric strips into 8″ segments
Cut the fabric into 2.5″ by 8″ rectangular pieces using pinking shears. I have an 8″ piece of cardboard that I frequently use for measuring 8″ strips. However, a ruler, tape measure, or the grid on your cutting mat work just as well.
Stack cutting 4-5 pieces at a time will reduce the number of cuts you need to make.
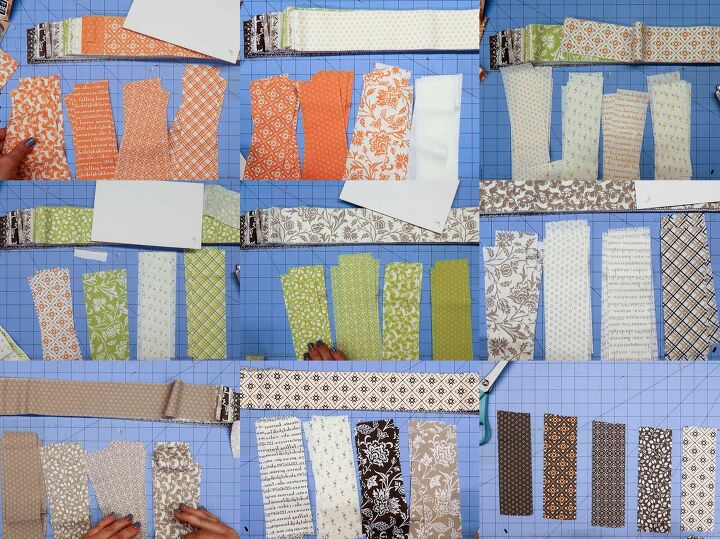
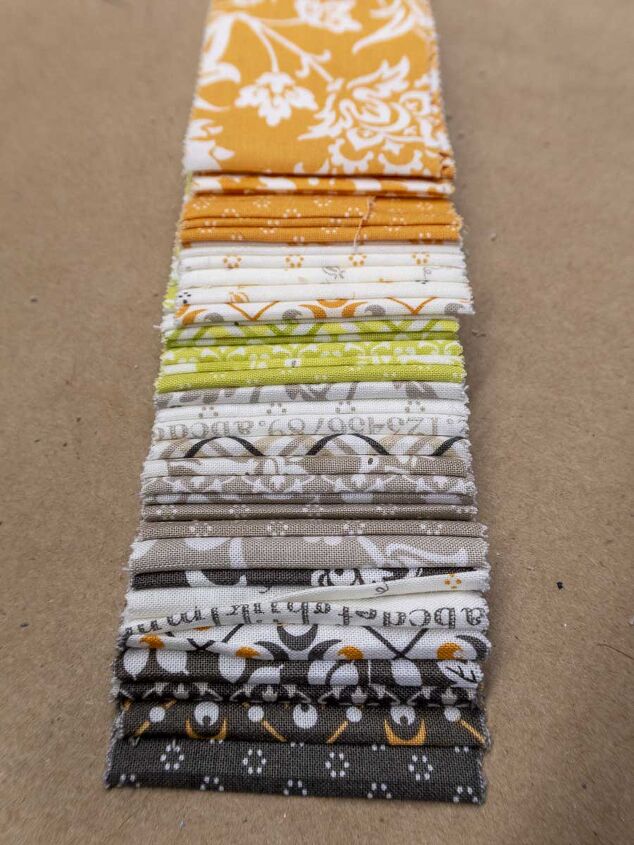
Cut and organize fabric strips
The wreath needs about 200 fabric pieces. Organize the pieces into stacks of similar colors. This makes it easier to grab pieces when tying them to the frame. Avoid attaching two similar pieces of material next to each other on the frame.
Fold fabric strip in half
Fold the rectangular piece of fabric in half lengthwise with wrong sides together and the right sides facing out. Finger press along the fold to help crease the fabric.
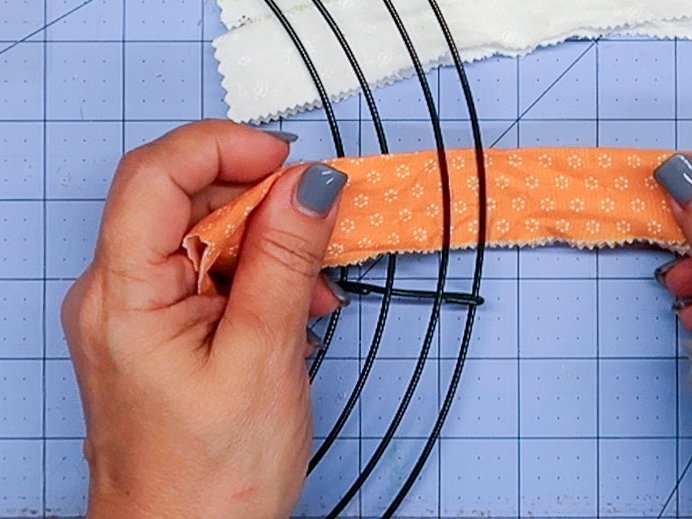
Thread folded strip under outer 2 rings
Take the folded piece of fabric and thread it under Rings 1 & 2 (the outermost rings on the wire frame).
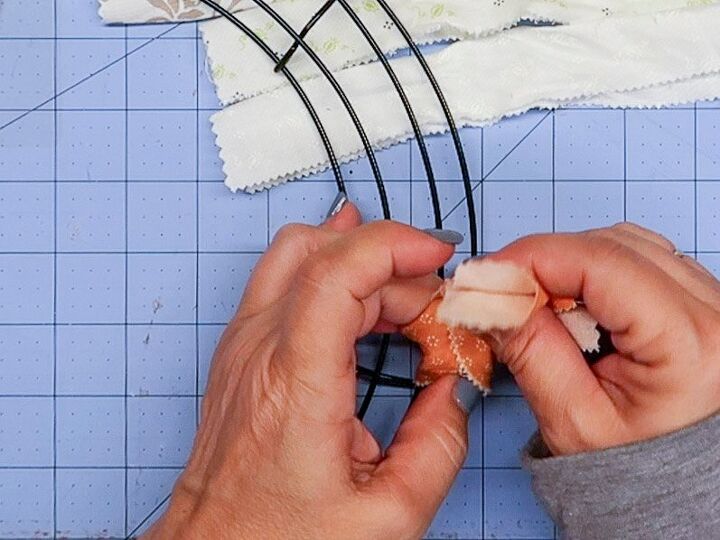
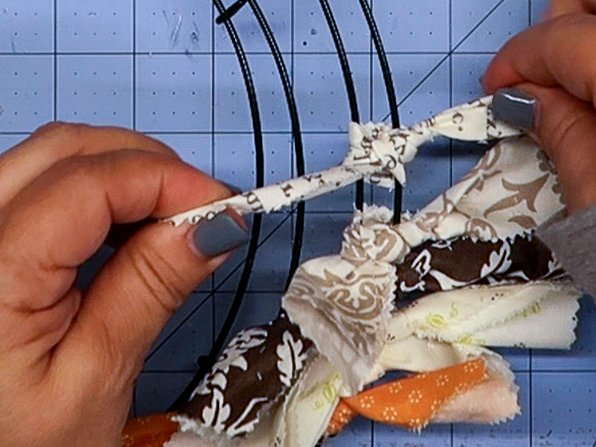
Tie fabric with an overhand knot
Cross the 2 ends of the fabric and pull one end of fabric through the loop forming an overhand knot (the simple knot you use to tie your shoes).
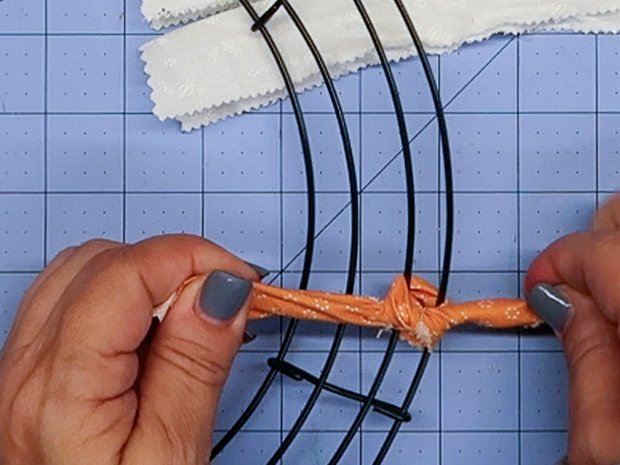
Pull ends tight
Make a tight knot by pulling the two ends.
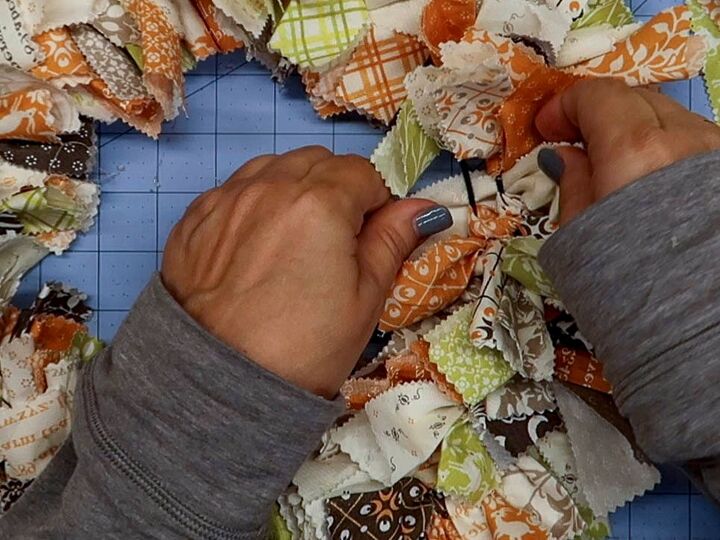
Continue tying knots around the entire frame
Choose a contrasting piece of fabric (such as a lighter or darker piece with a different pattern) and tie another knot over the two outer rings. Continue tying knots over the two outer rings around the entire frame.
My 12″ frame consisted of 6 sections (the areas between the crossbars). I tied 11 knots in each section, for a total of 66 knots in the outer row.

Form 2nd row of knots
Tie a second row of knots over Rings 2 & 3. Place the knots between the knots on the outer row. I tied 10 knots per section in the middle row for a total of 60 knots.
Tie 3rd row of knots
Tie knots over Rings 3 & 4 to form the final row. Place knots on either side of the knots in the middle row (similar to the 1st row of knots). I tied 11 knots per section in the innermost row for a total of 66 knots.
Flip wreath and push end of fabric to front
As you tie the knots, some of the fabric pieces will spin on the rings and you’ll have ends facing every which way. To fix this, flip the wreath over to work on the back side of the wreath. Push the ends of the fabric ties back towards the front of the wreath.

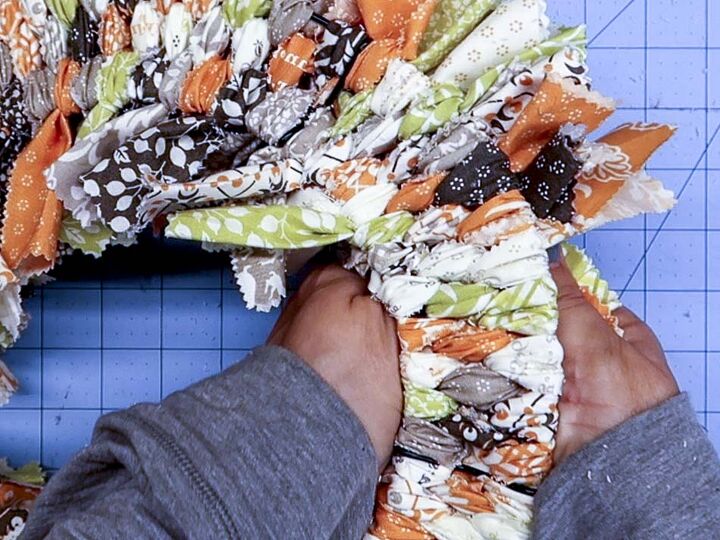
Fluff fabric
Turn the wreath back over to the front side. Fluff up the fabric pieces until the fabric wreath is nice and full. Be careful not to unfold the pieces, because you want to see the colors and patterns on the right side of the fabric.
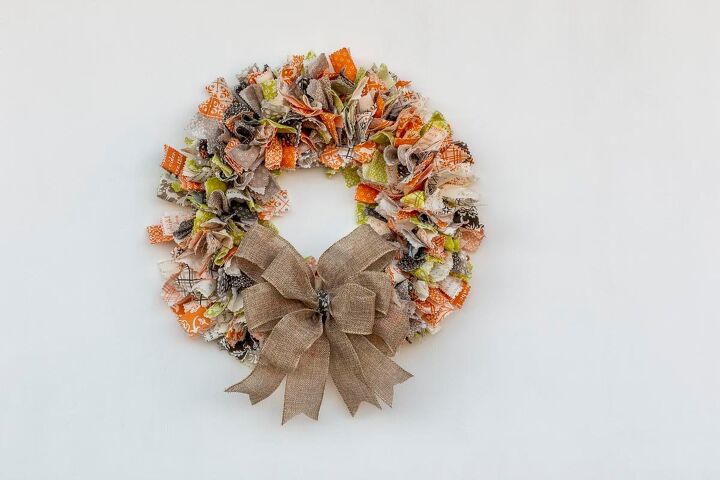
Add a bow and hang your new wreath!
If desired, add a complementary bow to your wreath.


Change up the fabric to make a wreath for any season or holiday!
DIY home decor using fabric

Comments
Join the conversation
-
I love this. Great idea.
-
Your directions are just what I needed! Thank you


Frequently asked questions
Have a question about this project?
WOW that is beautiful! And excellent, easy to follow, detailed instructions! Thank you for sharing - I gotta make one of these.
The instructions were great. I believe you said 200 strips to make this...so that would be five jellyrolls? Did I read it correctly?