


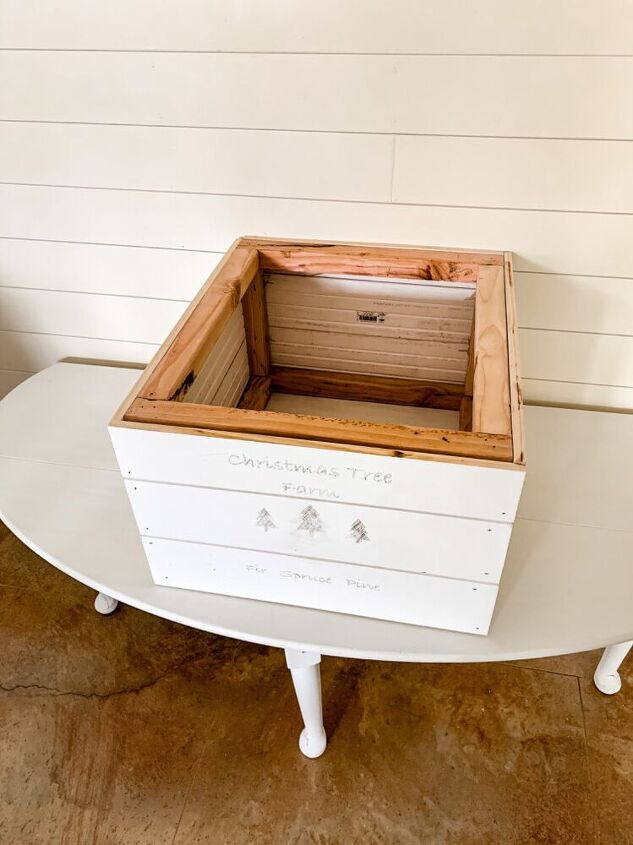
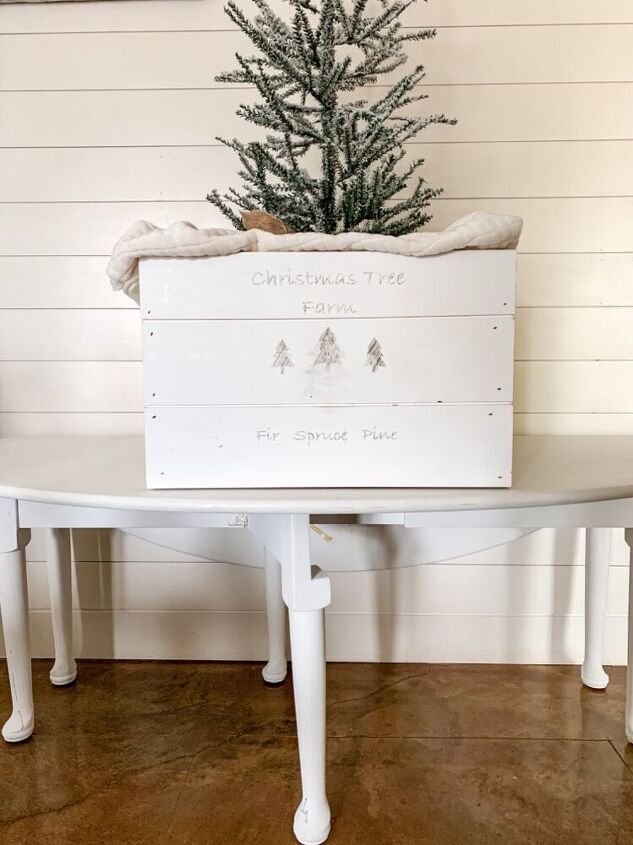
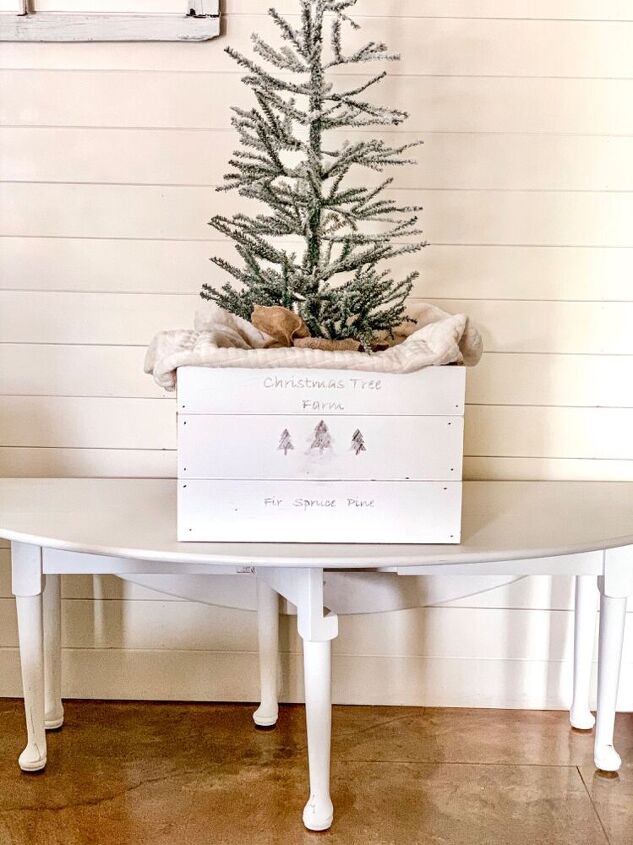
Christmas in July- Shiplap Christmas Tree Box

We were hanging shiplap in our bedroom so this seemed like the perfect time to make a shiplap Christmas tree box.
I know, I know… If the weather where you live is anything like Arkansas then it’s super hard to think about Christmas when it feels like 200° outside!
Anywhoo... let's get our the power tools and see what I can mess up 😂!
BTW for my favorite power tool and other finds click HERE! There is a great deal right now, a drill and impact set for $99! Sayyyyyy what!
Items used:
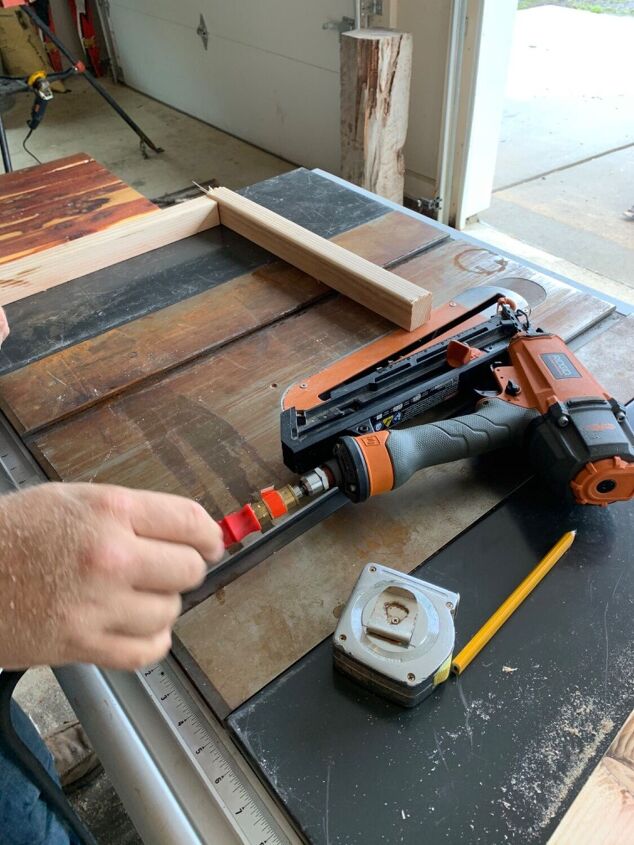
Nail gun with finishing nails
Tape measure
Square
Pencil
2- 2x2 8ft each (we used pine left over from making our farmhouse table)
2- 8 ft pieces of Shiplap (we used left over tongue and groove OR you can have the hardware store rip plywood for you).
Laser jet printer
Cuts:
2x2's
4- 18"
4- 19 1/8"
4- 9 3/4
Shiplap (ours is 6" wide)
Measure your box once done and make your cuts from that.
Cost:
Zero for us since everything was left over from other projects.
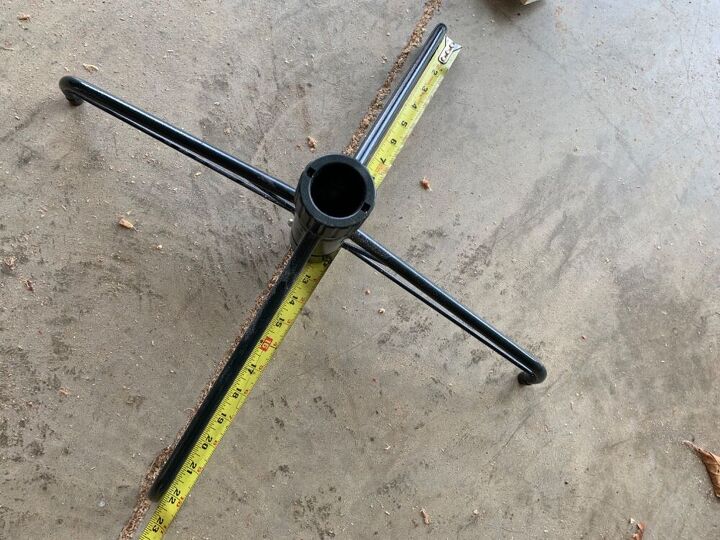
Measure your tree stand to make sure your box will easily fit around your tree. Our stand is 23" x 23".
If your tree measures the same then follow the cuts listed above for your lumber.
If not you will need to add a few inches or take away a few 🤷🏻♀️
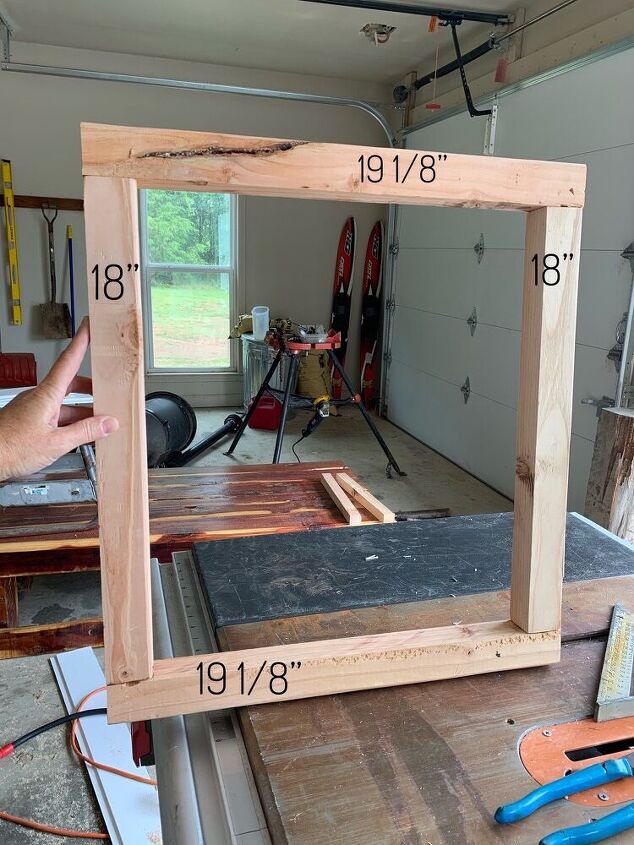
Now that you have all of your cuts start with the pine.
You're going to make two Squares and then use the shorter pieces between the two squares to make a box. This is how you will attach the shiplap.
Use the longer pieces on the top and bottom and the shorter pieces on each side. Also don't forget to use your square to make sure it's all straight.
Now listen... I’m a girl and don’t speak in lumber language so be nice and don’t be too judge-E of my instructions!
And while we're on the subject.. why do they call a triangle a square? I know it's used to keep things square, BUT ITS A TRIANGLE!
>>> Nail these pieces together.
Then repeat the same process and make a second square.
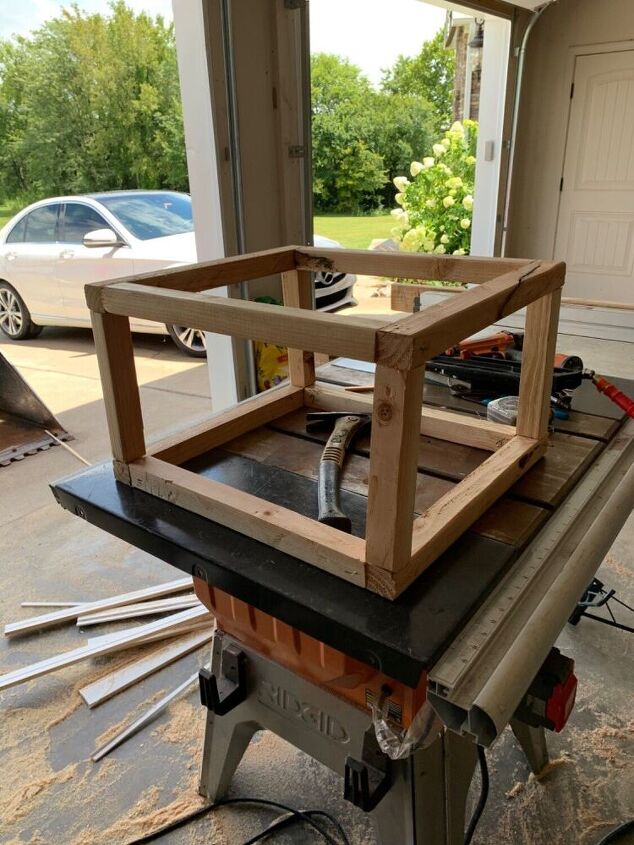
Using your 9 3/4" pieces use them between each square in each corner making a box.
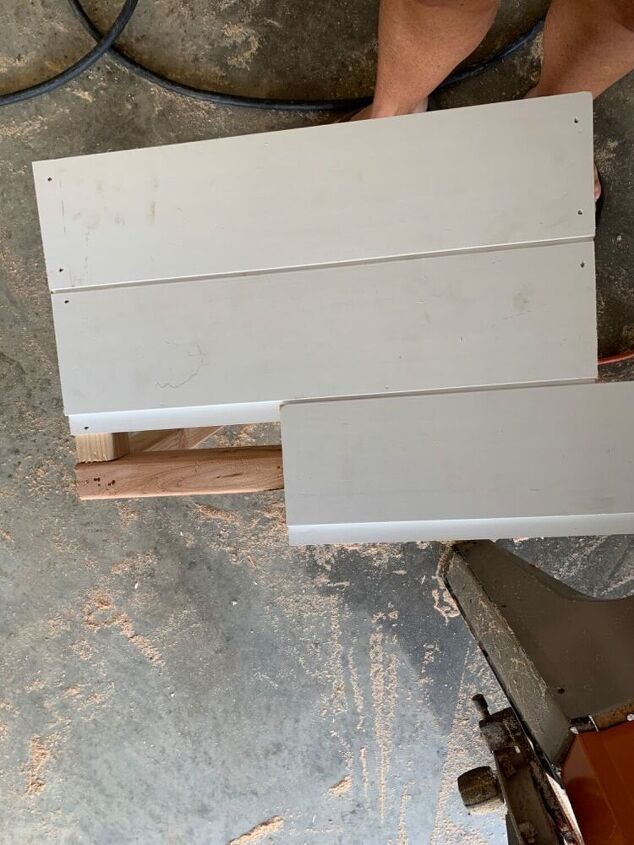

Now it's time to attach your shiplap. We had to rip 4 of these pieces with the table saw to get it to fit right.
LAST
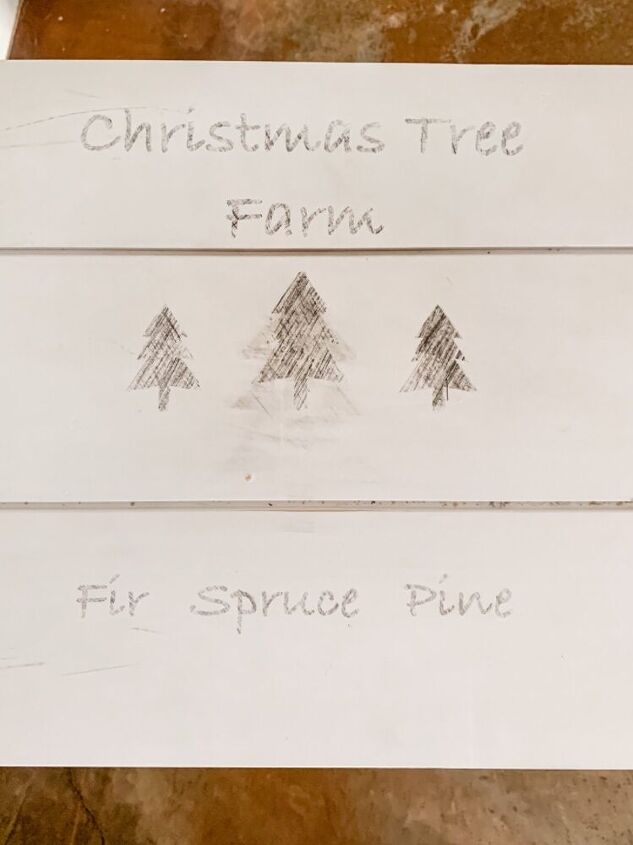
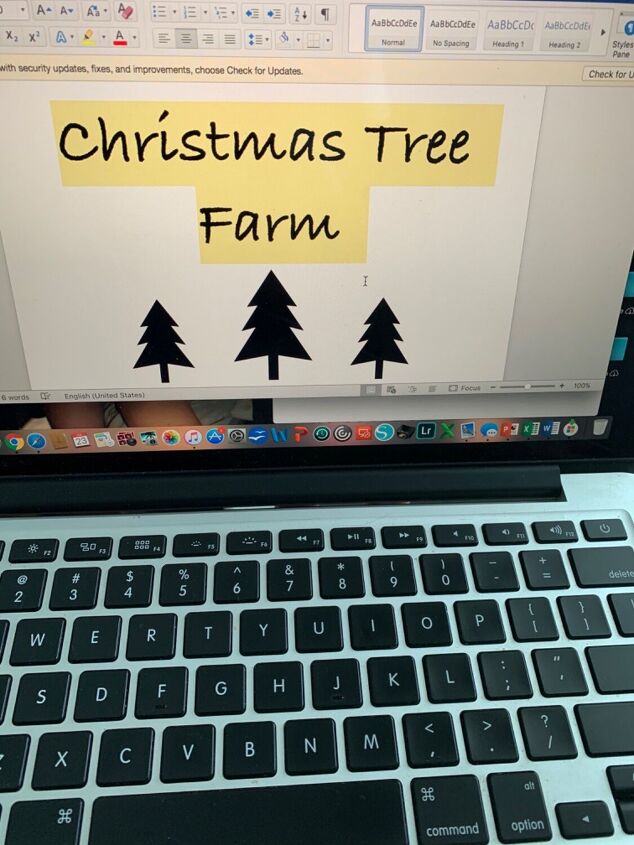
Now it's time to add your words. This is the first time I have done this process and I for sure would have went larger with my font!
Also, be sure you have a laser printer.
I used word and wrote our what I wanted it to say. Then when I went to print it I reversed everything. For me it was tricky finding this setting. It's under your print options and there is a box that says reverse.
Print and then lay it out on your wood. You can use an unsharpened pencil for this, but I used a paint can opener and this worked good.
Just go back and forth over each word and your ink will transfer to your wood.
Thanks so much for stopping by!!
If you decide to give this a try, tag me on IG or FB so I can share!
Be sure to give me a follow here and on Instagram for more projects 😘.


Frequently asked questions
Have a question about this project?