


DIY Advent Calendar Sign
Do you use the same Advent Calendar every year or do you like to change it up? We always do something different and this year I made this DIY Advent Calendar Sign and love it. I saw something similar to this at a store and knew it would be easy to make, so I tried it out and really like the coziness of the sign.
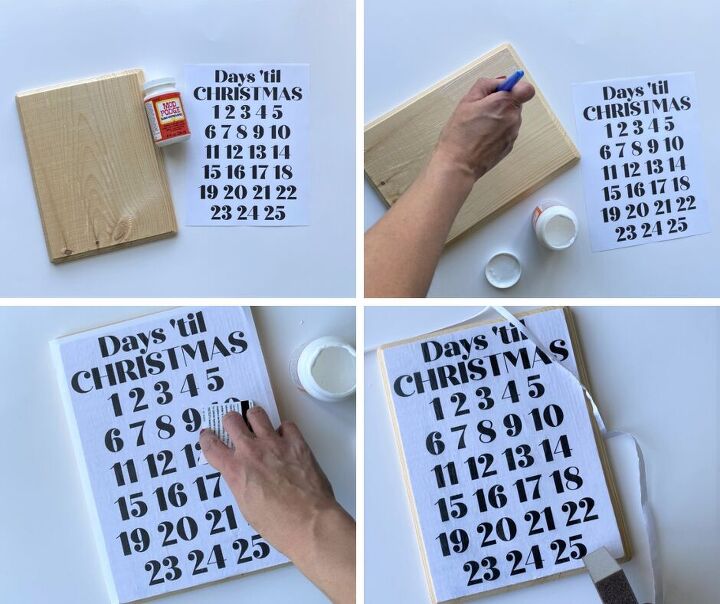
Grab one of these wood signs from the craft store. My sign is 8×10 with curved edges. You can choose from a variety of edges, it just depends on the look you are going for. Cover the board with Mod Podge, add your printable and smooth out with a credit card. Cover the top with another layer of Mod Podge and let dry. When the sign was dry, I used a sanding sponge to remove the edges of the paper.
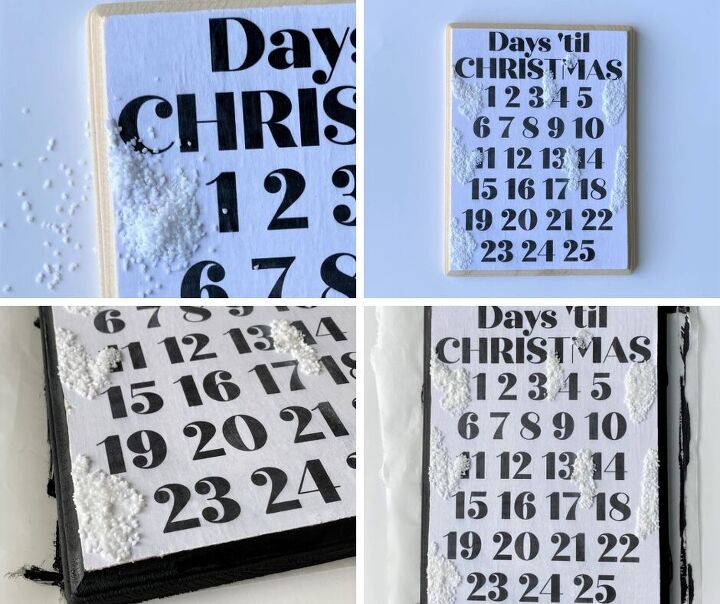
I got ahead of myself and started adding fake snow before painting the edges of my sign. Add generous amounts of Mod Podge to the sign and cover with fake snow. When dry, cover the fake snow with another layer of Mod Podge. After the snow was added, I painted the edges of the sign with black craft paint.
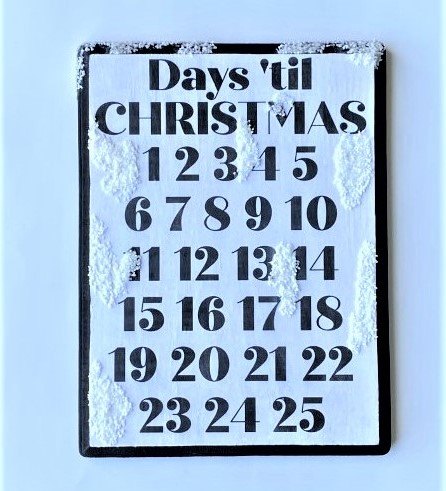
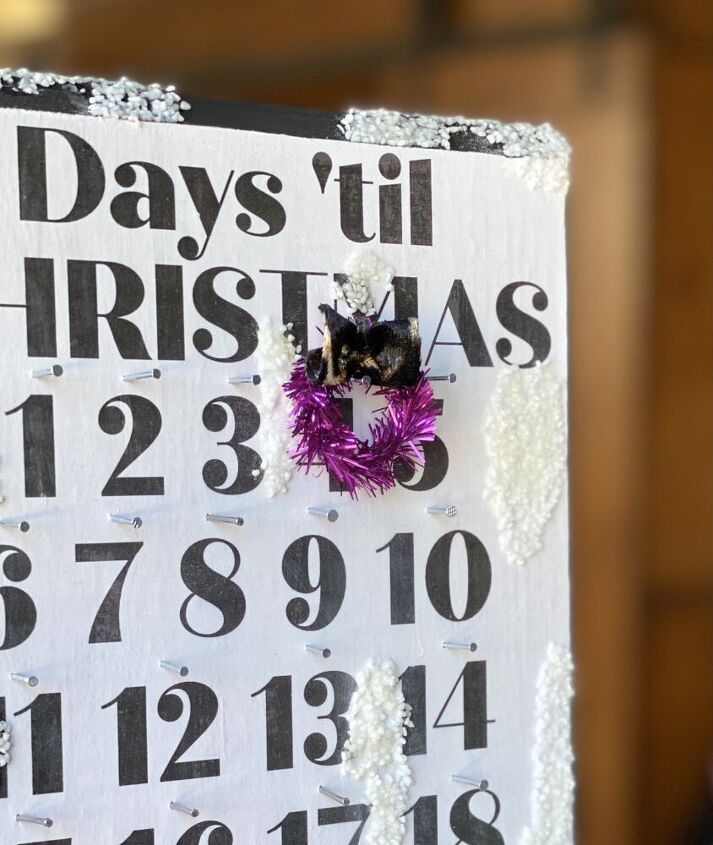
I knew I wanted snow on the top, so I added more snow after the black paint was dry.
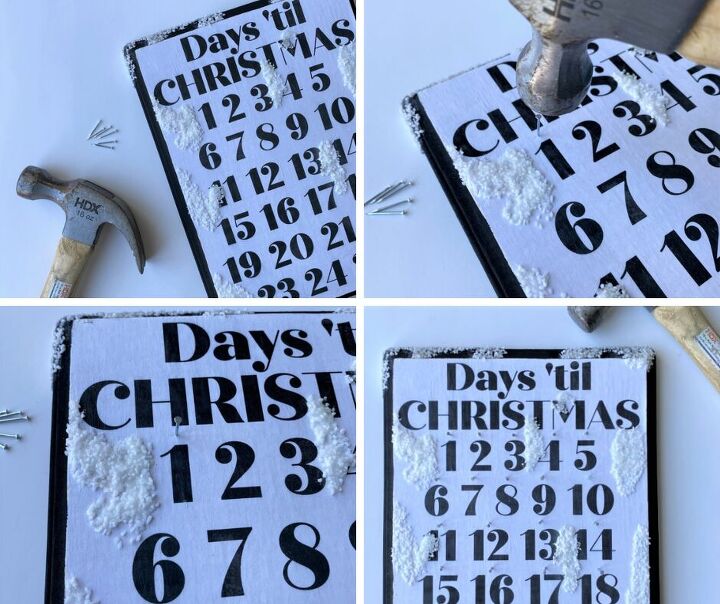
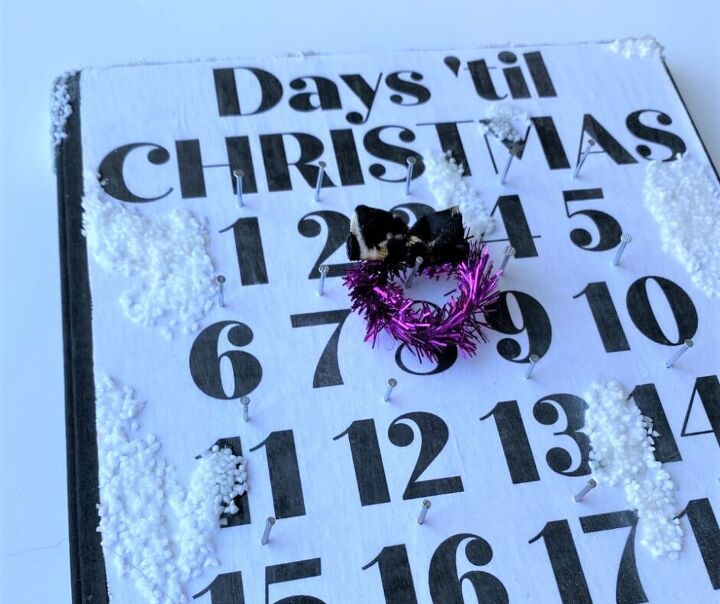
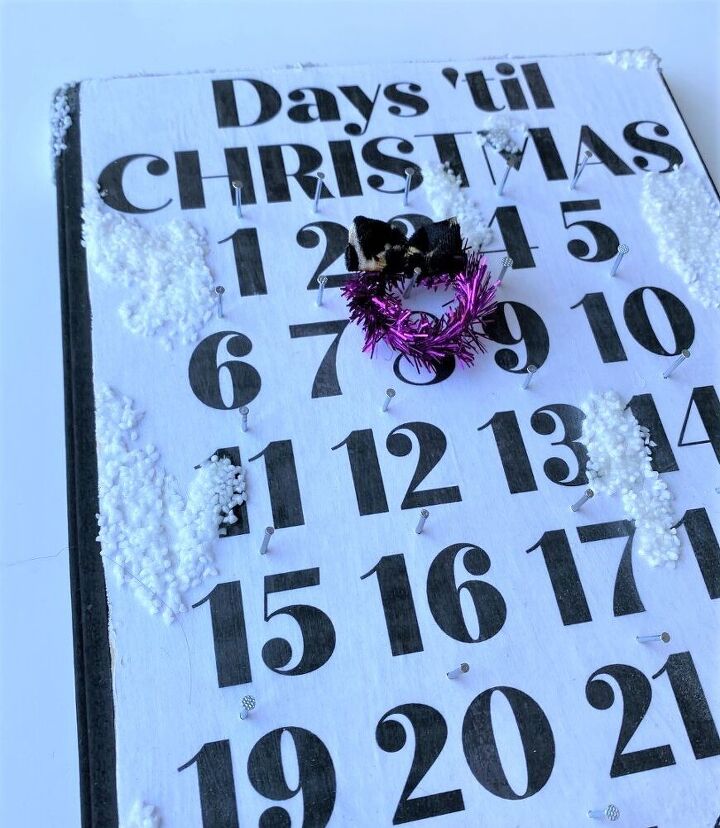
When everything was dry, it was time to add small nails over each number.
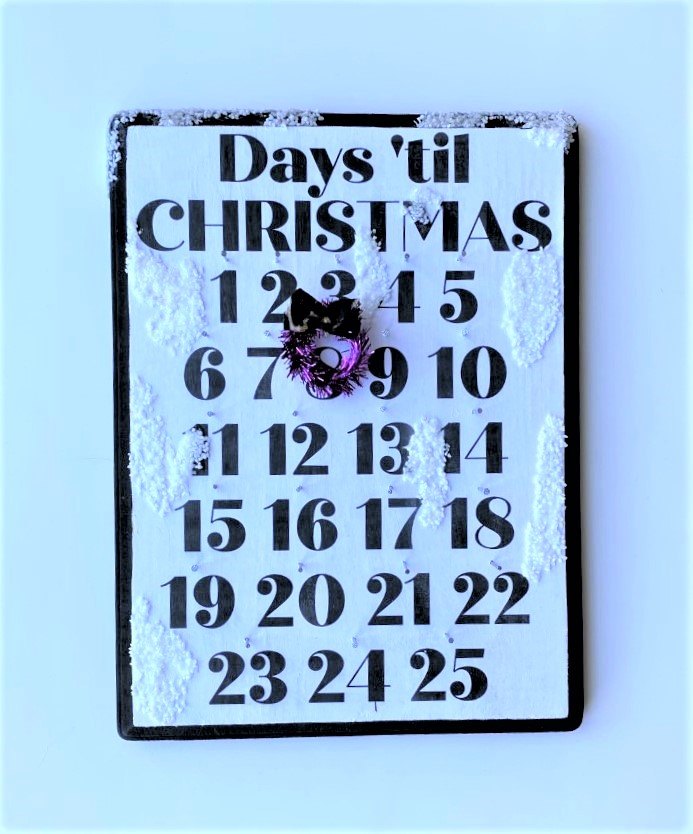
Hang a mini wreath to mark the date and you have an adorable, DIY Advent Calendar Sign!
Resources for this project:
See all materials


Frequently asked questions
Have a question about this project?