


Dried Fruit Garland
You can create a beautiful and unique Dried Fruit Garland using my simple DIY method.
These garlands are beautiful and great to use in your fall, Thanksgiving, and Christmas decor.
All you need are a few natural elements to create these easy pieces.
Steps to Make Dried Fruit Garland
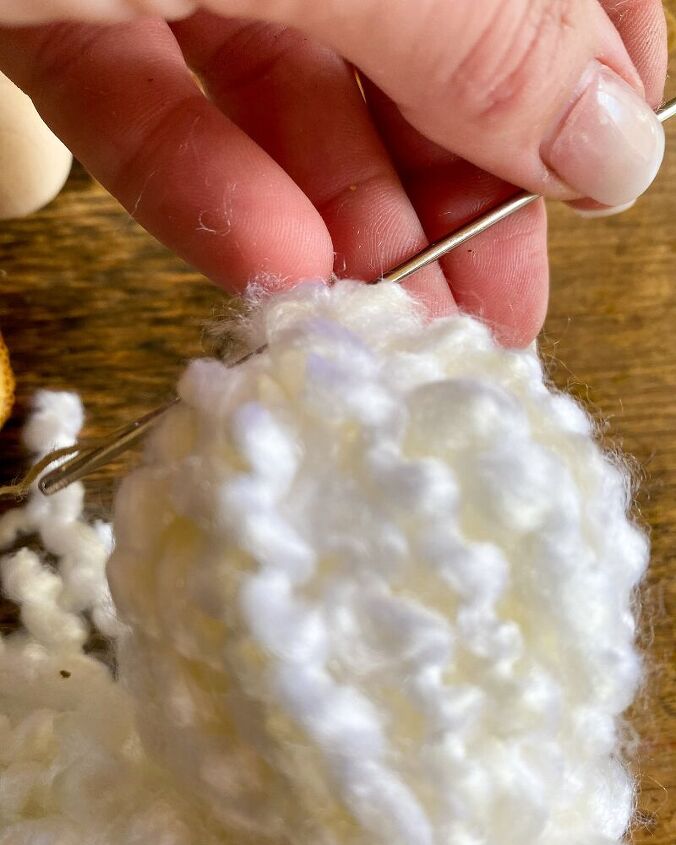
- First, thread a crochet needle with waxed thread.
- Run the needle through the tassel and establish the length you want to achieve for your garland. For the two garlands I created in this project, I made one garland 5 feet long and one garland 3 feet long. Therefore, I pulled out thread at that length for each garland and then cut the thread.
- Remove the ends of the tassel with scissors as these pieces are not needed.
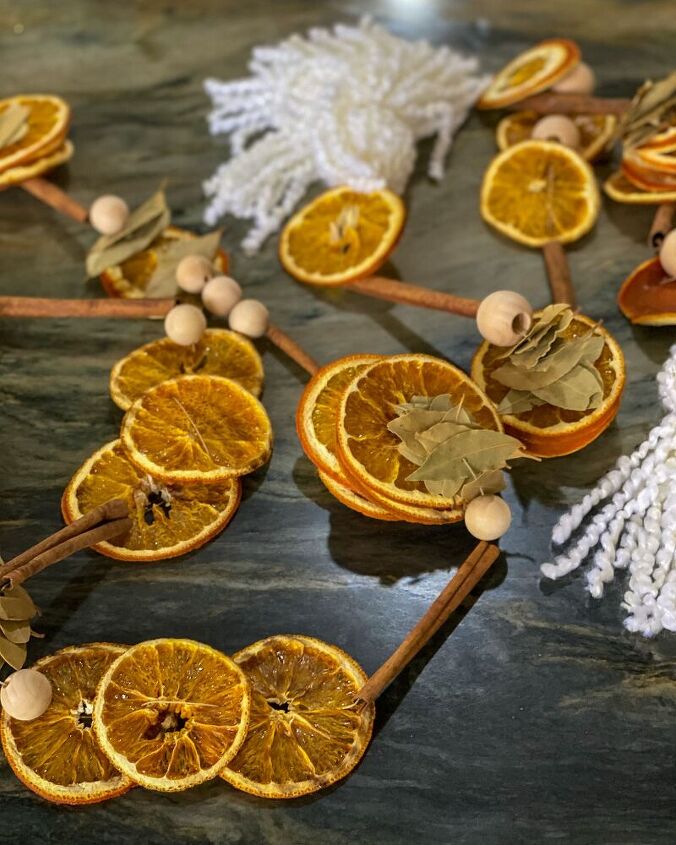
- Tie a knot in the wax thread to secure the tassel and begin stringing your elements (dried orange slices, beads, bay leaves, cinnamon sticks).
- You can string these elements in any order you desire to create your unique pattern.
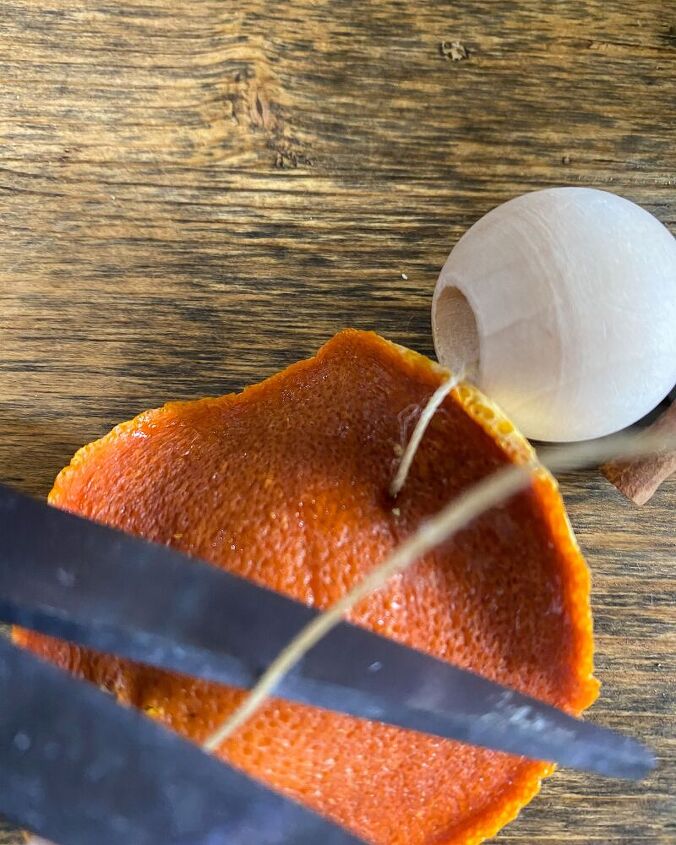
- I started my garland by running the needle through both ends of a dried orange slice. But, you can start with whatever element you choose.
- Next, I added a cinnamon stick by carefully pushing the crochet needle through the hole on one end of the stick.
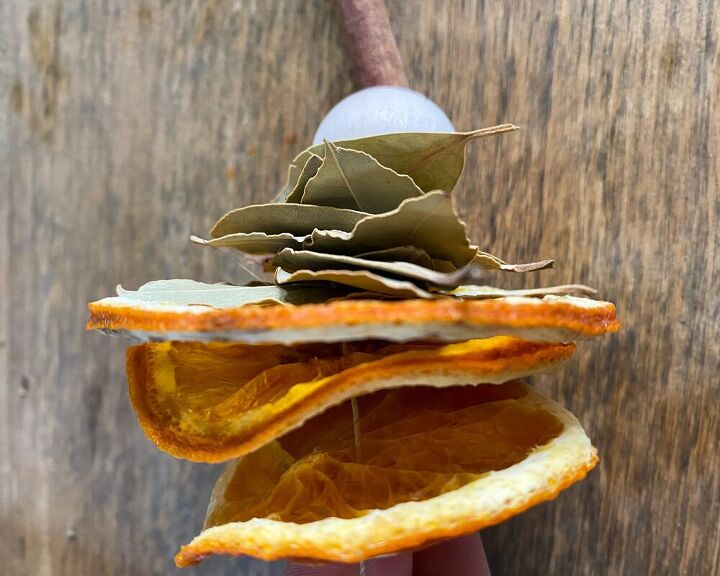
- Then, I added a wood bead, and approximately 7 bay leaves to achieve the look below.
- Instead of having all the oranges lay flat in the garland, I also stacked several slices together to create more dimension and interest.
- I also strung several oranges together flatly, separating each dried oragne slice with a wood bead.
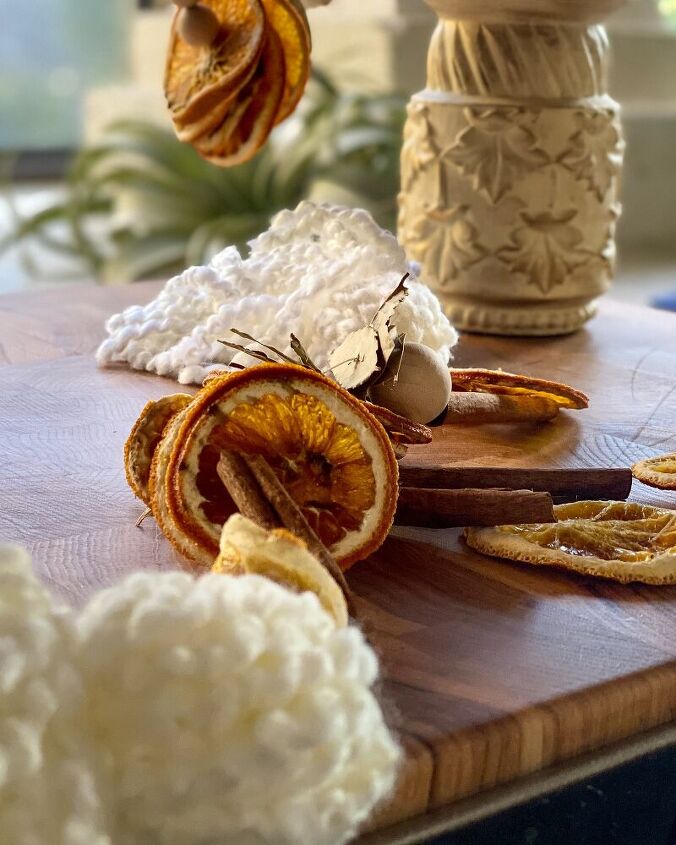
- When I was approximately 6″ of the end of the waxed thread, I pushed the needle through my second tassel.
- I cut the ends off the tassel and tied a double knot to secure the garland.
- Now the dried fruit garland DIY is complete and ready to style with all of your fall and holiday decor!
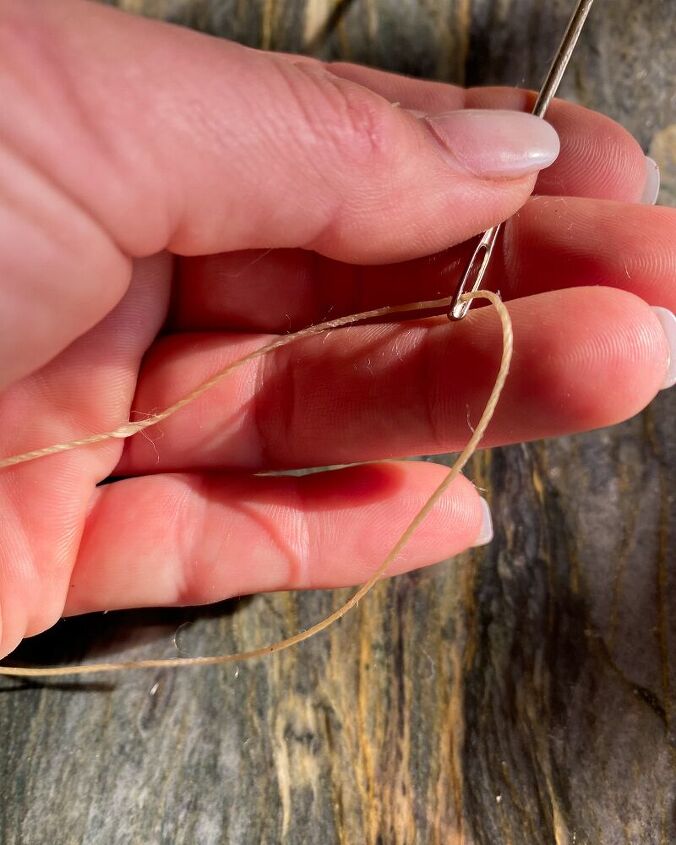
Thread the upholstery needle with wax thread.

Slip needle through the tassel and tie a knot.
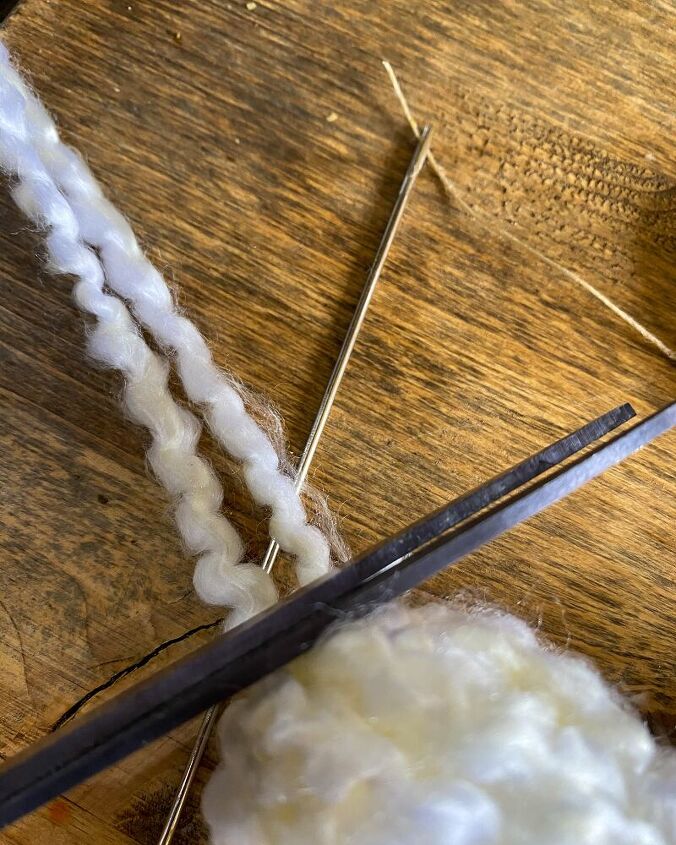
If your tassel has ties, cut them off as they are not necessary.
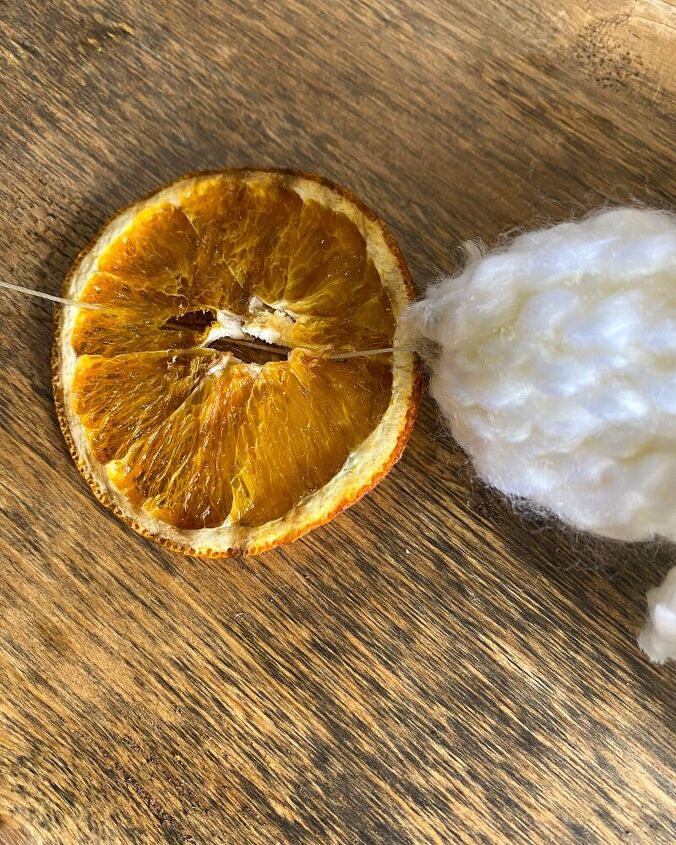
Run needle through an orange twic so that it lays flat.

Push needle gently through hole in cinnamon stick.
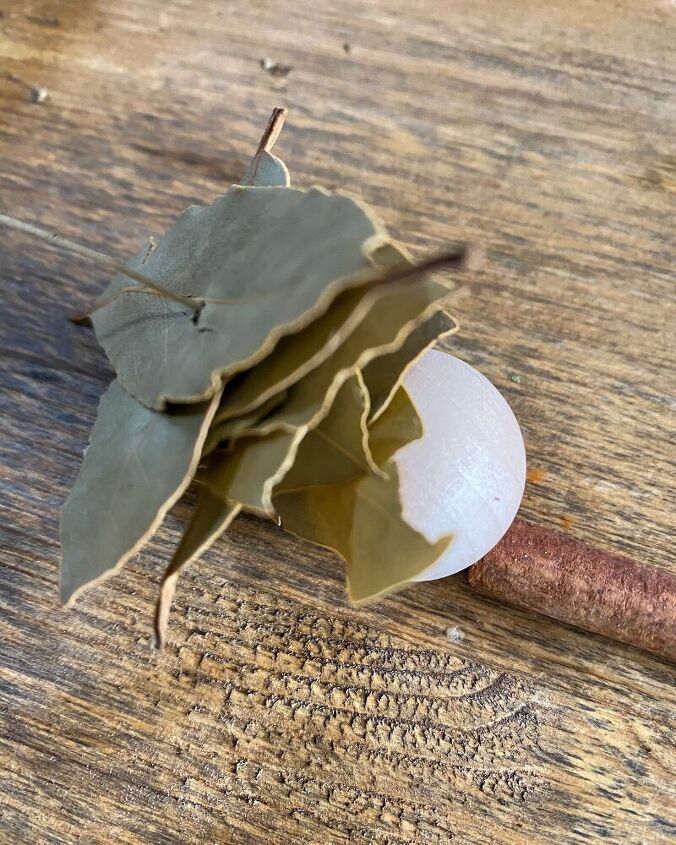
String large wood beads and stacked bay leaves onto the garland.
You can do this in any pattern you like.
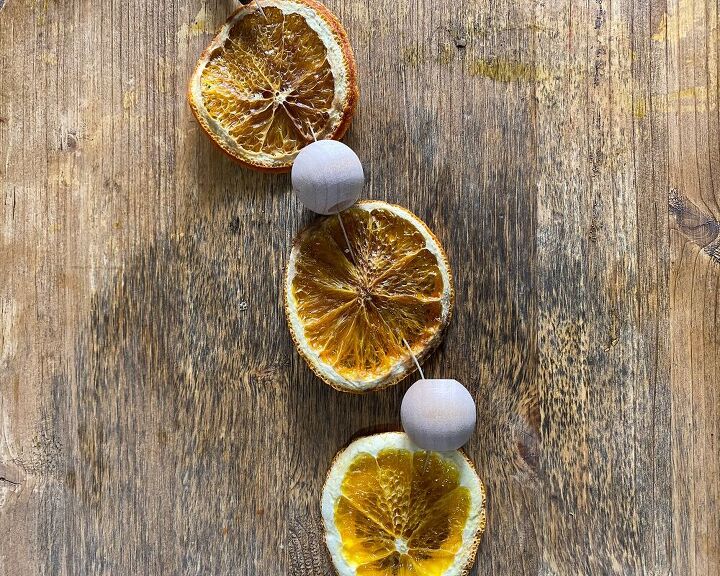
You can also string more oranged together to lay flat. These are separated by a large wood bead.
When your garland is complete, repeat the same process with the end tassel.

Cut the ends of the tassel off and discard.
Tie a knot at the end of the garland after the tassel to prevent the garland from unraveling.
Resources for this project:
See all materials


Frequently asked questions
Have a question about this project?