


Make This Fantastic DIY Christmas Topiary and Wow Friends and Neighbor
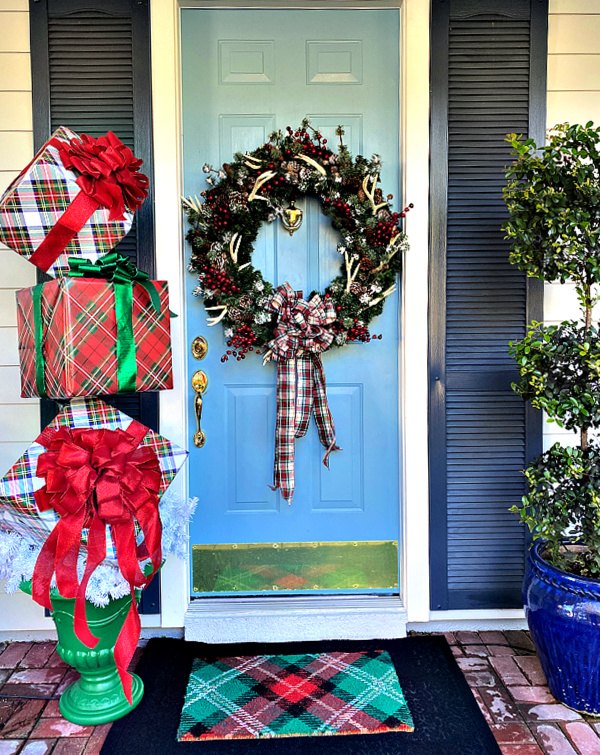
This fantastic Christmas topiary stands over five feet tall and makes such an impressive decoration for a bargain price! Make one, or even a pair of these and you will be envied by your neighbors for your remarkable Christmas decorations!
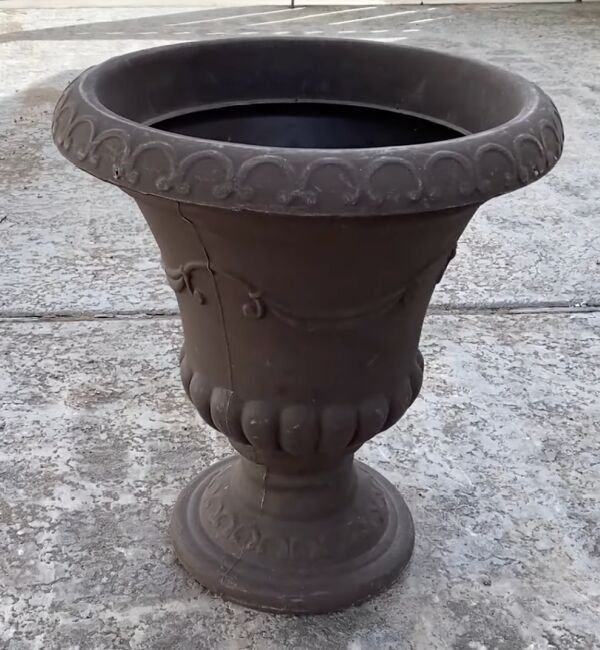
I have used this garden urn many times for many different displays so I did not want to secure anything permanently into it. Therefore, I selected a flower pot with NO hole in the bottom of it. Any pot, even a plastic dollar store pot will do for this part. You will want to get some plaster of paris and mix it per the instructions on the package.
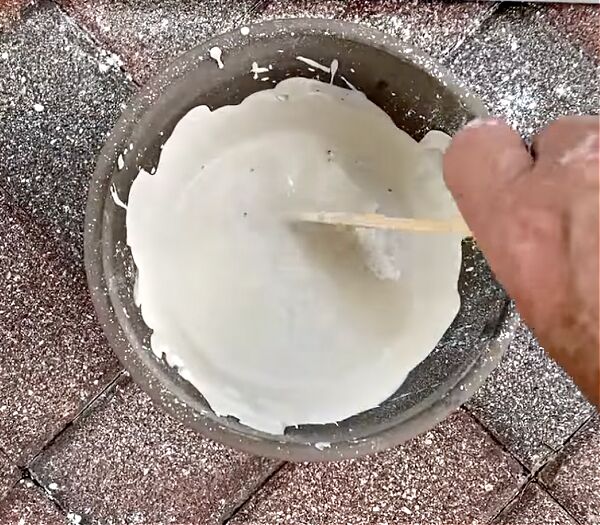
When mixing your plaster of paris, DO NOT put your hand into the mixture. this is a chemical reaction. Use something like a paint stir stick and mix thoroughly. You want to make sure that you scrape all of the powder along the edges and the bottom and mix it in. The mixture should look creamy like the photo below.
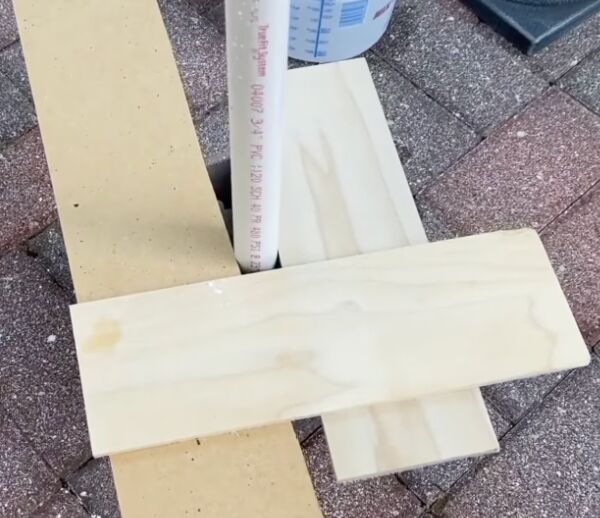
If you would like to use this for for different creations in the future, use a piece of PVC like I have. If you are only using this for this one craft, you can just use a tall dowel and put it right down in the plaster of paris. It is important for whatever you use to be straight. Use a level alongside your pole and then prop your pole with boards like I have shown you in the photo below.
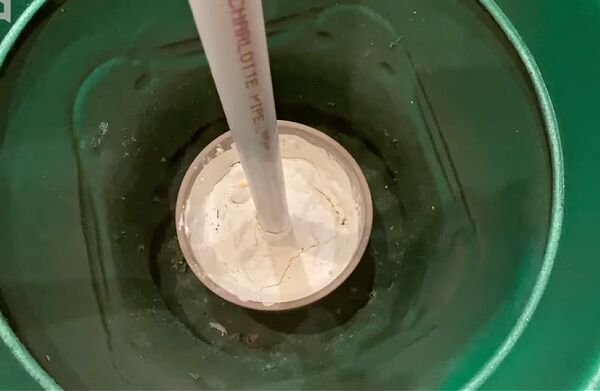
When the plaster of paris is dry, your pot will look something like this below. For my project I then used a piece of wood trim I had on hand. I simply slid the piece down inside the piece of PVC. I had measured beforehand and knew that this flowerpot would wedge tightly inside my garden urn.
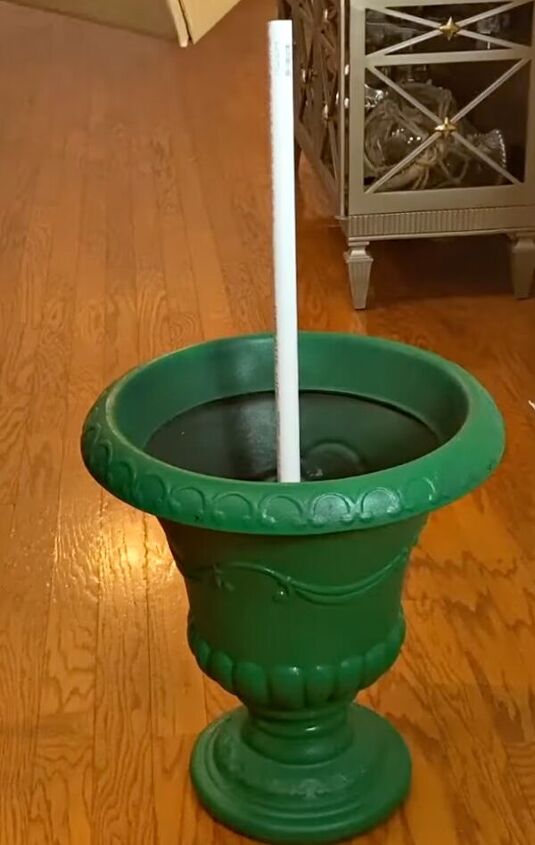
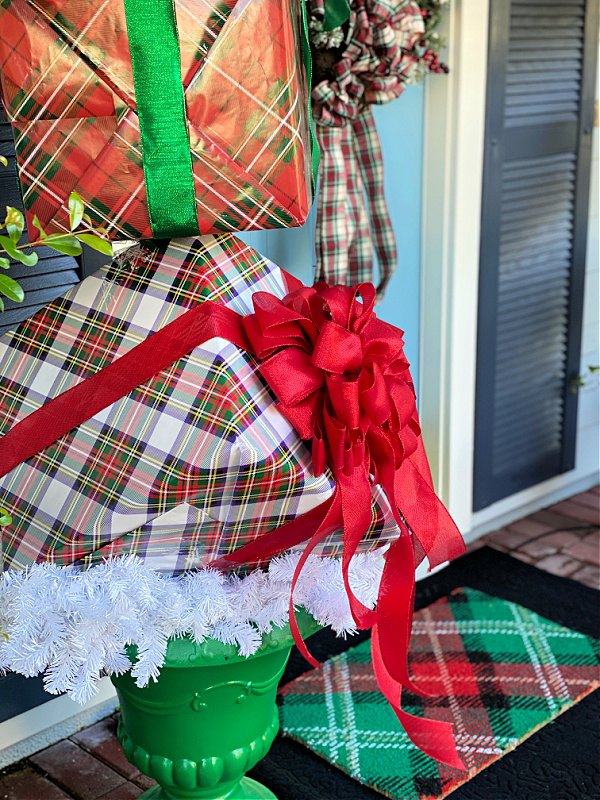
The great thing about a plastic garden urn like this is that you can paint it over and over again with spray paint to create whatever look you want. For this project, I went with a holiday green!
The packages:
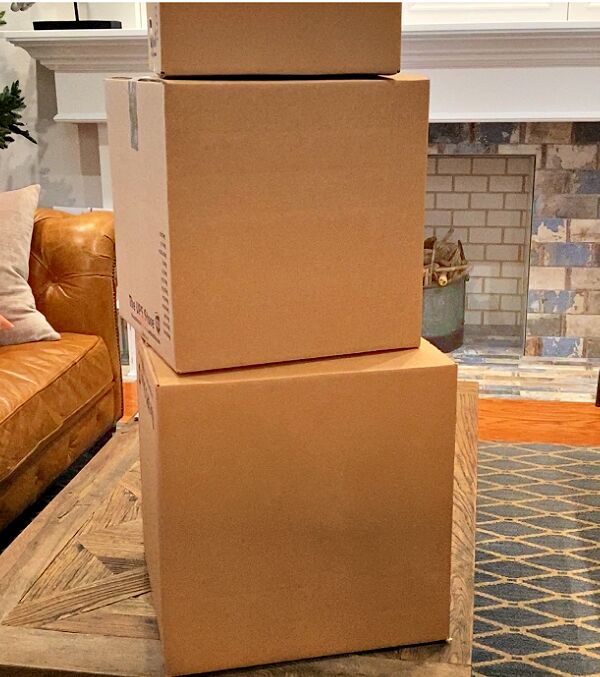
You will want to begin with three cardboard boxes of varying sizes. You will have the best results if you find and use square boxes. Rectangular boxes will give you more of a challenge to create your topsy turvy Christmas package stack. The only place I could find square boxes was at my local UPS store. These boxes were a little more expensive than the ones I like to buy at Walmart, but, as I said, the square part is important! I selected boxes that were 18″ x 18″, 16″ x 16″ and 12″ x 12″.
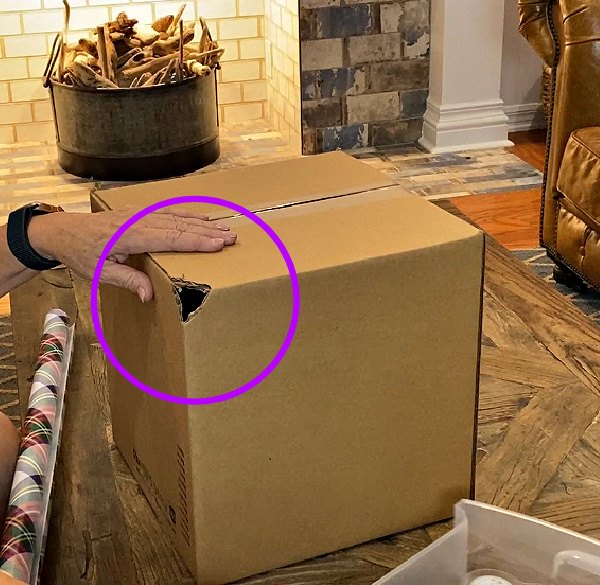
Assemble to boxes, taping each one securely and then get to work making the holes so that you can stack them on the pole in your pot. For the bottom box you will cut a corner off as shown below. Then go to the opposite corner of your box and cut it the same way.
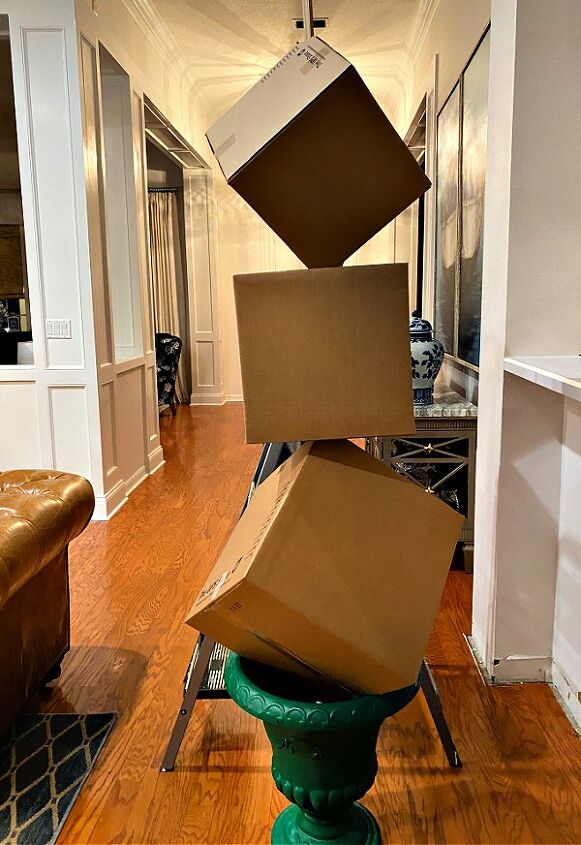
For the second box, cut holes in the middle of two opposite sides of the box. Make sure you cut those in sides of the box that do not have tape in them. Slide that on top of the first box. The top box will be cut the same as the first box.
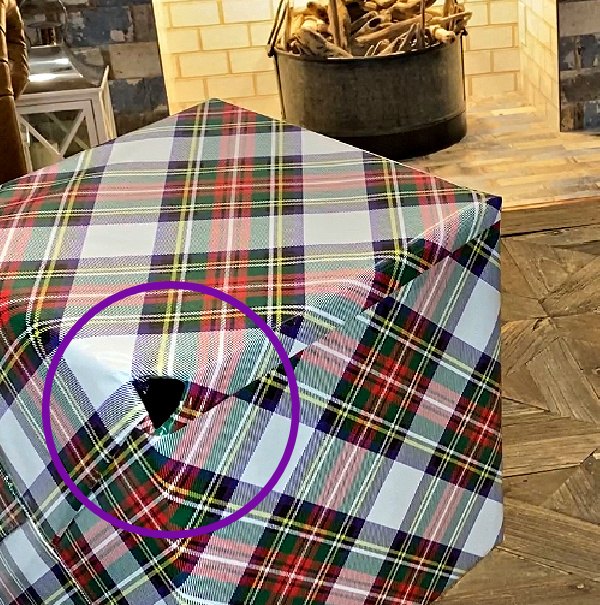
Wrap your gifts in your choice of wrapping paper. I have a deep covered porch so my topiary is protected from the weather. If you want to make this but have it be more waterproof. Select some fun vinyl Christmas print tablecloths to wrap your boxes in. After you have wrapped your boxes, make sure you cut the paper where your holes in your boxes are. You can tape the paper down inside the holes to keep the paper from ripping.
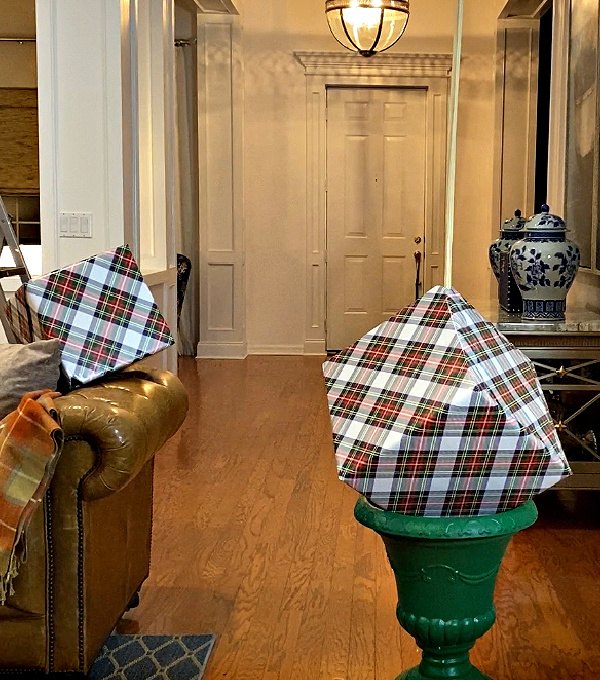
Stack your wrapped packages by threading them onto your dowel.
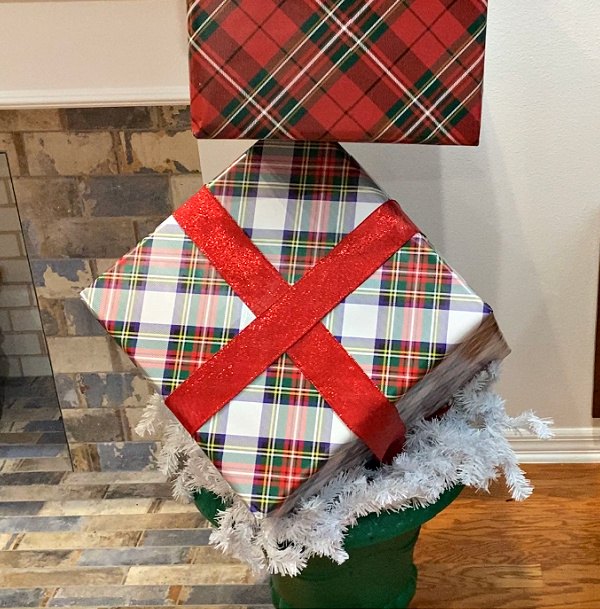
With the green urn, I decided to add some white faux garland around the base of my packages. The next step is to wrap each box with some ribbon. Use packing tape to secure the ribbon to the boxes.
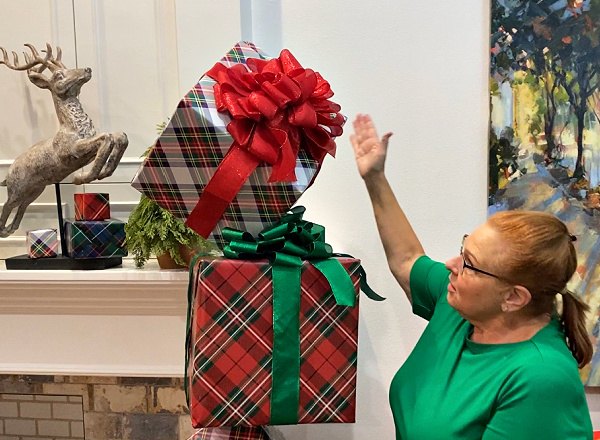
Add a big fluffy bow to each of the boxes and your topiary is ready to put on display!
Supplies for this project:
- Urn planter
- Cardboard boxes
- White garland
- Glitter Ribbon
- Plaid Wrapping paper
- Vinyl Christmas tablecloths
Resources for this project:
See all materials


Comments
Join the conversation
-
Use cheap vinyl Christmas tablecloths to protect from weather.
-
all of my topiaries are repurposed pots from summer flowers. I don’t bother emptying just stick whatever your post is in dirt and go for it. Never had a problem with dirt or mud on stuff. I like this a lot and table cloth idea great. For me it’s the beautiful bows that take this above and beyond. Thanks for sharing


Frequently asked questions
Have a question about this project?
It's a Wonderful idea! Thank you