


DIY Modern Easter Eggs

by
Lily Ardor
4 Materials
$12.00
1 Hour
Easy
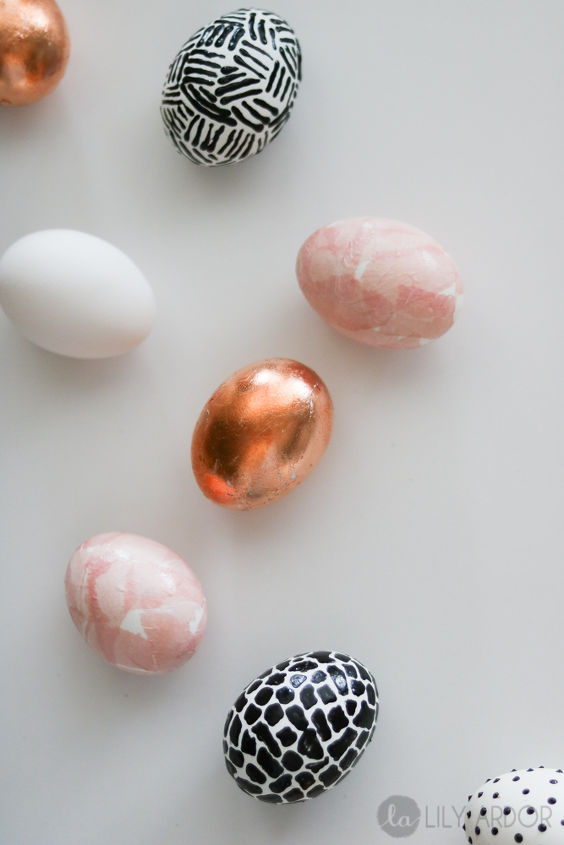
Make these jaw dropping beuatiful trendy easter eggs. Featuring 3D, Tissue paper, and copper leaf.
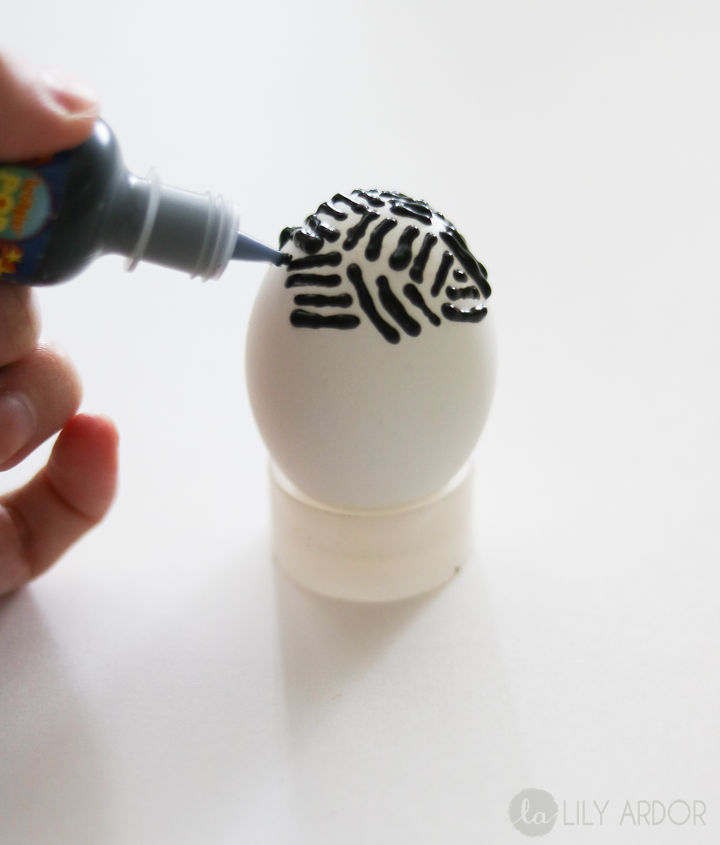
One of my favorite egg decorations is this 3D painting method. It's effortless and chic but most of all Modern, and who doesn't love a Modern Easter?  I used regular 3D t-shirt paint for this in the color black. I didn't go by any pattern or stencil. Simply freehand and have fun.
I used regular 3D t-shirt paint for this in the color black. I didn't go by any pattern or stencil. Simply freehand and have fun. 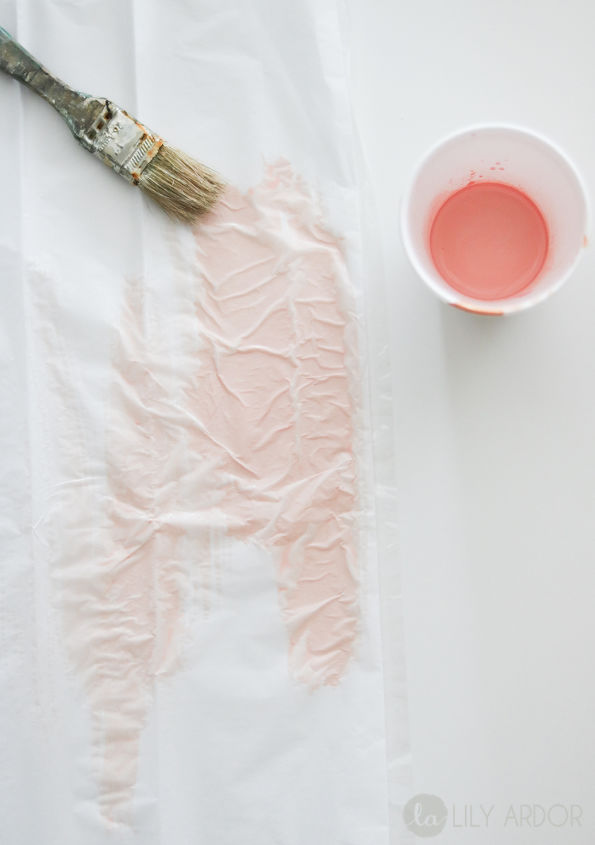
Yes I painted my tissue paper.  Because, I could not find the perfect peachy pink tissue paper. All in all I loved the texture it gave just, keep in mind to paint them separately or else you won't be able to pull them apart once dry. One tissue paper will cover at least 10 eggs.
Because, I could not find the perfect peachy pink tissue paper. All in all I loved the texture it gave just, keep in mind to paint them separately or else you won't be able to pull them apart once dry. One tissue paper will cover at least 10 eggs. 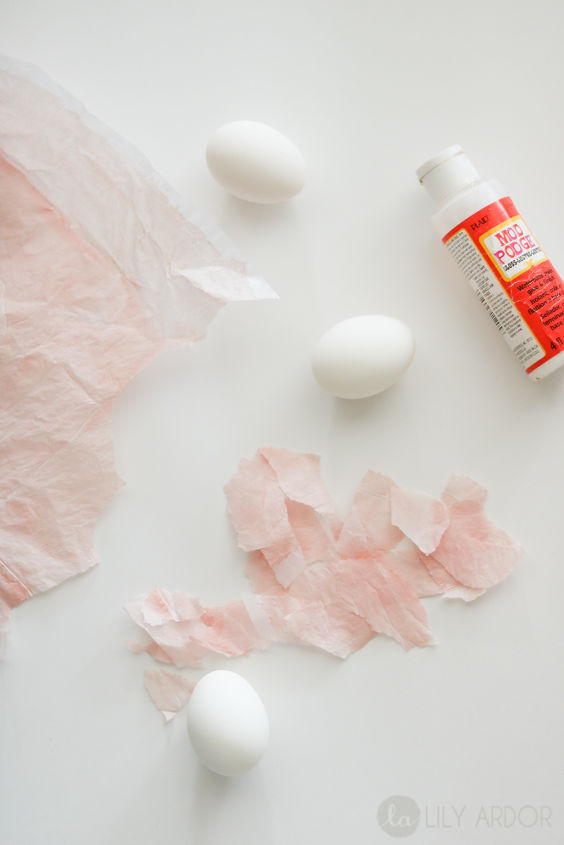
Our little guy had a blast with this step. We ripped the tissue paper into pieces and started gluing it onto the eggs in a messy manner. Perfection is overrated when it comes to this step..
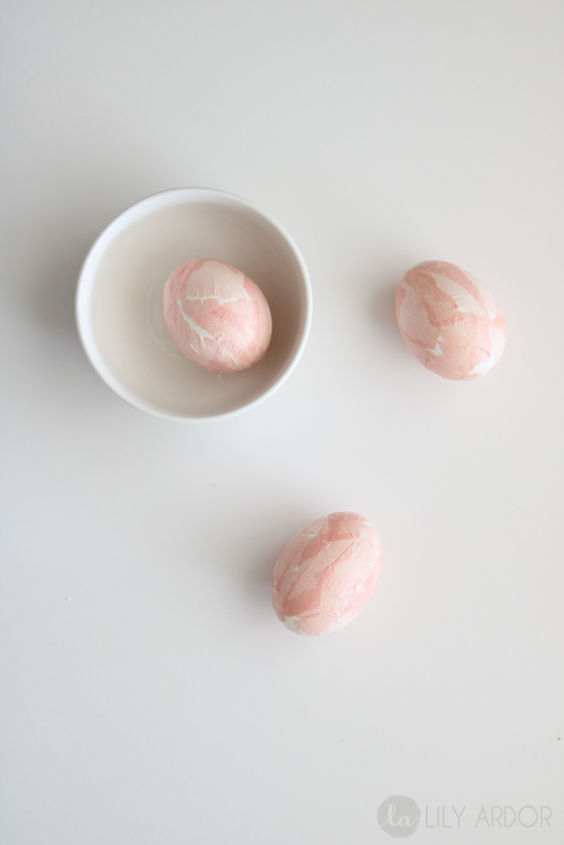
Messy glue + Textured tissue paper = Pretty pastel Eggs
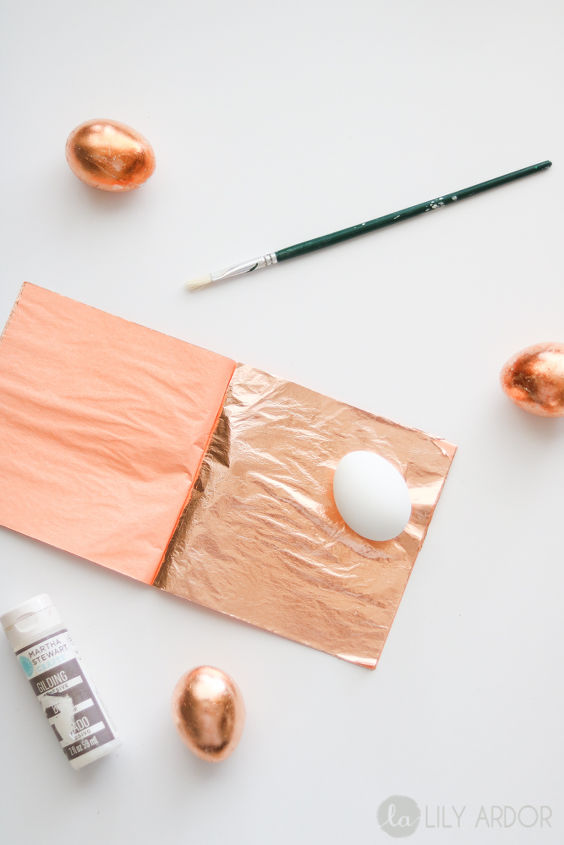
This was probably the simplest of them all. Although they are probably the most Eye catching.  Remember to let your Gilding set for at least 15 minutes before applying the copper leafing.
Remember to let your Gilding set for at least 15 minutes before applying the copper leafing. 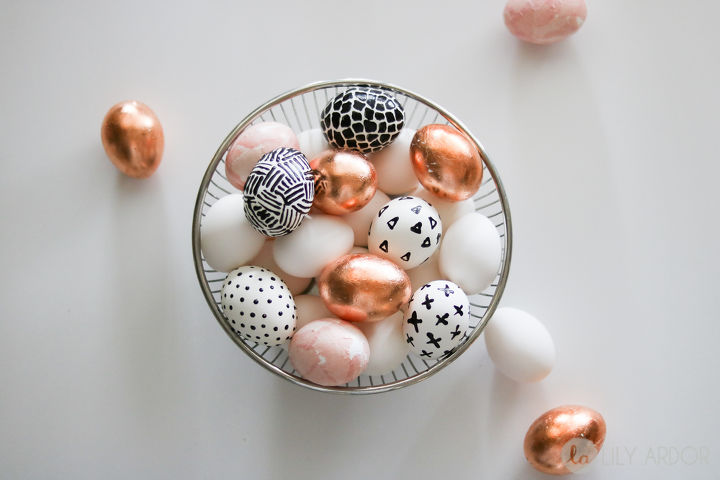
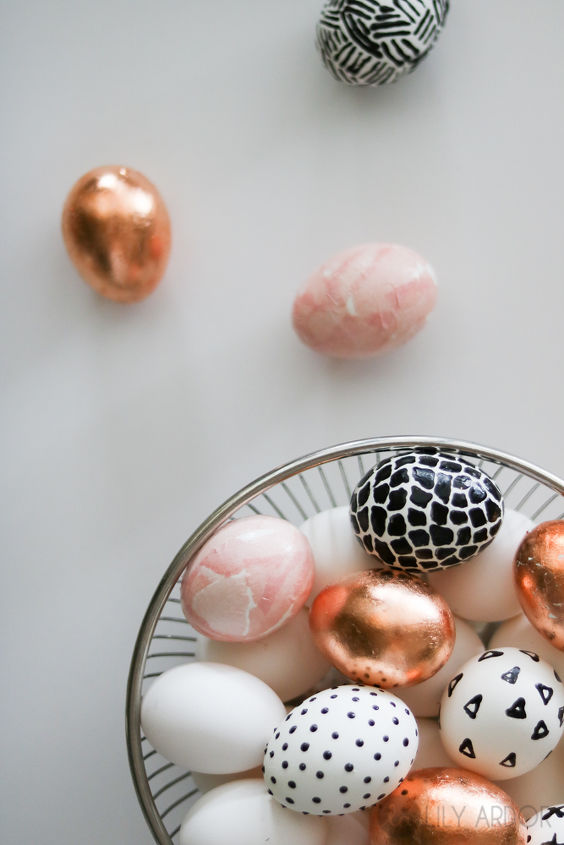
And this was the final result. The combination of the three textures is jaw-dropping beautiful.
A closeup snippet.
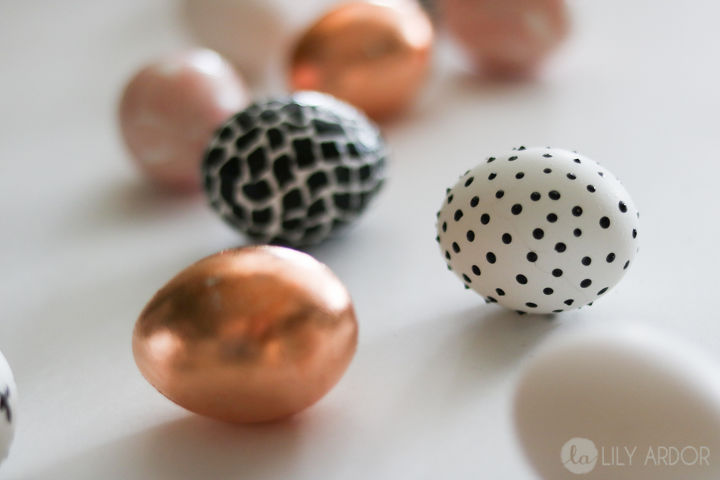
The texture on the polka dot is awesome 
And thats a wrap. Thanks for tuning in. Visit my Blog for more cool unqiue DIYS.
Want more details about this and other DIY projects? Check out my blog post!
Comments
Join the conversation
3 comments
-
Stunning!
-
One of the sleekest Easter egg ideas I've seen yet! Would totally make these. Thank you!


Frequently asked questions
Have a question about this project?