


Upcycle An Old Mirror

Upcycle An Old Mirror
It might appear to some that I am always changing or doing something to a section or piece in my home. The truth is that is completely true. I am always, at least at one point or another doing a project for myself or for someone else. I don’t know if this will ever change.
I can imagine that at some point I may stop or slow over the years, but not any time soon.
I got this idea to upcycle or update an old mirror that I have. In fact, this is not the first time that I have updated this same exact mirror.
This post contains some affiliate links for your convenience (which means if you make a purchase after clicking a link I will earn a small commission but it is at no additional cost to you)! Read my full disclosure here.

I even blogged about the process here, where I covered an old Ikea Mirror to match the decor of my home.
Well, in the words of Britney Spears, I did it again!
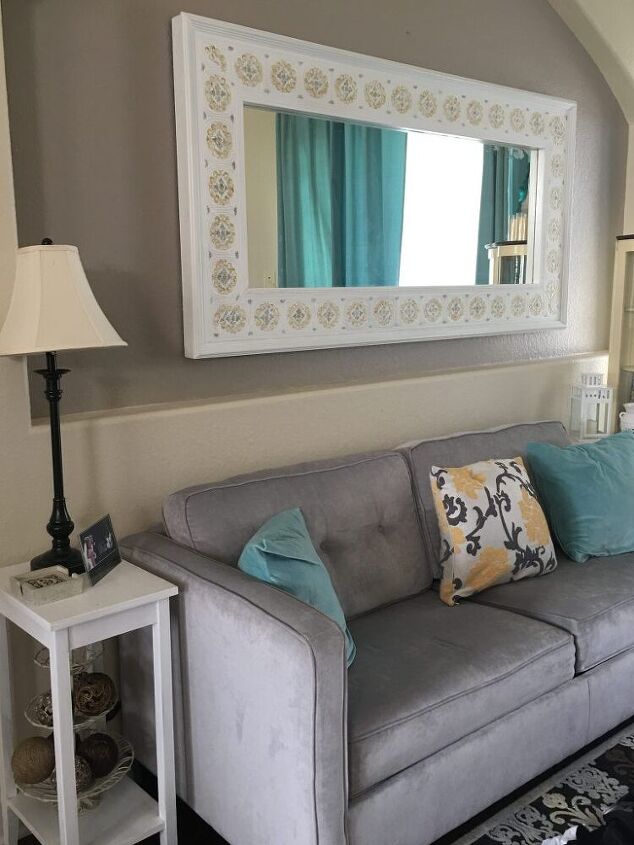
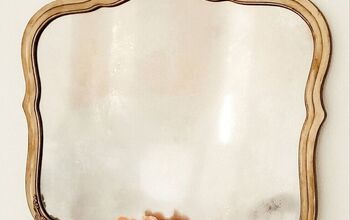
Here’s a look at the mirror before. It used to hang in my front living room before I made it over. I actually closed in the arch in the wall. So, naturally, that mirror had to come down, but I just couldn’t get rid of it.
Yet, I didn’t really like the look of it anymore as my taste had changed.
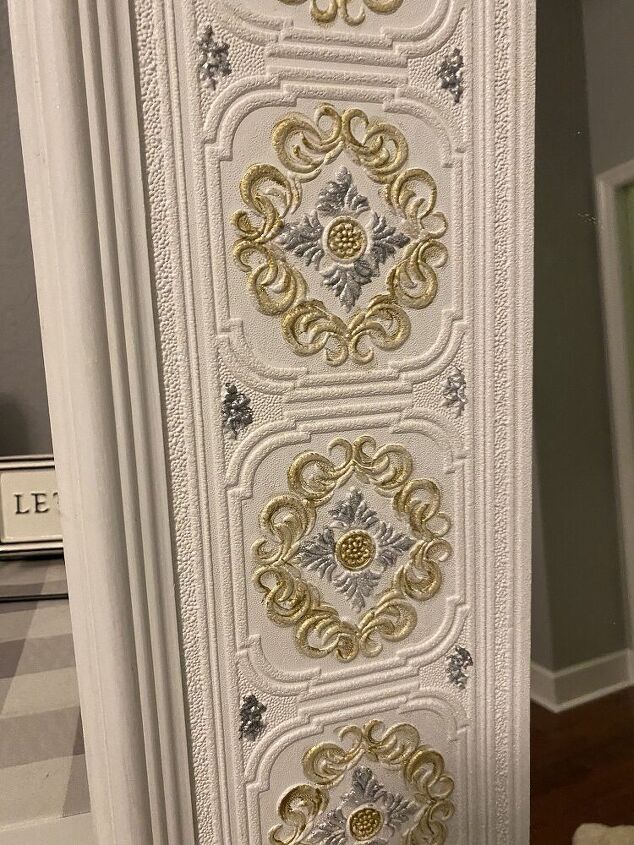
Here is a close-up look at the wallpaper design, and the painted effect I put on it.
Here’s the thing about home decor style and taste. Or I like to call flavor. Whatever you decide is “your flavor” it is okay to change it or evolve it into something more. As your style changes, you do not have to replace everything.
Simply use what you have. I say this all the time because I am asked by friends and family who ask my opinions on decor. A lot of times they have things that work and even go together, it just in the styling.
Other times, like the mirror, the size and shape are still right for having and keeping in my home, just not the over style or look.
So in this case, change it, modify it, paint it, distress it, or do a combination of these things to make it yours and unique.
For this mirror, I stripped off all of the paper borders. It was ugly after doing this and actually left a yellow tone paper on the wood. I probably could’ve sanded it off but since I was adding faux wood peel-and-stick flooring I didn’t care.
I found a box of peel and stick wood flooring in the Walmart clearance section. It seemed almost too thin for flooring, but for this project, it was exactly what I needed and wanted. I was going for a wood-look mirror.
First of all, the peel and stick panels are lightweight. Plus it was a wood look in the color scheme I was thinking. So I quickly grabbed it up knowing I had this project in mind.
Once I got to tackle this project, I pulled out six panels, and I gotta say, it was almost a match made in heaven because I only had to trim corners. Six panels fit around the mirror perfectly.
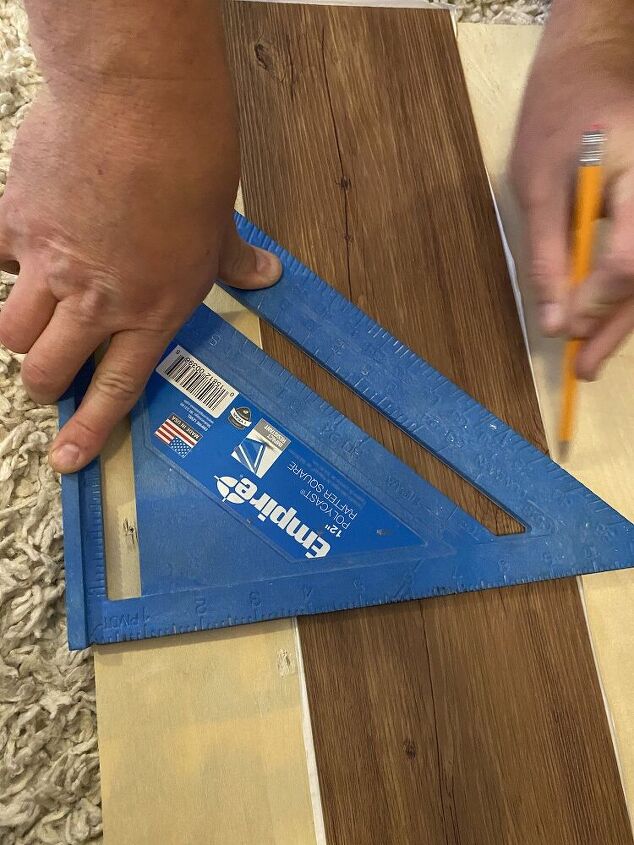
My husband was showing me how to measure the corner angle in the picture above, however, I gotta be honest. I didn’t measure this way. I eye-balled it. My cuts weren’t perfect. And yes some of the angles did not line up when butted against each other.

It was just easier to do it this way when cutting with a knife blade. I only had to run the knife blade on the angle I was cutting once and it would cut away the part I did not need.

With peel-and-stick floor panels, you just peel away the backing and stick it into place. It was almost too easy. You can see here I left the wood trim I added in the last makeover.
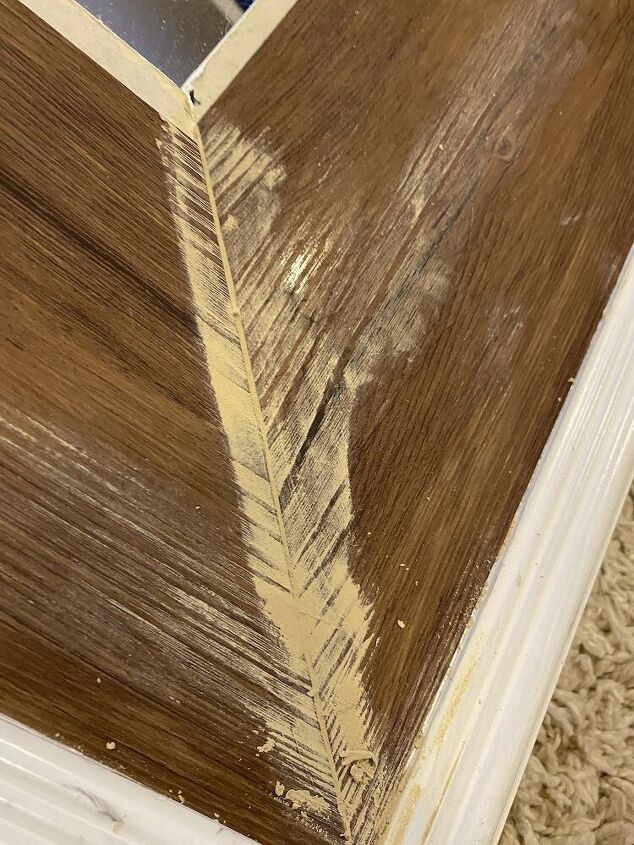
For the next steps, I filled in the seams with wood filler. Now, I know this is not real wood, but hear me out. I wanted the wood look, and I knew the filler would dry and kind of weld the pieces together into place. So I used the filler, and still sanded it down like wood into the panels.
You can also see where the wood paneling didn’t quite go to the edging of the mirror. I kind of had a feeling this might occur, and already knew that my original plans to update would fix this.
I wanted a slight boho-farmhouse vibe for this mirror, so I ordered 3 packs of the flat back wood beads from here. I didn’t quite use all 3 packs, but 2 wasn’t enough. I say this because if you decide to update the same Ikea mirror you will know how many packages to order.
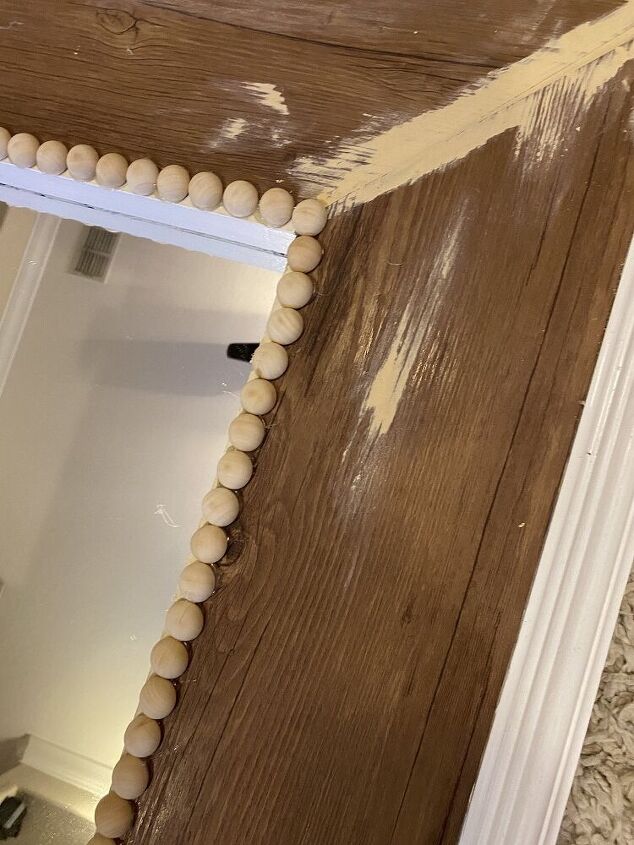
I starting by hot-gluing the beads around the edge starting in the corner.
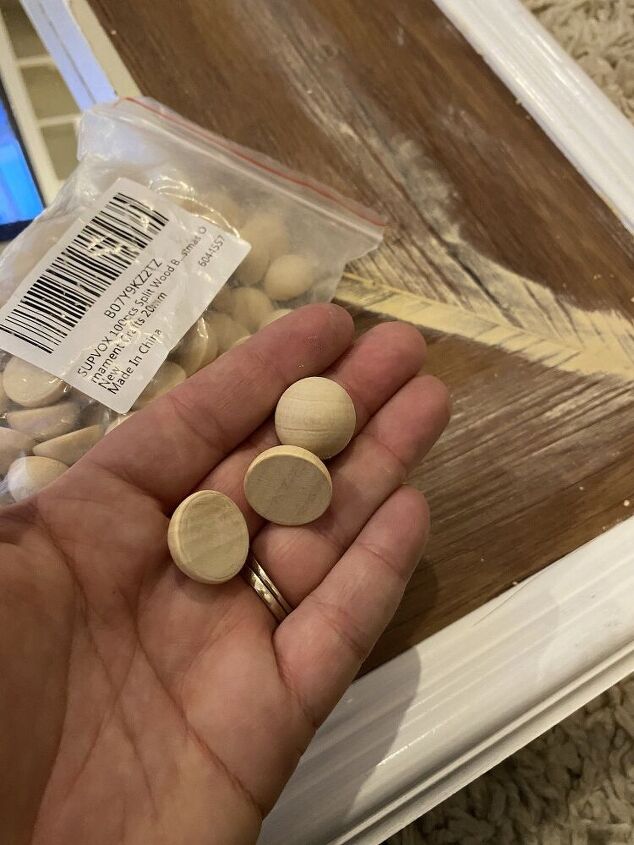
These are about 1/2 inch in size. You can certainly go bigger but I like this size for the look I wanted.
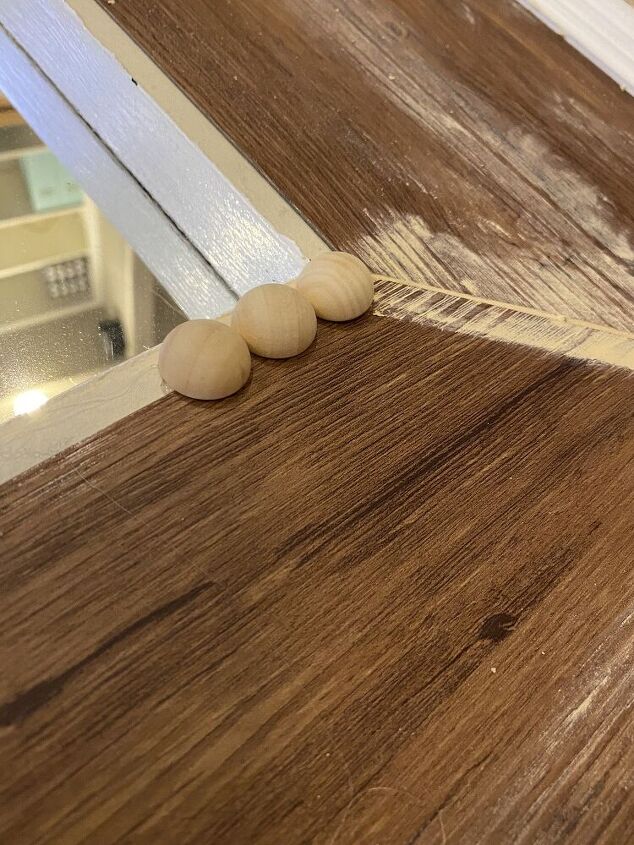
Gluing all of the beads on did take some time, but it was not too bad since I did this while also watching a movie in the living room.
Once I got the beads glued on all the way around, I painted the faux wood floor panels. I actually did the dry-brush technique mixing it with my favorite Waverly chalk paints in white and gel stain. I also applied the paint to the wood beads.
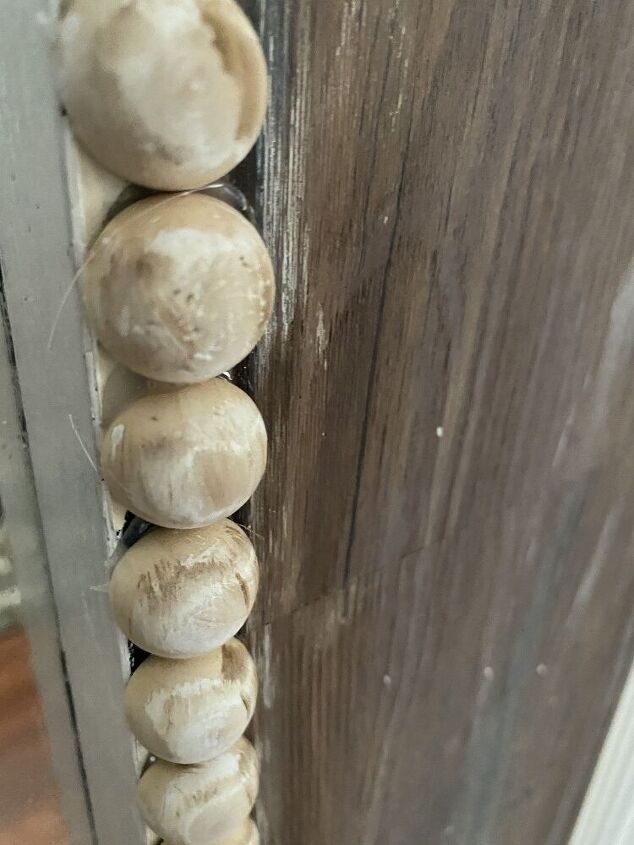
I did have to go back and pick off my glue strings. But once this was complete it was done.
I absolutely love the way this turned out. I styled it in my master bedroom with a faux wood ladder I created. I love it in our bedroom so much better because it’s great to have when getting dressed for the day.
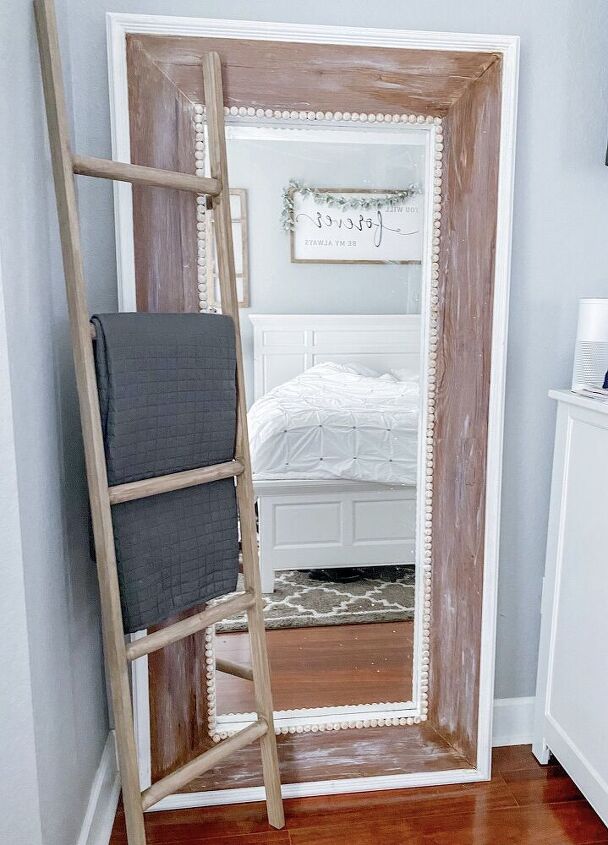
What do you think? I am so in love with the way this turned out.
I provide easy craft projects and DIYs plus tips and tricks for all of your crafting needs through the FREE Crafty Life email newsletter. Subscribers get access to my entire private craft resource library. I share printables for crafting projects and home decor DIYs. Plus, I have several SVG cut files that you can use with your Cricut or Silhouette cutting machine and there are also checklists and so much more!
Click the Pink Box below to get FREE Access!

Comments
Join the conversation
-
I absolutely love this! Lots of love went into this and it shows! Very very well done! Great share.
-
While I do love the idea of using the wood look peel and stick panels, I’m not a fan of the weathered look. It leaves me with an urge to grab a can of Liquid Gold and rub it down.. :) The added beading is a great touch :)


Frequently asked questions
Have a question about this project?
Love what you did with this mirror. I really liked the wallpaper you did on your other mirror. Where did you find such elegant wallpaper? I have a huge mirror in my kitchen that came with the house I want to cover up.
Thanks!
Karen. N