


Baker's Twine Pumpkins
3 Materials
$5
10 Minutes
Easy
Baker's twine makes the often overlooked stem the star of these mini pumpkins! Black and white baker's twine adds a fun Halloween touch to these pumpkin stems. Just wrap and hold in place with hot glue - so easy! You can also use a few strands of baker's twine to highlight the ridges in the pumpkins too. A 5 minute craft! If you like this idea, don't miss my other favorite Halloween crafts.
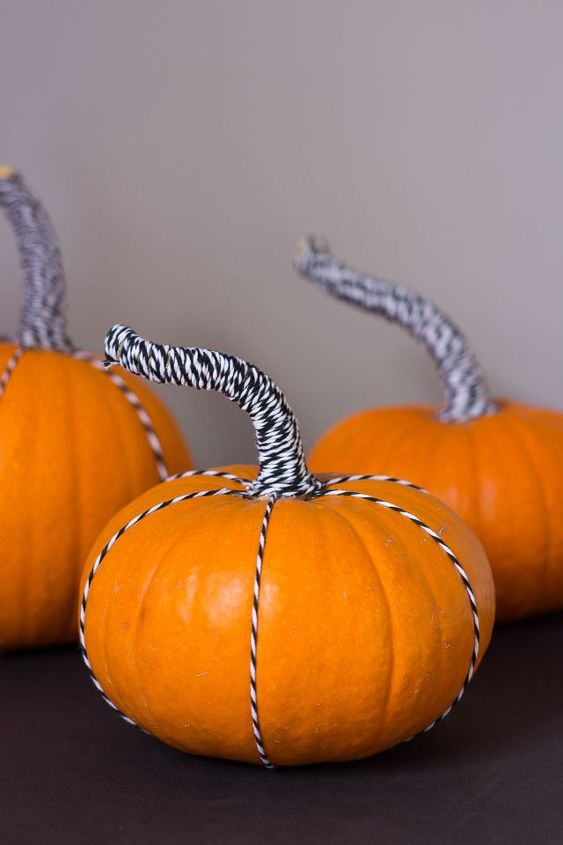
While I used black and white baker's twine, it would be fun to make a set of these with a variety of different colors of twine. Thin yarn would also work to wrap the stems. You'll want to find pumpkins with nice long, curvy stems for this project!
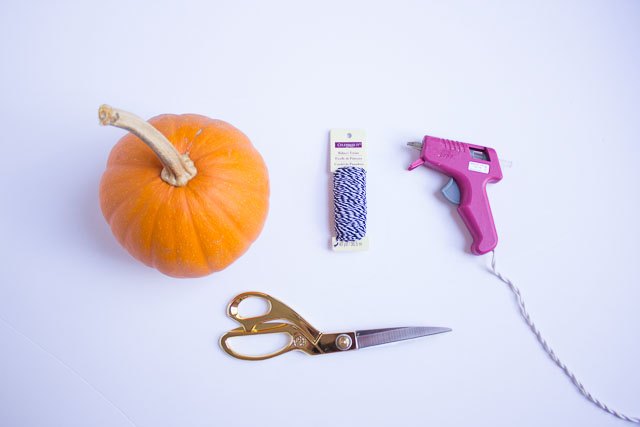
Supplies:
- Small pumpkin with long stem
- Baker's twine
- Hot glue
- Scissors
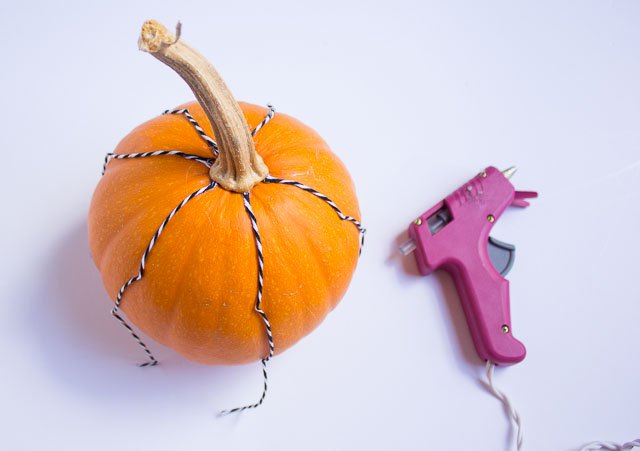
Step 1: To run baker's twine down the sides of the pumpkin, adhere one end at the base of the stem with a small dab of hot glue. Trim to fit and glue the other end of the twine to the bottom of the pumpkin.
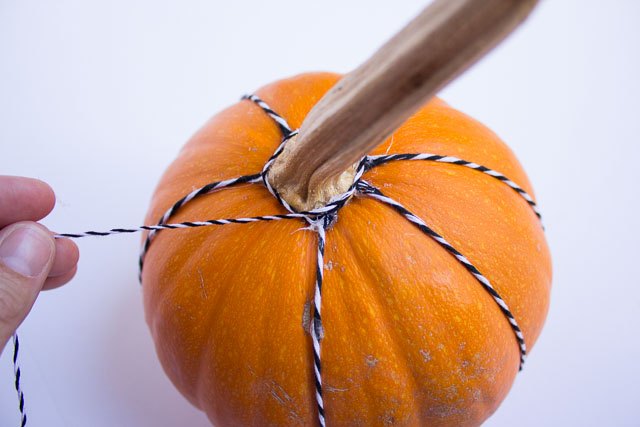
Step 2: To wrap the stem, start by gluing one end of the twine to the base of the stem and then wrapping tautly around the stem.

Push the twine down as you go to prevent any of the stem showing through. Once you've gotten to the end of the stem, trim and secure with hot glue.
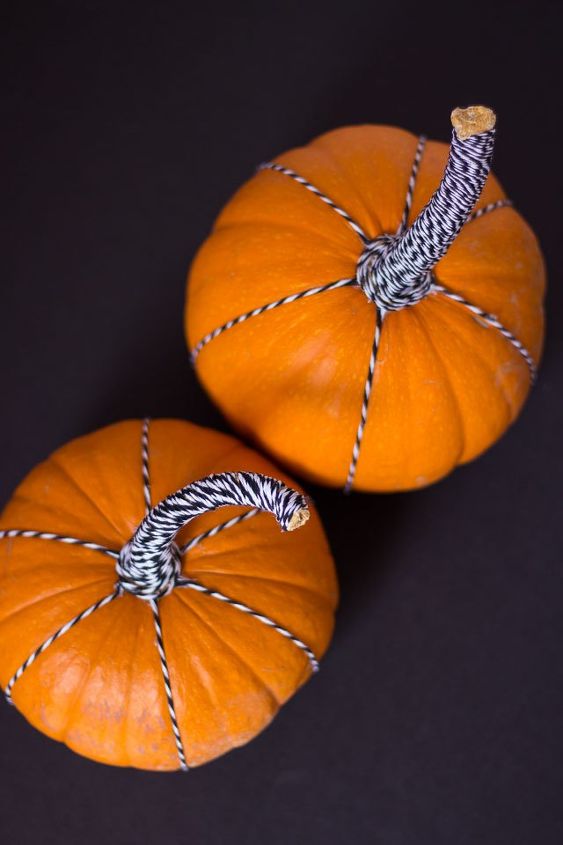
These are a simple, unexpected take on Halloween pumpkins that take minutes to make.
I love Halloween crafting - check out my other spooky Halloween craft ideas!

Want more details about this and other DIY projects? Check out my blog post!


Frequently asked questions
Have a question about this project?