


DIY Concrete Jack-O-Lanterns
Medium
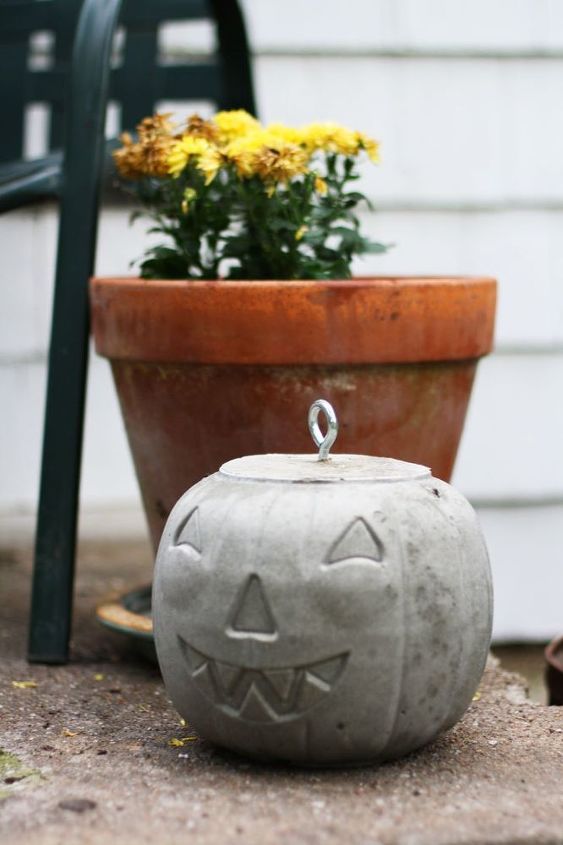
Who says pumpkins have to be orange? These do-it-yourself concrete jack-o-lanterns may be gray, but they’re anything but dull. They’re surprising, trendy and easier-to-make than you might expect. Adding one of these babies to your front porch is an unexpected way to decorate for Halloween.

Plastic pumpkin buckets—the ones trick-or-treaters use to gather their goodies—serve as the molds for these concrete jack-o-lanterns. If you don’t have any extra plastic pumpkin buckets around, you can find them at most dollar stores or big box stores for around $1 each.
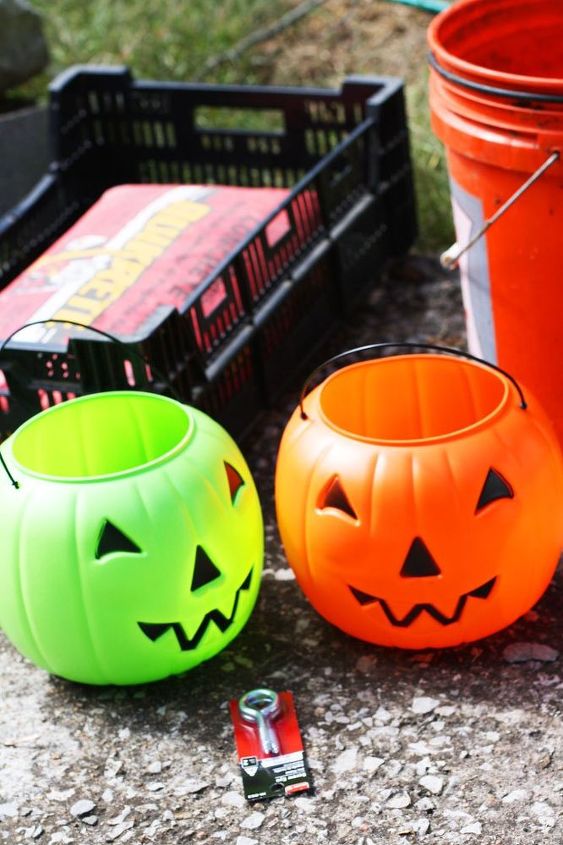
First, you’ll need to gather your supplies. The base materials for this project are just plastic pumpkin buckets (I used two) and a package of fast-setting QUIKRETE® concrete mix. But, you’ll need a few other tools you probably already have on hand to get the job done.
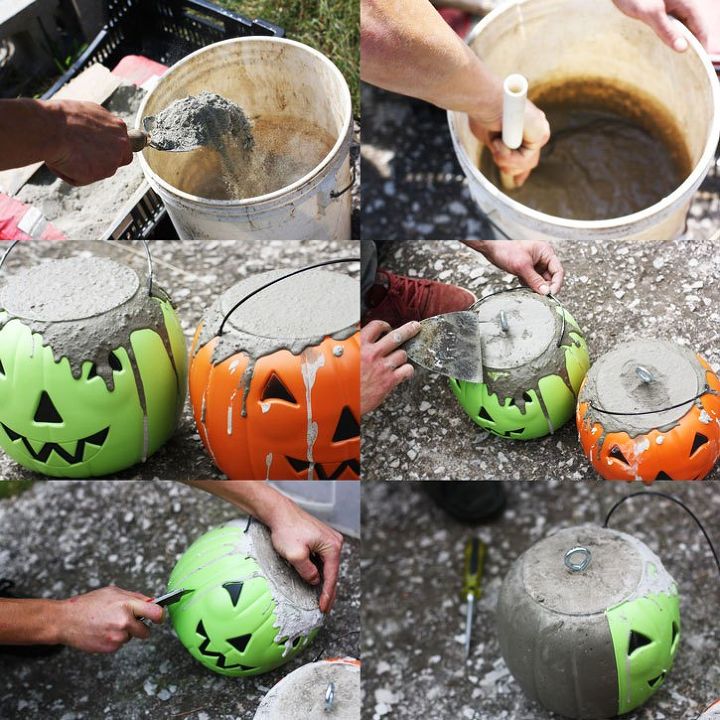
Get ready to get your hands a little dirty. This project is definitely hands-on. Also, grab your significant other or a friend because it’s easier to mix concrete with two people. One of you can drink a beer while the other stirs the concrete. Or, you can take turns stirring, I guess. Follow these steps to make your concrete jack-o-lanterns.
I was worried that the features—eyes, nose, ears—of the pumpkins were going to get messed up or not turn out at all. If they didn’t look prominent, I was pretty much just going to be stuck with a ball of concrete. But they came out great!
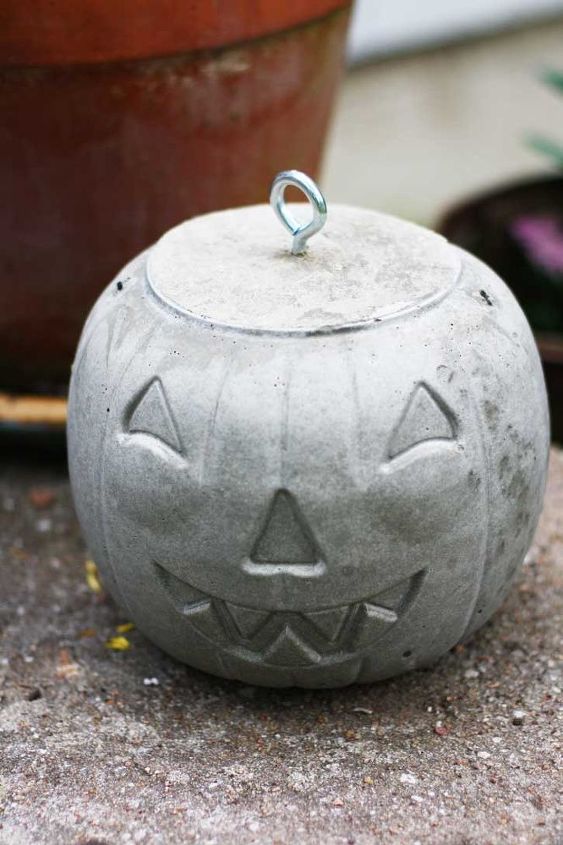
I’m so excited about these concrete jack-o-lanterns. They add an unexpected Halloween elements to my front porch, without looking kooky. What do you think?

Want more details about this and other DIY projects? Check out my blog post!
Comments
Join the conversation
2 of 7 comments
-
Nice project! I wonder if it would have been easier to cut the pumpkin mold in half BEFORE filling it with concrete then tightly taping it together again then pour the concrete in? Still wondering here if adding a sponge like ball in to the pumpkin when 1/3 full of concrete then finish filling with concrete to make it a bit lighter and save concrete as well? Just asking because I've not worked with concrete either.
-
You could use these as Autumn/Fall decor by turning the face to the back and adding some corn stalks etc. Love them!


Frequently asked questions
Have a question about this project?
I love these. Im curious as to how heavy these are. Will I be able to move these around? Some use perlite and peat moss with the concrete in a 1:1:1 mixture.
I do want to make one of these but my questions for this project is how do I get it to turn out so smooth and light colored. My other question is would using foam in bottom then a flower pot so that my pumpkin fills all the way to the top. Please let me know as I have never used or played with cement before