


DIY Concrete Jack O'Lanterns
DIY concrete jack o’lanterns are so fun and easy to make! Use them as Halloween planters, candle holders, or vases for Fall florals. They’re a wonderful way to decorate for Halloween and celebrate the season.

My Love For Concrete DIYs Continues
More like my obsession with concrete DIYs continues! Y’all may remember how much I loved making DIY concrete bowls in the summertime. Then, last Fall I was a DIY concrete pumpkin making machine. So, when images of concrete jack o’lanterns kept popping up on my Pinterest feed, I couldn’t help but think it was a sign. A sign from the concrete gods that they wanted me to try my hand at a new concrete project and you do not want to upset the concrete gods. So off to Walmart and Home Depot, I went.
What You Need to Make DIY Concrete Jack O’Lanterns

Materials:
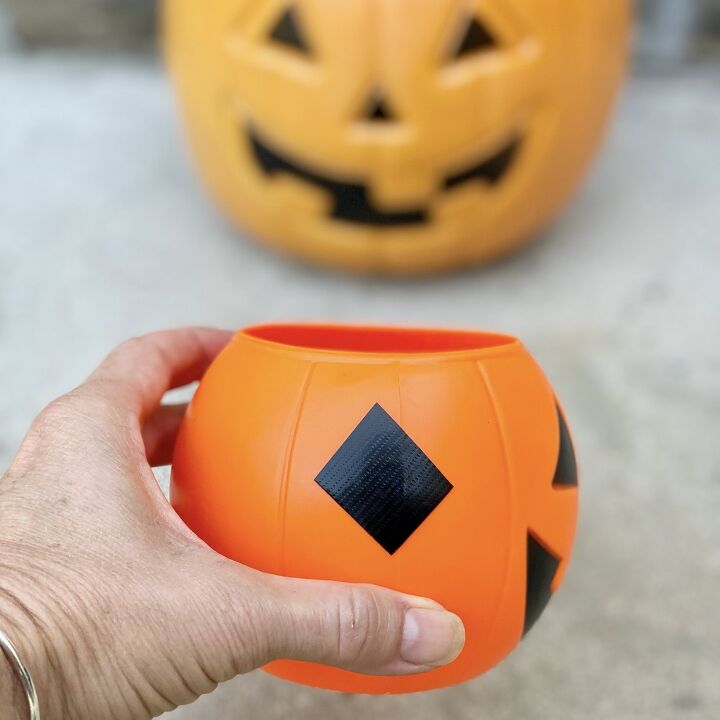
- Plastic Jack O’Lantern trick-or-treat pails (I got mine from Walmart in two different sizes.)
- Fast-setting concrete mix
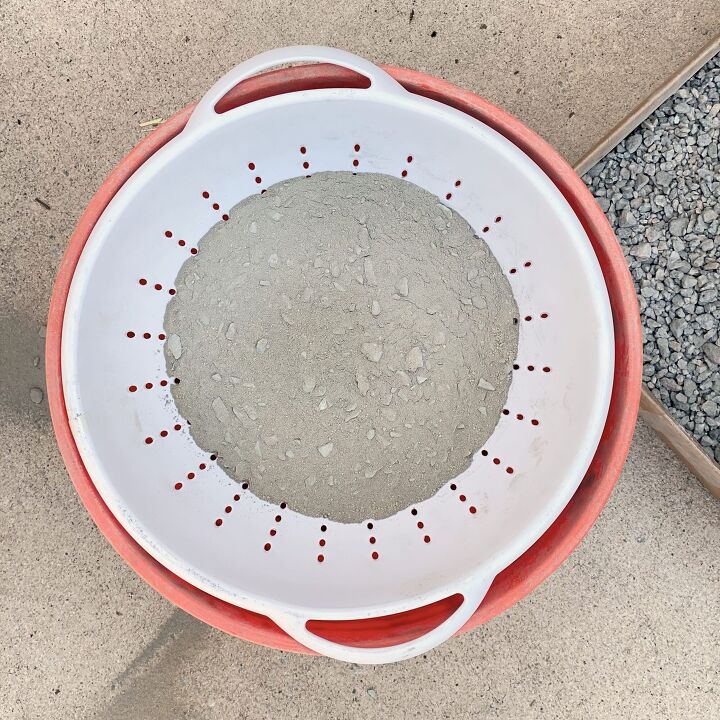
- Sifter (Helpful to remove large pieces of gravel in the concrete. I used a plastic colander I found at Walmart for under $1.)
- Water
- Large bucket
- Gloves (Recommended. Wet cement has a very high alkaline (high ph), so gloves are recommended to prevent the possibility of chemical burns.)
- Cooking spray (I used Pam.)
- Plastic cups (Sizing varies depending on the use of the concrete jack o’lantern.)
- Rocks
- Duct or painter’s tape
- Mask for nose and mouth (Recommended.)
Tools:
- Drill with concrete/grout mixing paddle
- Box cutter or metal scissors
How to Make DIY Concrete Jack O’Lanterns
To use as a planter or vase for flowers:

Prepare the concrete:
Sift out the rocks from the concrete. I prefer my concrete projects to have a smoother look. To achieve that, I sift the larger pieces of gravel out of the concrete before adding the water. This isn’t necessary though. If you prefer a more pitted (or rustic) look, you can leave the gravel in the concrete. To sift out the gravel I used a very inexpensive plastic colander I found at Walmart for less than a dollar. If you sift out the gravel, keep it close by. You’ll understand why once you get to Step 5.
Prepare the jack o’lantern:
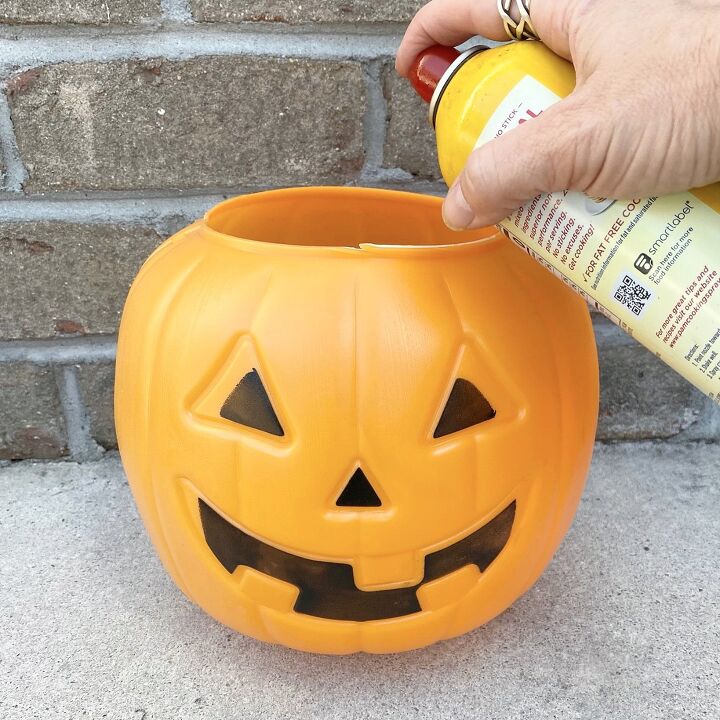
Prepare the jack o’lantern by cutting off the handle. Spray the inside of it generously with cooking spray. The cooking spray helps to keep the concrete from sticking to the inside of the jack o’lantern and makes it easier to remove from the form once the concrete is dry and set.
Mix and pour the concrete:
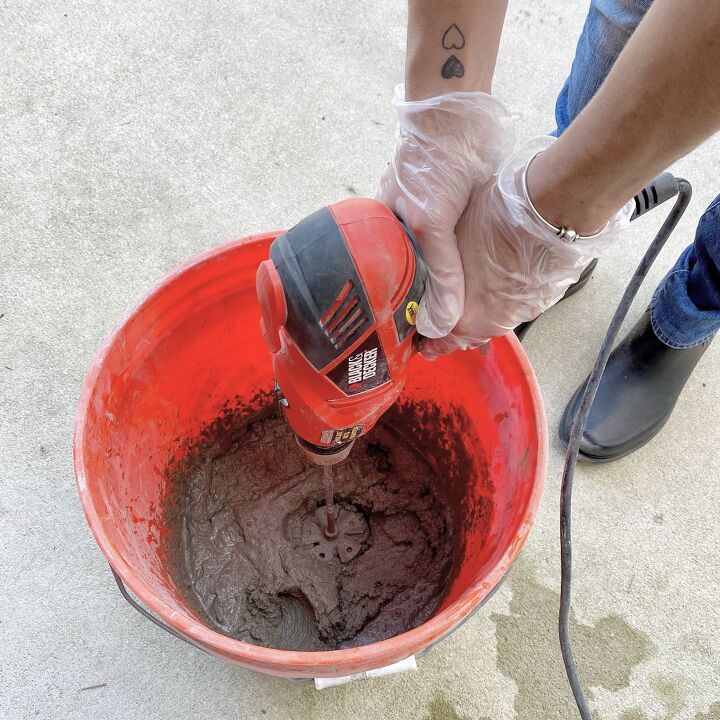
Mix up the concrete. This step needs to be relatively quick because fast-setting concrete begins to harden in about 15-minutes. In a large bucket pour in the dry concrete. Slowly begin adding water and use the mixing paddle to mix the concrete and water. The amount of water used in mixing the concrete depends on the amount of concrete being used. A good rule of thumb is to start out with less water and add more until it reaches the desired consistency. The concrete should be the consistency of pudding before it sets. Pour the concrete into the prepared jack o’lantern filling it about 3/4 of the way up.
Make the space inside the concrete jack o’lantern:
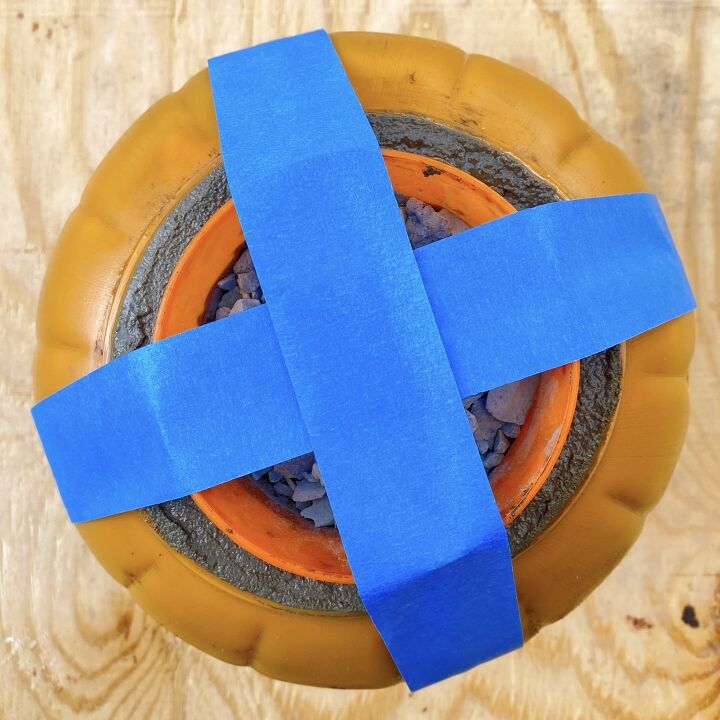
Next, if you sifted out the gravel from the concrete, fill the cup up that you’re using to make the space inside the jack o’lantern with that gravel. The gravel will help keep the cup weighted down. Then, spray the outside of the cup with cooking spray. Press the cup into the concrete in the jack o’lantern. If the cup is having trouble staying centered, use duct tape to secure it on either side of the opening of the jack o’lantern. The tape should look like an “X” at the opening. If necessary, slowly pour more concrete into the jack o’lantern around the cup until it’s filled to the top.
Allow the concrete to dry and set:
Allow the concrete in the jack o’lantern to dry and set for about 24-hours before trying to remove it from the form.
Remove the cup and form:
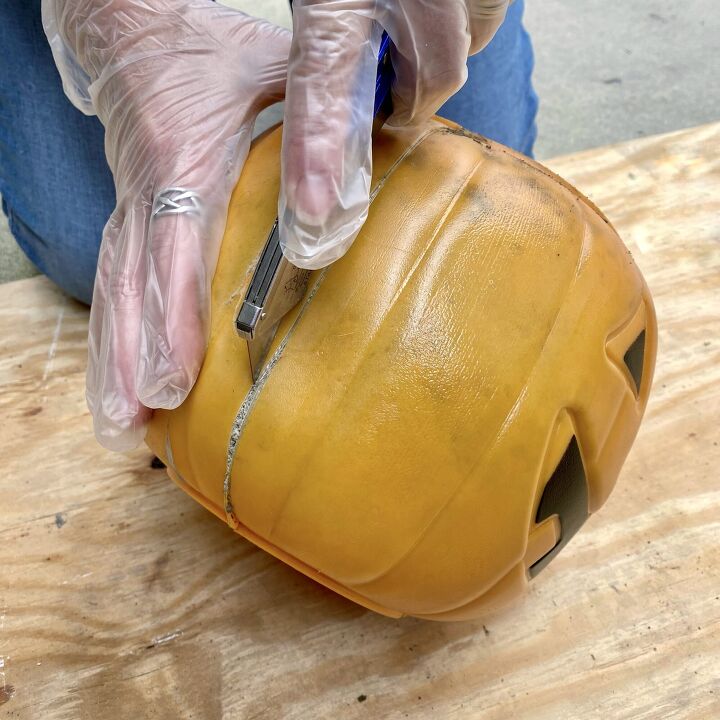
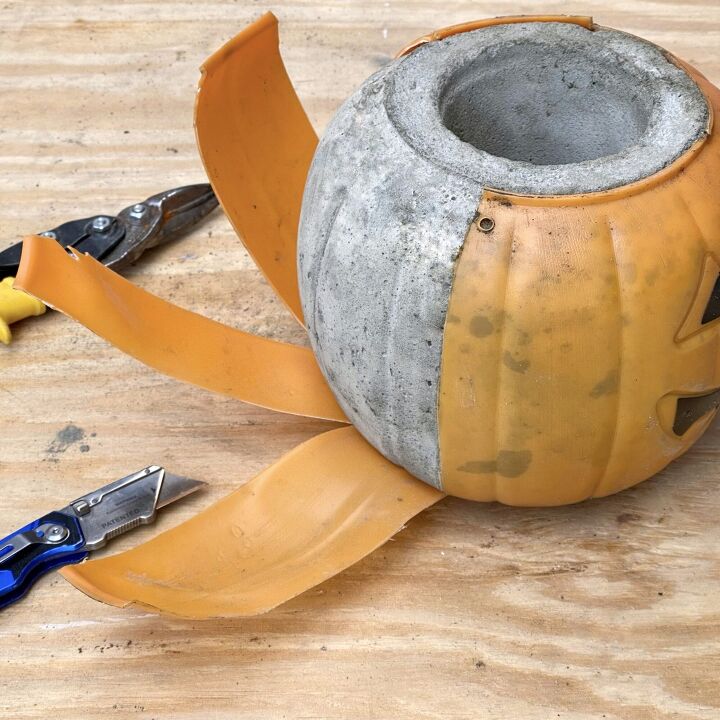
Once the concrete is dry and set, remove the cup from the center by carefully lifting it out. Then, score the outside of the jack o’lantern with a box cutter. I followed the vertical indents in the plastic of the jack o’lantern. Peel away the plastic pieces until the concrete stands alone.
NOTE: Keep the cup! Don’t throw away the cup used to create the space in the concrete jack o’lantern. It works perfectly as a vessel to hold the water for your plant or flower arrangement you plan to use in it.
To use as a candle holder:

Prepare the concrete:
The same way as above for a planter or a vase.
Prepare the jack o’lantern:
Similar to preparing the jack o’lantern above, cut off the handle. If there are holes in the side of the pumpkin that concrete will fill up to, cover the holes from the outside with panter’s tape or duct tape so that the concrete doesn’t leak out of them. Spray the inside of the jack o’lantern generously with cooking spray.
Mix and pour the concrete:
The same way as above.
Make the space inside the concrete jack o’lantern:
Depending on the candle size that you plan on using in your concrete jack o’lantern, you will want to find a plastic cup that it fits in. Spray the outside of the cup with cooking spray. For instance, I used votive candles for mine. Therefore, I used 3-fluid once plastic bath cups. Since the bath cups are very light, I taped the cups down to keep them in place while the concrete set and dried.
Using the concrete jack o’lantern for taper candles? Since there isn’t a cup small enough to create the form for a taper candle, spray the bottom of the candle and secure it in the concrete. Once the concrete is dry and set, the candle can be removed and replaced.
Remove the cup and form:
The same way as above.
Style and Enjoy!
Finally, with the concrete jack o’lanterns dry, set, and free from the forms, the time has come to style them. I decided to paint the eyes, nose, and mouth of my concrete jack o’lantern candleholders because the impressions of them in the concrete weren’t as defined as I’d like them to be. The metallic copper paint I used help to highlight the features more and added visual interest through color and shine.

Whether using your concrete jack o’lanterns for plants, candles, or for Fall floral arrangements, I hope enjoy this seasonal DIY as much as I do. Now, I’m off to try and figure out my next concrete project… I just can’t get enough!
If you are looking for more Fall and seasonal inspiration or you just want to keep up with me day to day on the farm, I hope you will join me on Instagram and Pinterest, I’d love to see you there too.

Resources for this project:
See all materials


Comments
Join the conversation
-
Love it!!!
-
Really like the idea, will really surprise the kids that go pumpkin busting.


Frequently asked questions
Have a question about this project?
Absolutely LOVE this project and can't wait to try it!!! Would make perfect fall gifts for my family and friends. Thank you!😊🎃