


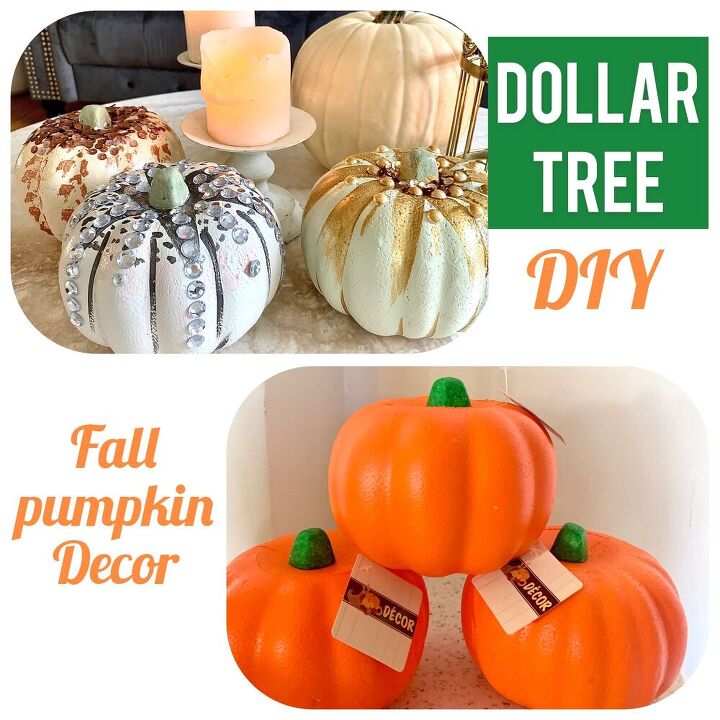
Dollar Tree Pumpkin in Style

If you see those neon orange dollar tree pumpkin, DO NOT PASS THEM UP. For a not an ordinary 2020 year, we need An extraordinary fall decor. i was browsing in dollar tree store, and i saw those foam pumpkin everywhere around me. I bought three for fun and then I’ve got the idea to much them with my interior decor. This year I’m going for a metallic and greenish pumpkin, so the orange ones were way to flashy for me.
watch the video for more details.
PLEASE, tell me which one is your favorite 1,2 or 3?
. Acrylic paint (white, beige, green)
. Metallic paint (copper, gold, silver)
. Gems
. Pearls
. Metallic confetti
. Mod podge glue
. Spray sealer
. Skewers
. Art brush
. Art sponge
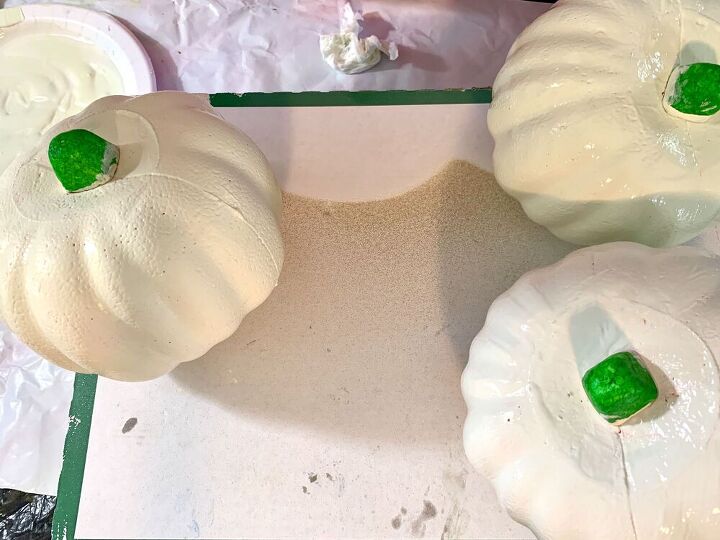
i painted them in three tones with acrylic paint and a medium flat art brush.
i used white, off white and pastel green as color base of the pumpkinS.
then, i used a mint green for the stem.
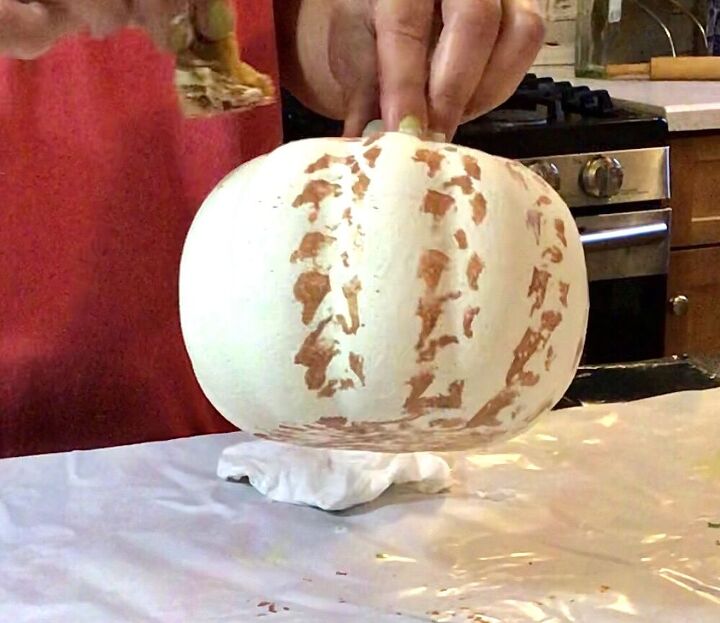
For The off white pumpkin I used the metallic copper paint and padded with a small art sponge from the top to the bottom following the pumpkin ribs shape.
I applied some glue on the top and sprinkled some rose gold and copper confetti.
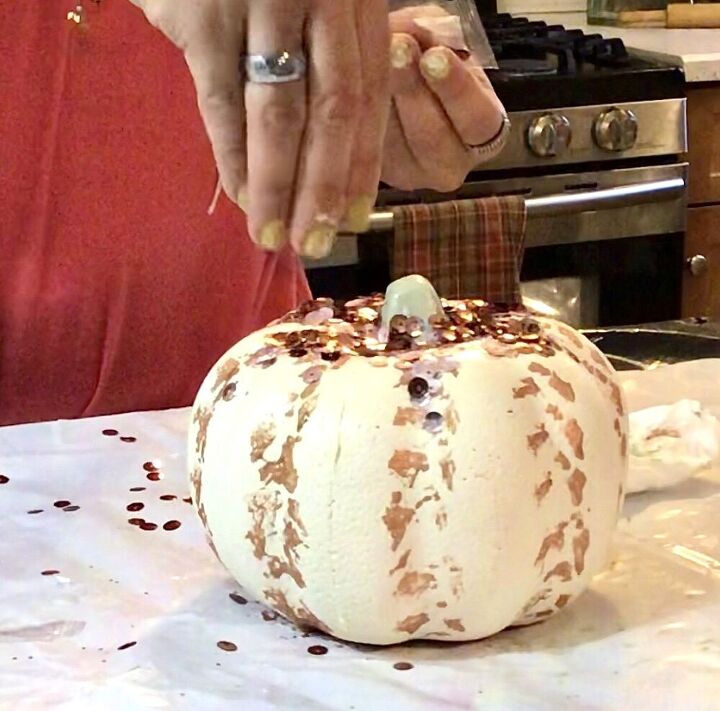
I sprayed the sealer over the Pumpkin with Confetti to secure them.
note: i spray the sealer for all the pumpkins when I’m done with metallic painting and One more spay when i finish them with the stones.
NEXT,
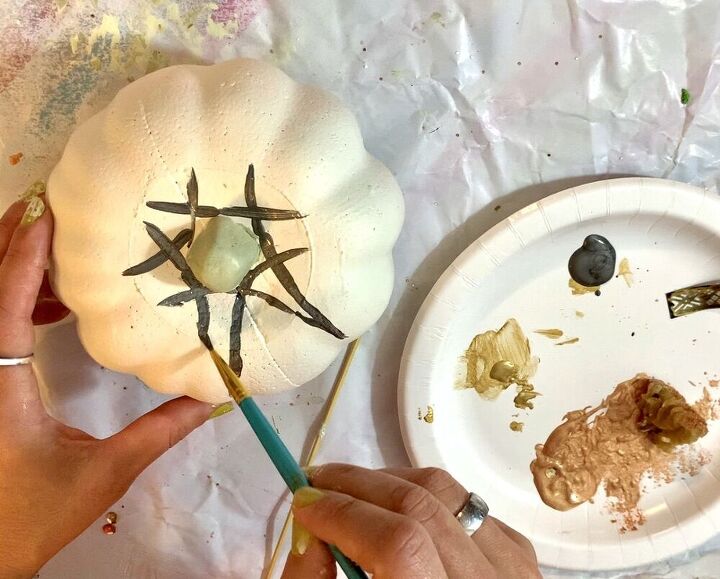
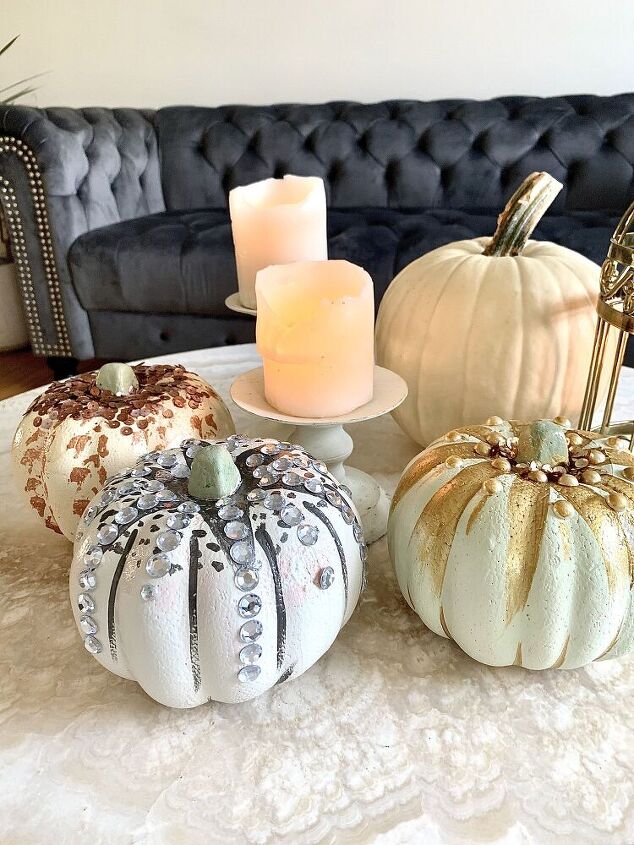
i picked the white pumpkin for the silver decor.
With a thin brush and a dark silver metallic paint, i did a drawing On the top, the ribs and bottom of the pumpkin.
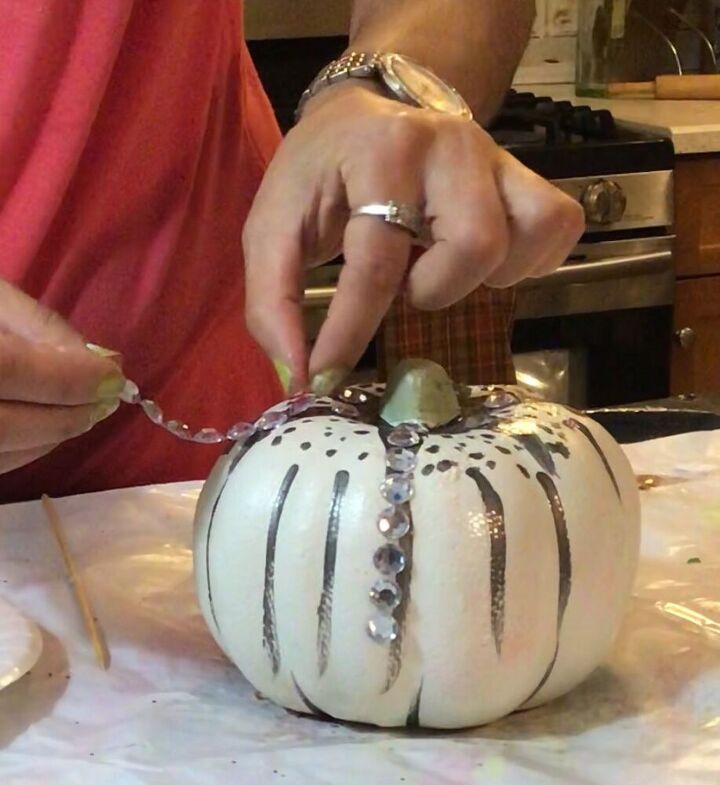
Then, i applied the shelve adhesive gems that I’ve got for 1 dollar from CVS all along the ribs.
NEXT,
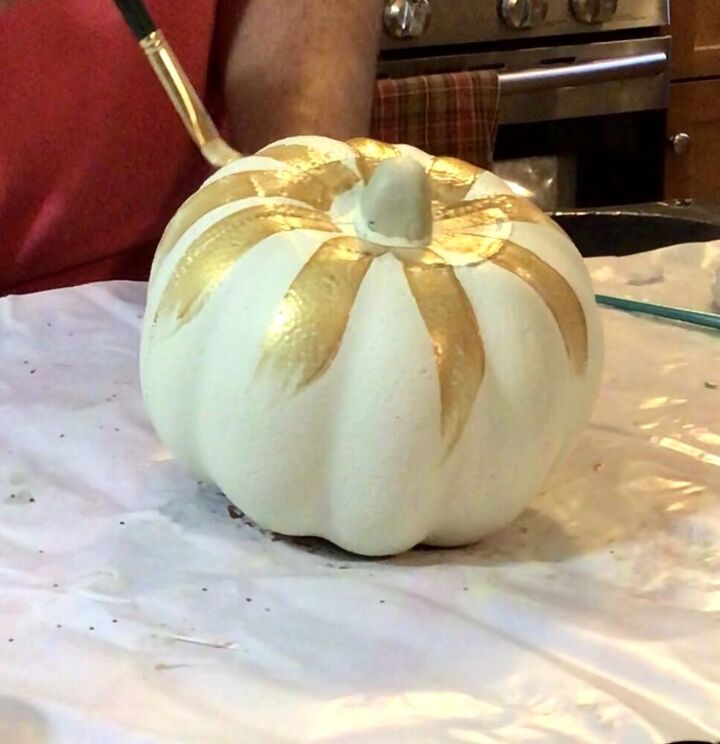
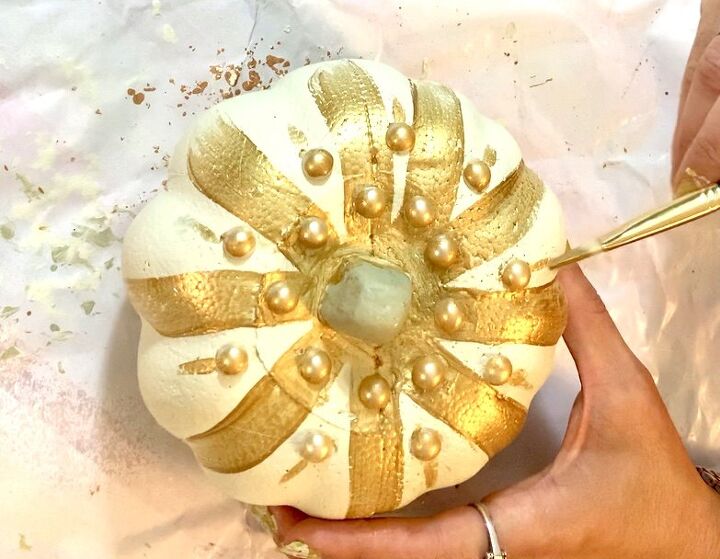
Finally, i picked the greenish pumpkin for the gold contrast. I find this two colors match very well.
With a flat art brush, like 1/2 inch wide. I did a strips drawing on the top. Forming a half way strips. Then very thin lines from the bottom up. You can see that in the video with more details.
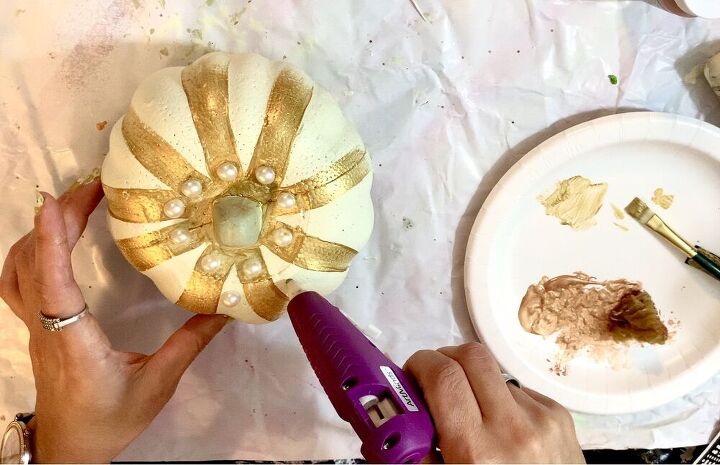
with a hot glue, I glued the pearls all over the mid top of the pumpkin and painted them in gold.
then, i applied some mod podge glue on the top, and sprinkled the gold confetti.
Spray sealed them and let it dry for a bit.
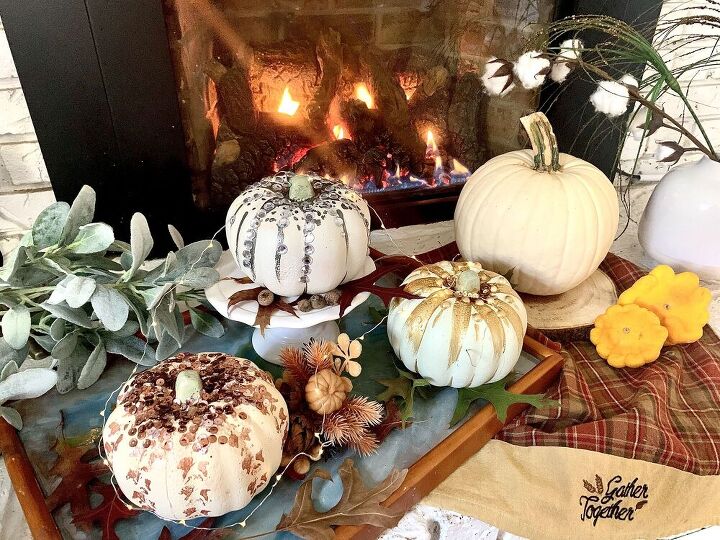
im enjoying this personalized fall decor. I feel that i will be more creative with those dollar tree pumpkin or any other faux pumpkin to make more style like rustic or Halloween decor. Stay tuned there Will be more coming up.
Resources for this project:
See all materials


Comments
Join the conversation
-
They are all very pretty. Tyfs! Definitely going to try this.


Frequently asked questions
Have a question about this project?