


Turn Brass into Ceramic

Typically I paint furniture and frames giving them a new look and a new life. I was up in Ottawa in September for a special event and saw this big beautiful brass lamp at a second hand store but was not in the position to purchase it that day. A few weeks later I was up that way to get some supplies and popped into that store and came home with several pieces including the lamp.
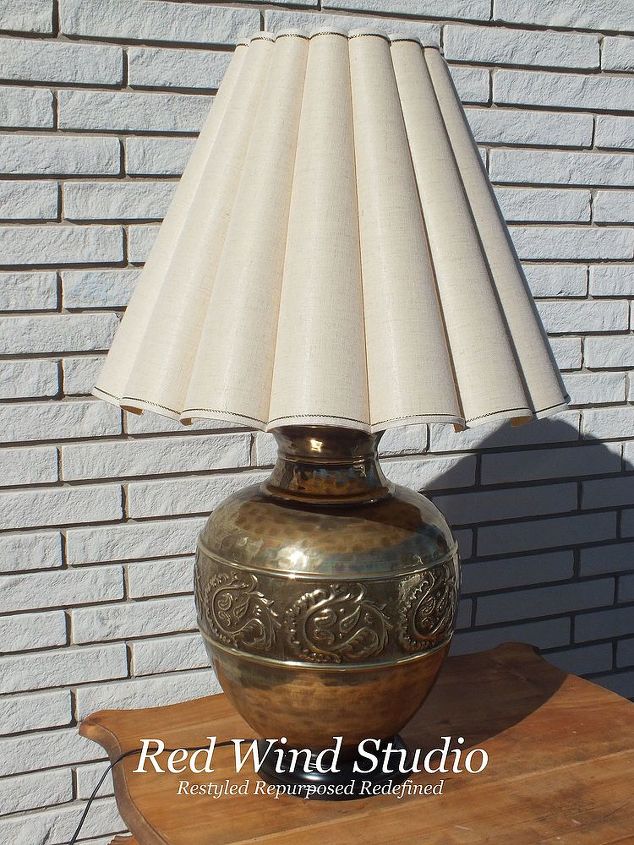
Ah hammered brass with a paisley design (I have to admit I have a thing for paisley) how unappealing as is. Oh and that massive scalloped shade, love the shape but the binding dates it. I knew I could transform this lamp and my wheels were turning. No great idea was coming to me, yet I new somehow I could make it work. Sometimes you just have to trust yourself and not over think things. So I grabbed a can of ASCP Napoleonic Blue and started painting. No special preparation other than a good cleaning was needed prior to painting.
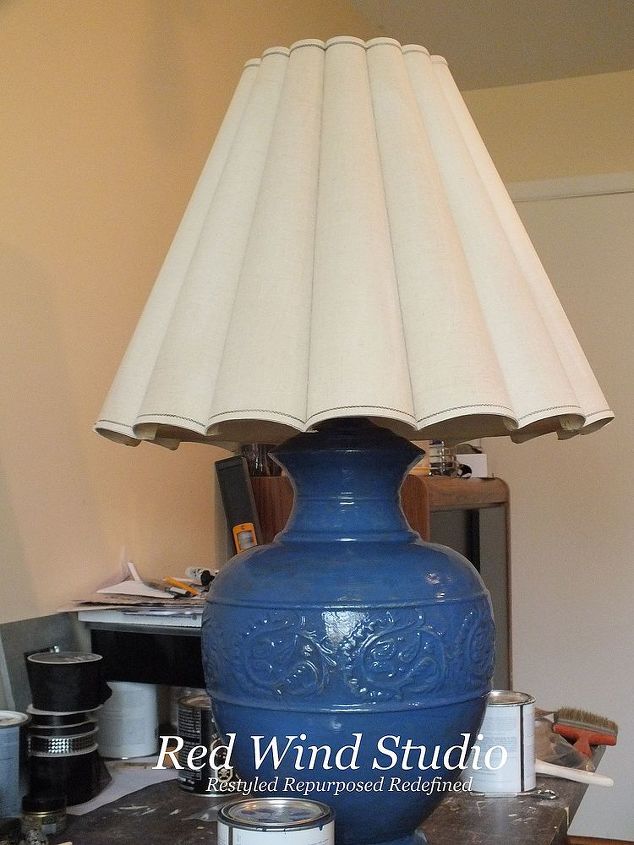
Once the entire base of the lamp including the nut which holds that shade in place had been painted and dried, I had to make a decision because plain old blue wasn’t much better than plain old brass. I decided to try a technique I had used on another piece quite some time ago but it was with a different type of paint so I was not sure it would work with Annie Sloan Chalk Paint ™. I decided to try the paint on wipe off method. So out came the Old White, my paint brush, a few rags and a bucket of water.
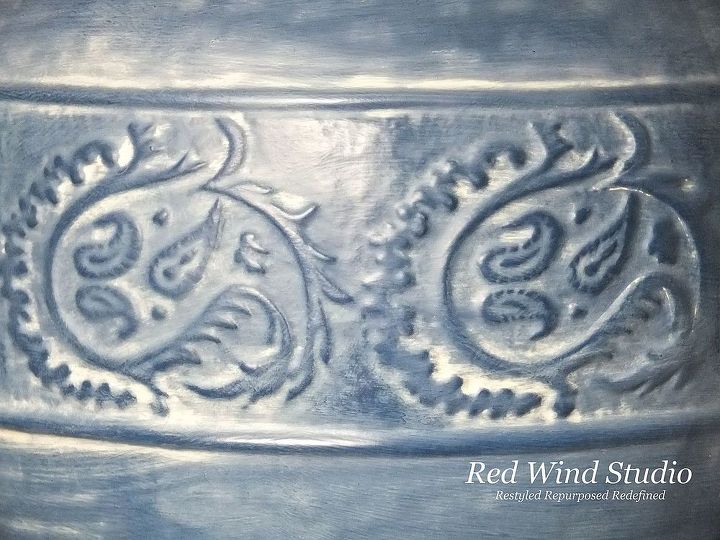
It is important to do this in sections so the paint doesn’t have time to dry before you wipe it off. On the area of the lamp where the paisley like design is I made sure I got the paint around all the intricate design fully then carefully use a damp cloth and wipe off the paint leaving small amounts of the white behind to highlight the design work. The rest of the lamp was a bit more a challenge as it was relatively flat even with the hammered effect. I used a very light touch removing the white and if I removed too much I painted it again and then wiped it again. An important note to take is to always step back from the piece you are working on to get the full picture or different perspective. This will allow you to see if the effect you want is coming together properly. See how the white paint sits in the lower areas enhancing the design and texture of the base. The last step after getting the white the way I wanted it was to add clear wax and buff it well in order to get a nice sheen.
Even the lamp shade got a face lift. It was painted in ASCP Old Ochre. I did slightly dampen the shade and then apply the paint. Again I did this in sections so the shade would not dry before I got the paint on. The dampened fabric allows the paint to absorb a bit better. No other finish was added to the shade. I felt if it had any type of sheen to it, it would take away from the base.
A side note to this technique is that I did not thin the Old White. If the texture had been fine or small and intricate I probably would have chosen to thin the paint down a bit.
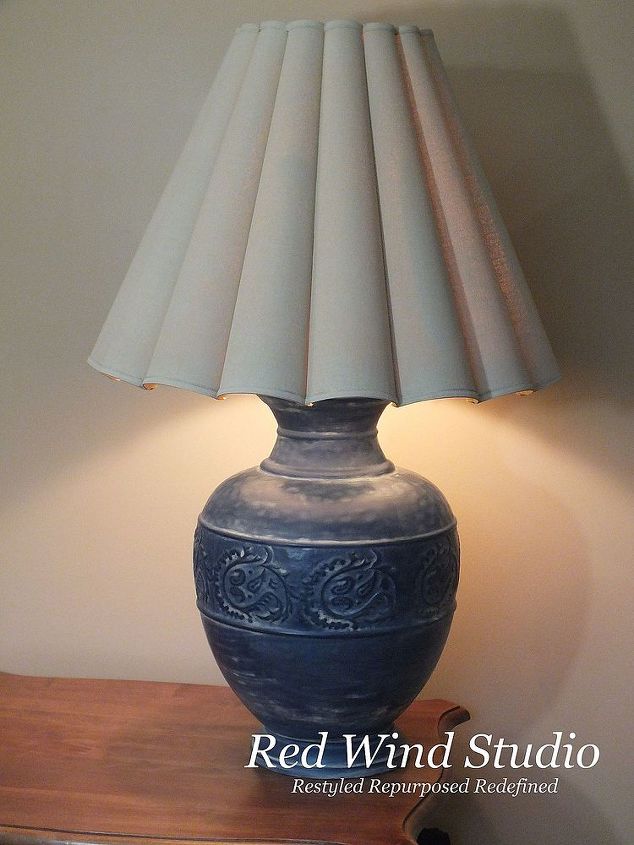
So here is the final result that even I was not expecting. The once dated brass lamp now looks like a classic elegant ceramic lamp. It just goes to show you sometimes you just need to follow your instincts and not over think things. I just love the way it turned out.
http://redwindstudio.ca/store/2014/01/03/brighten-your-day/
Comments
Join the conversation
3 comments
-
This is simply brilliant! I just love the way its turned out. I have two (cheap) brass lamps I've had for years and they're lookin' pretty tacky. I SO want to do this but have to ask, did you slightly rough-up the surface prior painting? Also, what kind of paint did you use on both the base, how did you achieve the antique whitening, and what paint was used for the shade?
-
Beautiful piece!


Frequently asked questions
Have a question about this project?