


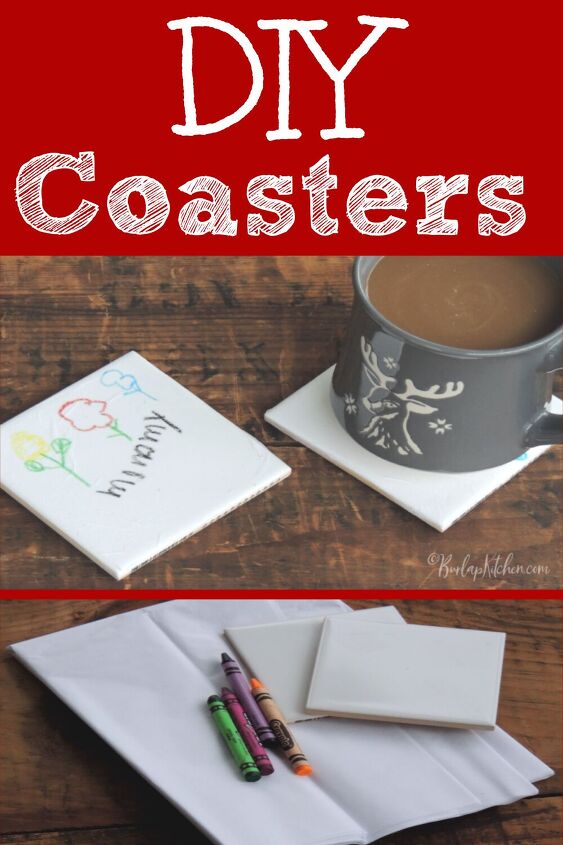
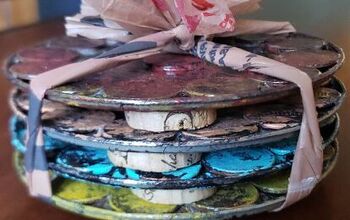
DIY Coasters
If you are looking for a last minute gift these cute DIY Coasters are perfect! Not only are they useful, but they are also a memorable piece to keep. They would be cute to give to parents, grandparents, and teachers for Christmas gifts. Actually, Logan made these for his teachers last year for teachers appreciation day, or maybe it was Christmas.. I forget, lol. Regardless, all his teachers got one of these cute coasters last year.
A few things before you get started:
you want to make sure you buy a plain white tile or the print will show through the tissue paper. Thats why I recommend buying these at Lowe’s and not Dollar tree. Plus, they are actually cheaper at Lowes!
You will want to use crayons and not markers. I have never used to markers personally, but I have a feeling the ink would smear when you go to paint on the Mod Podge. They crayons will smear a little bit sometimes, but they still turn out super cute!
Depending on how old your kiddos are, I would suggest cutting out a bunch of the tissue paper squares before sitting down to do this project. This way if the tissue paper rips you can just hand them another piece and avoid any melt downs, lol.
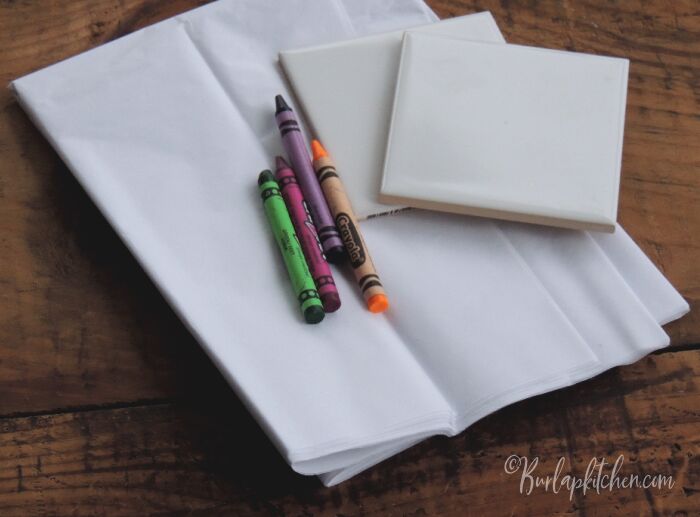
Materials:
- White tiles – I bought mine at Lowe’s and they were about .62 cents a piece.
- White tissue paper
- crayons – Make sure to use crayons and not markers as they will smear
- Mod Podge
- paint brush
- Felt or felt stickers for bottoms – You can find felt at Walmart in the craft section and the felt stickers at Lowe’s in with the furniture coasters.
How to:
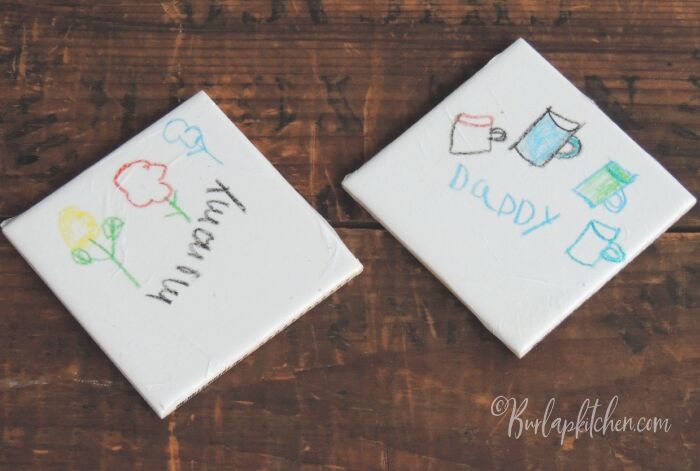
Step 1: First, take one of the tiles and trace it onto some tissue paper. Fold the tissue paper as many times as possible before tracing and cutting. This way you can cut a bunch of squares out all at once. I like to have extra squares on hand just incase my kiddo accidentally rips the paper when coloring.
Step 2: Have your kiddo or kiddos draw a cute picture on the tissue paper with crayons. Logan just learned how to draw coffee mugs in his art class, so he drew a bunch of those, lol. Like I said above, I like to cut out a bunch of extra pieces of tissue paper. If your kiddo accidentally rips a piece with the crayons its just easier to hand them another piece, in my opinion.
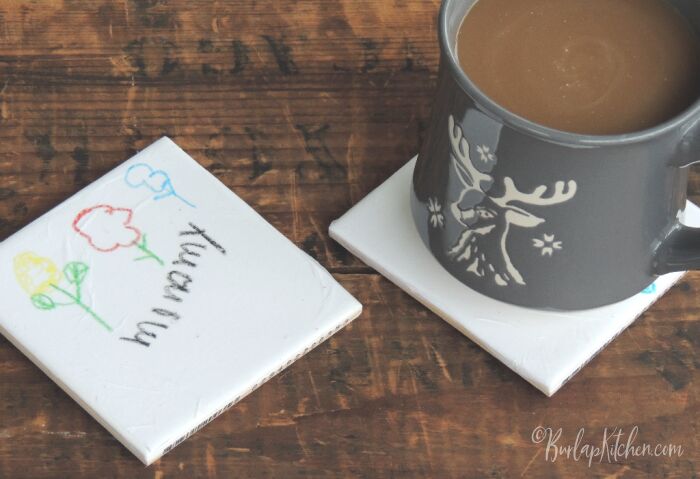
Step 3: Paint the front and sides of the tile with Mod Podge. Center the tissue paper drawing over the tile coaster and gently lay it down. Try your best to flatten out the wrinkles. You may have to gently pull it up and pull it a little to get them to come out. Just know that it is almost impossible to get all of them out. I actually heard that if you put Saran wrap over your hand they will rub out.. so maybe give that a try and let me know how it works!
Step 4: Allow the Mod Podge to dry completely. You can use a blow dryer or low temp heat gun to help the process along. Once it is dry, apply another coat of Mod Podge and allow it to dry. I added a total of 3 coats of Mod Podge. I used regular Mod Podge but someone had suggested the dish washer safe Mod Podge. That would work great, too! Just know that there is a longer cure time when using that. I want to say it is like 30 days, but don’t quote me on that, lol.
Step 5: The last and final step is to add some felt or felt stickers to the bottom of the coasters. This will keep them from scratching any surfaces they may sit on. If you are using regular felt, just cut a square the same size as your tile and hot glue it to the bottoms of your coasters. If you are using the felt stickers, stick one in each corner and one in the center for a total of 5 stickers.
If you decide to make this DIY I’d love to hear from ya! You can drop a comment below or message me on any of my social media pages. Hope you have a blessed weekend and as always remember to keep it simple. Catch ya next week my friends! Facebook, Twitter, Pinterest, Instagram, youtube


Frequently asked questions
Have a question about this project?