


DIY Concrete Bowls
Decor, DIY, How-Tos
I could not be more excited to share these incredibly easy, fun, and inexpensive DIY concrete bowls with y’all! This is by far and away, my favorite DIY of the year, if not of all time. I also feel that it is my responsibility to warn you that this DIY is highly addictive. Once you start making concrete bowls, you are going to find it very hard to stop. I’m obsessed!
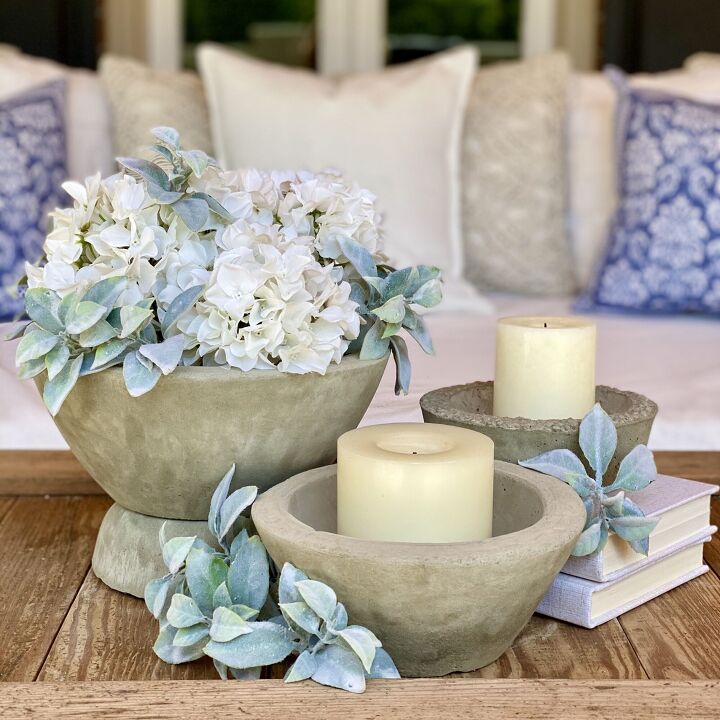
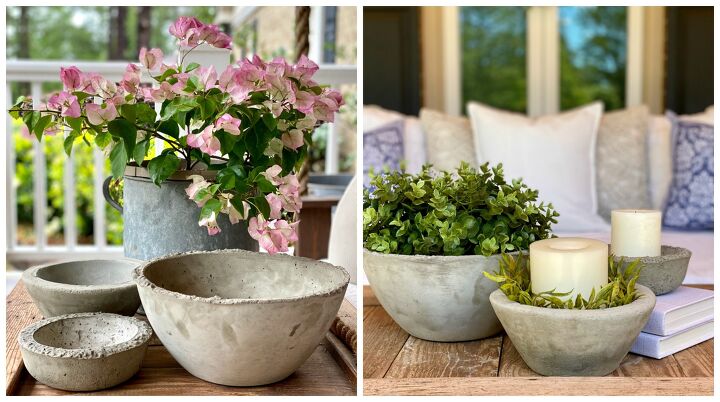
Concrete bowls are not only beautiful, but they are incredibly durable too, especially for use outdoors. They can be used as planters for green plants, vessels for flower arrangements, or as candle holders. The options and uses for these bowls are endless. Whatever you do though, don’t serve food or eat out of them.
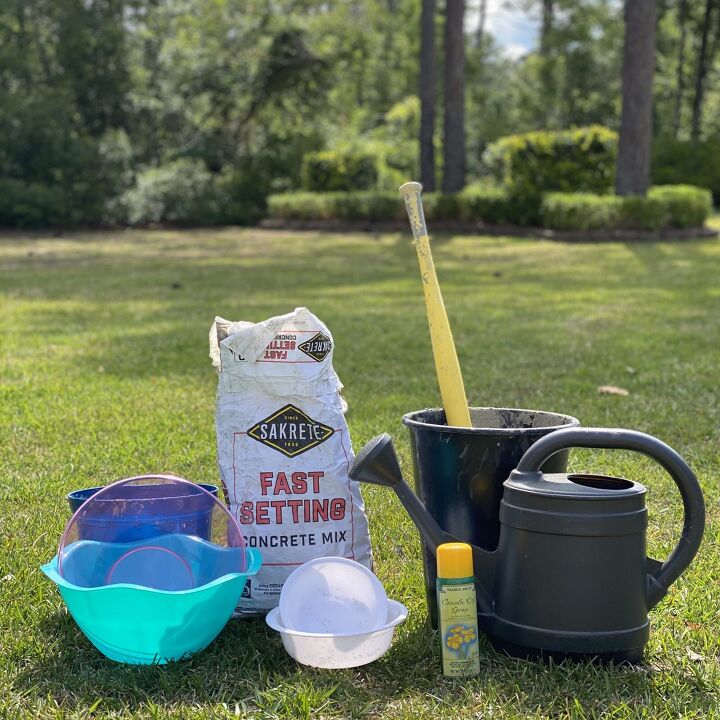
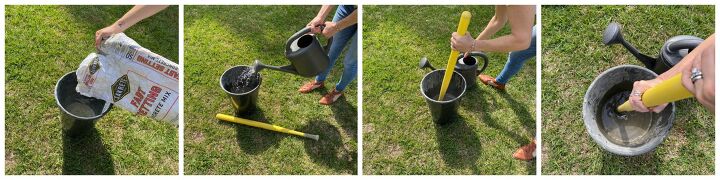
Be sure to mix the concrete in a bucket that you aren’t emotionally attached to because it’s unlikely your bucket will ever be the same again. I used a bucket that Trader Joe’s gave me to bring home bunches of flowers I had bought. Your concrete should be the consistency of pudding. It’s difficult to give an exact concrete mix/water ratio because it depends on the size of the bowl you’re making. I highly recommend using gloves for this project as wet cement has a very high alkaline (high ph) so gloves will help prevent the possibility of chemical burns.
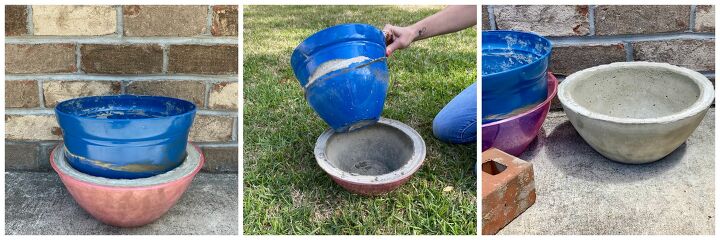
The bowl forms I used to create my bowls were all bowls I had around the house. One of my outer bowls was an old ($1) birthday party chip bowl, the inner bowl I used with the chip bowl was an old plant container from the nursery. The plant is now in the yard, so I repurposed the container for this project. If you don’t have spare bowls like I did, don’t despair. Cheap nesting bowls are super easy to find at stores like Dollar Tree.
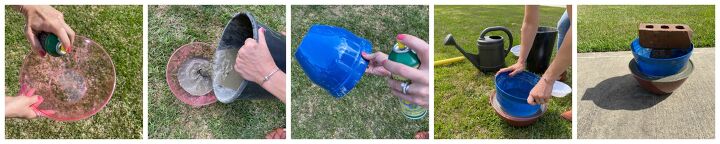
The secret sauce for DIY concrete bowls is cooking spray. Yup, I said it, cooking spray. If you take nothing else from this tutorial, remember the cooking spray!
Why you ask?! Thank you for asking… I forgot to use cooking spray on one of the bowls I made and believe me, you only make that mistake once. I spent about an hour carefully chipping away the bowl molds to save the concrete bowl. Thankfully the concrete bowl was spared, however, the bowl molds were demolished.
It’s imperative that you spray the molds with cooking spray. You will spray the inside of the base bowl and the outside of the bowl that will be placed in the concrete. This helps tremendously when it comes time to remove the concrete from the molds once the bowl is dry.
With one bag of concrete, I made nine bowls. The sizes varied. The fun part was how unique each bowl turned out. Not just in shape and size, but also in regard to texture. Some of the bowls had more gravel in the cement giving the bowl a very rough texture, while other bowls were surprisingly smooth. Even air bubbles in the concrete differed from bowl to bowl, some looked coral-like. I had so much fun playing around with different styles.
Here are a few of my favorite concrete bowl creations. I hope you enjoy this DIY as much as I did! I would love to see the bowls and planters you create for your home. Feel free to email me photos!

Post revised on July 7, 2021 to add the beautiful pedestal version of DIY concrete bowls. This look can be achieved easily by using a smaller bowl turned upside-down on the bottom and placing a larger bowl on top. There is no need to glue or adhere the two bowls together because of the inherent weight of the top bowl. This idea is my new favorite!


Frequently asked questions
Have a question about this project?