


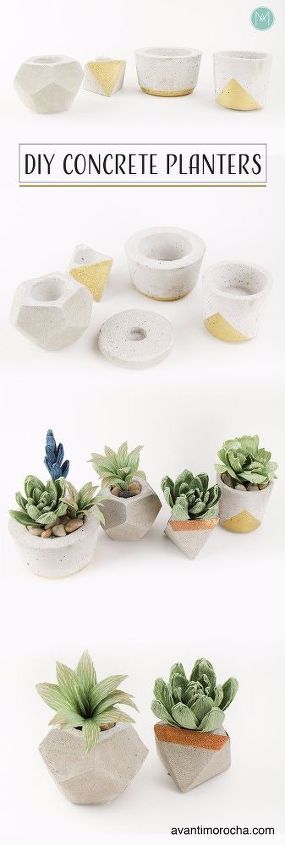
DIY Concrete Planters | Maceteros De Concreto

1 Material
$5
24 Hours
Easy
There is nothing that I like more about a project than it being inexpensive, for only $4.65 a bag, 60 lbs, this is a steal! The industrial trend has been going strong for some time and there’s no sign that it’s going away anytime soon. What makes the general industrial trend so great is that it’s incredibly versatile and has something for everyone even if you’re your own esthetic is not an exactly urban.
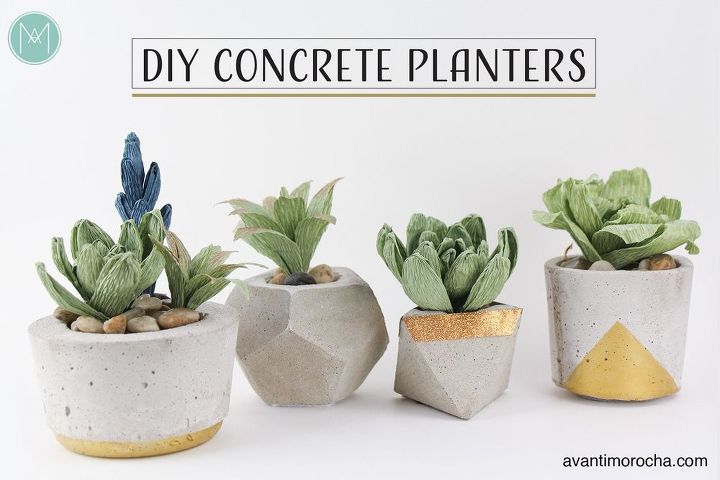
Check out the video below to learn how to make these concrete planters on your own! OR you could always just follow this step-by-step guide. No matter what you do I’m sure you’ll enjoy making these lovely little planters.
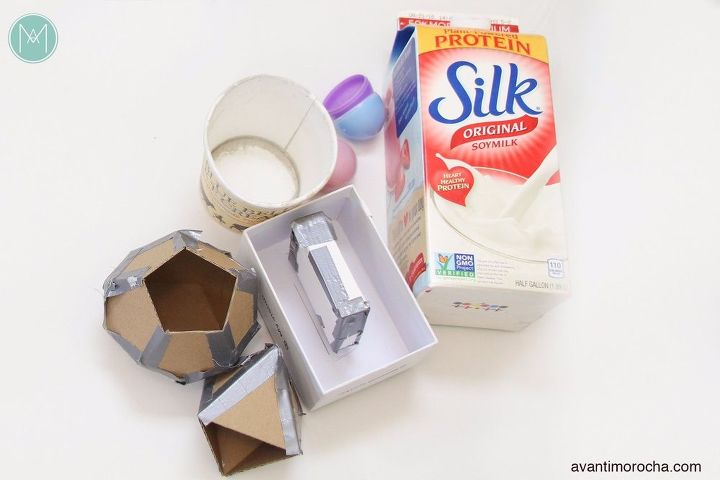
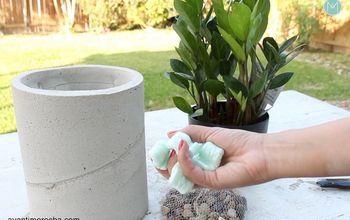
1. Molds: Use any recycled container. I recommend to using paper or plastic containers, as they’re easy to remove later on. If you want to make some geometric planter you can download the patterns from my blog https://avantimorocha.com/diy-concrete-planters/
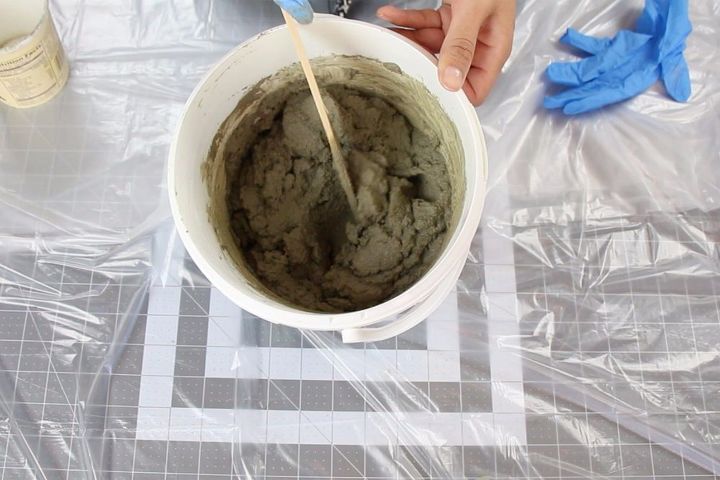
2. Mix the concrete, the radio I used is “4:1” while this worked for me, this may be different based on the brand of pre-mixed concrete you use. Make sure you read the label and follow the manufacturer's instructions, as you may need more or less water. The mix should have have a peanut butter like consistency.
a. Tip: I recommend using mortar mix not concrete mix; you’ll need to trust me mortar mix works better for this project.
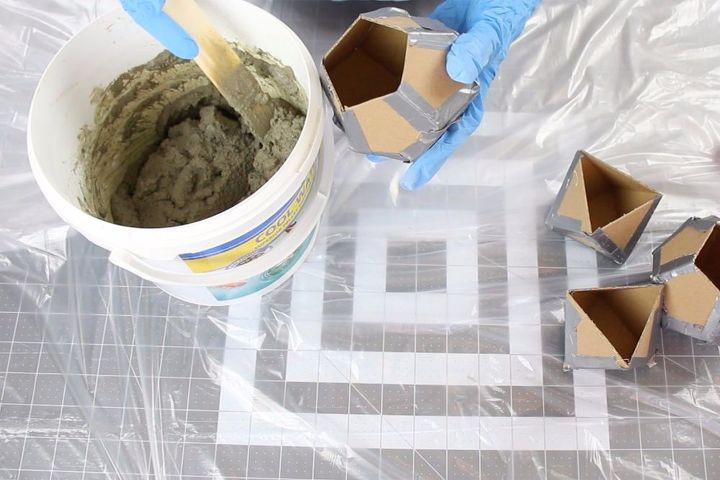
3. Fill the molds.
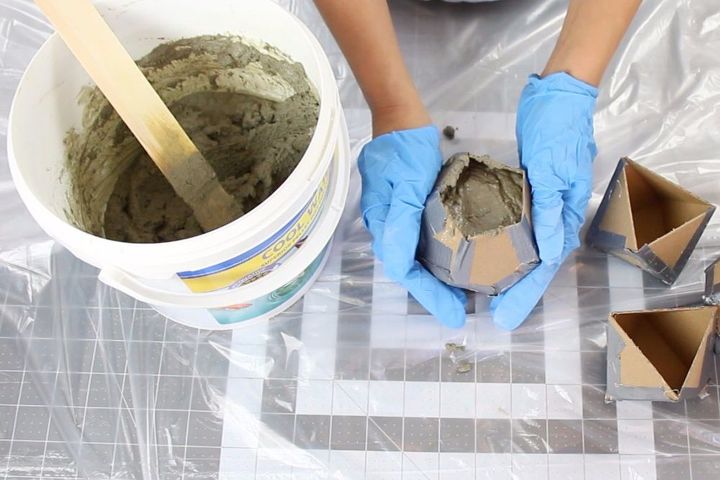
4. As you’re filling the molds, shake them a little while pouring in the mix the concrete. The shaking / vibrations will help the mix settle ensuring you have a perfect mold without any air pockets.
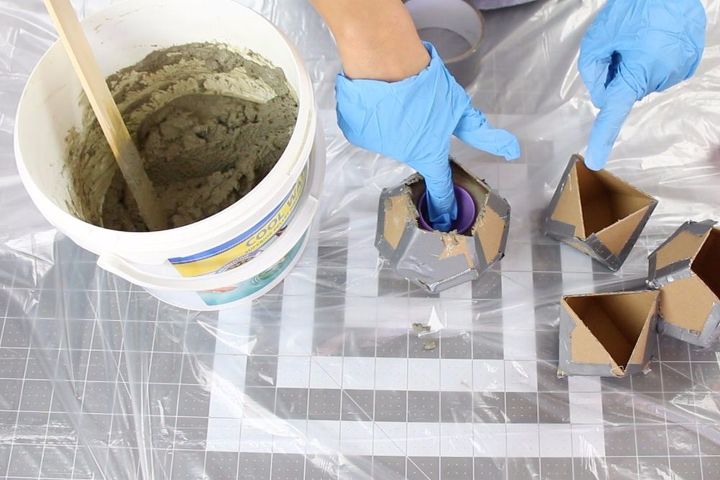
5. Place the inner mold into the outer one and secure it in place.
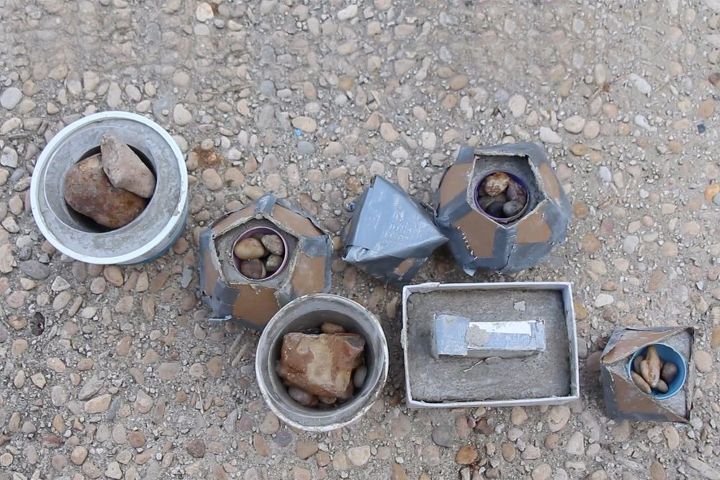
6. With the molds secure, stow them outside and allow them to cure for about 5 hours.
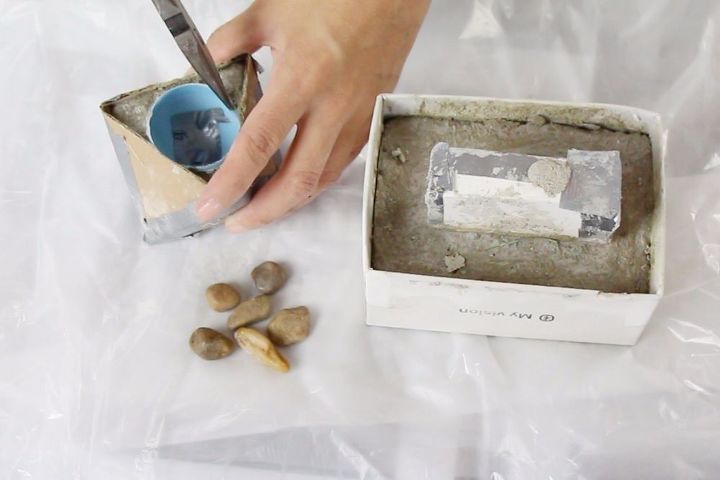
8. Remove the outer molds
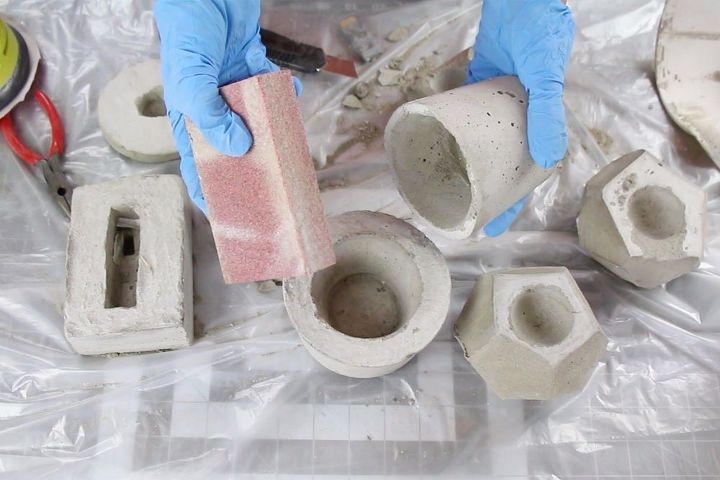
9. If needed, sand any rough area.
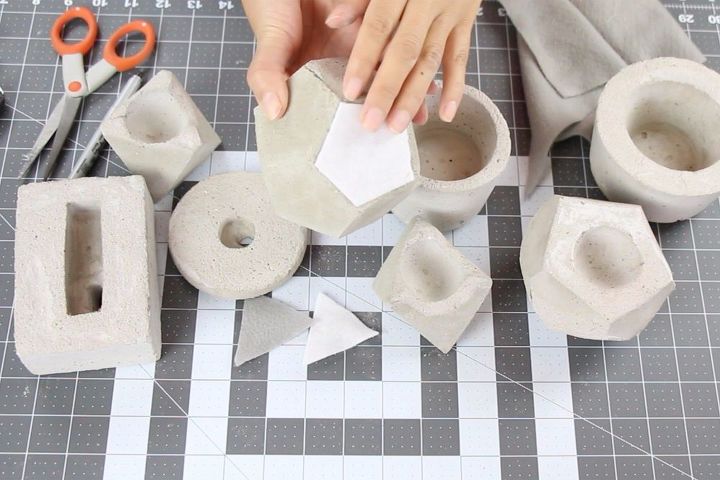
10. Glue a piece of felt onto the bottom of the planter. This will allow you to place the little planter anywhere you like without having to worry about it scratching the surface.
Thank you for stopping by and I hope you like this DIY. Don’t forget to visit my blog, subscribe to my YouTube channel https://www.youtube.com/LatinMorocha and follow me on my social media, see you soon chau chau!
Facebook - https://www.facebook.com/LatinMorocha
Instagram -https://www.instagram.com/avantimorocha_1/
Twitter - https://twitter.com/1Avantimorocha1
https://www.pinterest.com/AvantiMorocha/
{
"id": "3967914",
"alt": "",
"title": "",
"video_link": "https://www.youtube.com/embed/mz1s86U0wJE",
"youtube_video_id": "mz1s86U0wJE"
}
{
"width": 634,
"height": 357,
"showRelated": true
}
Comments
Join the conversation
2 of 27 comments
-
Such a great idea!! I love different planters but as Lynne said they are expensive in the store. Thank you so much for sharing!!

-
You bet I'll try this. I love my plants but the planters - not so much. Now I can make my own style planters. Thank you for sharing.


Frequently asked questions
Have a question about this project?
What do you put inside & fill with pebbles, because I couldnt open the video?
What do you use for the hole inserts?
Is there a way to make these "Water proof" so I can use them outdoors?
I unfortunately learned the hard way after I paid for 2 concrete planters that they didn't last very long outside. The bottoms crumbled. I live in CT & didn't bring them in for the Winter either.....
I guess that's what's meant by the saying
live & learn.
Thank you in advance for any advice you can share!
Your's are really great looking plus they seem doable for me! I'd just like some outdoor ones.
Thanks,
Judy