


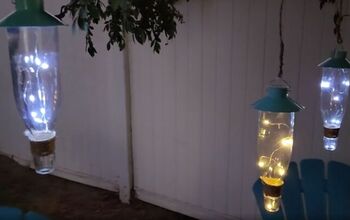
DIY Hanging Rope Light

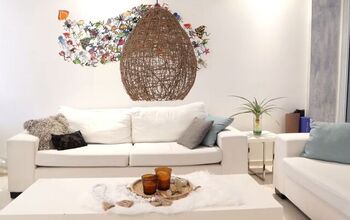
I had been looking to add some extra light to my sunroom since it gets pretty dark at night back there! I have one large light in the upper portion of my sunroom but the lower portion has nothing. I didn’t want to add any new electrical work due to cost concerns, so I pondered for a few weeks brainstorming ideas. Here is a shot of the room before!
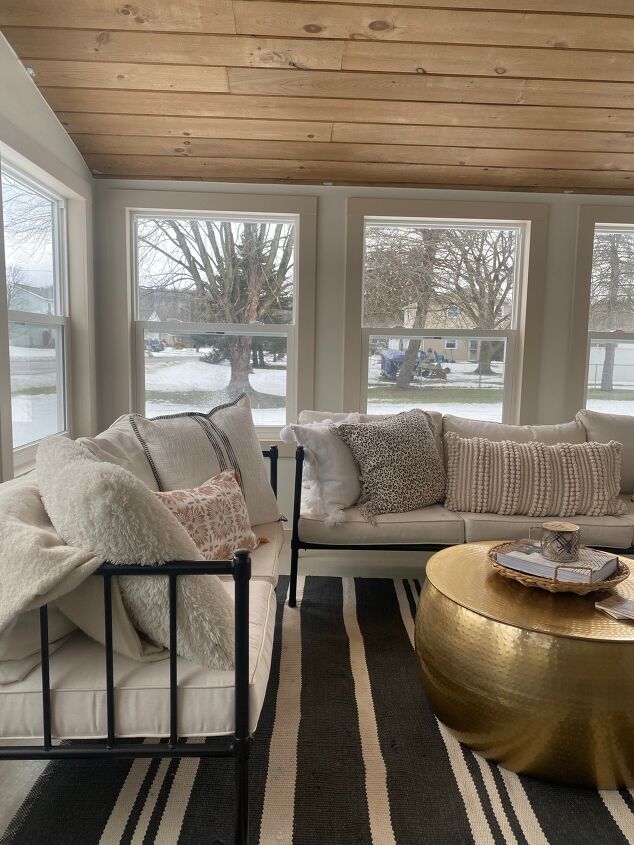
My plan is to add a side table right in that corner. I thought worst case I could just add a lamp there, but nothing was really hitting me that I really loved! I was scrolling Pinterest and kept coming across hanging lights and fell in love with all of them! I was truly so close to buying one online until I saw @angelarosehome DIY one! After seeing hers I fell in love!! I just switched the rope and bought a slightly different light bulb. Below are the supplies!
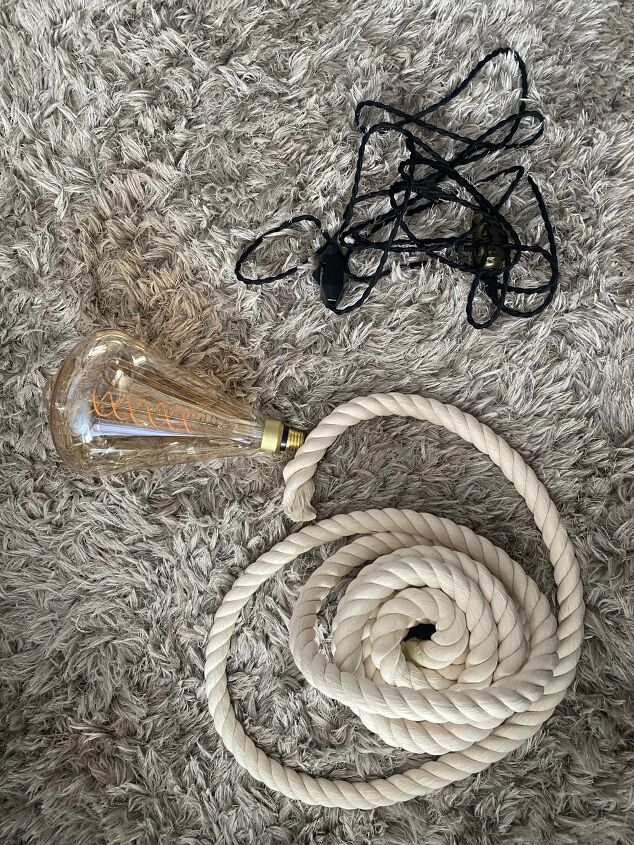
The rope is a 1in by 25ft natural rope from Amazon! The light cord is also from Amazon, and is 15ft long. The large light bulb I picked up from my local Home Depot, they had several different shapes and sizes that you could choose from! All supplies I purchased are linked here!
I was going for a thick natural rope with a big hanging light look. But, in order to do this, I needed to hide that black light cord somehow in the rope. I first started by untwisting one of the strands of rope from the bundle. This made me nervous at first because I thought I was ruining the rope, but don’t worry it doesn’t. Below is a picture to better show how I took one of the strands of the rope and removed it from the bunch…
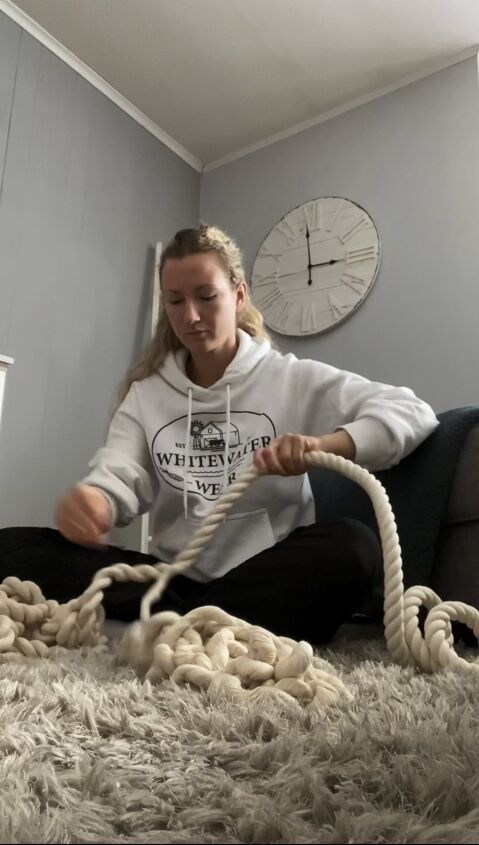
Excuse my serious face, I guess I was just really into this project! This took some time, patience, and a few hand cramps to untangle all 25ft but after I finished I lined up the light cord into the rope and hot glued it into place. Just like pictured below…
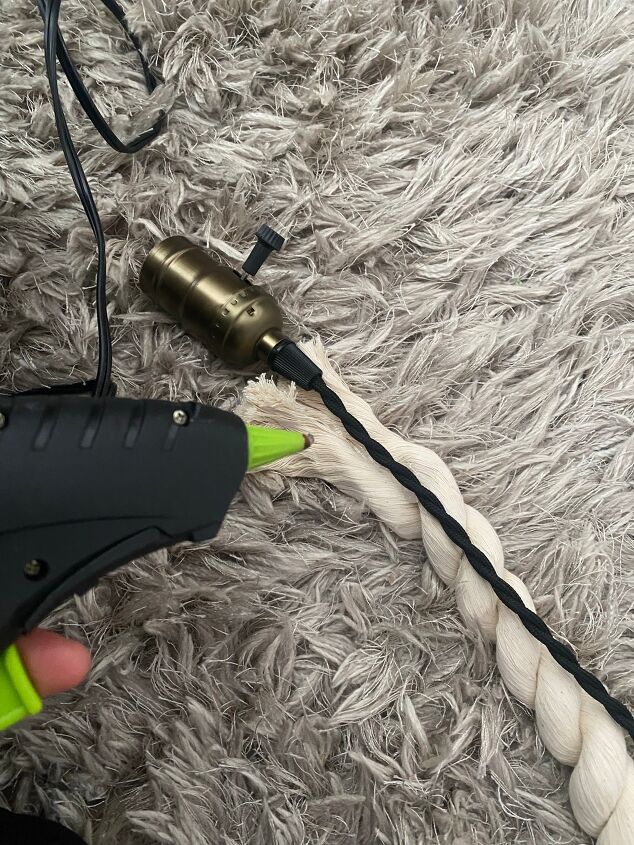
After that dried I was ready to re-assemble the cord back together. I simply took the strand of rope I had just untangled and tightly wrapped it back around in the same pattern and direction I had taken it apart in.
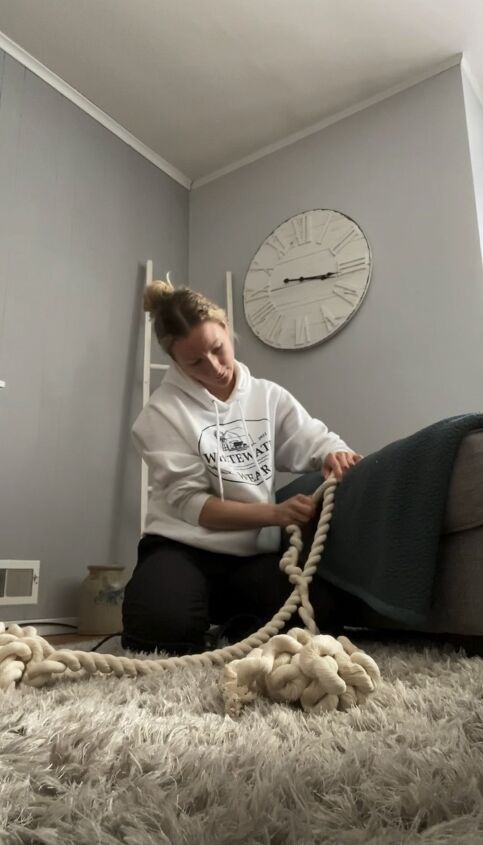
Once again, after some more time, patience, and hand cramps later… all done! The most important part to this step was really tightly winding that strand back into that rope!
I then got these ceiling hooks in a natural color to try to blend in as best as possible with the rope for hanging the light! I got these from Amazon and they are linked in the supplies link above!
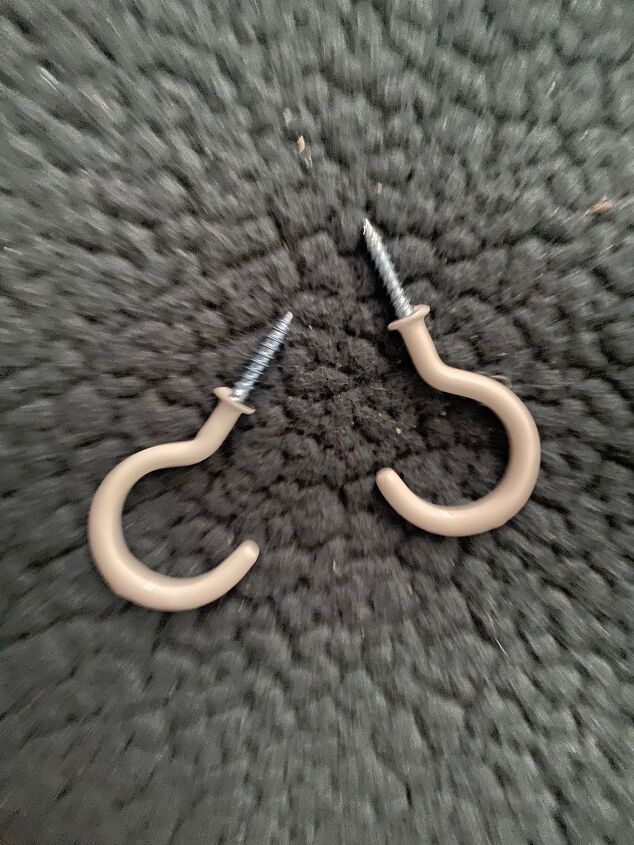
I simply screwed the 2 ceiling hook screws into my ceiling joists and where I wanted the light to hang and taa-daa!
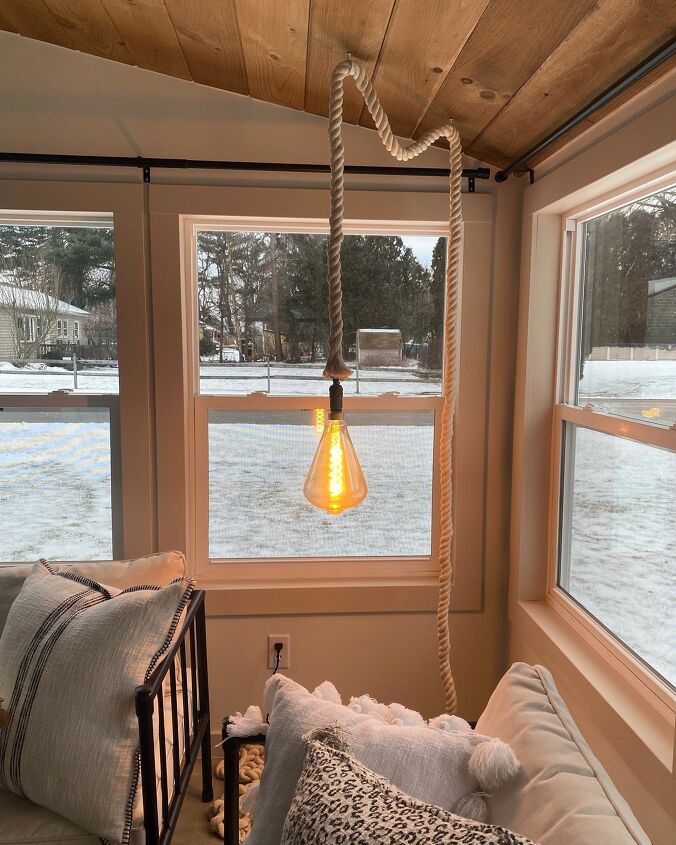
I really love how this hanging light turned out! Again full credit to @angelarosehome for the great idea and inspiration! For more DIYs just like this follow me on my Instagram @abbbclark_homeee !
Comments
Join the conversation
-
I love this light. Right where the rope ends there looks like a disc or something. I can’t zoom in to figure out what it is. What is it?
Edit - I just took a screenshot & zoomed in on that. I think what I’m seeing is the end of the rope is frayed out. Is that right?


Frequently asked questions
Have a question about this project?