


DIY Paper Airplane Bouquet
This simple diy paper airplane bouquet is a SUPER CUTE, SUPER EASY, and SUPER CHEAP alternative to a floral bouquet.
It’s SO EASY to make and it doesn’t die (haha)!!
Who says that a bouquet can only be flowers?
Not me! LOL
I made this simple diy paper airplane bouquet for a Father’s Day table setting this year, but wouldn’t it be TOO CUTE for a little girl or boy’s birthday party?
I mean, you can make the paper airplanes match your party’s theme colors.
And talk about a budget-friendly diy project!
All you need is paper, and a little wire (pipe cleaners would work well, too).
So, let’s get to making diy paper airplanes!!!
Supplies for a DIY Paper Airplane Bouquet
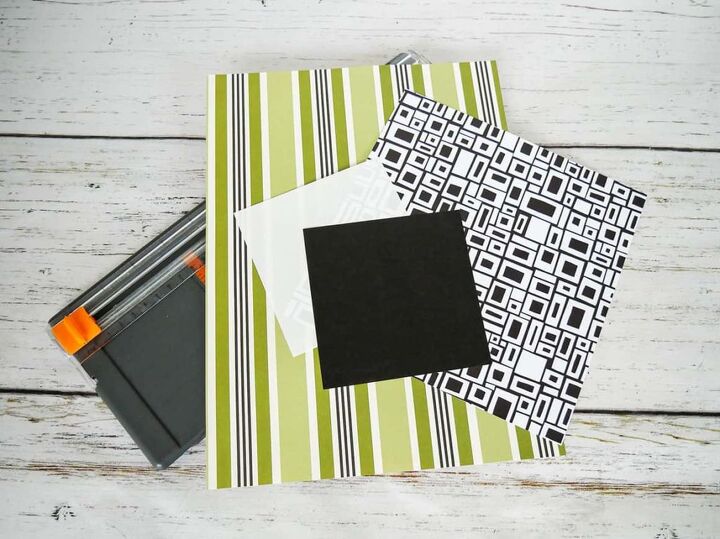
- Origami or other thin paper
- Floral stem wire
- Glue
How to Make a Paper Airplane DIY Bouquet
Step 1: Selecting the paper for your diy paper airplane bouquet
Maybe it seems straightforward about selecting paper to make diy paper airplanes, but there are a few things to consider first.
When choosing the paper to use for making your paper airplanes, think about the color on both sides of the paper.
Origami paper and patterned paper often have the color/pattern only on one side. The other side is white or solid.
Are you okay with that? That the underside of your diy paper airplane won’t be the same as the top?
Also, check out the thickness of the paper.
You will be making multiple folds to create a paper airplane. Thicker paper will be too hard to fold at a certain point. Plus, it won’t crease well. The paper might crack.
Once you have selected the paper for your diy paper airplanes, move on to step 2…
Step 2: Folding your paper airplanes
There are SO many different types of paper airplane folds. Some are simple and some are very intricate.
For this easy paper airplane diy bouquet, I decided to make the Harrier paper airplane. Actually, a slight variation of it, as I was using small pieces of paper and I wanted the wings of those to be pointed.
Here are the instructions to make my paper airplane:
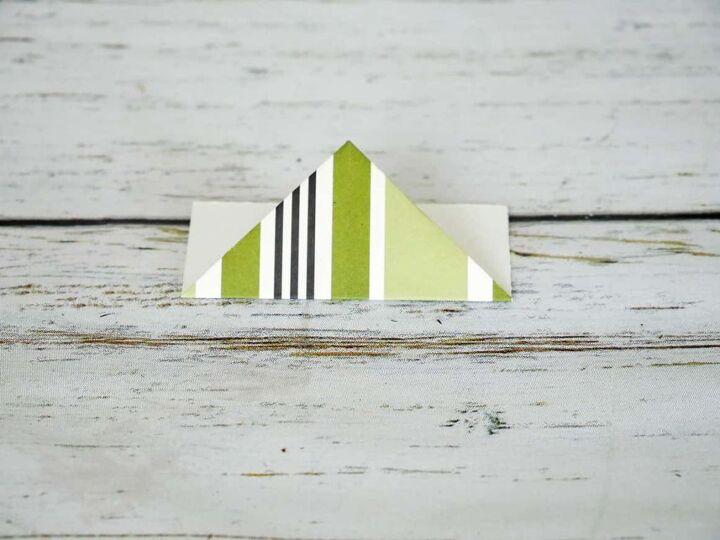
First: Use a square (or rectangular piece of paper). My small paper airplane diy used 3-inch squares. My larger diy paper airplanes used 4.5-inch by 6-inch rectangular pieces.
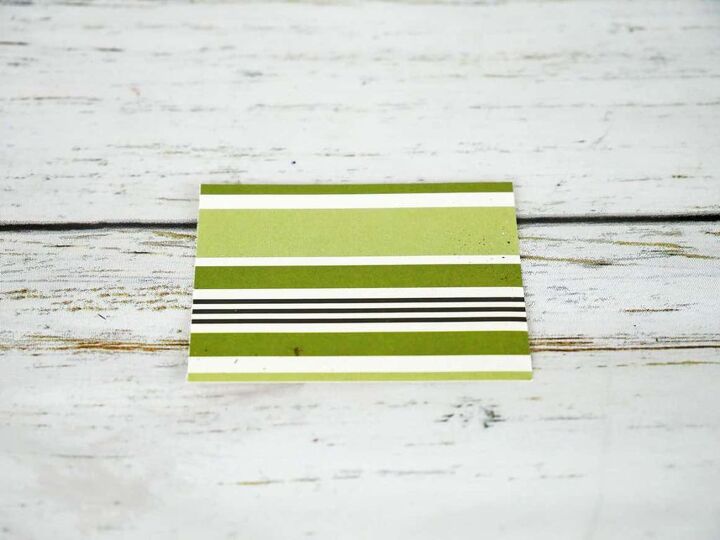
With the pattern facing down, fold the paper in half.
If you are using a rectangular piece of paper, you will fold the short side in half. (A 2″ x 4″ piece will become 1″ x 4″)
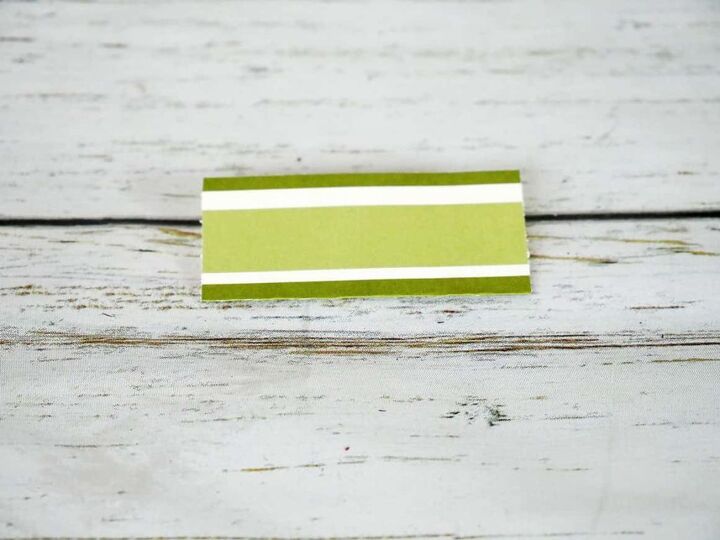
Open the paper for step 2.
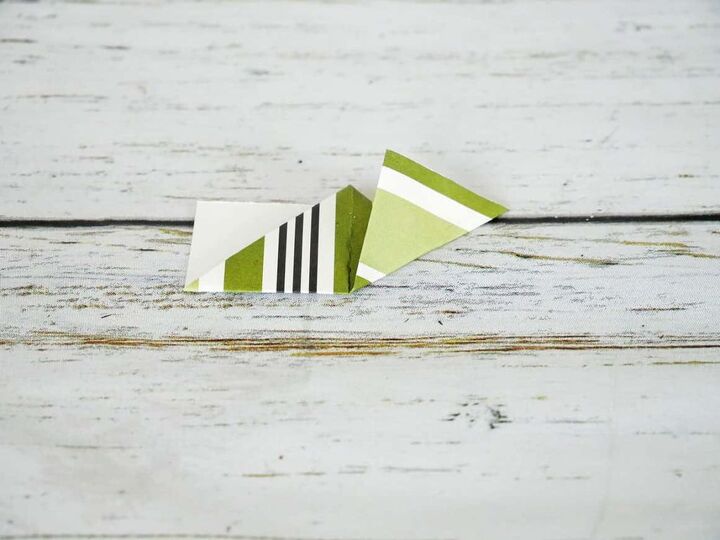
Second: Take a corner and fold it up to the fold you just made. This will create a triangle. Now do the same to the adjacent corner.
The results will create a point.
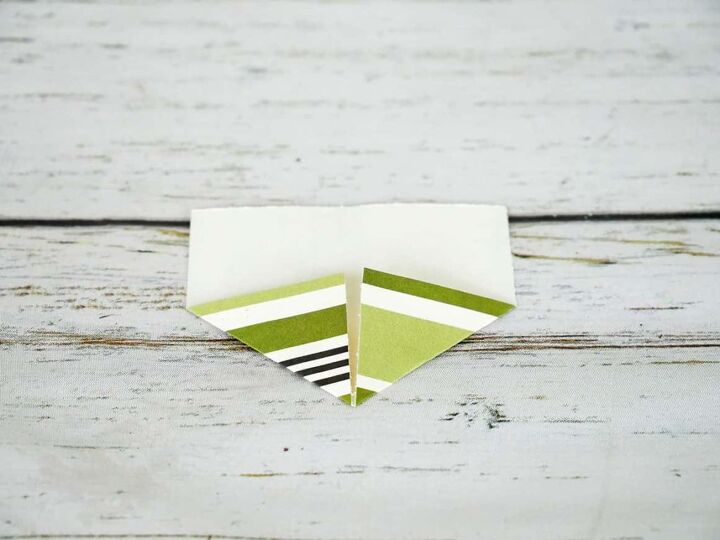
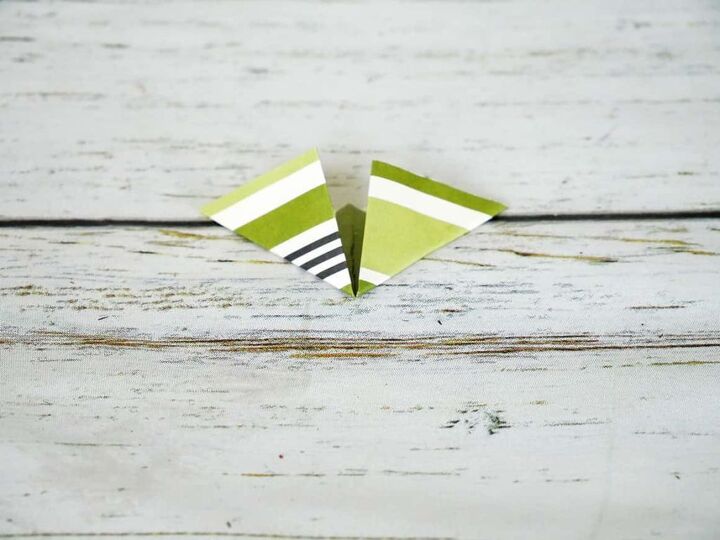
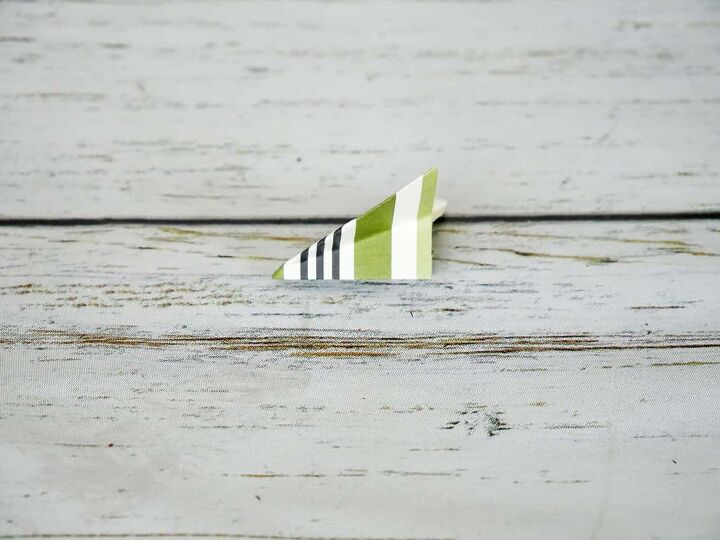
Third: Fold that point up, along the straight edges.
Run your finger along the fold to create a nice edge.
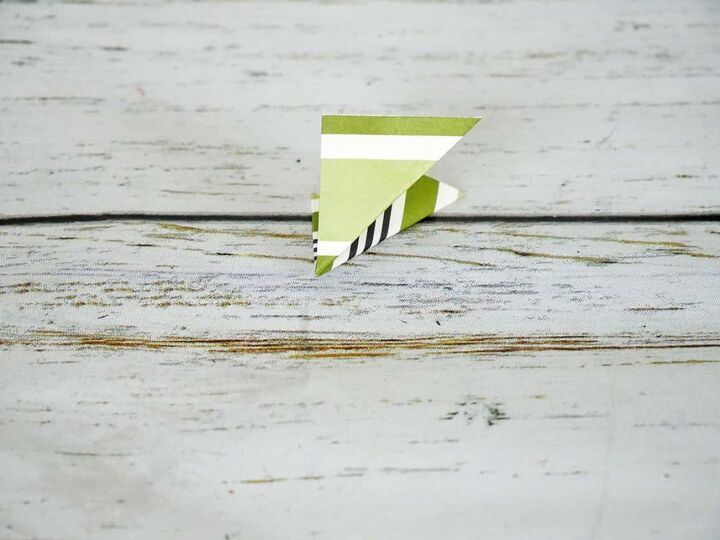
Fourth: Take the right bottom corner and fold it up to the middle fold.
Then do the same to the other corner.
Run your finger along the folds to create a nice edge.
Fifth: Flip the paper airplane over, on its side, so the left side and top are at a right angle.
Now fold the angled side to the left flat side and run your finger along the new fold.
Do the same to the other side.
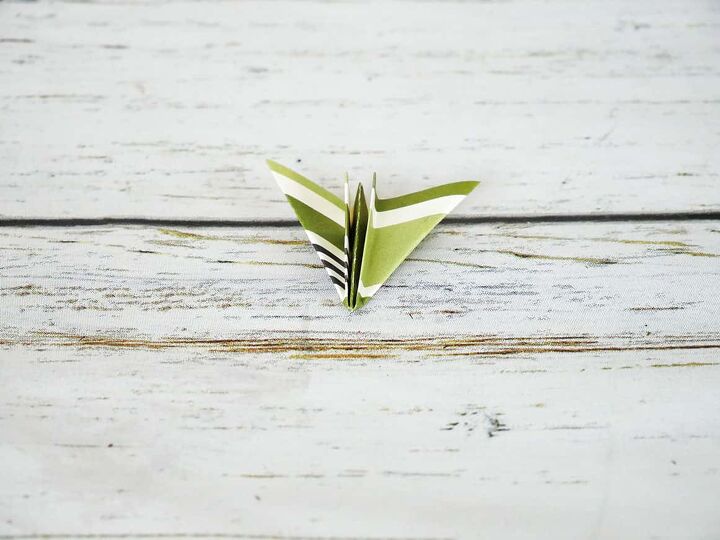
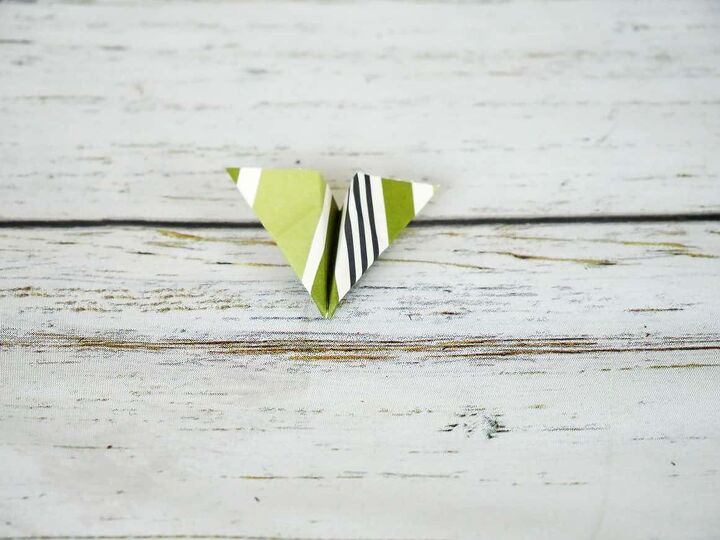
Voila! Your simple diy paper airplane is done.
Isn’t it cute!
Step 3: Attaching the support to your diy paper airplane
To create your paper airplane diy bouquet, use straight floral stem wire.
If you prefer for your wire to not be as noticeable, use a 22 or 26 gauge wire. If you prefer a thicker wire then 18 or 20 will work.
Note that the thinner gauge will only hold the smaller diy paper airplanes, as larger ones are too heavy. For those, you will need the thicker wire.
Cut your wire to the desired length.
Then fold a little of the wire at a right angle. Using hot glue, put a small dot on the inside fold of your paper airplane and glue the wire in place.
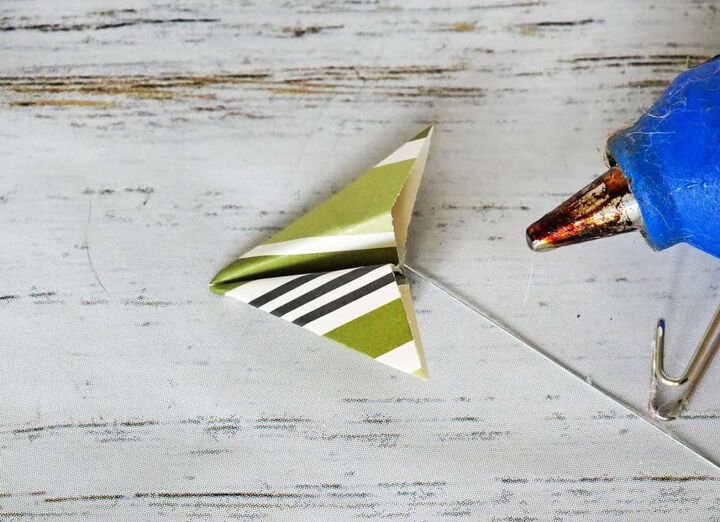
Continue attaching the floral stem wires to your completed paper airplanes.
Step 4: Creating your diy paper airplane bouquet
After you have stems on your paper airplanes, it’s time to add them to a vase or other container.
I created my diy paper airplane bouquet in cement vases I diy’d.
They’re super easy to make. (The link is below.)

*Tip: When you add your paper airplanes to your vase, create a gentle arc in your wires at differing heights by carefully bending them around a round object. This will create visual interest and movement.
Check out how cute they look as part of my Father’s Day table setting.
Check out other easy diy projects:
- Easy Cement Vase DIY
- Easiest DIY Napkin Rings for Everyday
- Pretty Lace Flower Pot DIY
- DIY Unique Menu Holder
- Simple DIY Wood Tray with Handles
- DIY Wine Cork Napkin Rings
- Simple Moss Bowl Centerpiece DIY
- Diamond Napkin Rings
- Twisted Paper Flower Napkin Rings
- Simple 2-Tier Tray


Frequently asked questions
Have a question about this project?