


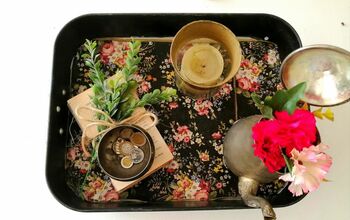
DIY Paper Crafts - How to Make a Mini Album / Camera Box

Learn how to make this lovely Camera Box - Step by step Tutorial
I know that it's still a little bit of time until Valentine's Day but I wanted to make sure that I won't need to rush and come with a last minute gift. I did this album for my husband, I love him and wanted to give him something special, something made by hand, something unique :)
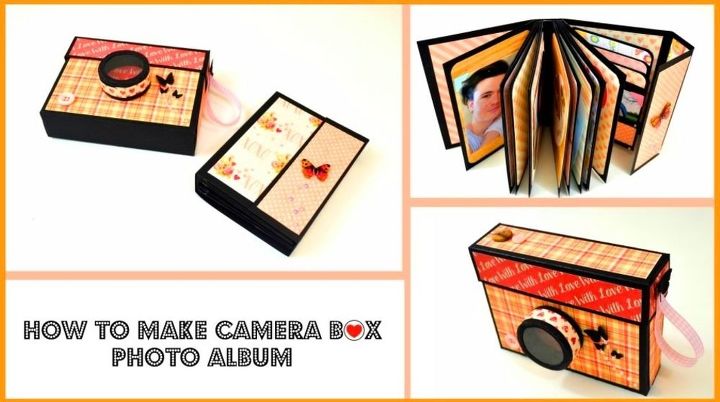
I'm sure you gonna love this Creative Gift Idea.
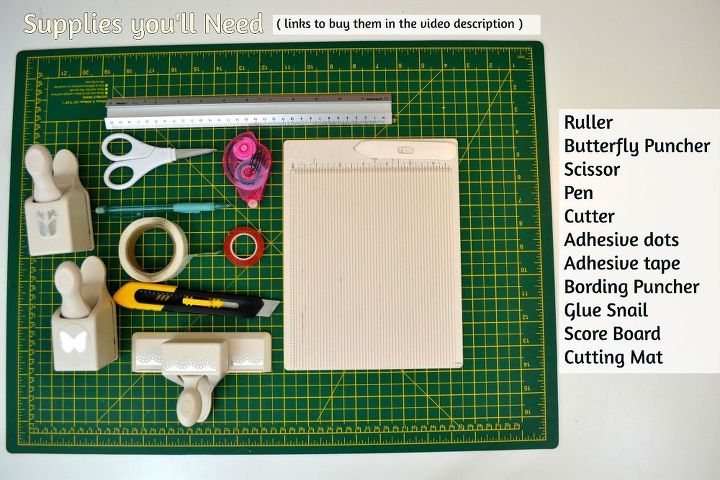
Step 1: Gather Your Tools & Supplies!
You need:
- Double sided adhesive tape
- Glue dots
- Glue snail
- Score board
- Cutting mat
- Cutter
- Exact-o-knife
- Sccisors
- Butterfly puncher
- Ruler
- Pencil
You can buy them from the materials section of this project :)
Step 2: Watch the video!
For some people it's easier to watch a video than following step by step photos.
So if you are one of them I hope that this video will help you !
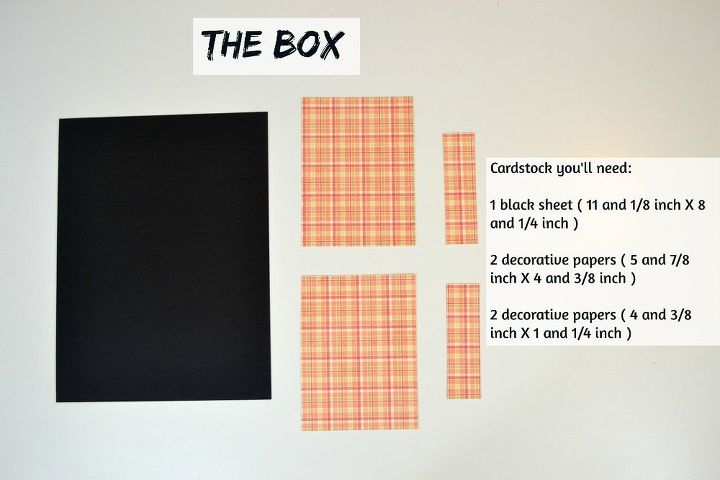
Step 3: Making the Box ( Dimensions )
To make the box you will need :
- Black cardstock
- Decorative paper
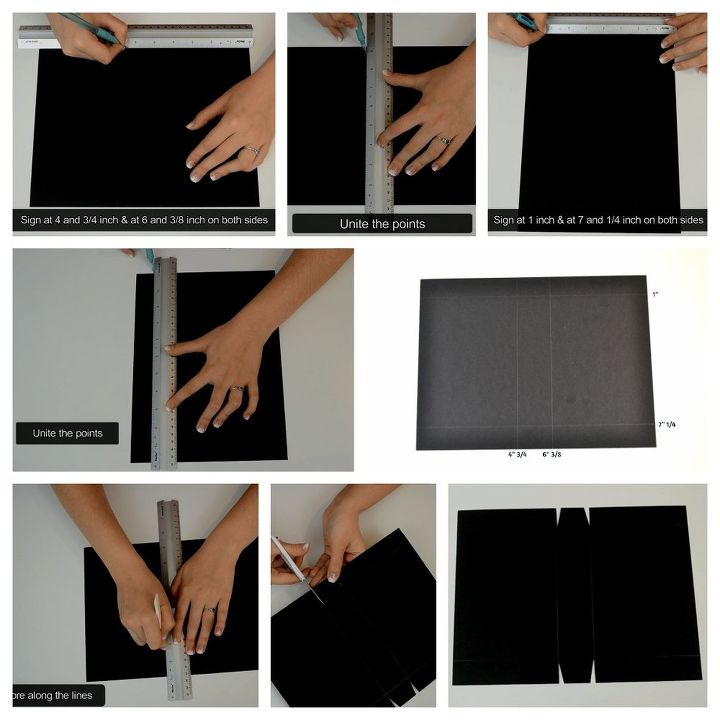
Step 4: Making the Box ( Signing and Cutting the Black Cardstock )
- Sign the card on the long side.
- Unite the points.
- Sign on the short side.
- Unite the points.
- Score along the lines.
- Cut little V shapes on the small rectangles.
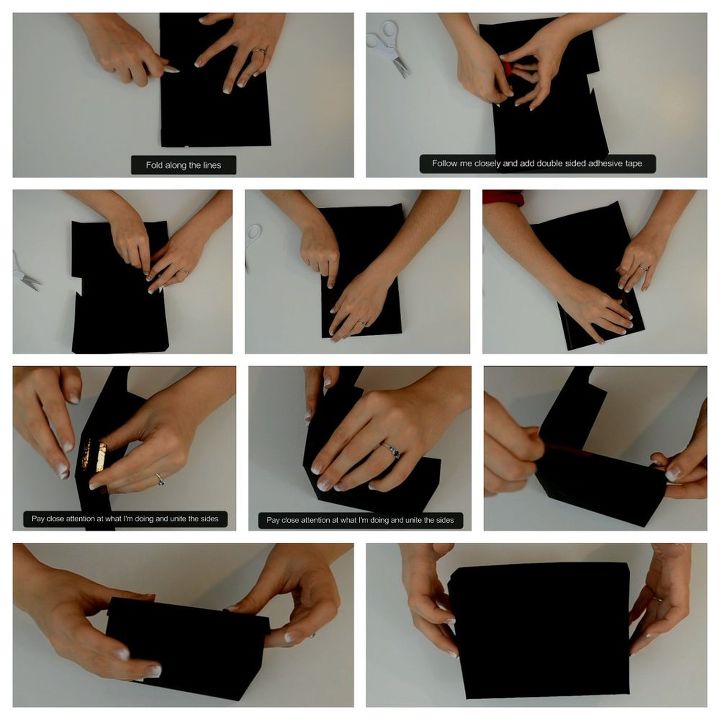
Step 5: Making the Box ( Assembling It )
- With a bone folder, fold along the lines.
- Add adhesive tape on the small rectangles.
- Also add adhesive tape on two long rectangle.
- Stick the long side ( the one with the adhesive tape on ) on the small rectangle.
- Now stick the other rectangle on top of the previous one.
- Repeat the process for the other side and you should obtain the box.
Lastly, stick the decorative paper on it ( Step 6 )
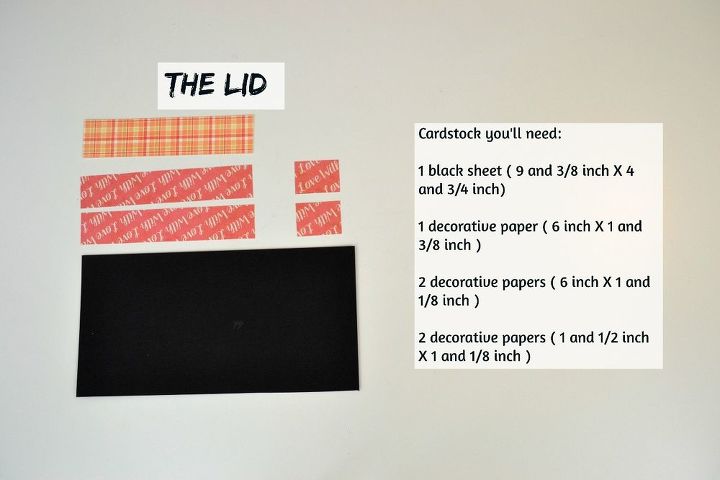
Step 7: Making the Lid ( Dimensions )
To make the lid you will need:
- Black cardstock
- Designed paper
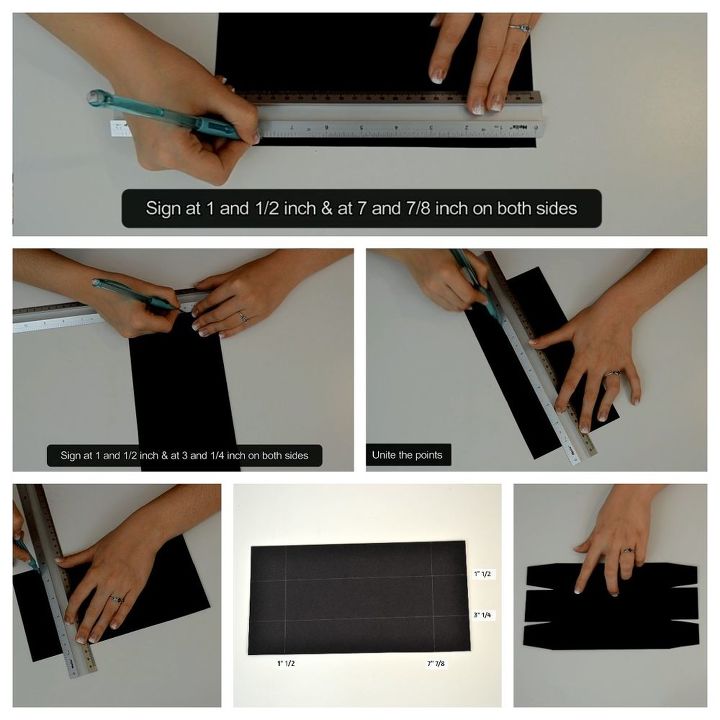
Step 8: Making the Lid ( Signing and Cutting the Black Cardstock )
- Sign the black cardstock along the sides.
- Unite the points.
- Cut little V shapes same as I did.
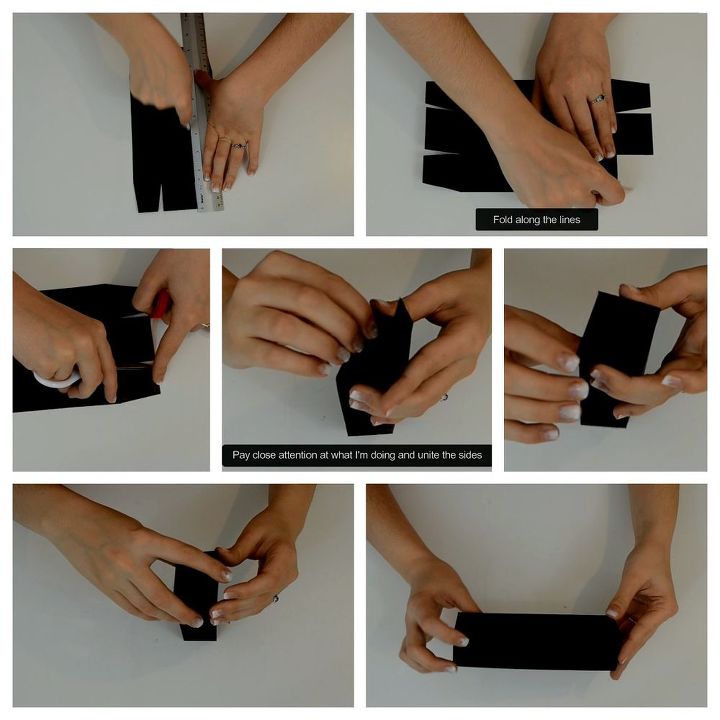
Step 9: Making the Lid ( Assembling It )
- Score along the lines.
- Fold along the scored lines.
- Add adhesive tape on all the corners.
- Stick the sides together.
- Stick the middle rectangle on top of them.
- Repeat the process for the other side, then you should obtain the lid.
Lastly, stick the decorative paper on it ( Step 10 )
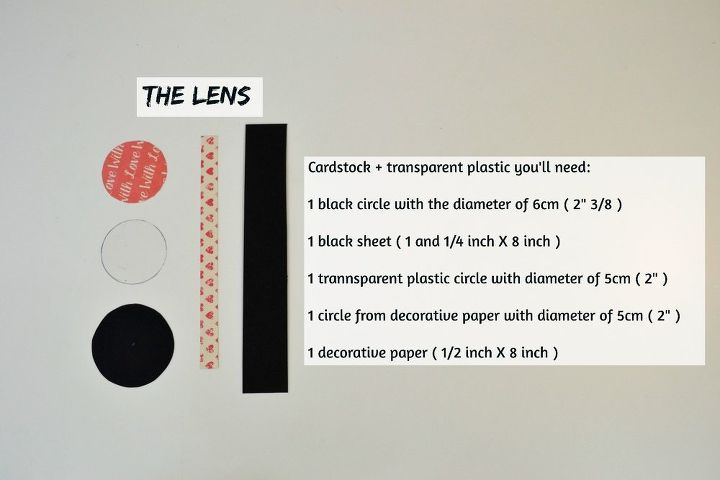
Step 11: Making the Lens ( Dimensions )
To make the lens you will need:
- Decorative paper
- Black cardstock
- Transparent sheet.
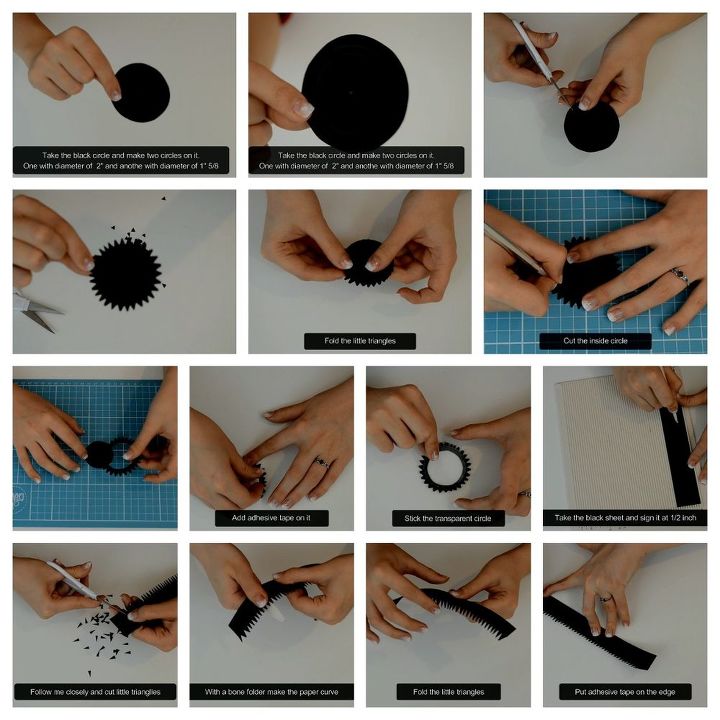
Step 12: Making the Lens ( Preparing the Parts )
- Take the black cardstock circle and draw other two concentric circle.
- Cut small triangle up to the middle circle.
- Fold the little triangle.
- With a cutter or an exact-o-knife, cut the inside circle.
- Add adhesive tape on the inside of the circle.
- Add the transparent circle.
- Take the black cardstock strip and score it at 1/2".
- Cut small triangles on the small side of stripe.
- with a bone folder make it curve.
- Add adhesive tape on the edge of it.
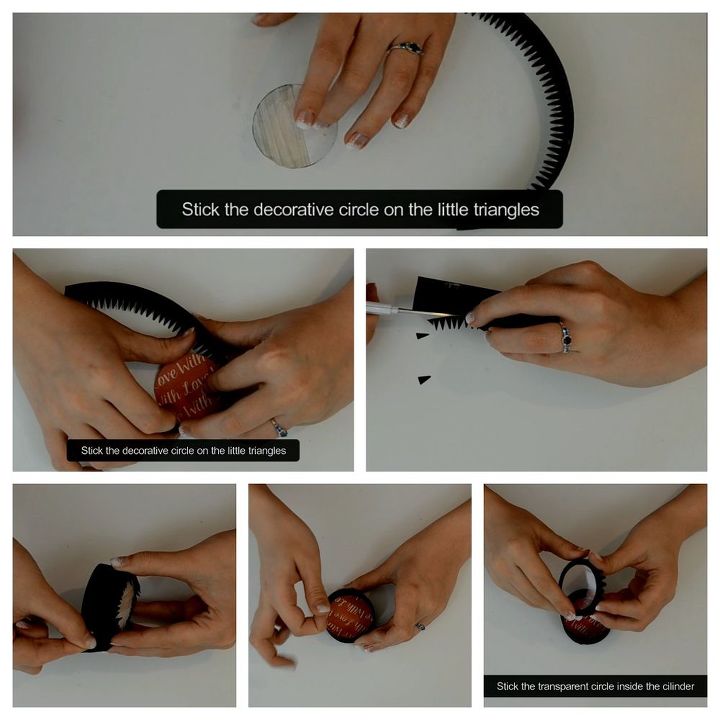
Step 13: Making the Lens ( Assembling It )
- Stick the decorative circle on top of the triangles.
- Cut off the extra triangles.
- Add some adhesive tape at the end of the strip to close the cylinder.
- Now take off the protective film from adhesive tape and stick the triangles from the circle inside the cylinder.
Add adhesive tape on the decorative paper and stick on the lens (Step 14)
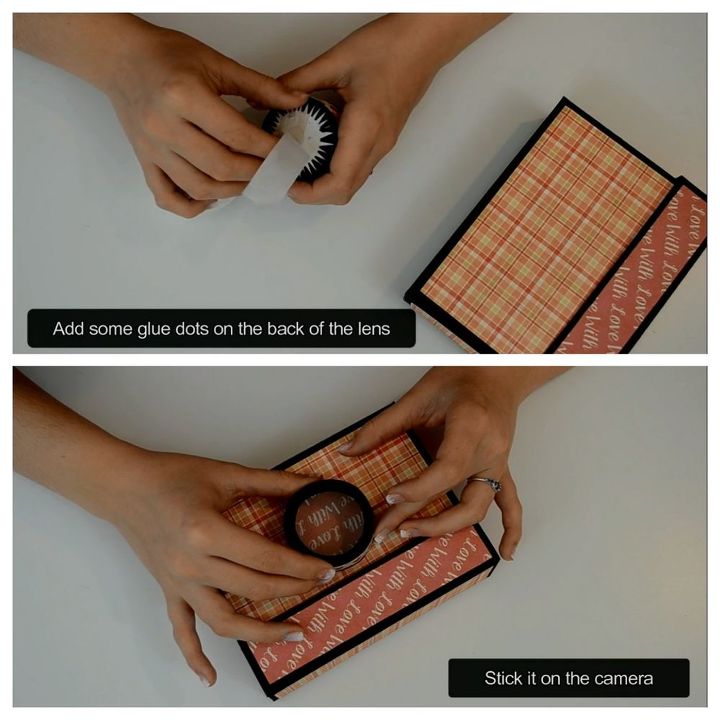
Step 15: Attaching the Lens to the Box
Using some glue dots, attache the lens to the box.
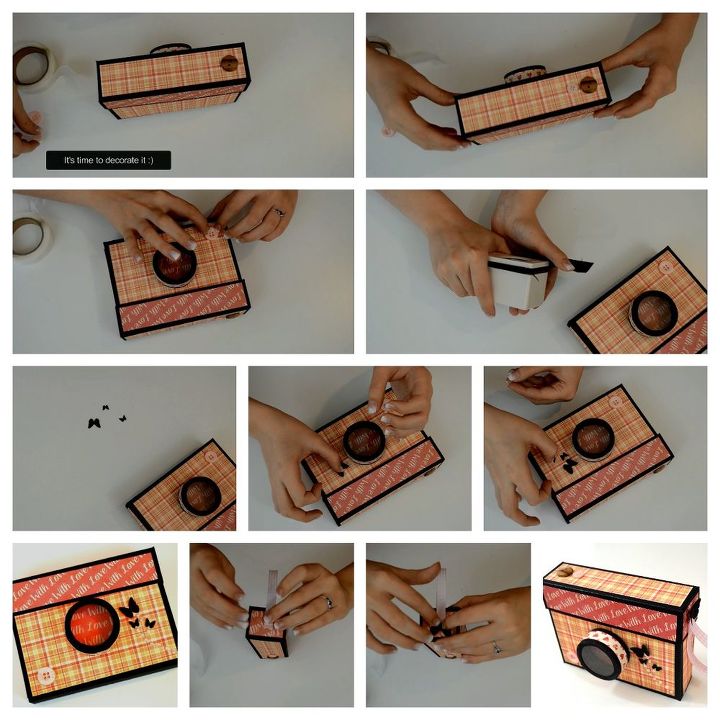
Step 16: Decorating the Camera Box.
- Using glue dots, add some buttons on the top of the lid as well as on the box.
- With a butterfly puncher, make some butterflies on the side of the lens
- Also add some half pears nearby butterflies.
- On the side of the lid stick a piece of ribbon.
- On top of it, add a big butterfly.
Step 17: Making the Photo Album for the Camera Box.
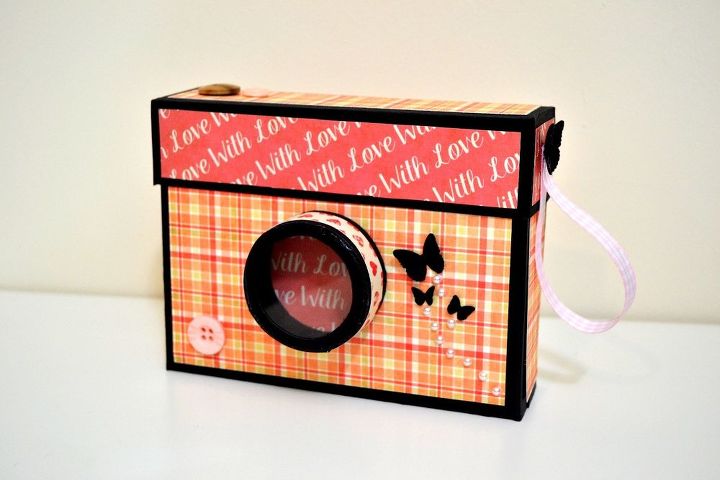
Step 18: That's It!
Now you know how to do a Camera Box - Photo Album :)
If you'll do it, the recipient of your Camera Box will love your creation! In this step by step tutorial you will learn how to make this Photo Album that you can give it like a gift for Valentine's Day, Mothers Day, Birthdays etc.
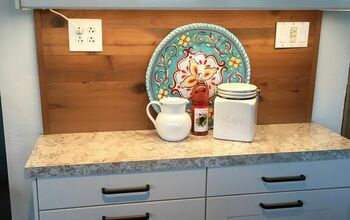
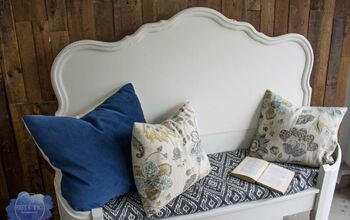
More Mother's Day Ideas
With this handmade Album you can prove to your loved ones that you care about them & you are willing to create special gifts and not just buy them. Remember, without love we are lost ! :)
Comments
Join the conversation
-
An interesting logic is to do this and I don't know what to see what will happen... Transfer data between mobile devices using Wi-Fi Direct technology and the Samsung Smart Switch app or another app if you have different brands and different devices. I have a camera from the list of mirrorless cameras for entry-level world and there the instructions say how and what to do. But it seems to me that you just need to install special extensions on your smart TV or PC to be able to do what you have in mind.


Frequently asked questions
Have a question about this project?