DIY Tobacco Basket

Lucy Ancheta-Akins
by Lucy Ancheta-Akins
$35
1.5 Hours
Medium
Tobacco baskets make beautiful decor statements but are pricey and hard to find. But what if I told you the materials to make one can be found at your local hardware store.
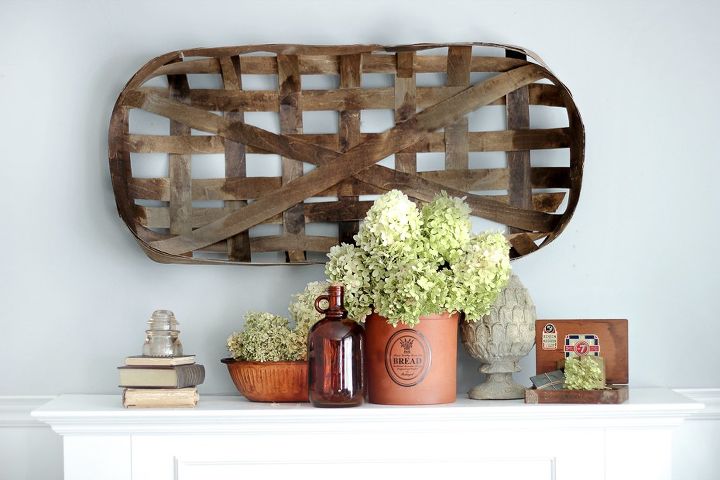
DIY Tobacco Basket
I love the idea of using your creativity to create something that is either hard to acquire or costs a little too much. I've had this idea in my mind for a while now, but it wasn't until recently that I decided to give it a try.


The materials I used are of course not the wood splints found with a real tobacco basket, but I do love the way it turned out and I hope you do too.
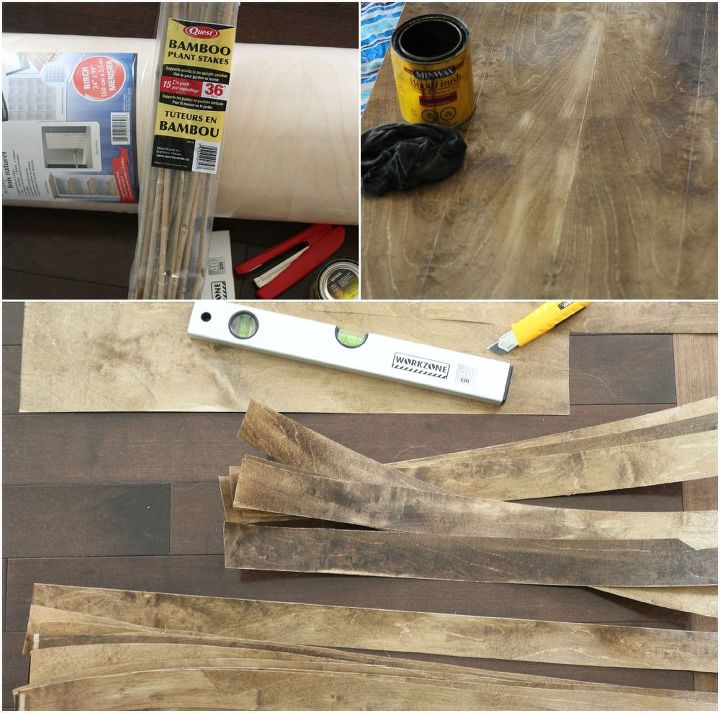
Materials required to make a tobacco basket
In order to make your very own tobacco basket you will need the following materials:Wood Veneer (I purchased mine at Home Depot or you can find similar online HERE)


Stapler


Utility Knife


Wood Stain of choice (I used special walnut and dark walnut)


Scissors


Ruler


Heavy item to hold in place (I used books and jars)
1. Unroll wood veneer and stain both sides as desired. I used a mixture of special walnut and dark walnut by Minwax, but a steel wool and vinegar solution would also work really well to give it that grayish, aged looked.


2. Allow stain to penetrate for about 5-10 minutes. As the stain makes the veneer more pliable, you will want to work before the stain completely dries (I advise wearing rubber gloves).


3. Measure and mark the thickness of each of the strips of your basket (mine measured 2 wide).


4. Using a ruler and utility knife, cut the desired number of strips along the grain of the wood. My basket had 5 long strips measuring 41 in length and 7 short strips measuring 21


NOTE: Cut several extra long strips for the edge of the basket (I used 5).
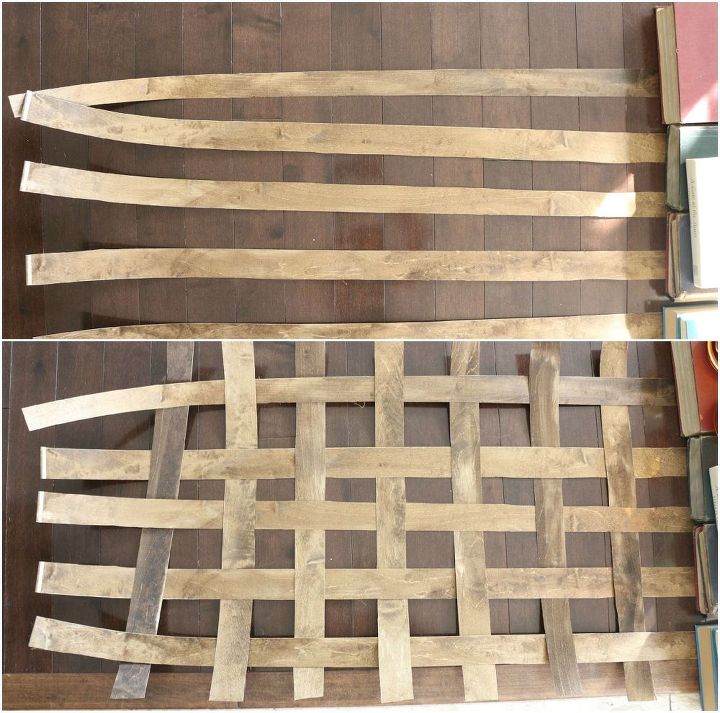
5. Lay your long splints on the ground or flat surface and place a heavy item at the ends (I used books and cans).


6. Weave short splints in an over/under manner through the long splints.


7. Remove weight and rearrange splints if needed, making sure that all the holes are even (I'm not very good at making things even as you can see).


8. Staple ends in place.9. Place one of the extra long splints outside weave and start to staple the ends of the splints onto it.


10. Continue to wrap and staple around weave.


Frequently asked questions
Have a question about this project?
3 of 4 questions
  • Terri Terri on Feb 28, 2016
    Where can you order wood splints online?
  • Kristin Kristin on Feb 28, 2016
    beautiful job! how long were the splits you cut for the edge?
  • Liz Weiss Liz Weiss on Mar 01, 2016
    Was your veneer the iron on type? That is all I can find.
Comments
Join the conversation
2 of 20 comments
  • Mcgypsy9 Mcgypsy9 on Sep 13, 2020

    Nicely done! I’m actually using 2” veneer on a roll for mine. I haven’t put it together yet but when I do it will be posted.

  • Shelly Moore Shelly Moore on Aug 04, 2022

    This how to and the results are Amazing!!!! I've been looking for some at reasonable prices, but they don't look Nearly as nice as yours!!! I plan now to even make some for gifts!!!

Next