


Faux Neon Cement Lamp
6 Materials
$25
4 Hours
Medium
I (steph) went to see the movie Wonder Woman a few weeks ago with my family. I didn't know much about the superhero going in, so the first time I saw the glowing rope I didn't know what it was, but it looked cool! Wonder Woman has this glowing yellow/gold rope that is called a magic lasso or lasso of truth. The first time I saw it in the movie, I thought it looked like el wire. Electroluminescent wire (el wire) produces 360 degrees of light and is often used in costumes. I have been wanting to use it in a DIY project. During the movie I came up with an idea of making a lamp out of it- inspired by the Wonder Woman film!
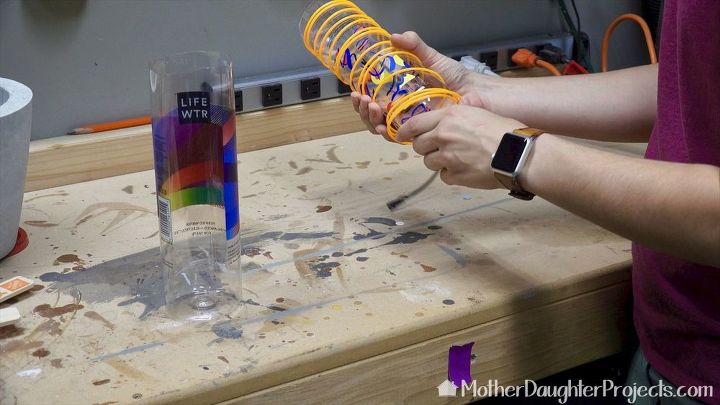
To make the base of the lamp we used a one liter lifewater bottle and an optional 24 ounce bottle. Start by wrapping the El wire around the smaller bottle.
{
"id": "4122154",
"alt": "",
"title": "",
"video_link": "https://www.youtube.com/embed/txmyidl9yWU",
"youtube_video_id": "txmyidl9yWU"
}
{
"width": 634,
"height": 357,
"showRelated": true
}
Watch the video to see how we made the lamp!
To see all our new projects in your inbox sign-up for our newsletter here.
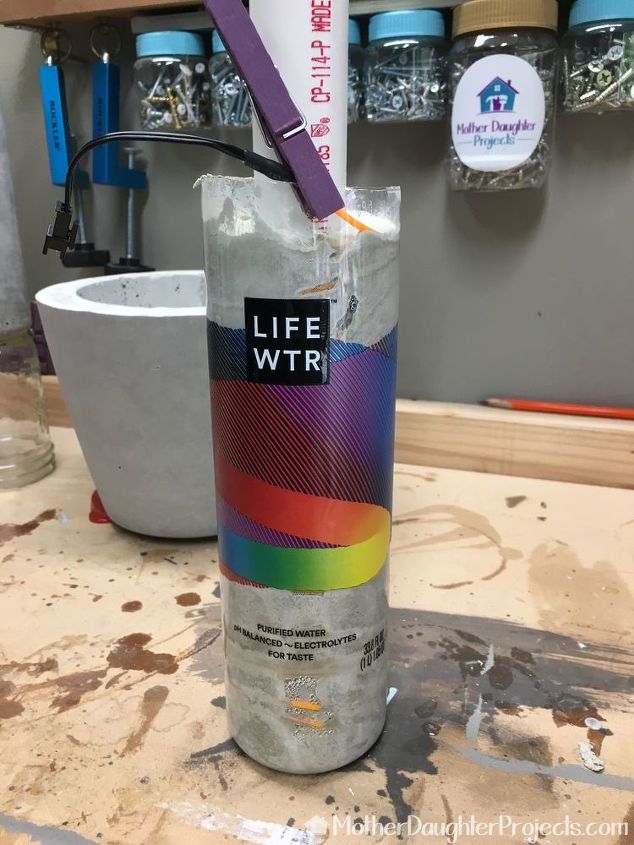
Carefully place the bottle into the larger one. Then remove the smaller bottle. We placed two paint sticks on the sides to try to keep the El wire as close to the sides as possible. We secured them in place with clothes pins then we mixed up the concrete. We are using Rapid Set cement that sets in one hour. We though this would be a good idea so the el wire wouldn’t have to sit in the mold for 24 hours like traditional concrete.
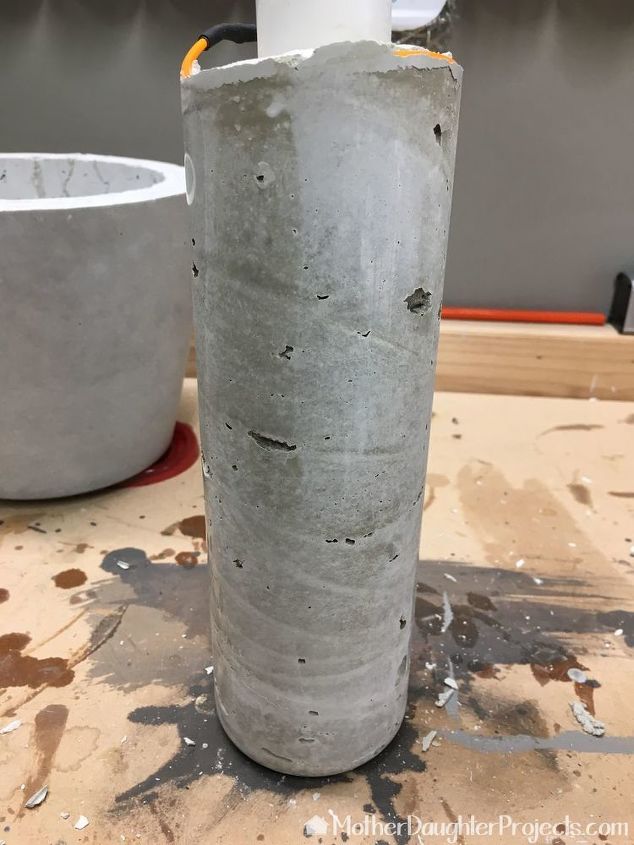
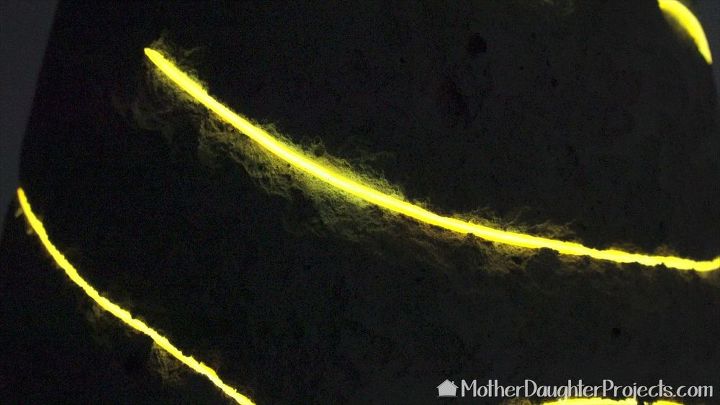
Let the cement sit for one hour before removing the mold. This is how it looked with the mold removed, we could see where the el wire was but needed to work on exposing it.
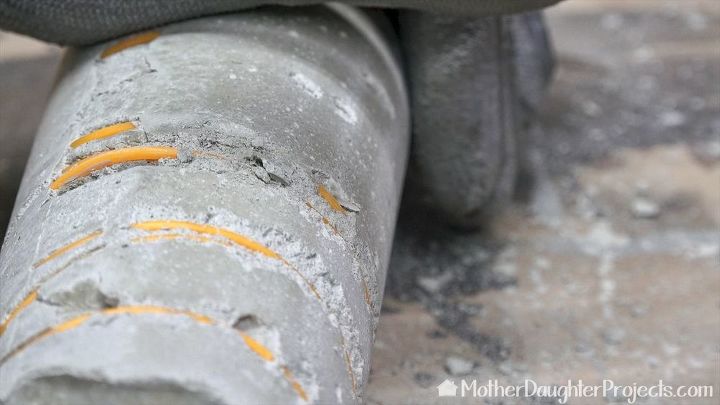
With a hammer, carefully expose the el wire. As we did this, we checked periodically that the wire still worked.
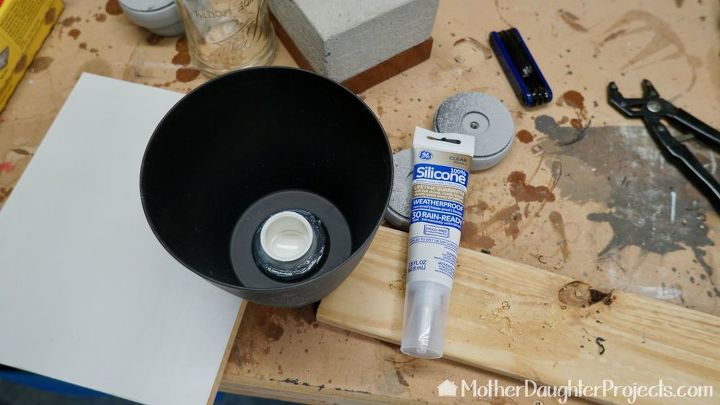
To make the lampshade, cut a 1 3/4” inch hole in a 6” pot and add a 1” pvc cap halfway into the hole. Use silicone to secure the cap in place.
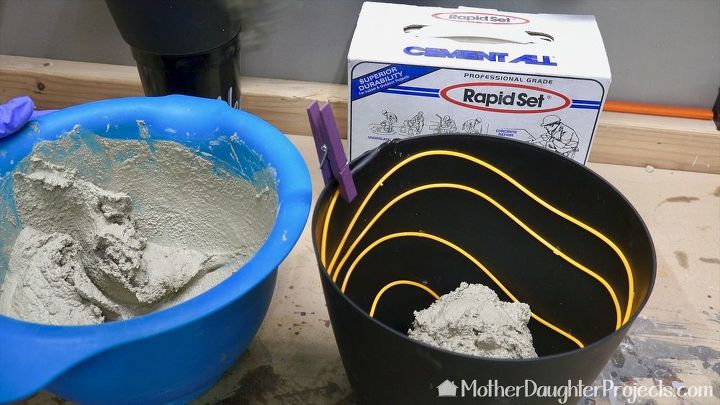
We used glue dots to secure the el wire to the 8”pot. Then we mixed up more rapid set cement and added it into the bigger pot.

Add the smaller pot inside and finish filling the mold. Continue to fill the mold with cement, making sure to distribute it on all sides.
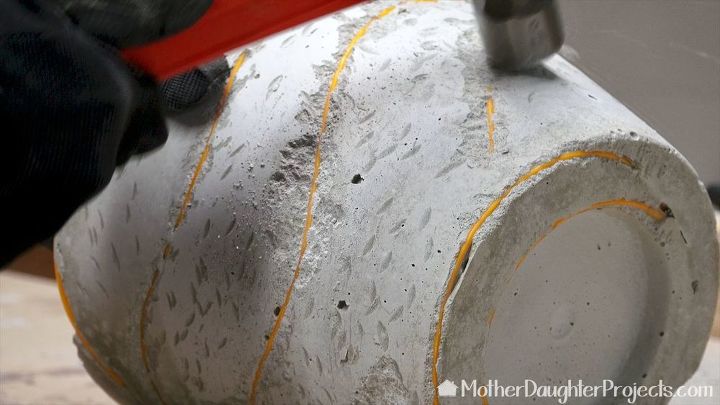
With a hammer, carefully expose the el wire. As we did this, we checked periodically that the wire still worked.
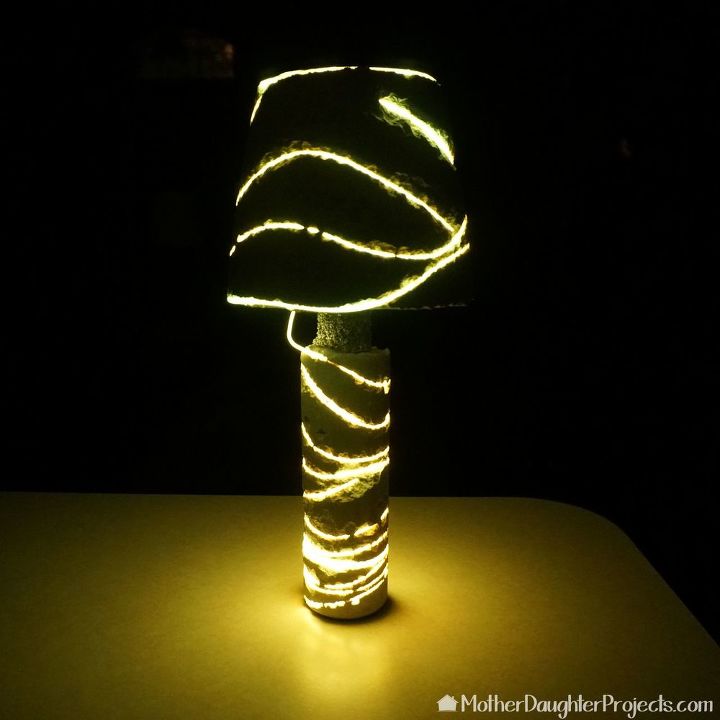
Secure the battery packs to the inside of the shade with velcro. With the lights out, the el wire really glows!
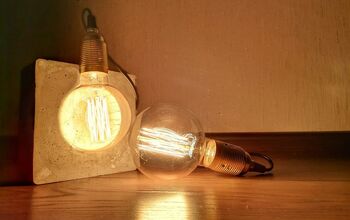
We are both really happy with how this lamp turned out! The look is way cooler than I imagined! I really like the rough look we were able to achieve and how the el wire looks like it's part of the 'rock.' One of my favorite things is finding inspiration when I least expect it. Without fail, whenever I let myself take some time for fun or vacation, I get the best ideas!
Resources for this project:
See all materials


Any price and availability information displayed on [relevant Amazon Site(s), as applicable] at the time of purchase will apply to the purchase of this product.
Hometalk may collect a small share of sales from the links on this page.More info

Want more details about this and other DIY projects? Check out my blog post!
Comments
Join the conversation
2 of 16 comments
-
Yes, I'm SO INSPIRED! And YES, I want to (I will) try it!! Thanks for
this incredibly fun, diy project!
-
I’m inspired to use el wire, but I need to know more about using it. Amazing lamp. ☺️


Frequently asked questions
Have a question about this project?
Is the wire waterproof? Can it be used outside with no covering ( that is exposed to the weather)