Giant Leaning Mirror

$50
1 Day
Easy
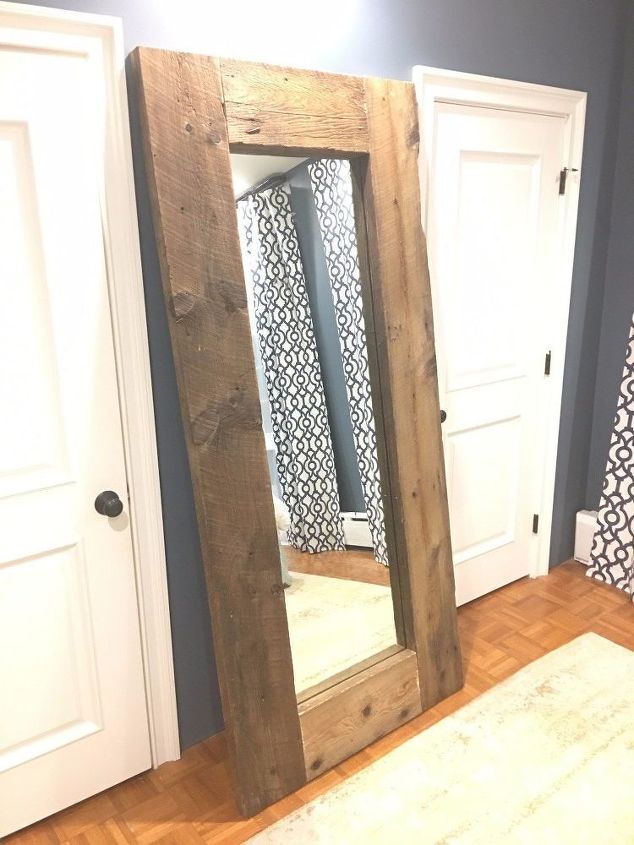
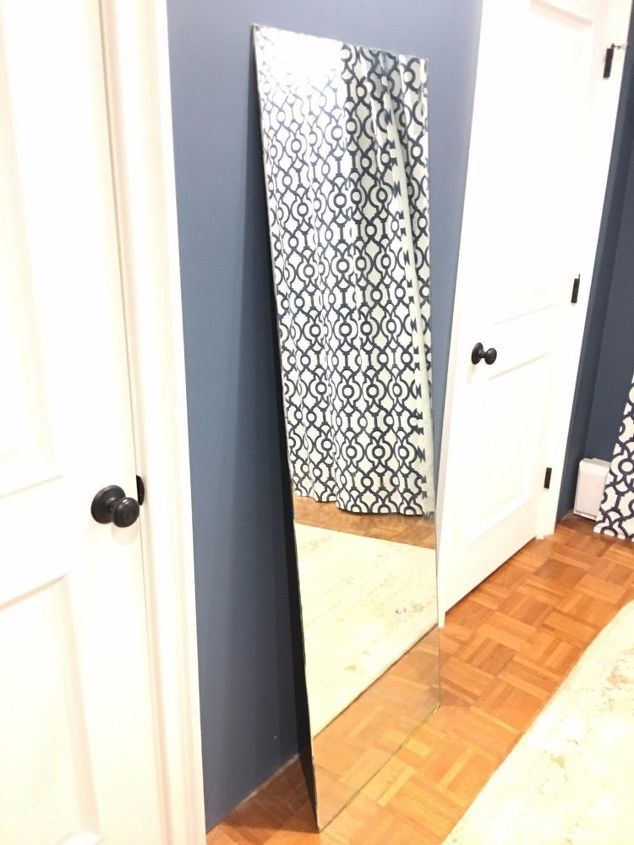
Who here loves West Elm and Restoration Hardware? Who here doesn't always love the West Elm and RH prices? If you're anything like me when I go shopping I spot something I love and then ask myself, "could I easily make that for less?". That's what happened with this mirror. I saw something like it while window shopping but it seriously had a $1,000 price. I knew I could easily figure this out. The hardest part would be finding the materials. I kept my eye out for a large old mirror and found this mirror for $35. It used to be a horizontal bathroom vanity mirror. At that price, I knew I could make this work. I then visitied my local salvage warehouse and picked up this old scaffolding wood for super cheap. Once I assembled the frame I secured the mirror, leaned it against my bedroom wall, looked at myself in the reflection and said, "Nailed It"!
I'm probably a bit biased, but I think this is as pretty as a store bought one!
Materials:


Large Mirror


Thick Reclaimed Wood (mine is 2" x 10")


Sandpaper


Wood glue


Clamp


Sealer/Stain/Polyurethane


Table Saw


Drill


Wood Screws


(4) Metal mending construction plates


Scrap Wood
STEP 1:


Althought reclaimed wood is already beautiful, I still recommend prepping the wood. Once I cut the reclaimed planks to the desiered size (2 @ 1'-8" and 2@7') I got to scrubbing the wood with a TSP and water solution. Once clean and completely dried, I sanded them down using a 120 grit sandpaper. I then wanted to seal my wood but still keep its natural color. I love using Watco Danish Oil and I chose their "natural" option. If you choose to stain and/or apply a finish coat on your wood follow the insturctions on your product's label.
STEP 2:


Now that the wood was cleaned, stained, and cut to size I used some wood glue and a clamp to attach the 4 planks of wood together before securing it with metal mending plates.
STEP 3:


Using 1-1/2" wood screws, I attached mending plates in all four corners of my frame. I was careful to place the plates at a location above where the mirror will sit.
STEP 4:


One it was secured all the way around I stood it up and took it inside to meet its new best friend - my salvaged mirror!
STEP 5:


I carefully lowered the mirror into place. You'll notice the metal plates are out of the way of the mirror. This ensures the mirror is flush to the wood.
STEP 6:


Because I didn't want to spend any uncessary money, I used newer scrap wood I had to act as braces for the mirror. I cut a 1/4" notch in the wood, the thickness of my mirror, so the mirror would have a snug encasement.
STEP 7:


I cut four of these braces in total. Then, I attached them to the back of the frame to hold the mirror in place using wood screws.
STEP 8:


I then stood up my mirror, made sure the glass was snug, and leaned it against the wall in my bedroom. Quick, affordable, and super pretty.
Frequently asked questions
Have a question about this project?
  2 questions
  • Joyce Jones Joyce Jones on Oct 09, 2016
    How did u get 1/4 in groove in boards to drop mirro in
  • KT KT on Oct 12, 2016
    Great job! I love the color of your bedroom, what color is that?
Comments
Join the conversation
2 of 33 comments
Next