


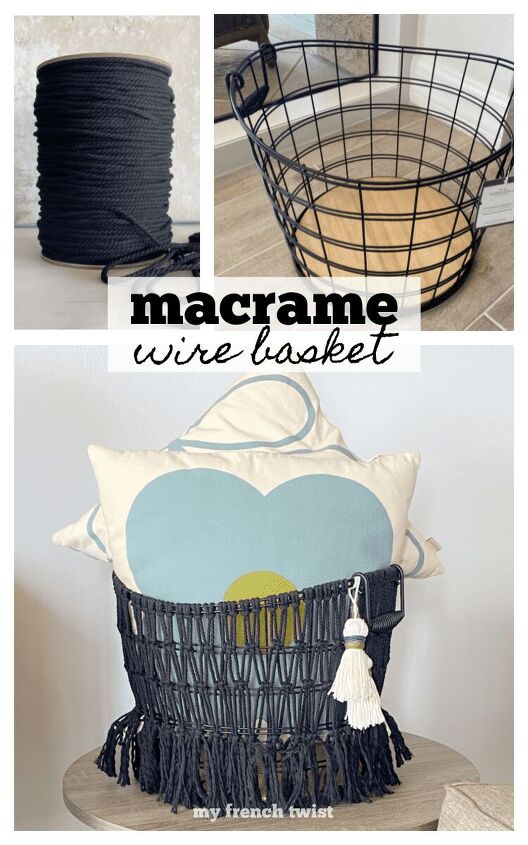
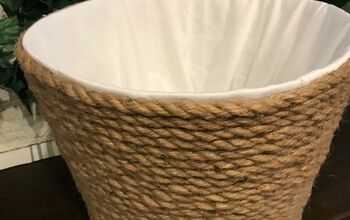
Macramé Wire Basket
Want to add a cute Boho accessory to your home? Here’s a simple tutorial on how to give a wire basket a macramé makeover. All you need is a basket, some macramé rope, and a free afternoon.
(This post may contain affiliate links; as an Amazon associate I earn from qualifying purchases. See disclosure here.)
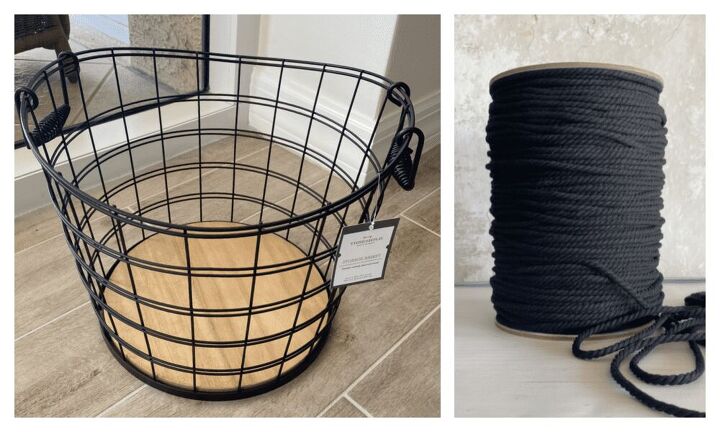
- supplies needed:macramé rope
- wire basket
- scissors, painters’ tape
preparation
There are lots of cute baskets around, but I bought this basket from Target. It measures approximately 11″ tall and 12″ diameter. I cut 80 pieces of rope, each measuring 40″. (If you use a smaller basket, you may need less cording. However, remember that you need enough cords to somewhat cover the entire top rim, and the total number of individual cords you use must be divisible by four.) Cover all ends of rope pieces with tape to prevent fraying while working.
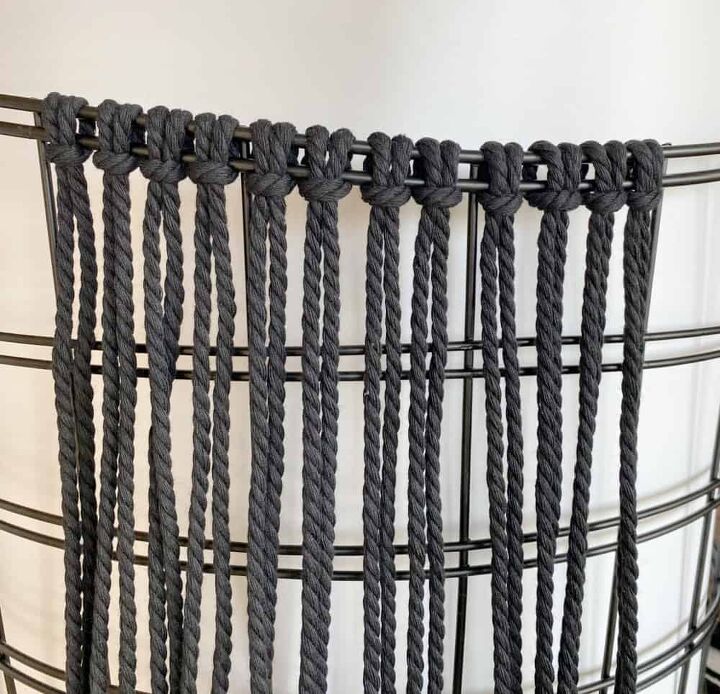
lark’s head knots
Tie all cords onto the top rim of the basket, using Lark’s Head Knots. Remember, the number of cords you use must be divisible by four.
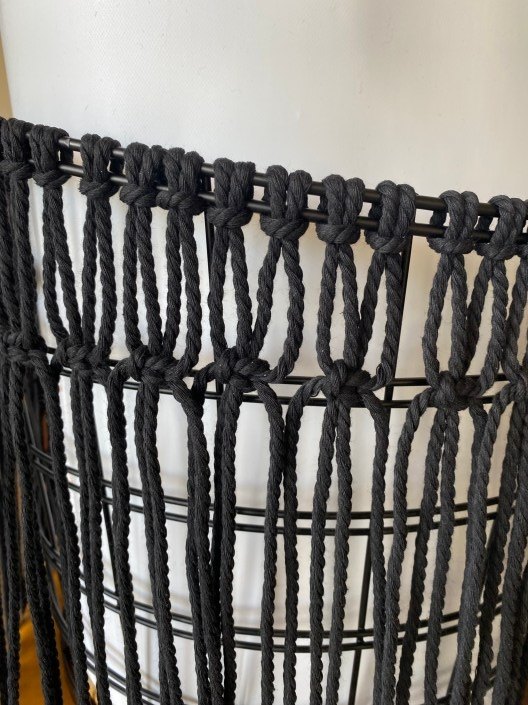
square knots
Just a few inches down from the rim, make a horizontal row of Square Knots. Because the top of the basket I used is uneven (it arches up on two sides), I kept my second row even with the metal wires behind it. (If you are using a tall basket, you can add more than one rows of Alternating Square Knots.)
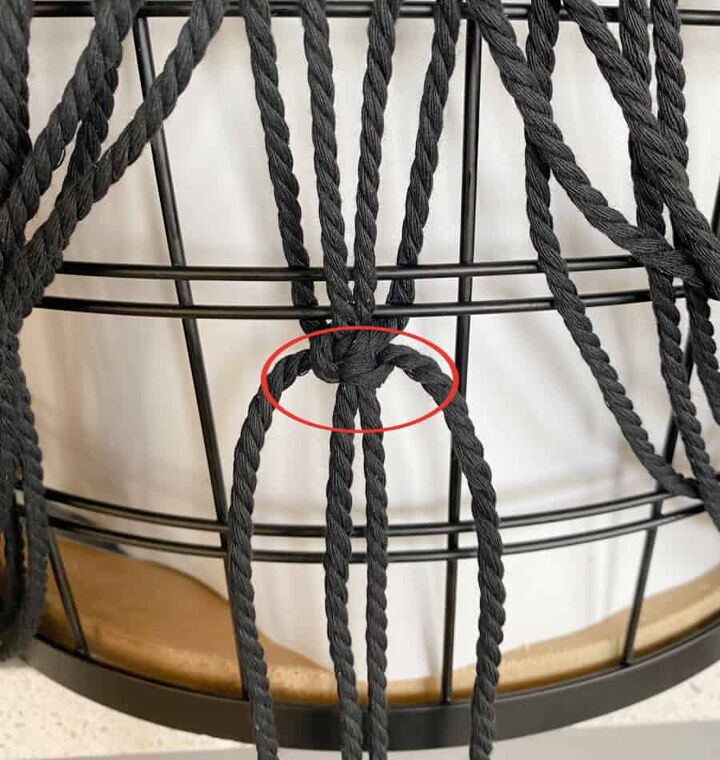
I only made two rows of Square Knots for this basket, so I wanted to secure the second or last row to the basket. Before tying each Square Knot, I first ran the 2 outside cords (of the 4 cords needed for each knot) behind the metal wire, while keeping the 2 inner cords in front (see photo below.)
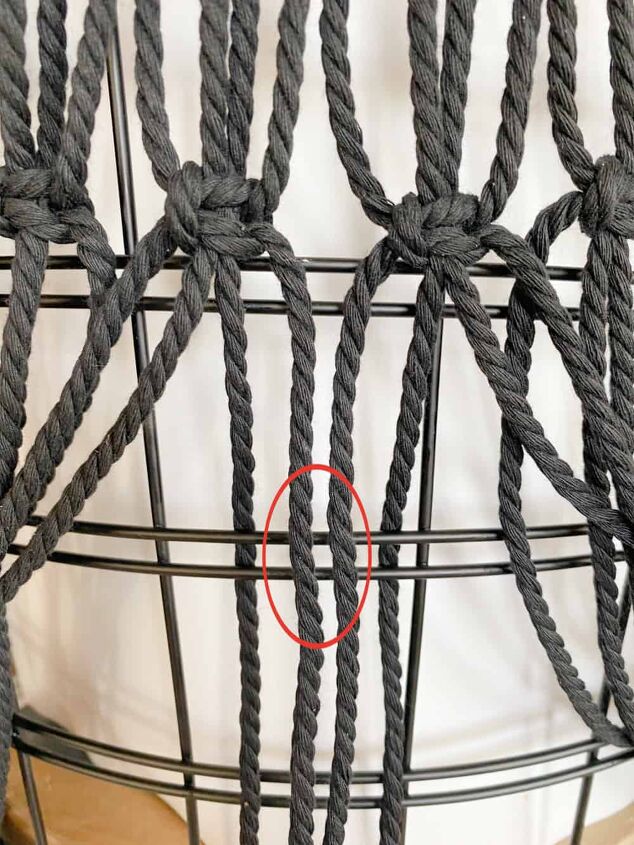
Then I pulled the 4 cords tautly and tied the Square Knot.

finishing touches
Trim the bottom of the loose cords evenly. Then gently untwist the bottom cords to create a fringed effect. I also added a couple tassels just for fun (see my easy tutorial for making tassels.)
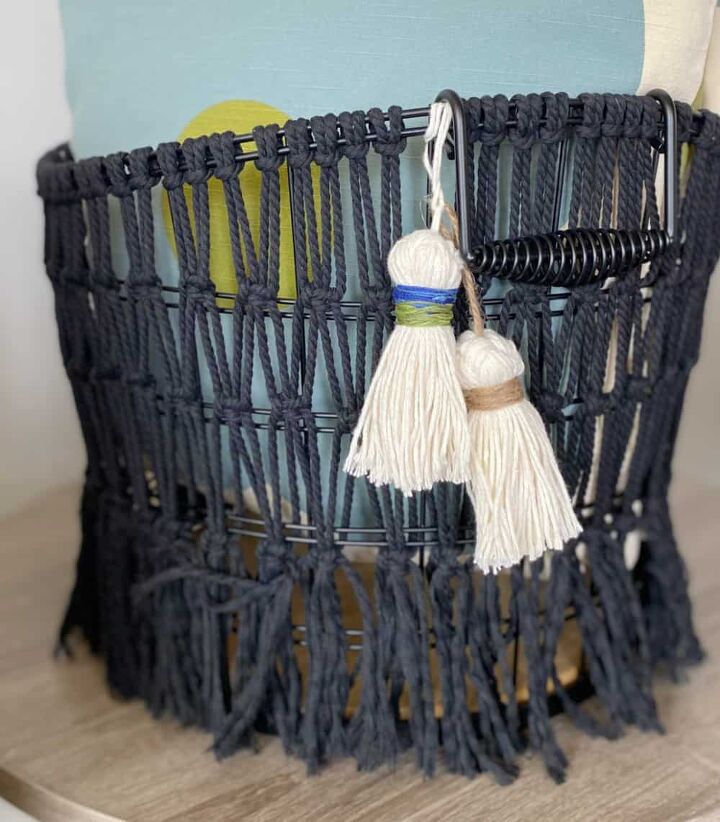
See how easy it is to make a macramé wire basket? And it makes quite a statement when added to a fun living area!

The biggest compliment is a little share – please pin the photo below!


Comments
Join the conversation
-
I love it! I would like to give it a try myself
-
How fun! Love this idea and will definitely try it! Thanks!


Frequently asked questions
Have a question about this project?