


Mid-Century Birds for Your Mid-Century Modern Decor
Several years ago, I found a small collection of vintage magazines including copies of Woman's Day. I eagerly read through them, marveling at the advertisements, the article topics, extensive pull-out recipe sections, and the crafts! Oh, the crafts! The issue that really caught my attention was Woman's Day, November 1964.
In that issue there was an article on 100 Christmas gifts to make--everything from scarves to woodworking. Every one of the 100 things were similar in that they offered scant instructions. In the sixties, I guess they assumed you already knew all the things!
The mid-century bird sculpture was the one thing that I knew I wanted to make, but without the proper tools, this had to wait! Now that I have the tools, it was time to make it.
Take a minute to watch the video as it will help you to see the entire process.
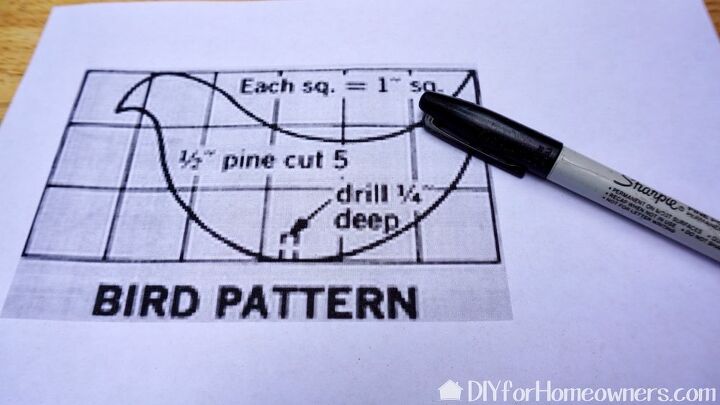
To start, I enlarged the pattern that was printed in the magazine. Back in the day, patterns were printed on a grid so that you could enlarge them. What you would do is make a grid of one inch squares and then follow the tiny pattern to enlarge it into the size you needed. This actually took a lot of time! But this is the 21st century so I enlarged it by scanning the image and then putting it into a word processing program and enlarged it there. I printed it and it was then ready!
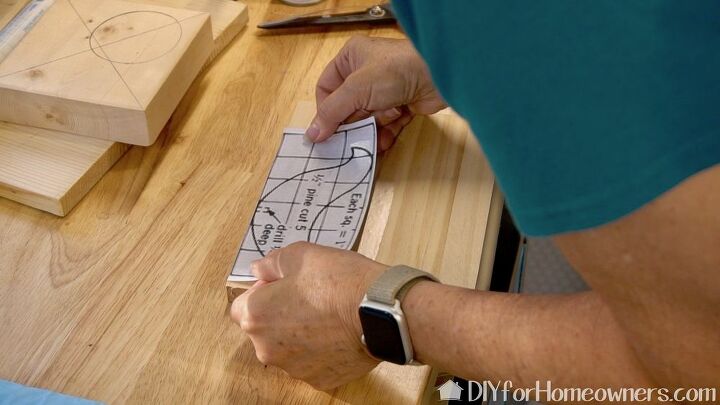
To make it easy to remove the pattern from the wood, you first lay now some clear contact paper and then use spray adhesive to attach the paper pattern. I'm using wood from an old shelf, but any 1/2" thick should work for this.

Now the fun part! Cutting the birds, and you'll need five, on a scroll saw. As far as power saws go, this is one of the least scary ones. If you sew, you probably would enjoy learning how to use a scroll saw.
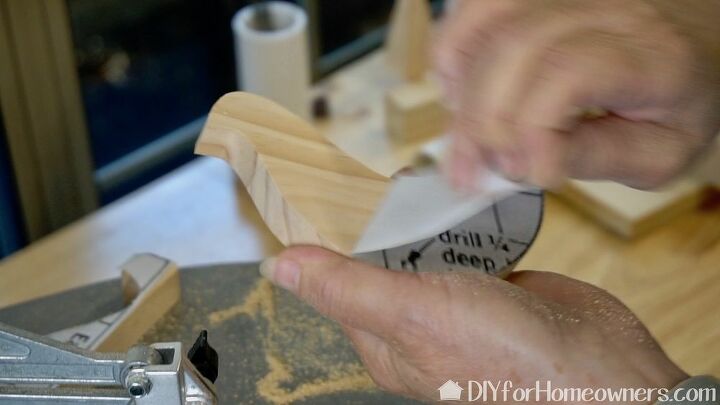
Once the bird is cut, remove the paper pattern. Sand any rough edges at this point and drill the holes in the bottom of each of the five birds.
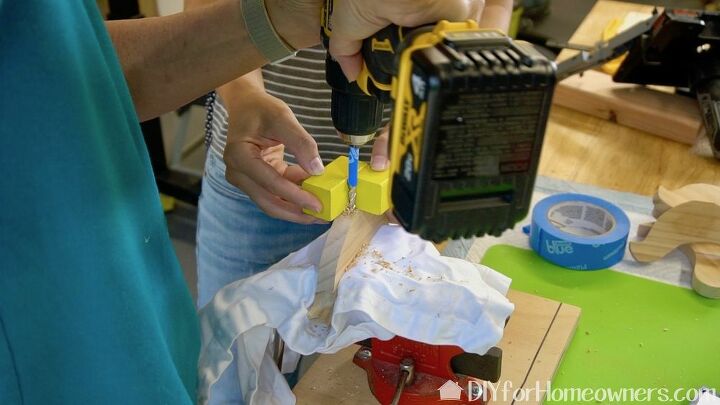
Here I'm drilling a hole in the bottom of the bird. That yellow block thing is a jig to help keep the drilled hole perfectly straight. The bird is held in place in a vice. I used that piece of fabric to keep the vice "jaws" from marring the bird surface. Check out our full post on our website to see how the base is made. There are also some tool tips for the project in the video.
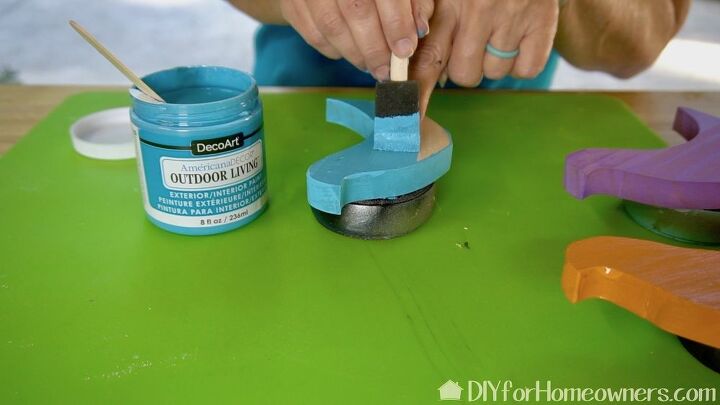
Time to paint. I'm using five different colors for the birds as well as black for the base and wood dowels. All the pieces got 2 to 3 coats of paint. Let that dry and then it's time to assemble.
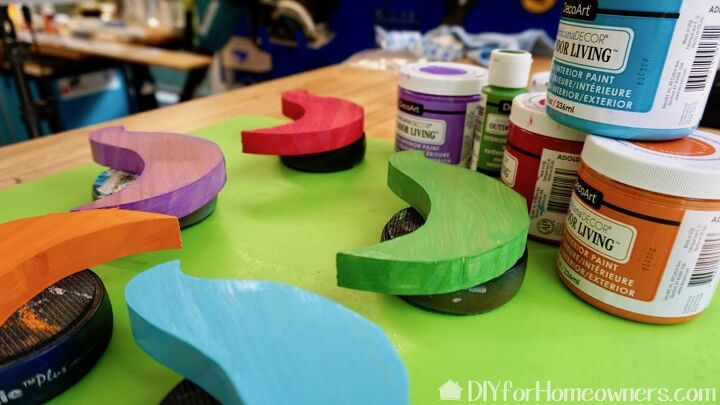
These are the five colors. It was a little tricky to match the mid-century colors from a tiny magazine picture, but I'm pleased with how well the colors match up to the original.
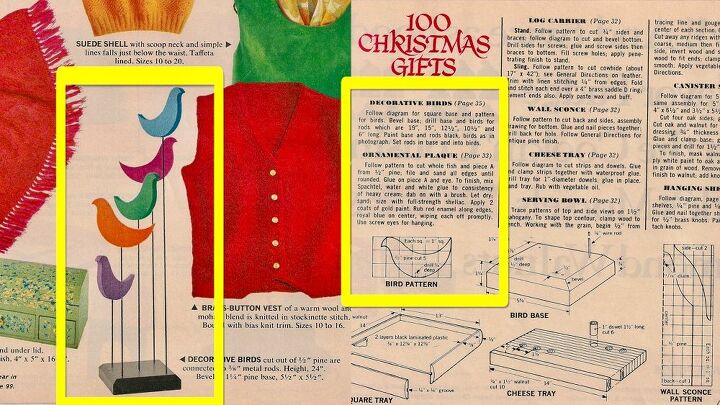
Once the birds, base, and wood dowels are dry, you simply push one end of the dowels into the bottom of the birds and the other end into the base. The directions in the magazine gives you the measurements for the dowel length as well as a tiny diagram on how to build the base!
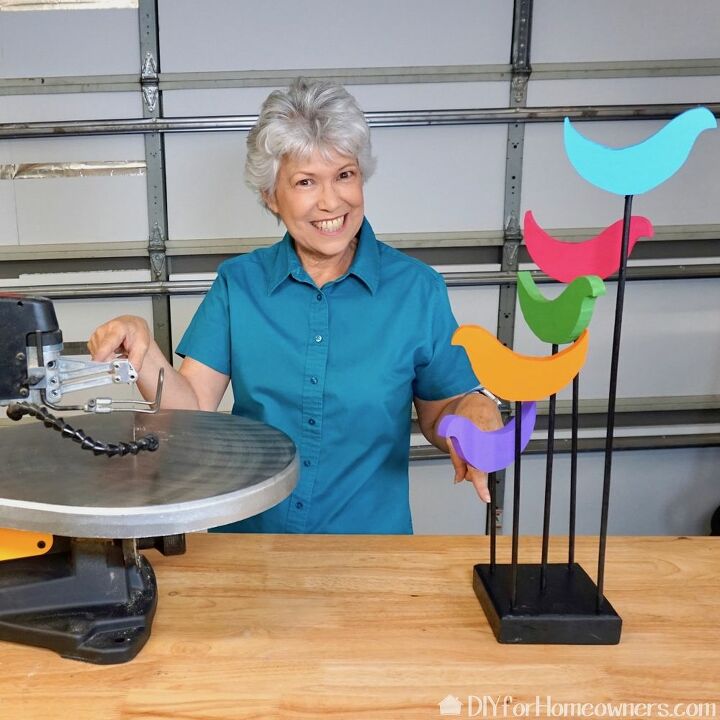
Using a scroll saw made it possible to create these mid-century birds using a 1964 Woman's Day magazine article! Just a word about the estimated cost and time. It is difficult to determine the true cost so the amount given is if you have to purchase a board and dowels. The time estimate doesn't take into account the learning I had on this project or drying time.
Resources for this project:
See all materials


Frequently asked questions
Have a question about this project?