


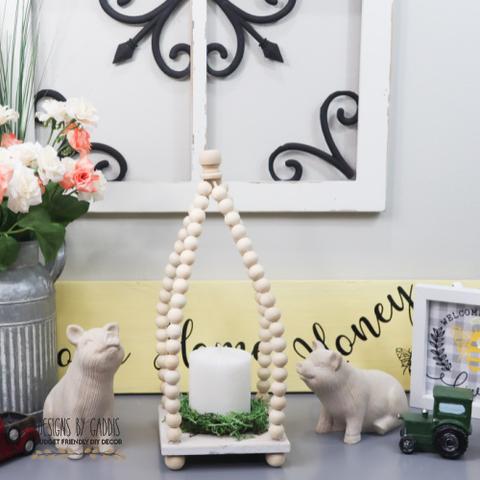
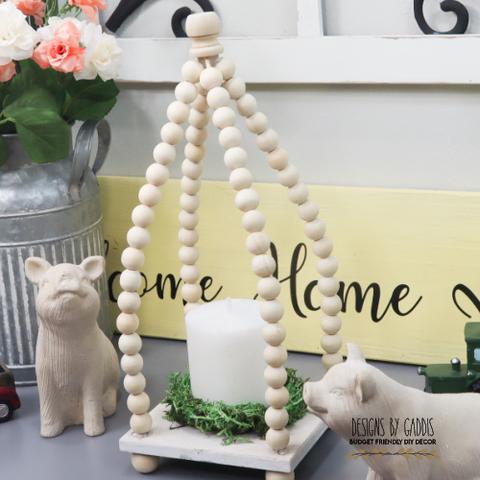
Simple Beaded Lantern Tutorial | Farmhouse Lantern DIY
I keep seeing all these beautiful and amazing lanterns online and in stores but I personally can't afford to spend $40 + on a lantern. So let's try to DIY one!
The hardest part of this DIY was getting the skewers to bend. It took some brainstorming to figure it out.
STEP 1.
- I put them in hot water on the stove. I left the top part of the skewer out of the water and then placed a pickles jar on the skewers where I wanted it to be curved.
- I left them in the hot water for about an hour.
- I then took them out and placed them in the bathroom sink with the pickle jar still sitting on them until the next morning.
And believe it or not, it worked.
STEP 2.
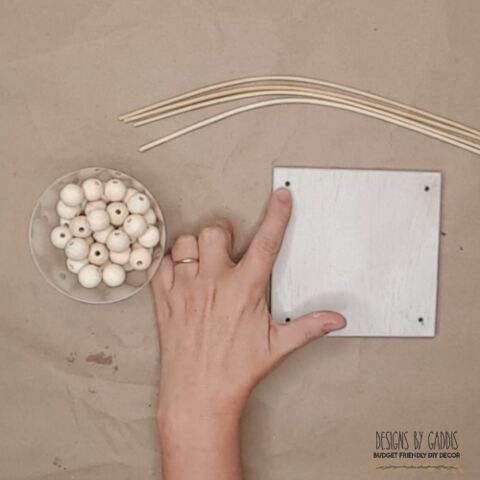
- I used a square wood block I had in my stash. It was already painted a gray color, so no painting required.
- I drilled small holes in the 4 corners, just a little larger than the skewers.
STEP 3.
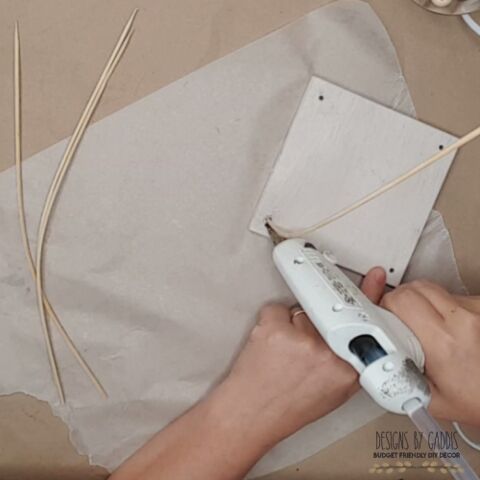
- I filled each hole with hot glue and placed the skewer into the hole making sure it was point towards the center.
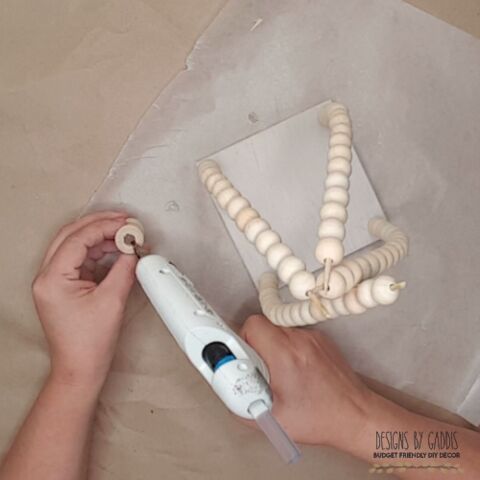
STEP 4.
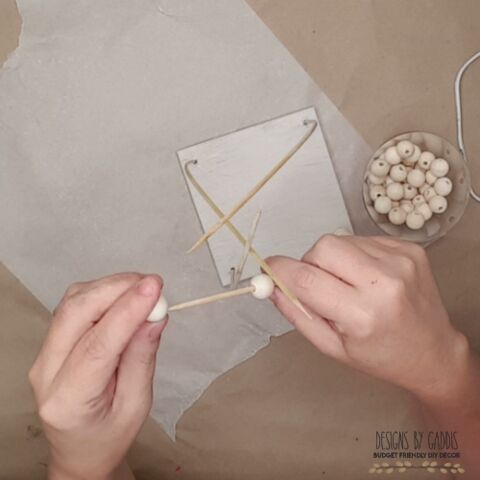
- I placed 18 16 mm natural wood beads on each skewer.
STEP 5.
- I found this little topper in my stash. I think I got it from Wish.com a while back. I order several things from there to see how they would work as craft supplies.
- I filled the hole in the topper with hot glue and placed all of the skewer's ends in it.
- I turned it upside down to let the hot glue dry because I didn't want it running down my skewers and beads.
STEP 6.
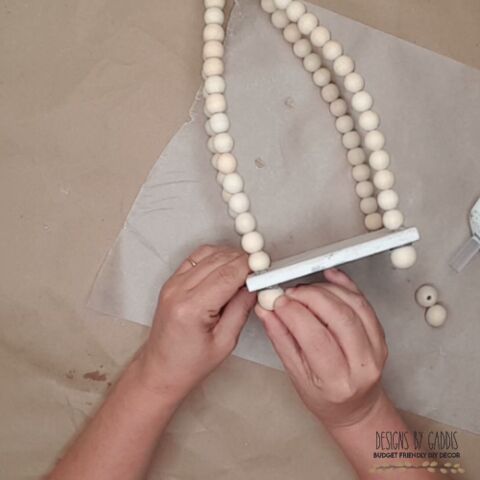
- The next thing I did was add 4 20 mm beads to the bottom for feet.
I left all the beads and the topper the natural color, but you can paint it to any color that will match your decor. I may actually paint it white and do a little distressing. I just haven't decided yet.
WATCH THE VIDEO FOR THE FULL TUTORIAL!
Items Used:
- Natural Wood Beads
- Wood Square
- Wood Topper

Products I Recommend and Use on a Regular Basis:
- Sola Wood Flowers
- Monvict Hot Glue Gun
- Tacklight Hot Air Gun
- Design Bundles Cut Files & Bundles
*As an Affiliate, we may earn a small commission when you purchase thru our link at no extra cost to you.*
JOIN MY COMMUNITY for access to free printables, cut files, and special discounts for subscribers only.
My Disclaimer: All of the video footage, photos, and designs are created by me and are owned by Designs By Gaddis. You may only use the video footage, photos, and designs with my permission. My content is mine and it is protected. I am not sponsored or paid by any of the product companies or tools shown in these videos unless otherwise mentioned. I have full rights and control of the content.
Copyright @ Designs By Gaddis 2021. Any reproduction or illegal distribution of the content in any form will result in immediate action against the person concerned.
Resources for this project:
See all materials


Comments
Join the conversation
-
Love it
-
I still do not understand how the sticks were bent. Pictures would have been helpful. Maybe just one picture of the sticks and pickle jar.


Frequently asked questions
Have a question about this project?
It’s beautiful! Is there a concern with the beads catching fire? The heat from the pillar candle can go up pretty good and at the very least scorch the beads?
any thoughts?
I’d love to make it and maybe put other things in it. Just so creative!