


DIY Brush Stroke Art
3 Materials
$40
20 Minutes
Easy
I really wanted some unique and simple art for my living room but I couldn't find anything that fit the large space I needed to fill. I decided to create my own, even though I'm not a great painter, and it ended up being so simple and so beautiful! If you like this project, you can see more easy and affordable DIY projects on my blog!
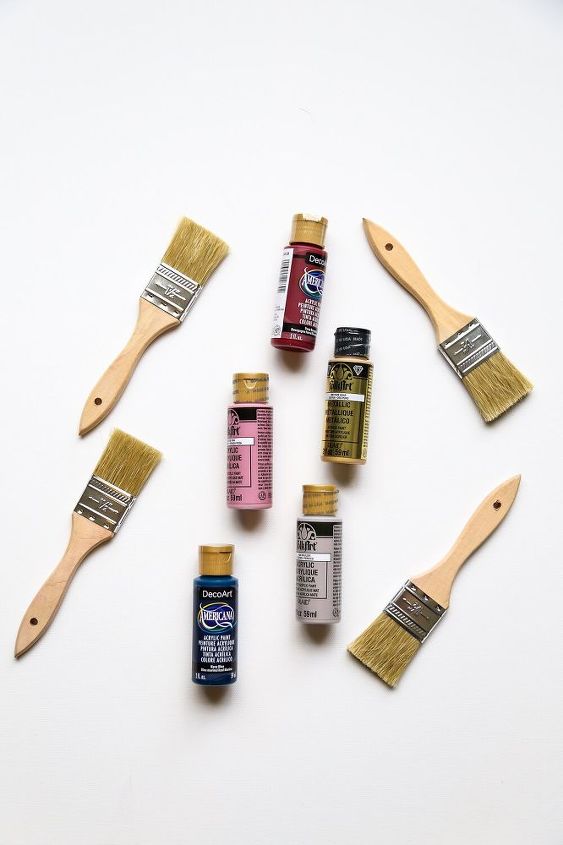
I started with a large canvas (use a 40% off coupon at Hobby Lobby!) and several different colors of acrylic paint. I also used chip brushes (cheap, throwaway brushes) so that I could use a different one for each color without needing to clean them in-between.
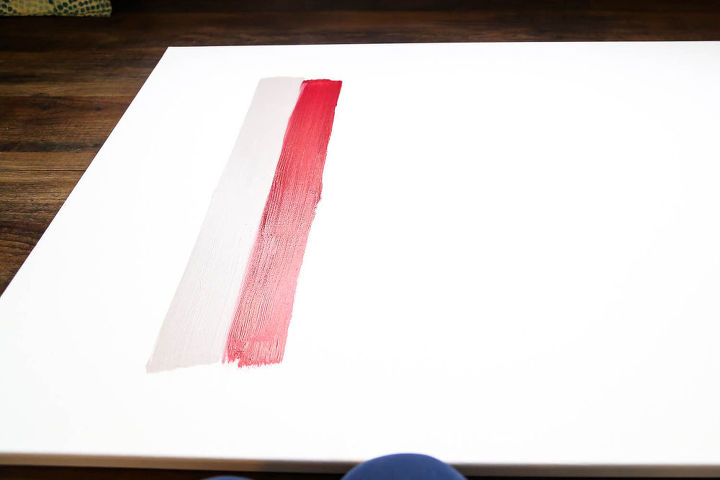
Then, I just started painting lines on my canvas! I found that two paintbrush strokes side-by-side was the perfect width, and I also found that the more imperfect it is, the better it looks (score!). I didn't start in the middle of my canvas, but if you're re-creating this, I would suggest you do that instead of starting at one end. It would make it much easier to keep it centered!
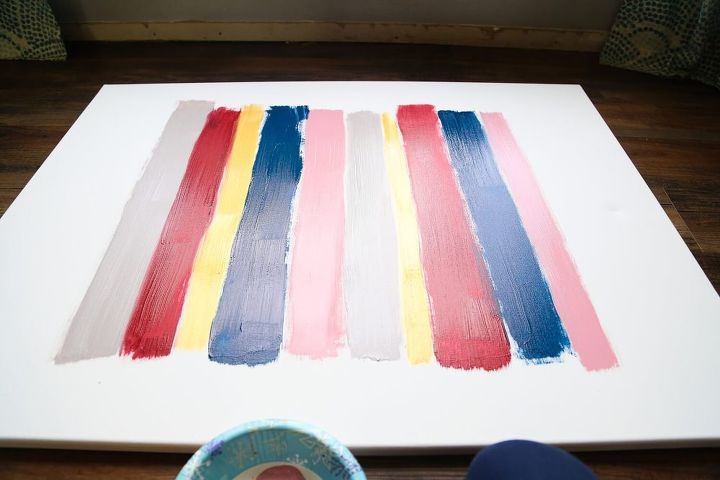
I continued along the canvas until I felt like it looked done. I ended up doing 10 lines, with each color used twice. This wasn't intentional, just how it happened. You can see a few more details about how I chose the colors and a few technique tips on the full post on my blog.
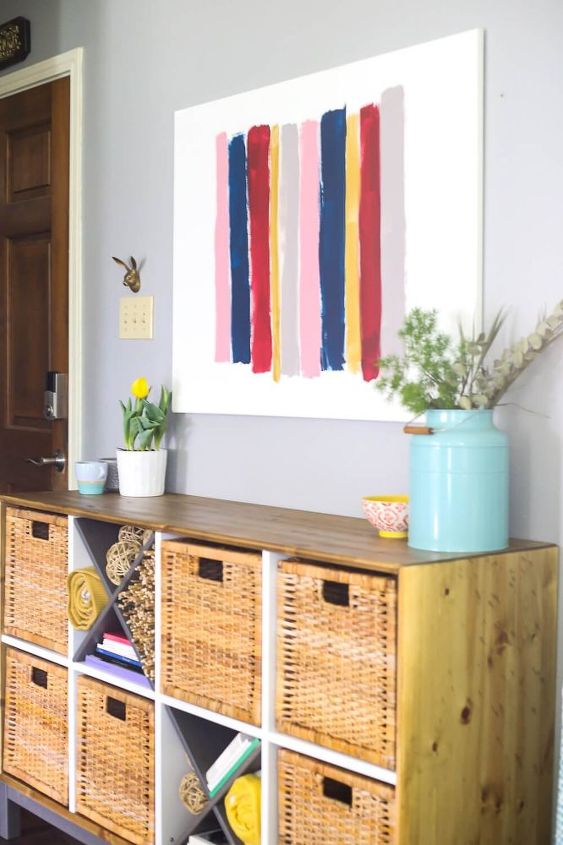
I let it dry, then I hung it up. Seriously, that's ALL there is to it!

Want more details about this and other DIY projects? Check out my blog post!
Comments
Join the conversation
2 comments
-
Wow!! I love this!
-
Don't you just love when something so simple has such an impact, nice!


Frequently asked questions
Have a question about this project?