


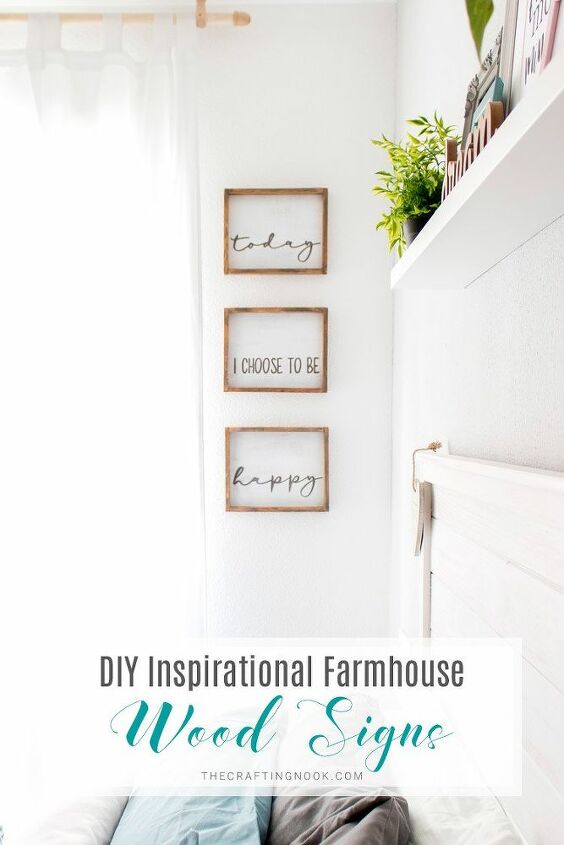
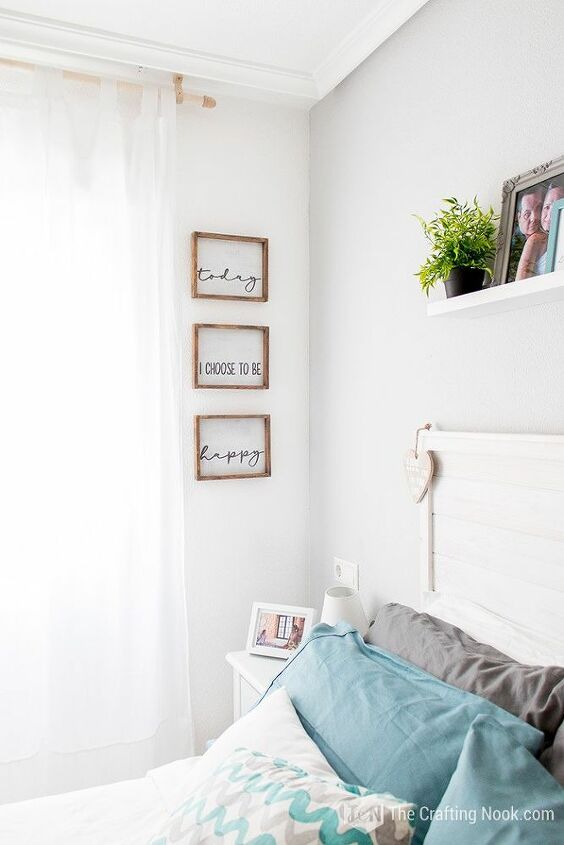
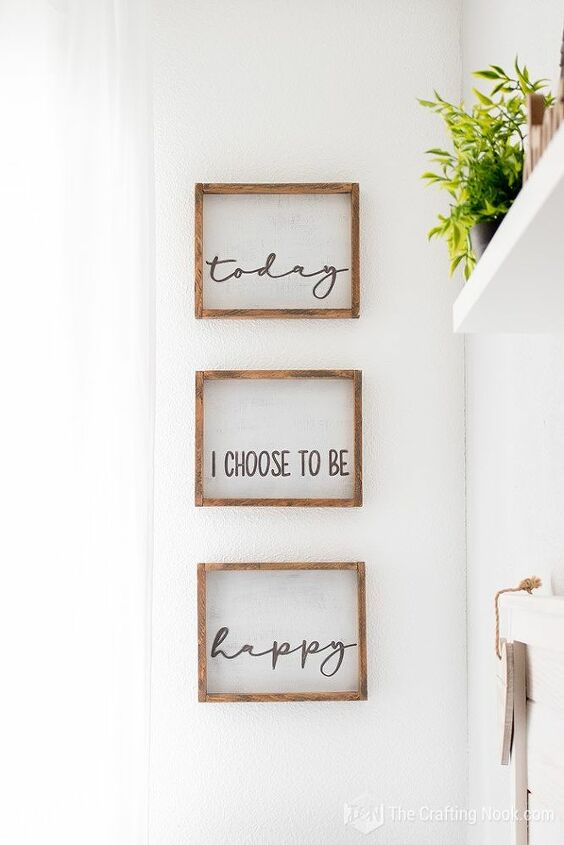
DIY Inspirational Farmhouse Wood Signs
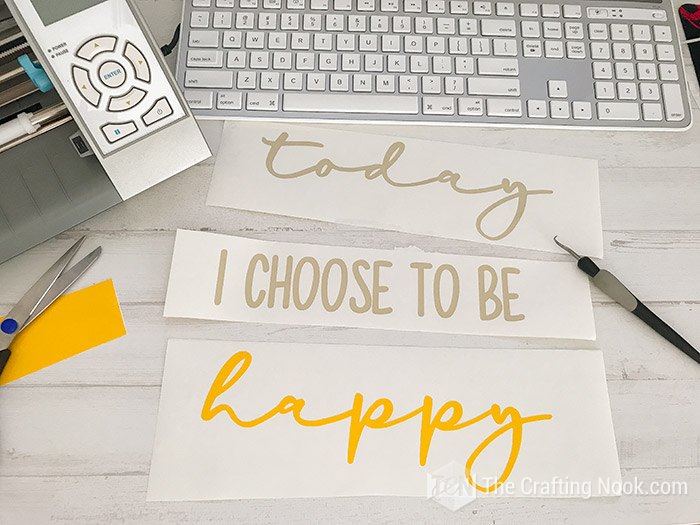
Let’s Learn how to make These pretty DIY Inspirational Farmhouse Wood Signs with a cutting machine (or your favorite stencils) and some really cool lettering fonts!
Truth be told, when life get so overwhelming we tend to let that take over our emotions and we forget that we are only humans and can do so much.
I easily get so frustrated and overwhelmed with all the thing I need to accomplish that when I see myself in the mirror, I Often don’t see a hint of joy in my eyes. It’s my own personal work in progress: TO BE HAPPY despite anything else.
Because I know myself and I tend to forget that, I wanted to have a reminder really close to be happy every day. Because as hard as things can get we can still be happy and thankful for just being alive and having the family we have.
This being said, I decided to create some cute wood signs that would say: Today I choose to be happy.
This is a super easy project. You don't need fancy machines to actually achieve it. You can find adhesive stencils, you can create the stencil digitally and cut them on any vinyl cutting service shop (more expensive solution but possible) or you can even variate the process I describe to just hand write your words.
In my case I made it with a cutting machine to create my stencils.
And then of course most wood shops offer to cut the wood for you.
I went to the closest to my location and I got all these pieces:
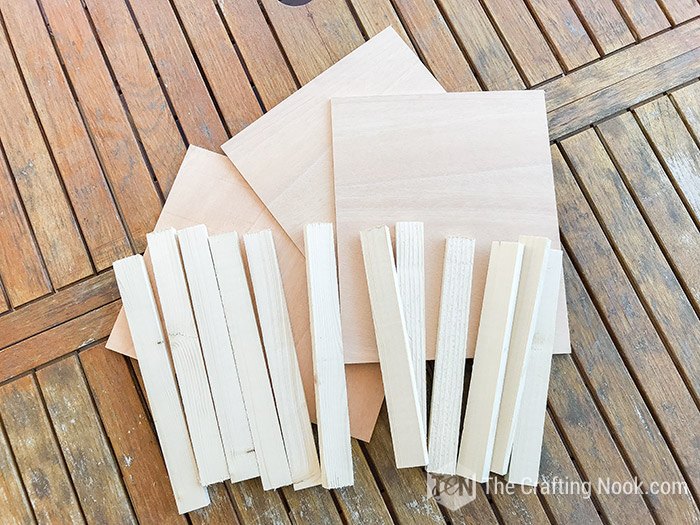
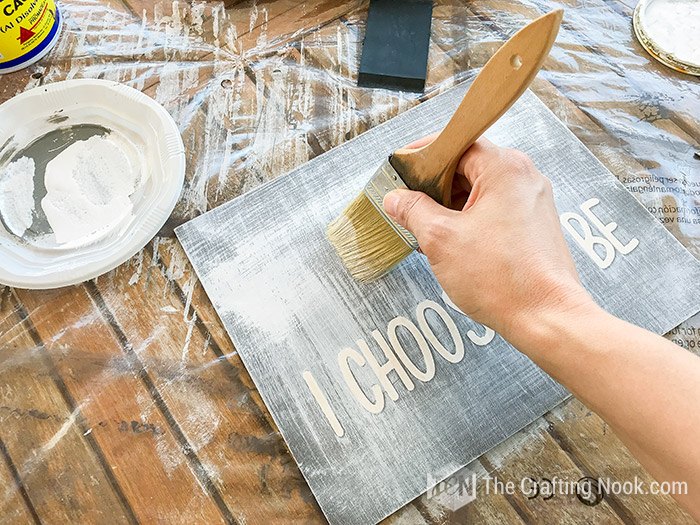
All ready to work. I started by painting and staining the frame pieces and let them dry while working on the sign pieces.
I used a dark base (grey) then applied stencils and dry brushed with white paint.
I really enjoyed this project. It had a special meaning and besides, wood working and painting it's almost therapeutic for me.
The next step was assembling the wood signs which is, in my opinion, the most relaxing and fun part!
I'm not a carpenter so I just glued the frame together and nailed the corners. Lastly, nailed the wood sign to the frame.
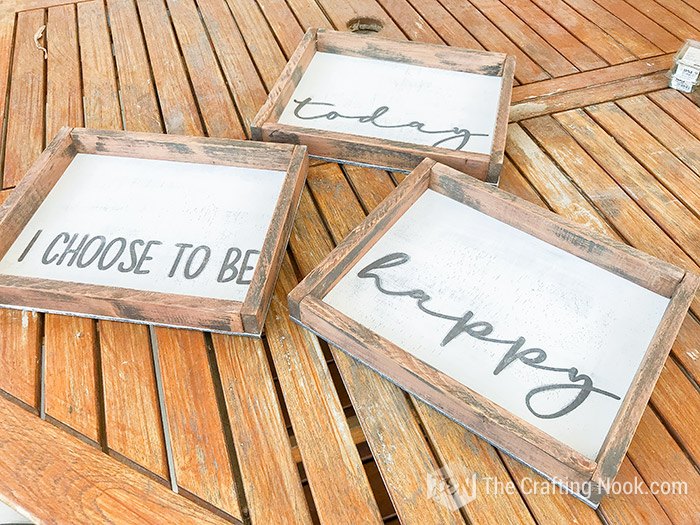
And this is how it turned out! I just love them. Hope you try them some day!
You can find the full detailed tutorial over at the blog.
*Disclamer: This post was sponsored by FontBundles. You will see all the details on the blog post.


Frequently asked questions
Have a question about this project?