


DIY Skateboard Deck Shelf Upcycle

by
Makeful
TO maximize more space in your home, wall shelves always come in handy. However, anyone can go to the hardware store and buy some shelves to install in their wall. Of course, we like to step out of the box and step it up a notch by breaking the rules a bit. If you are looking to install new wall shelves and have some skateboards decks that you are about to throw away, this is the one shelving hack you're going to need to try out.
If you have some old skateboard decks that you're not using anymore lying around the house or are just looking to give your wall shelves a new look, decks will be the best new addition to your home decor in a few easy steps.
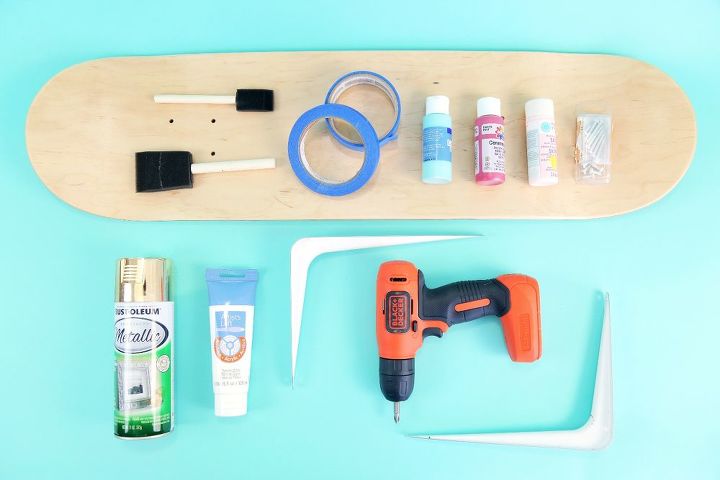
Since we parted ways from our skateboards from back in the day a few years ago (along with our Walkmen and Tamagotchis from middle school), we had to get some new (and inexpensive) decks from Amazon. For this project, you have to make sure that your decks do not have griptape on them. Make sure that they are bare, or if they do have grip tape, remove it to make the deck completely bare.
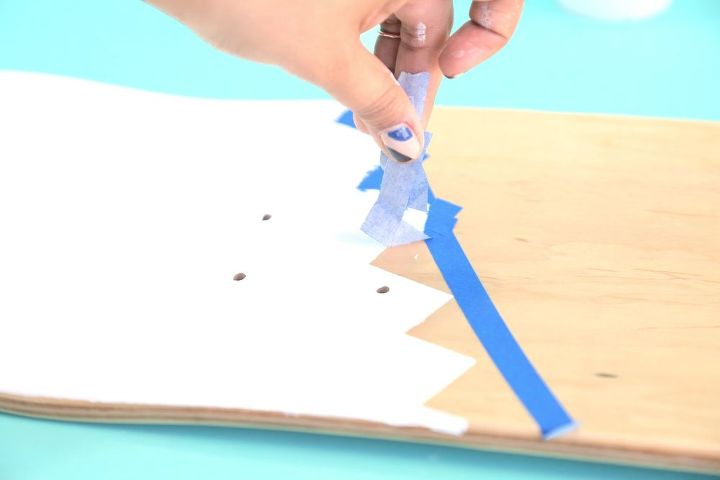
Step 1: Grabbing one of your skateboard decks, begin painting them with whichever pattern or colors you would like. For this deck, we decided to paint it with white borders on both sides, leaving the middle bare. With painter's tape, added two strips of painters tape diagonally to outline where we wanted our design to start. From there, we made a zig zag design to decorate both ends to make them look symmetrical, but again, this design is all up to you.
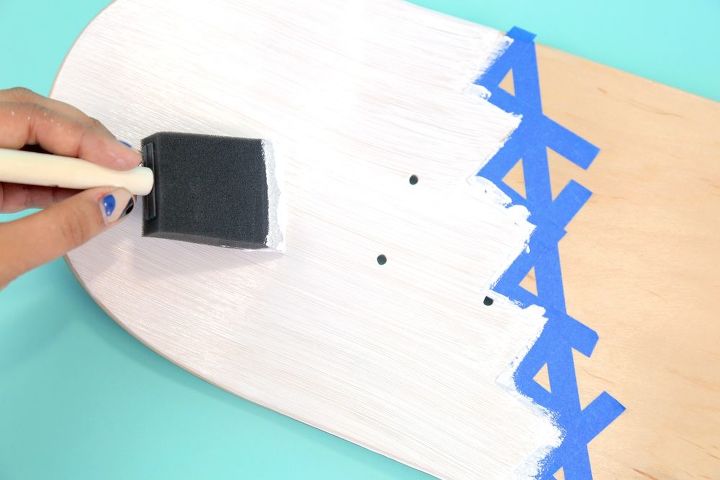
Step 1: Grabbing one of your skateboard decks, begin painting them with whichever pattern or colors you would like. For this deck, we decided to paint it with white borders on both sides, leaving the middle bare. With painter's tape, added two strips of painters tape diagonally to outline where we wanted our design to start. From there, we made a zig zag design to decorate both ends to make them look symmetrical, but again, this design is all up to you.
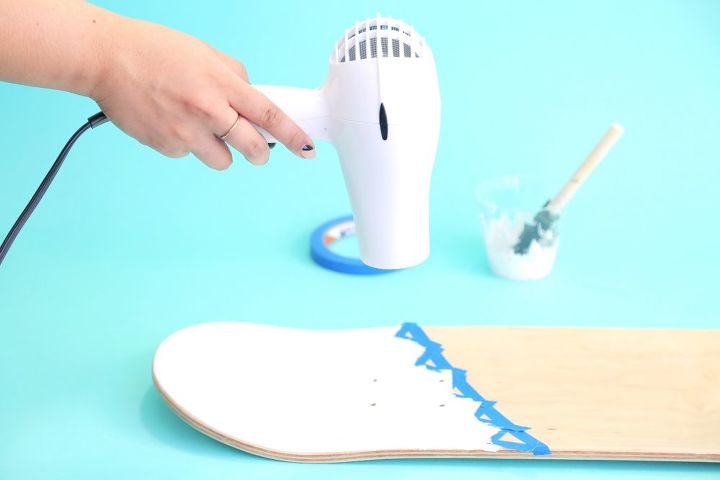
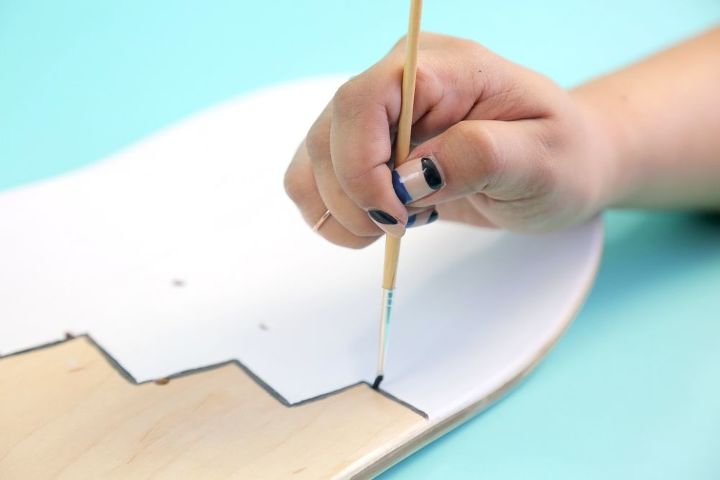
Step 2: Begin painting your board with the first coat of paint of your choosing. For this board, we chose white paint to keep it minimal. Based on how pigmented you want your board to be, we recommend painting three coats for the color to look smooth on the deck. Also, between each coat, let it dry outdoors, or if you're impatient like us, feel free to use a hair dryer to make it dry faster.
Step 3: After the paint has completely dried, carefully remove the painters tape and see your painted masterpiece!
Step 4: If you would like to add more details to your board, you are can continue adding them. As a finishing touch, we added a black border to the outline of the zig zag pattern on the board, to channel that Charlie Brown feel. Let the decks dry completely.
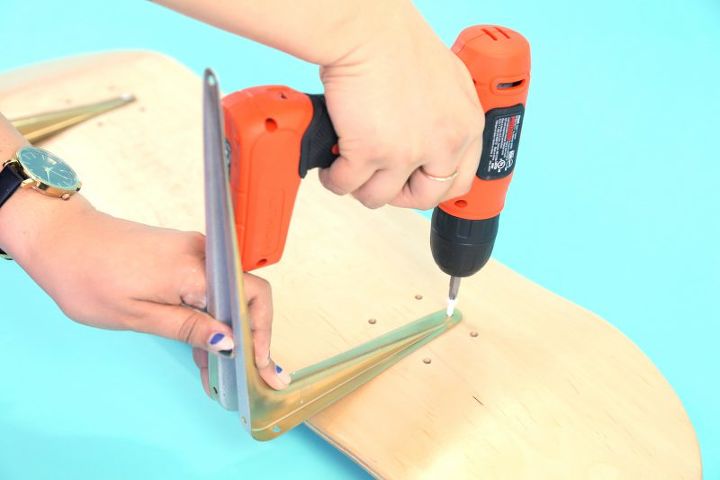
Step 5: As you are letting the boards dry, it is time to spray paint the L brackets with gold spray. Make sure to spray the entire front part of the bracket that will be visible on the wall. After you have let the boards and the brackets dry completely, drill the L-bracket to the deck with a 1/2 in. screw. Keep in mind that the boards are curved from the bottom, so they will not align completely with the L brackets and might wobble a little. As long as you have it drilled securely in between the truck holes, your shelf will be fine. Repeat the same for the other side of the deck, and repeat for any other boards you are shelving.
Step 6: Now that your boards are drilled with the L-brackets, drill the deck to the wall with a 1 inch wall screw. Make sure that you level your board by using a level (or the level on your iPhone). If you are adding multiple shelves, make sure to keep them 1 1/2 in. apart when stacking them on top of another.
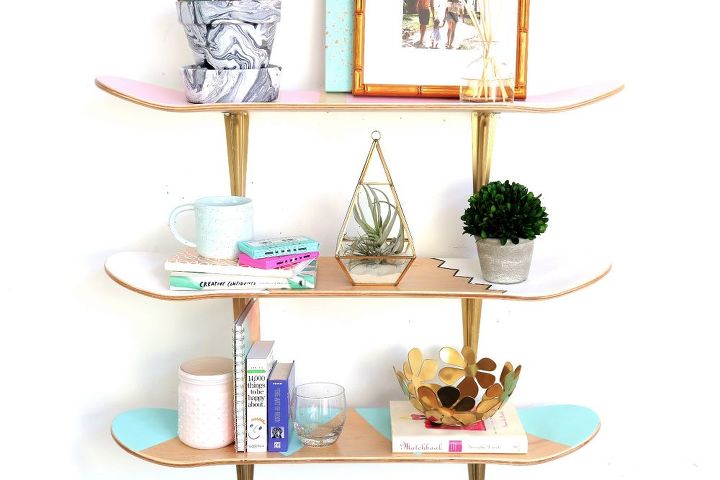
And that's it! Your skateboard wall shelf is ready to be on display! We added some of our favorite knick knacks and projects here at Makeful to the shelves; check those out as well as the full tutorial including materials for this skateboard shelf at the link below to bemakeful.com!
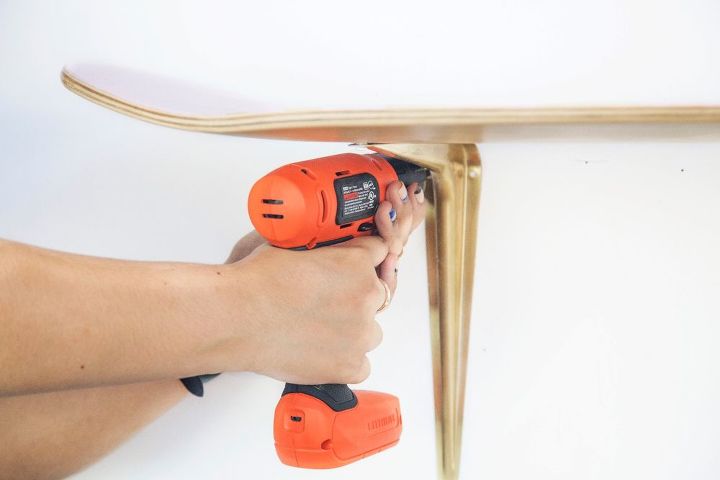
Step 6: Now that your boards are drilled with the L-brackets, drill the deck to the wall with a 1 inch wall screw. Make sure that you level your board by using a level (or the level on your iPhone). If you are adding multiple shelves, make sure to keep them 1 1/2 in. apart when stacking them on top of another.
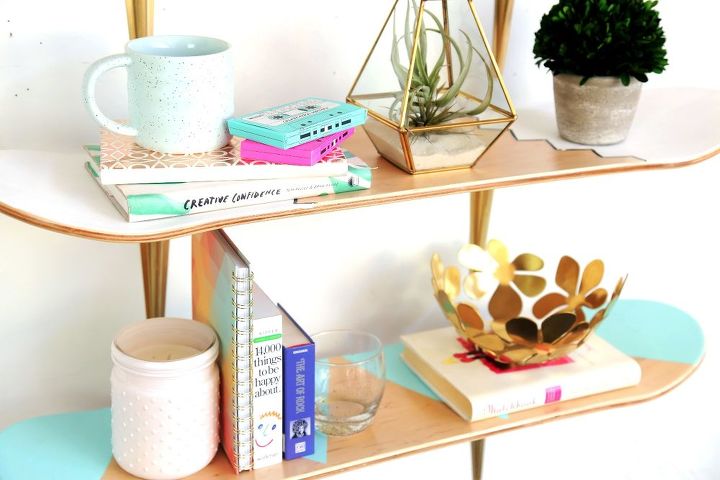
And that's it! Your skateboard wall shelf is ready to be on display! We added some of our favorite knick knacks and projects here at Makeful to the shelves; check those out as well as the full tutorial including materials for this skateboard shelf at the link below to bemakeful.com!
Comments
Join the conversation
2 of 12 comments
-
Will be on the lookout for some old decks for my grandson. Would be a nice addition to his room. Great idea!!
-
My grandson used his old skateboards for shelves. I haven't seen them, but his Mom told me. He is quite clever. Your's look real nice. Wooden, beautiful shelves!!!


Frequently asked questions
Have a question about this project?