


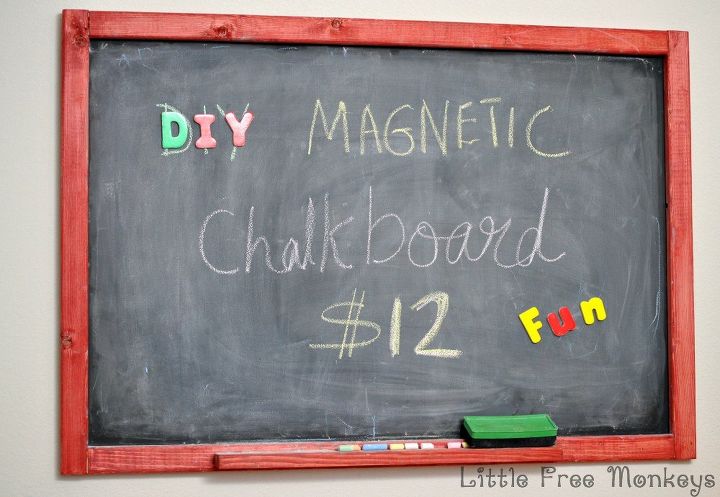
Easy DIY Magnetic Chalkboard Under $12

by
Anika Gandhi
6 Materials
Create a DIY magnetic chalkboard with this simple tutorial for under $12 and about half an hour of active build time. Great weekend project or gift! Kids will love to spend hours with it this summer!
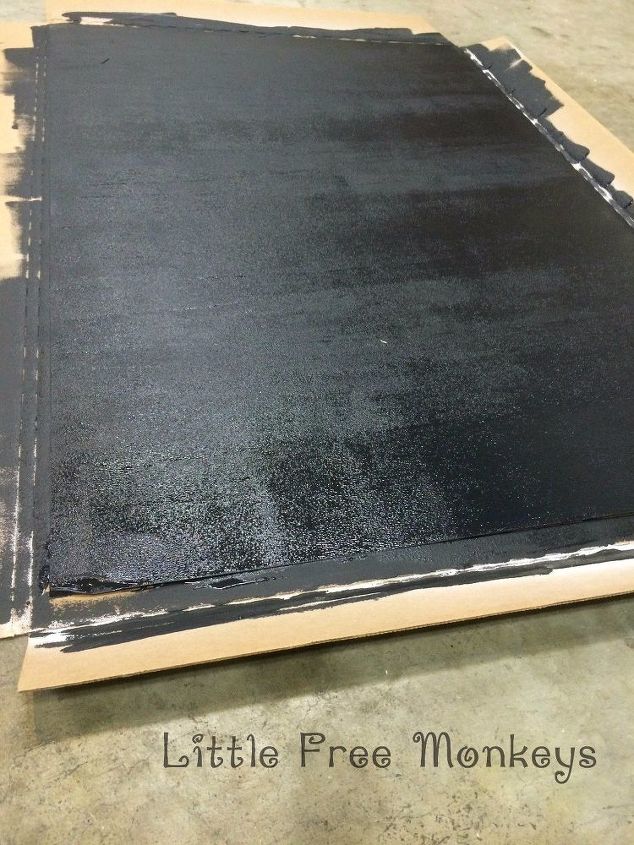
Start by roughing up the galvanized sheet metal with a steel wool and prime. Let that dry. Then give it a few coats of Chalkboard paint. I needed 3 coats to get good coverage!
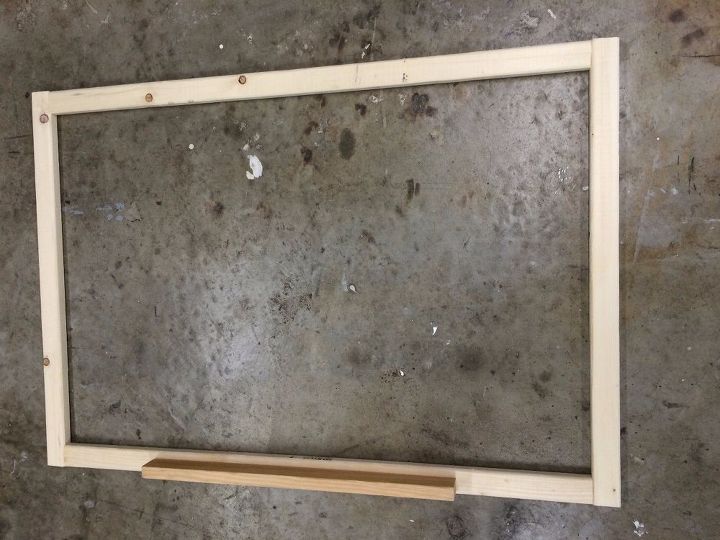
Cut the 1 x 2 furring strips to 2@25.5" - short sides, 2@34.5 " - long sides and 1 @ 20" - shelf. Make pocket holes and build the frame. You can also use countersunk screws if you don't have a pocket hole Jig. Attach the bottom shelf using screws from behind.
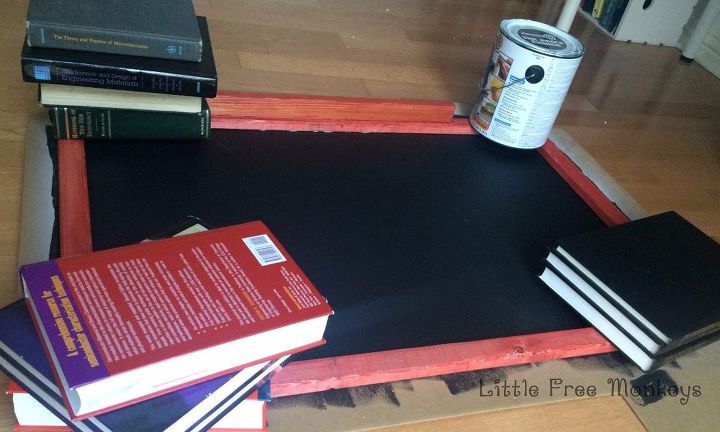
Paint or stain the frame to color of your choice. I used a red stain I had from another project. Glue Frame to chalkboard using liquid nails.
Hang up on the wall and enjoy. I used D-rings and monkey hooks combined with 3M command strips to hang it. It is super sturdy and has stood up to my 2 year old's rough ways.
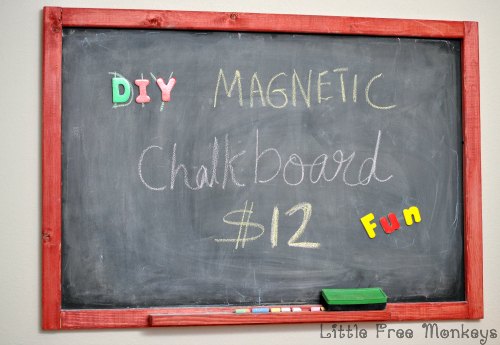
The kids love it and have enjoyed it for hours on end playing school or just doodling! They also love to play with the cute pom pom magnets they made which is a great art project for the summer afternoons. And I am happy at how it fits in the playroom with the Homework organizer I made.
Want more details about this and other DIY projects? Check out my blog post!
Comments
Join the conversation
2 comments
-
Nice!
-
Love it!


Frequently asked questions
Have a question about this project?
Is it possible to see the back of this, specifically your hanging method which was used.
Nice project!
Thank you.