


Easy Spring Wood Sign

Hello everyone! I would like to say thank you to everyone who has taken the time to join me in creating these crafts. I really appreciate all of you.
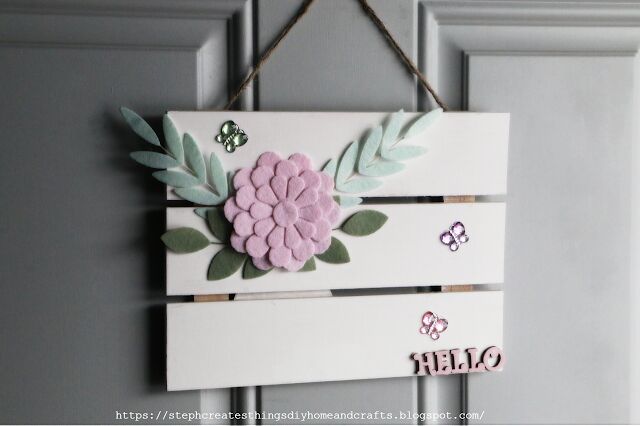
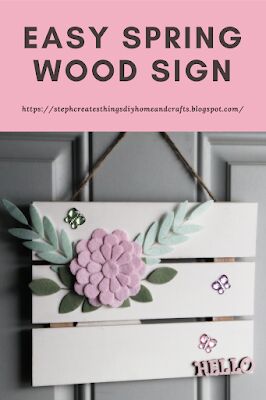
Today we are creating an easy Spring wood sign. The wood piece I am using was purchased at my local Dollar Tree store, and it was three dollars. I'm also using felt flowers from a wreath pack I purchased at my local Target store. I was able to find this pack in the dollar aisle, and it was three dollars.
If you're ready, we will begin to create our Spring sign. First, let's check out the materials needed for this craft.
Be sure to check out the video tutorial

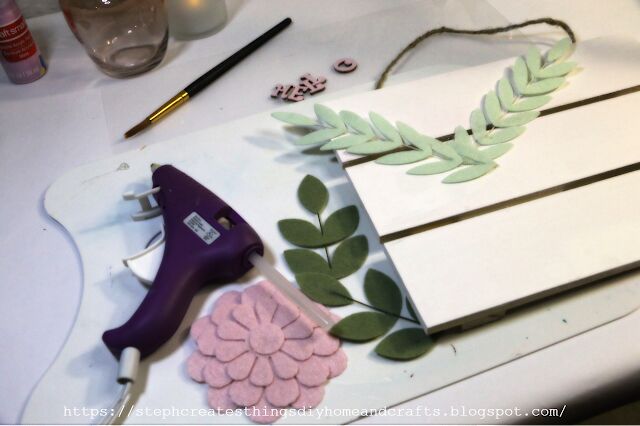
Materials needed:
One Wood pallet sign- purchased at Dollar Tree
Felt flowers- I'm using a felt flower wreath pack from Target
White paint
Pink paint
Adhesive- I used hot glue and E6000
Wood letters
Paintbrush
Butterfly gems- or any assorted gems of your choice.- I'm using butterfly gems from my local Dollar Tree
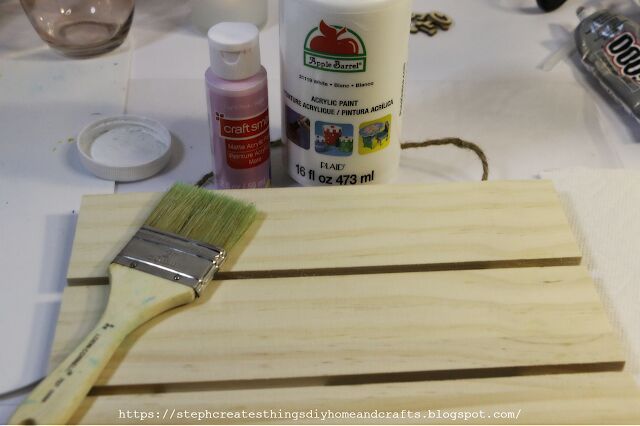
Start with applying white paint onto your wood pallet. I put about three two coats of just white paint.
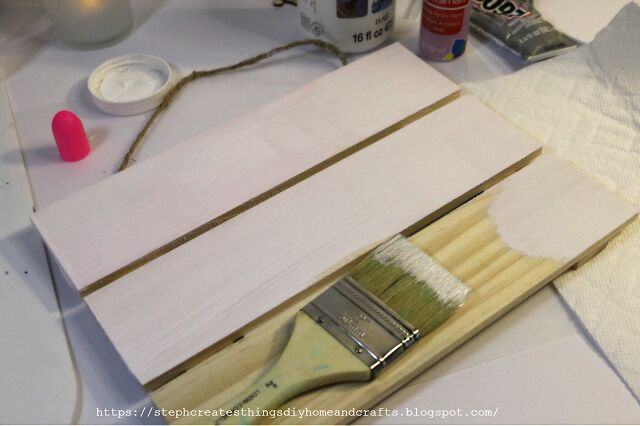
Next, mix some of your pink paint with your white paint, and apply this mixture onto your wood pallet sign. Allow for your sign to dry.
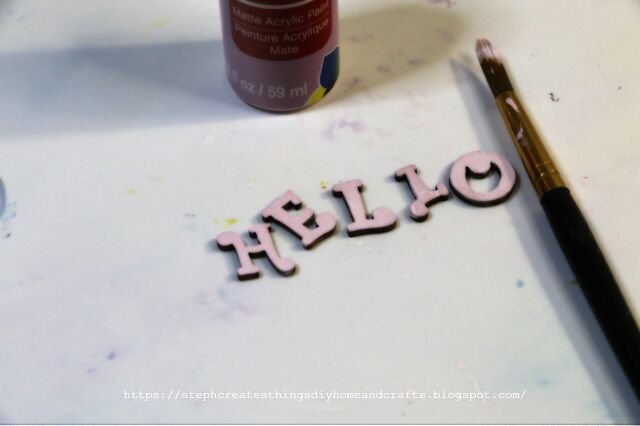
While your sign is drying, start applying some paint to your letters. I used pink paint on my letters. I applied two coats to completely cover each letter. I wanted my words to spell out home, but you can have your words say pretty much anything.
Next, take your felt flowers and use hot glue to apply them to your wood sign.
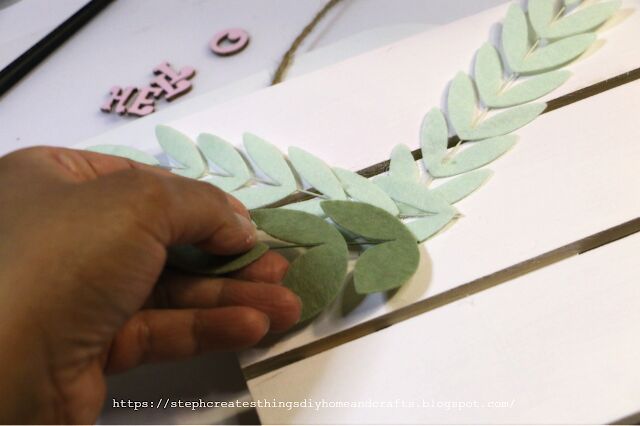
I started with my longer leaves, glued them down, and then I added the shorter darker leaves on top of those. Once the leaves were down, I added the pink felt flower on top of the leaves.

Now you are ready to add your wood letters. I found that it was easier to use my E6000. With the letters being on the smaller side, I did not want to burn my fingers if I used hot glue for this step.
I applied a small amount of adhesive on each of the letters, and then I gently pressed each letter down onto my wood sign. I decided to add my letters to the bottom of my sign.
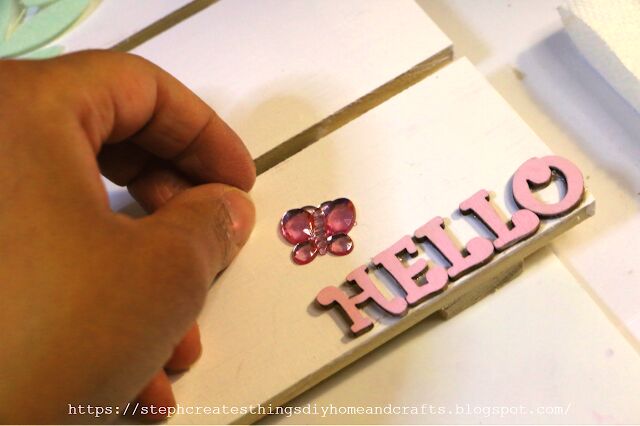
After you have applied your letters, take your butterfly gems, and add a small amount of glue on the back of each butterfly. I randomly placed my butterflies on my wooden sign. You can place your butterflies wherever you choose.
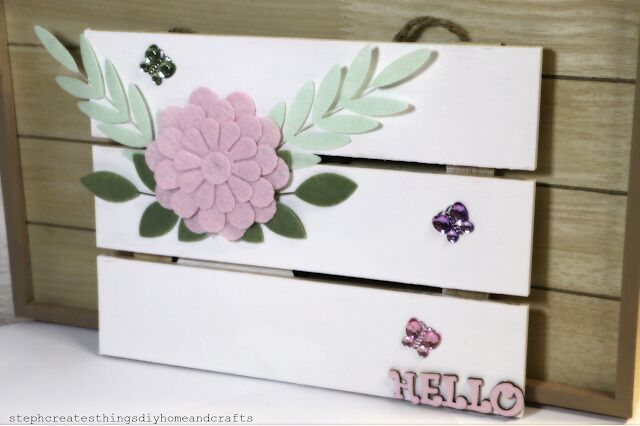
Your wood sign is now complete. All that is left is to find a spot to hang your Spring wooden sign. I hope that you have enjoyed this easy DIY project. Be sure to check out my other DIY projects on my blog. https://stephcreatesthingsdiyhomeandcrafts.blogspot.com/
Thank you so much for stopping by.
You might also like
DIY Dollar Tree Wood Pallet Succulent Key Holder Design
DIY -Decorative Hanging Flower Design With Wooden Pots
Pin/Share/Save


Frequently asked questions
Have a question about this project?