


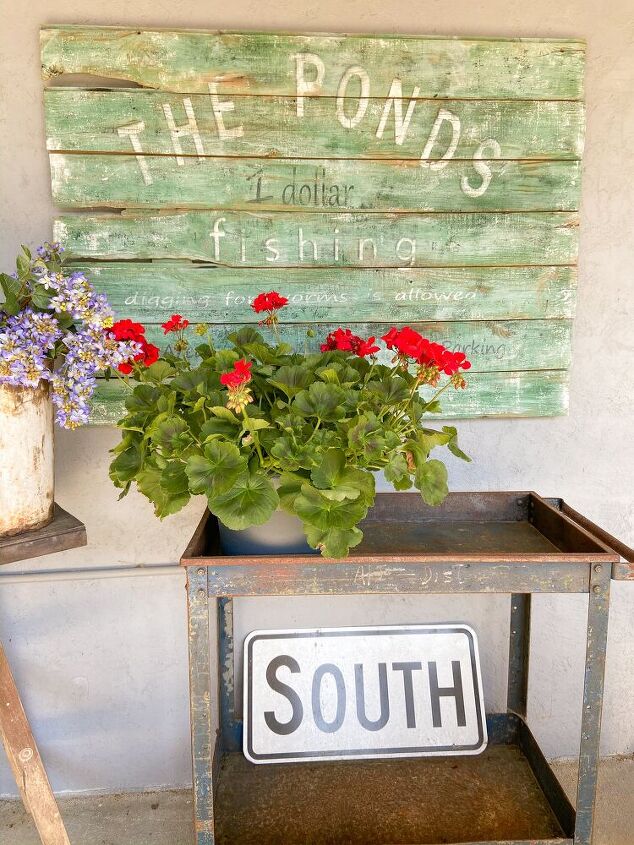
How To Build A Vintage Inspired Sign
DON'T YOU JUST LOVE OLD VINTAGE SIGNS? BECAUSE THEY ARE HARD TO FIND, HERE IS HOW TO BUILD YOUR OWN DIY VINTAGE INSPIRED SIGN AND HAVE THE LOOK OF AN AUTHENTIC OLD SIGN.
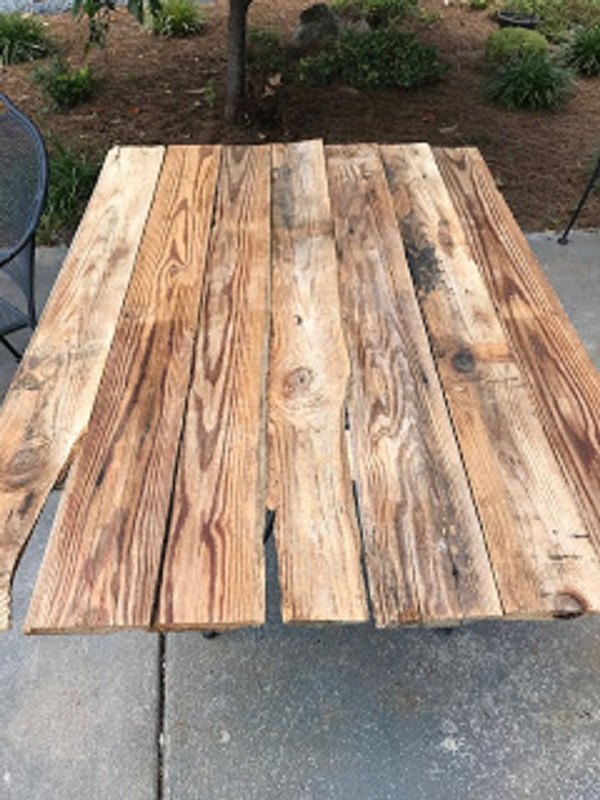
Since most signs from that era would have been made of wood, imperfections would be important. To add to the authenticity of a real vintage sign, it was important to use old wood.
Fortunately, this old shiplap was stacked in my dad's old building. After we cleaned the boards, we cut them to the desired width for the vintage sign we were making. These boards will be perfect to build a vintage inspired sign.
Don't worry if you don't have old wood. You can use new wood and use distressing techniques like these to make the wood look old.
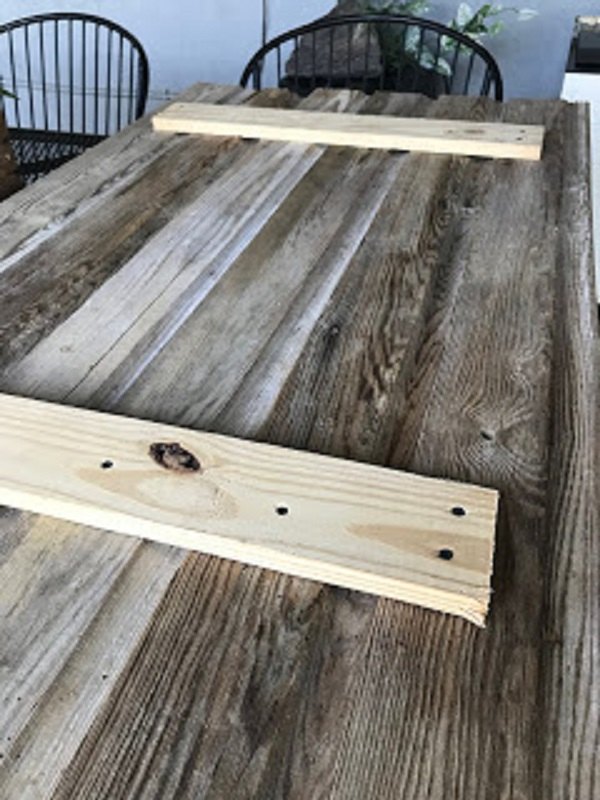
Next we cut a couple of 1×4 boards slightly shorter than the height of the sign. We attached to the back of the shiplap to hold the boards together using wood screws. Be sure your screws aren't to long. You want them to attached the two pieces of wood without puncturing the wood in the front of your sign.
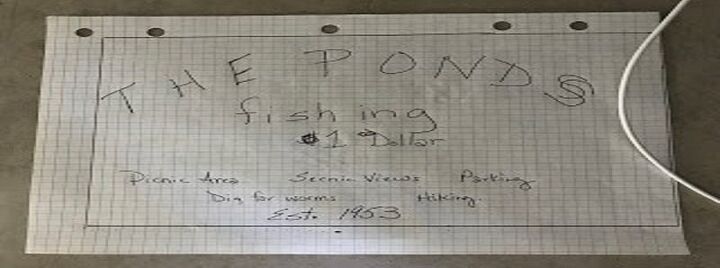
Once you have the size of your sign determined, draw out your design. I like to use graph paper to draw the design to scale.
This step very important in determining where each letter will go. Each square on the graph paper equals an inch on my board. Therefore, I know exactly where to place each letter and how large to cut the letters.
Next I used my Silhouette Cameo 3 to design and cut a stencil for the sign. For this project, I used card stock to cut the stencils. I knew this was a one time project. When cutting stencils to be used multiple times, I use stencil material instead.
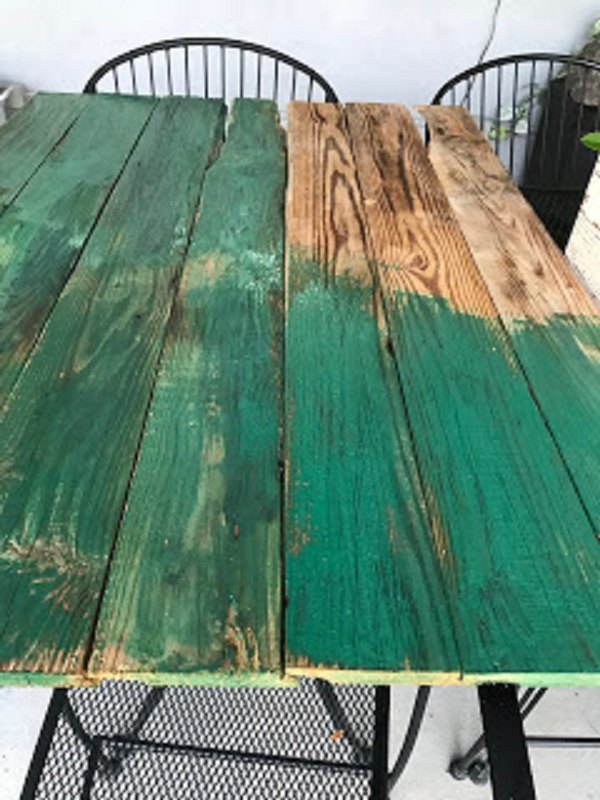
For this project I choose Amsterdam Green and Duck Egg by Annie Sloan Chalk Paint and Black Craft Paint. Beginning with Amsterdam and 50% water, apply a light wash over the whole board.

Then using a dry brush technique, add Duck Egg over the top, leaving a lot of the green peeking through.
Using iron orchid decor large distress stamp, you can add some black craft paint to add a distressed look to the surface. These are so cool. You just roll a small amount of paint onto the stamp and then just gently lay it on your piece and lightly press. It leaves these perfect distress marks on the boards.
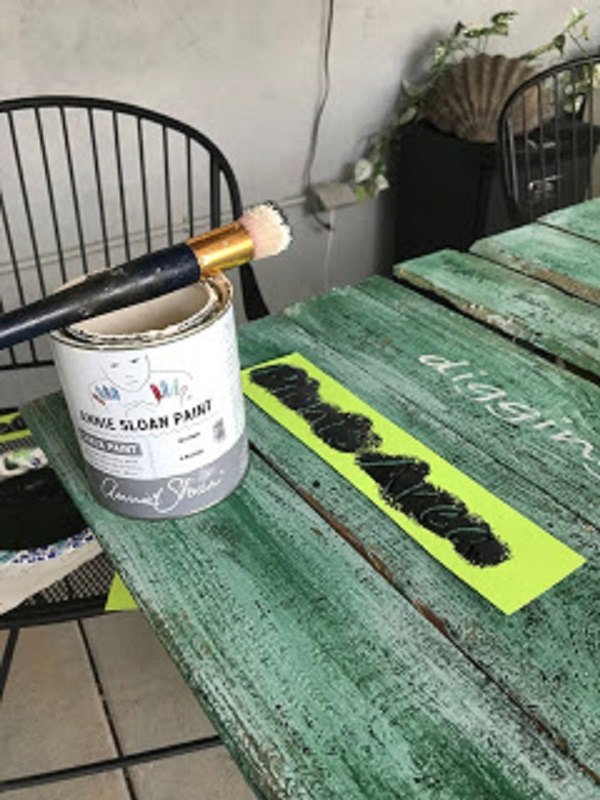
Use White Chalk paint and the black craft paint to stencil the sign. Carefully attach your stencils to the board following the pattern you made on graph paper. Use painter's tape to hold your stencils in place Use a stencil brush, carefully apply the paint to the boards.
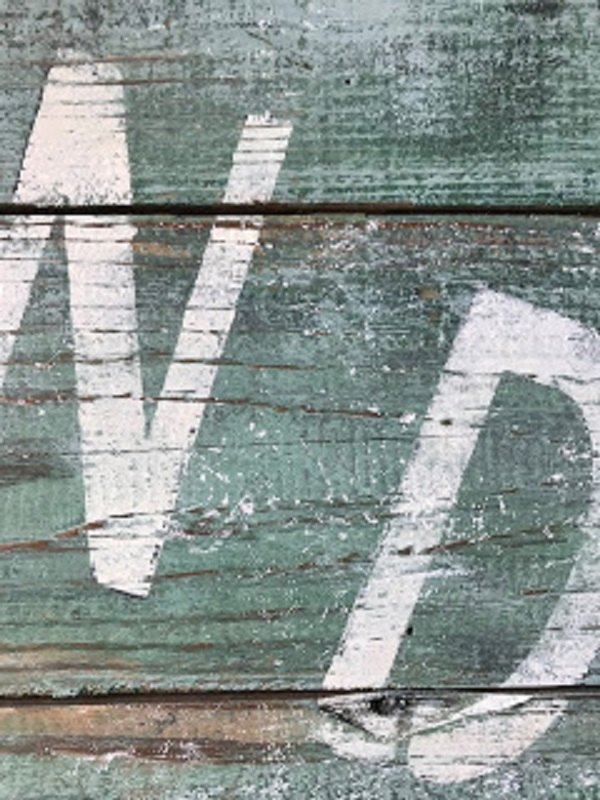
You may want your sign to show more signs of age! So, once the stencil is dry, sand the entire board, removing more paint. Next, add a layer of Old White Paint distressing by using the Iron Orchid Distress Stamp.
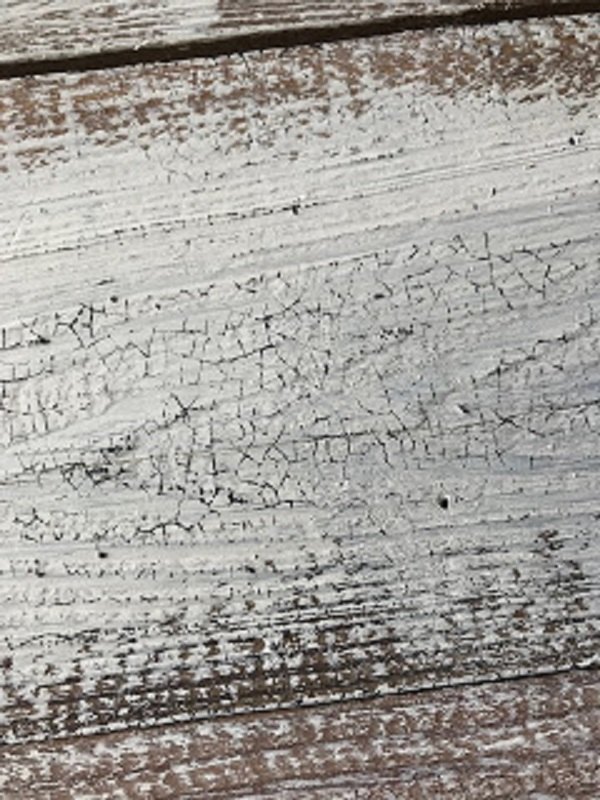
You know paint that is over 50 years old will be crackled. If you want an authentic vintage sign, then add a crackle effect to the piece using another stamp. I used Iron Orchid Craquelure Stamp and black craft paint. Note: I am not affiliated with Iron Orchid but I do like these reusable stamps.
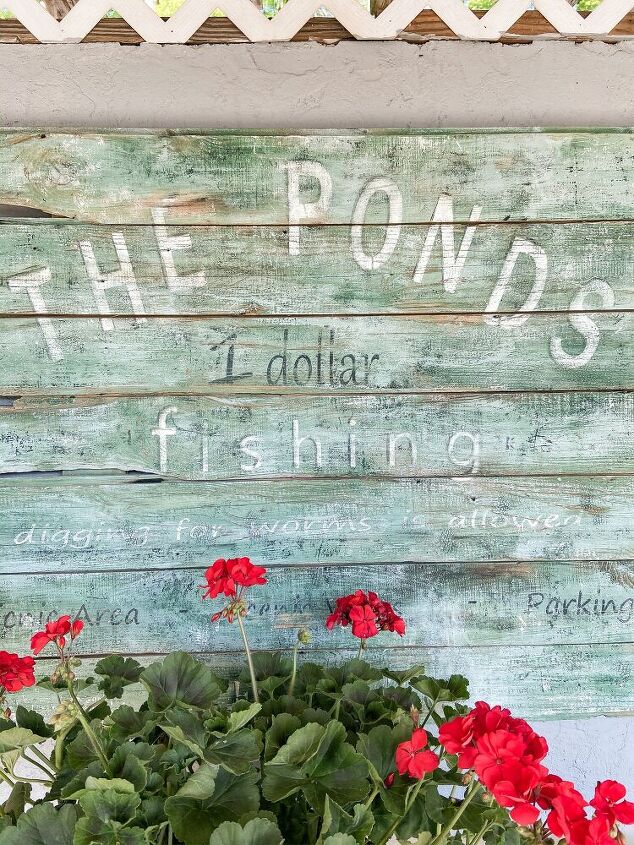
How do you like it? I can truly believe this sign stood on our property over 50 years ago!!!
If I close one eye!!! LOL
Thank you for stopping by. I hope you are inspired to make your own vintage inspired sign. Here is another DIY project you might enjoy.
Resources for this project:
See all materials


Comments
Join the conversation
-
Beautiful! I loved it and I assure you inspired me.
-
Loveeeee your sign!! We have a place in the lake, this would be perfect 🎣🐟 keep making beautiful signs and keeping us inspired 😃


Frequently asked questions
Have a question about this project?