


Wall Stripes With Contact Paper

by
MyEye4DIY
3 Materials
$15
1 Hour
Medium
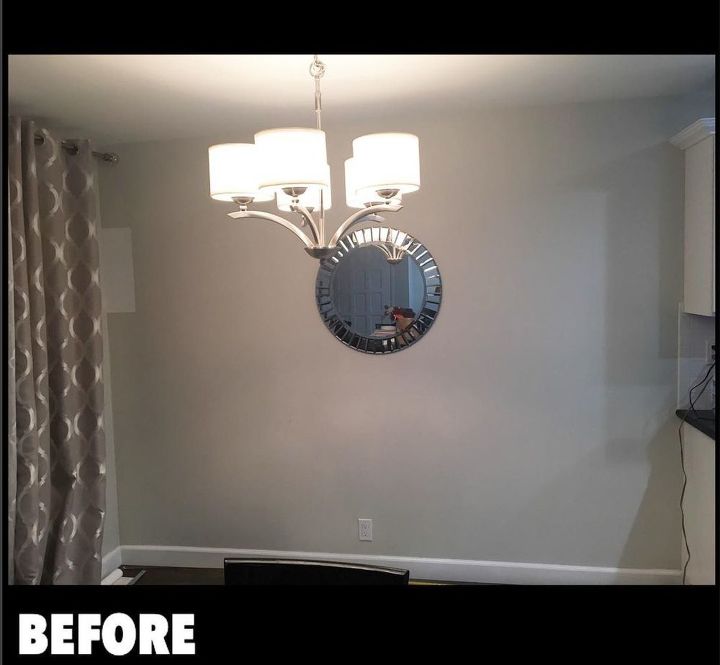
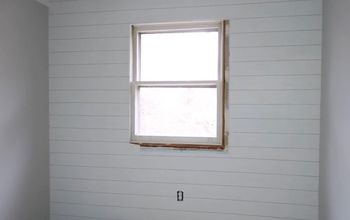
Want wall stripes without all the fuss? I'll show you how to create a cool accent wall using contact paper.
THE BENEFIT: Straight Lines! No painting, less clean up!
Here is how I did it:
I decided on horizontal wall stripes. (Try vertical if that's your thing).
Most contact paper is 18 inch x 108in. I new I'd only apply about 3 rows since my wall isn't that tall. Be sure to measure your wall to see if you will need multiple rolls of contact paper.
CUT CONTACT PAPER
- I cut three pieces of contact paper to the width of my wall. MEASURE ACCENT WALL- I measured the hight of my wall to calculate how high I wanted each stripe. I could have done stripes that were all 18 inches thick (the size of the contact paper) but I wanted to add a little more dynamic to our accent wall and decided the opposing heights. - To start, I marked an 8 inch high row at the very top of my wall, then an 18 inch high row directly underneath. I repeated this step until I reached the bottom of the wall. - When complete I had three 18 in rows and four 8 in rows. The 8in rows will remain the color of my existing wall (Gray) and the 18in rows will be covered with my contact paper.
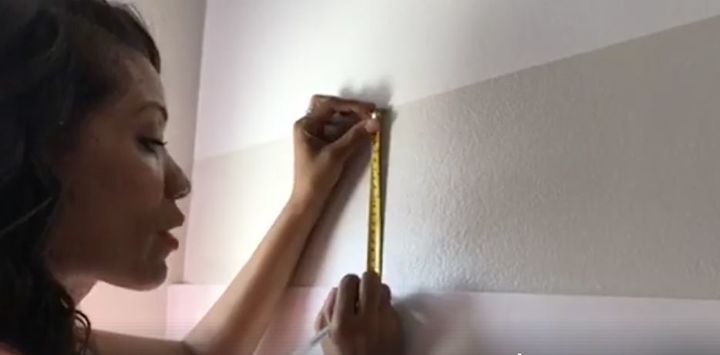
CREATE ROWS ON WALL
- To make sure my rows were straight, I used a level with a laser beam and marked the wall in 4 -6 places going across to assure the contact paper remained in a straight line as I applied it to the wall from left to right. I repeated this step along the top of all three 18 inch rows. - To make it easier to apply the contact paper to the wall, I lightly taped each row of contact paper to the wall with painters tape (easy to take off) along the lines I just drew.

APPLY CONTACT PAPER STRIPES
- Starting with the first 18 inch row of contact paper toward the ceiling, I peeled back the wax paper from the top & bottom left corners and folded them backwards. This is important because grabbing onto these two corners of wax paper is how you will be able to easily apply the sticky part of the contact to the wall.
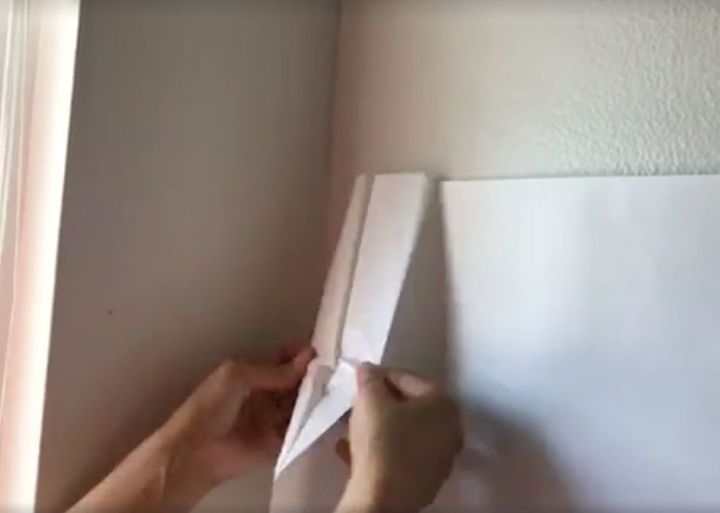
- Start to apply the strip adhering the top and bottom corners to the wall. I then used my paint guide tool and ran it along the top of the contact paper to secure paper to the wall. You can also use your hand. You can also use it in the corner of the wall to really secure the paper in the little crack.
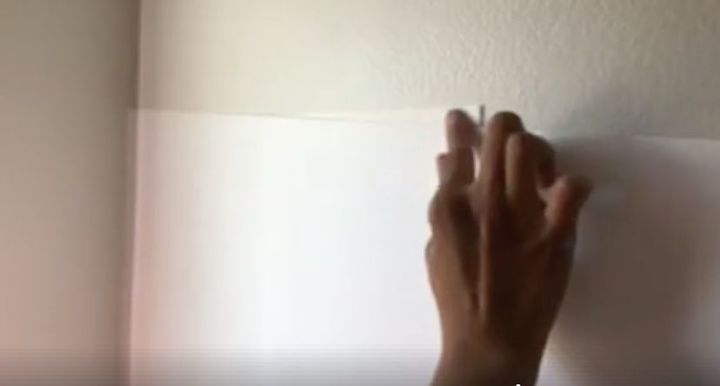
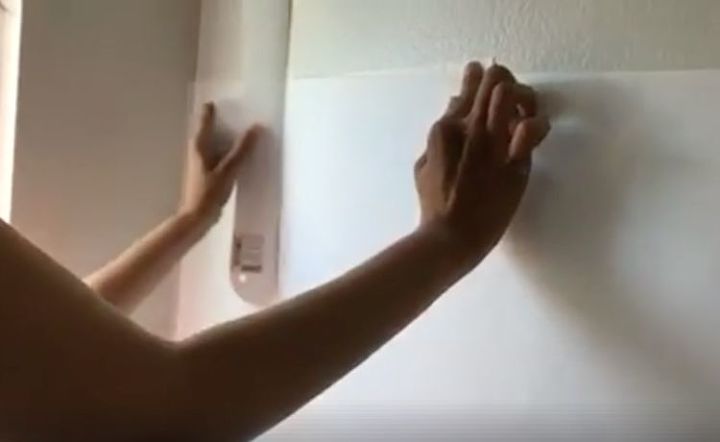
- I began to pull back the wax paper along the back of the contact paper and continued to apply to the wall in SMALL sections. I made sure to line up the strip of contact paper along the markers I created with the level to make sure the strip was straight going all the way across the wall. - Once the entire stripe was on the wall I used my hands to smooth out any air pockets and make sure the contact paper was firmly pressed against the wall. - I repeated these steps for the remaining two 18 inch stripes.
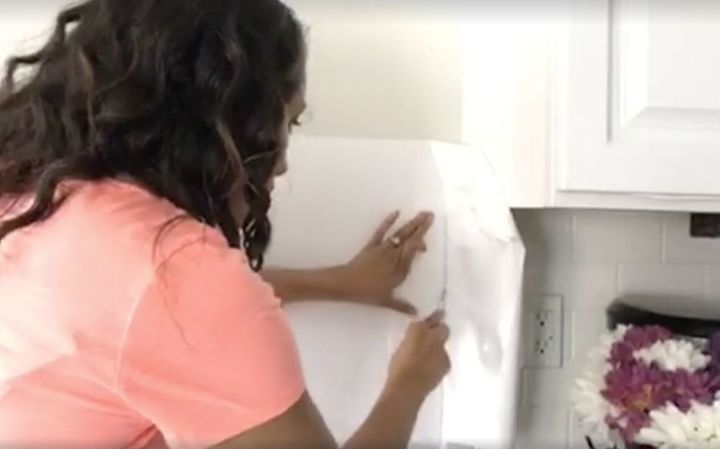
CUT OFF EDGES WITH XACTO-KNIFE
- Once all my stripes were applied to wall, I places my paint guard along the corners of each stripe and ran my xacto-knife along it from top to bottom to cut off the excess contact paper.
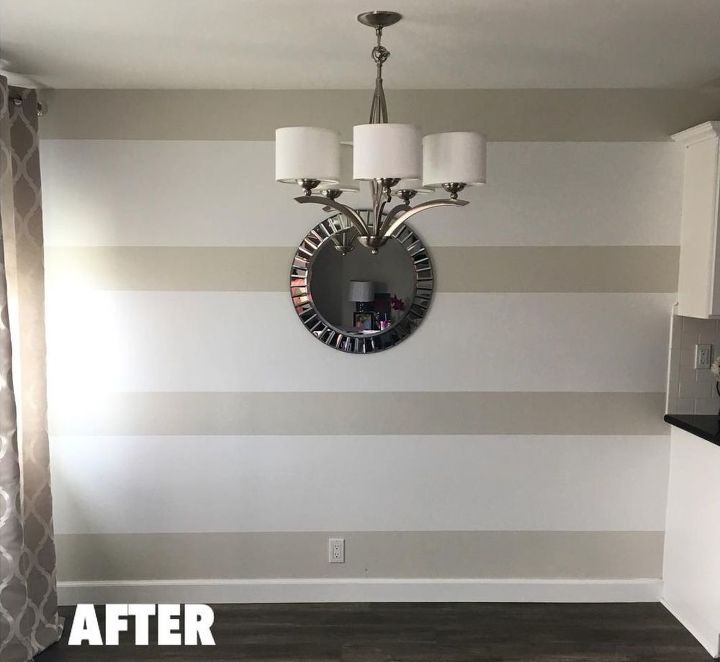
I love the way it turned out! I love the contracting thickness of the stripes as well as the white and gray colors. There are no rules in the world of DIY, just guidelines. DO what works for you and have fun!
If you have any questions comment below and I'd be happy to get back to you. See you all on the next project! Kalia
{
"id": "4256100",
"alt": "",
"title": "",
"video_library_id": "7647",
"thumbnail": "https://cdn-fastly.hometalk.com/media/2017/09/15/4256100/wall-stripes-with-contact-paper.jpg"
}
{
"width": 634,
"height": 357,
"showRelated": true,
"noautoplay": ""
}
Comments
Join the conversation
1 comment
-
My best friend’s sister makes $89 an hour on the internet . She has been out of a job for six months but last month her check was $14750 just working on the internet for a few hours.
Go this web and start your work.. Good luck... http://ow.ly/oa7a30fbLnf


Frequently asked questions
Have a question about this project?
Great job!!! The funny thing is I have horizontal stripes in a bedroom in similar colours and they were a pain, since it is a windowless room. I wish I had thought of this. Contact paper is more expensive here, but would be worth it. Do you think it could damage a flat finish painted wall?
Is this the cling Con-Tact paper or the one with sticky adhesive? Thanks in advance.
Hello. I loved your post. It's something I'd like to try in my next apartment. How long can I leave the contact paper on? I may be in the next apartment for a few years.
Thank you.