


Fabulous Restored Vintage Metal Lockers

by
DIY Passion
YOU GUYS! This is one of my absolute FAVORITE projects ALL YEAR. And I do a lot of projects, so that's saying something ;)
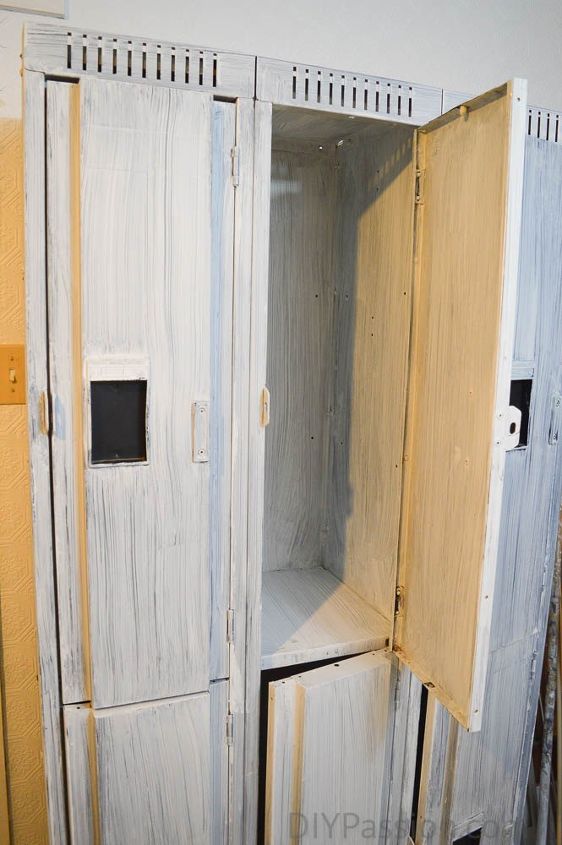
I snagged this old set of lockers from an autobody shop that was under renovation. They sold them to me for a cool $25!! (And then I had to buy my friend a case of beer to deliver them to my house in his pick-up! haha) But they are the real deal - heavy, full-blown steel and insanely cool, right?
I snagged this old set of lockers from an autobody shop that was under renovation. They sold them to me for a cool $25!! (And then I had to buy my friend a case of beer to deliver them to my house in his pick-up! haha) But they are the real deal - heavy, full-blown steel and insanely cool, right?

But they clearly needed some TLC. We are in the middle of a (never-ending) basement fix-up and these lockers are going to be the cornerstone statement piece in my 'studio' area. First things first, we cleaned them with sand paper and steel wool and removed all the hooks and nuts and bolts from inside the lockers. (This step took FOREVER) Then we primed them twice with stain blocking primer. We weren't delicate ;)
We didn't want a glossy look (and investigated sand blasting, but holy expensive batman!) - so we settled on a super matte finish. We used Rustoleum Chalked paint on the fronts, doors and insides - white, robin's egg blue and medium grey. It took three coats and we let each coat dry entirely before applying the next. Normally, I wouldn't do that - but with this heavy metal, it stuck MUCH better.
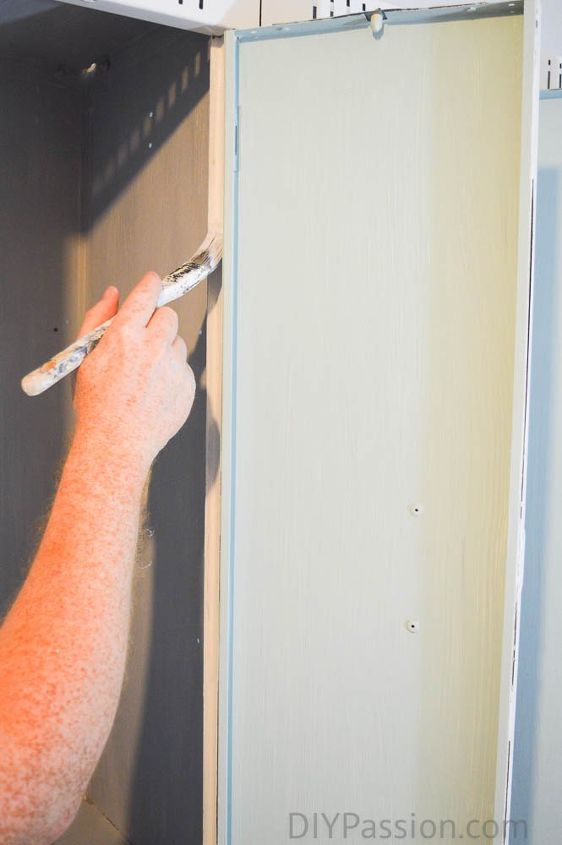
The sides were quite dented. We tried to pound out the dents, but soon realized we'd never get them looking 100% un-dented - so we did the next best thing! Covered them up! We simply used the bolts that held the lockers together to attach basic 1/4 inch ply to the sides. Once the room is finished and the floors are painted, the natural wood will be the accent hue in the room - so it will work well! Plus - it hides the dents :)
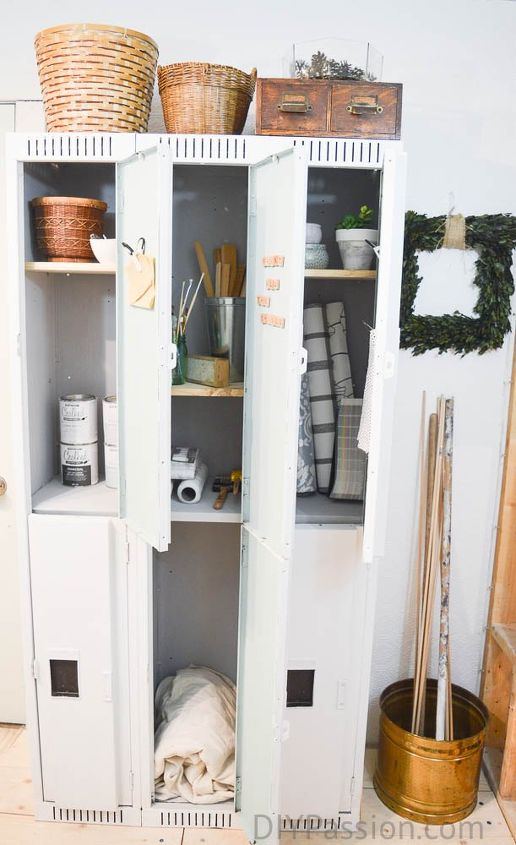
And here they are! I LOVE that they hold all my paint and DIY supplies and I'm super excited with how they turned out. We did let them cure for almost a week before really closing the doors etc. And they don't scratch at all! Make sure you check out our full post below :)
Want more details about this and other DIY projects? Check out my blog post!


Frequently asked questions
Have a question about this project?