


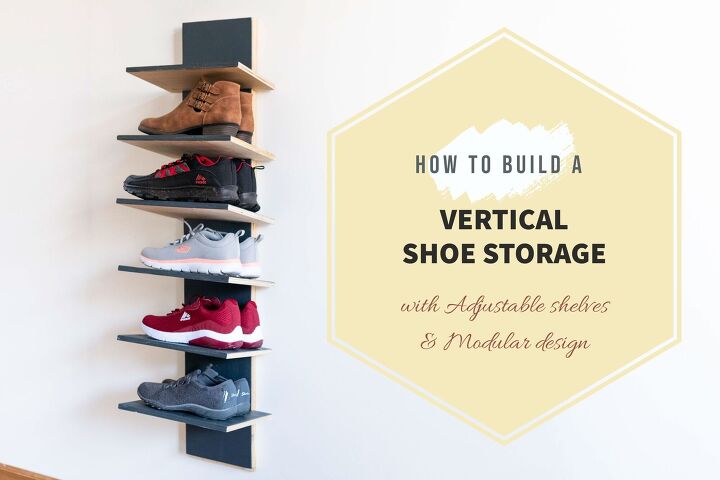
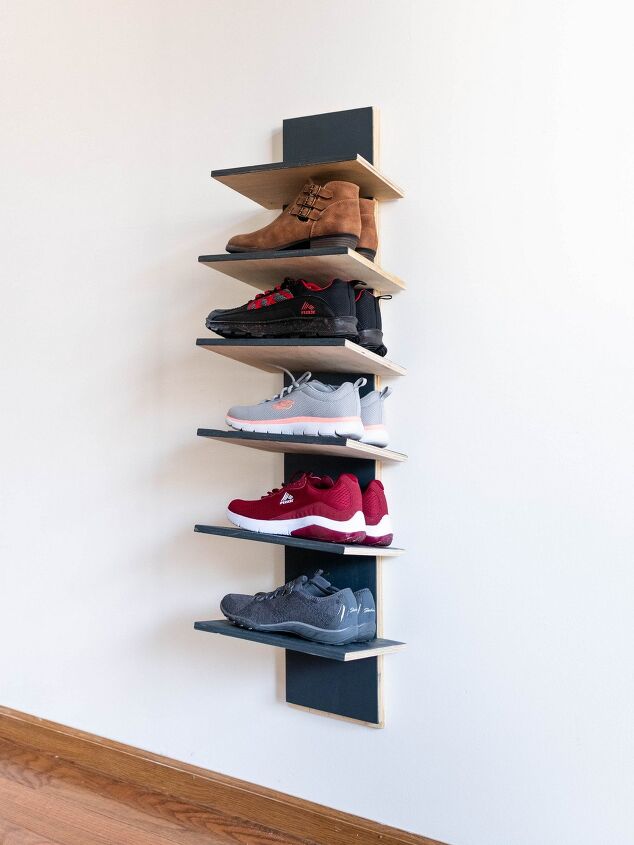
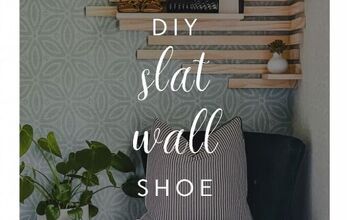
DIY Vertical Shoe Storage With Adjustable Shelves
A beginner project. Weekend build. A grab and go storage for footwears! If you have more vertical space than width on your wall, then this compact shoe storage will work for you! This storage rack features a simple system with adjustable shelves to accommodate any kind of footwear height. Not to mention, the design is modular too. Here comes the DIY Vertical Shoe Rack with Adjustable Shelves.
In a way, I can say that its a scrap wood project. Because, I built this storage using leftover plywood from my TV cabinet build. Technically, I spent zero dollar on this project. You can build this for less than $25.
Hometalk Recommends!
DESIGN:
The design is purely based on my need for our home. We have a narrow wall space to keep our casual footwears near the entrance of our garage. (The pictures of the storage you see in this blog are staged in location with better lighting. So, you may not see the actual narrow wall). We have separate closet inside the house for rest of the footwear. The garage storage is mainly for our grab and go shoes but at the same time it is not an eye sore or a closed storage, something off the floor and need to hold only a few casual shoes.
Best thing about this design is that you can make more than one and stack it on top or on side depending upon your wall space. If you want to keep a tall pair of boots, you can just remove the shelf in between to gain the height you need. You can mount this in garage, mudroom, entryway or wherever you have the need.
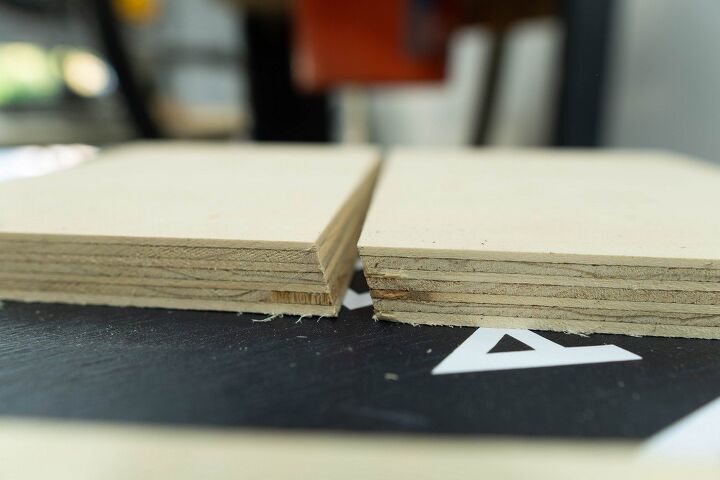
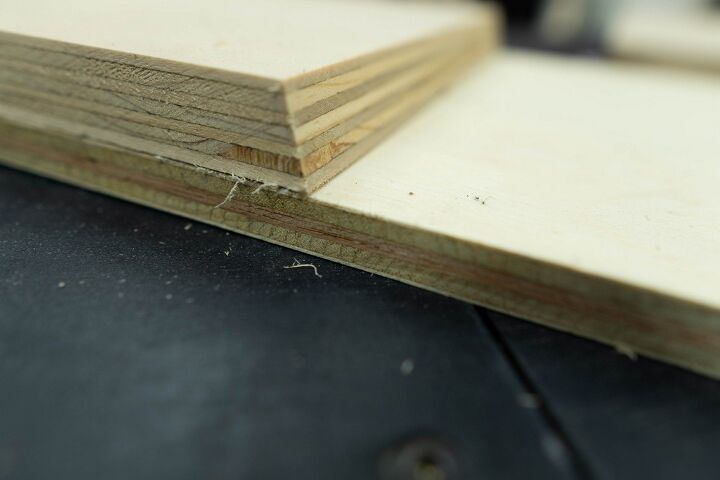
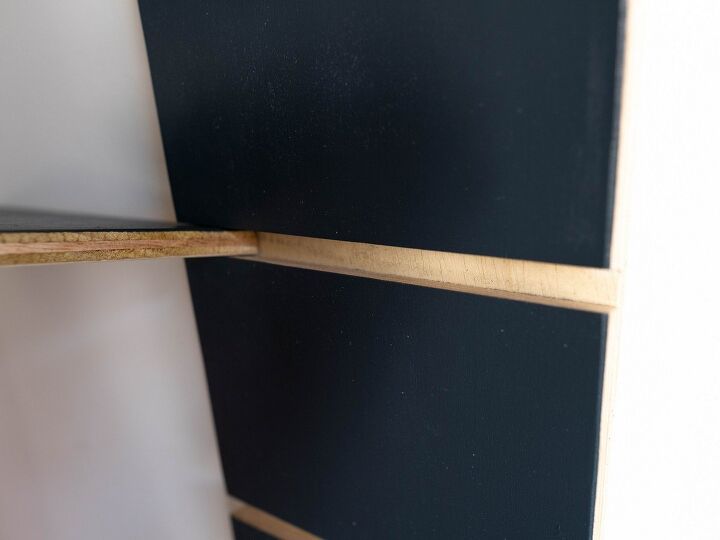
The shelves are made adjustable with a simple 15 degree gap track. It is only an angled gap that holds the shelf in position. Its stable and does not move unless you move it manually. I have used the same track technique while building our Dressing unit with full height mirror with LED light. The tracks were used for adjustable wall hooks to hang accessories. If you want to build something like that, follow the video tutorial or get free plans from this article. In this shoe storage build, I have only tried to push the limit of that simple angle cut track.
1: CUT
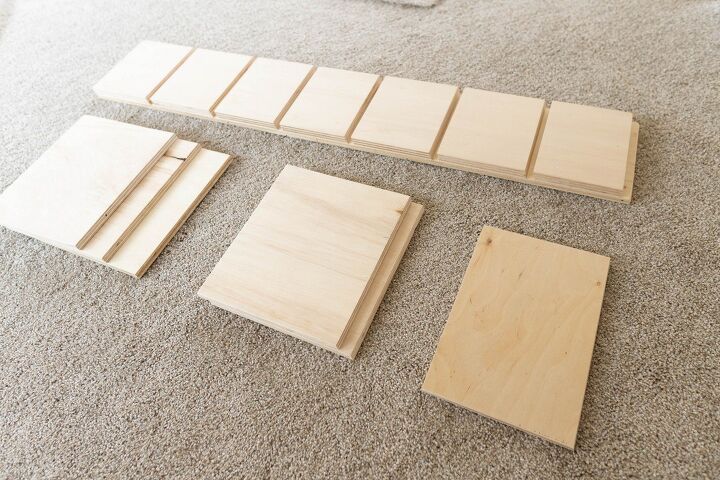
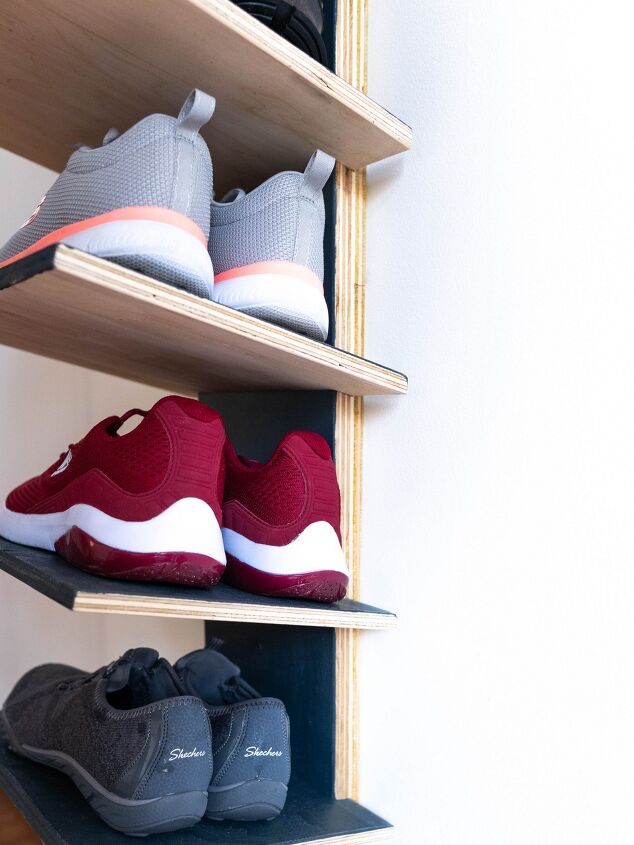
Cut the wood according to the dimensions in below image. This dimension will accommodate maximum of six footwears. The shelf sizes are based on the maximum size of footwear. Optionally, you can reduce or increase the size based on your need.
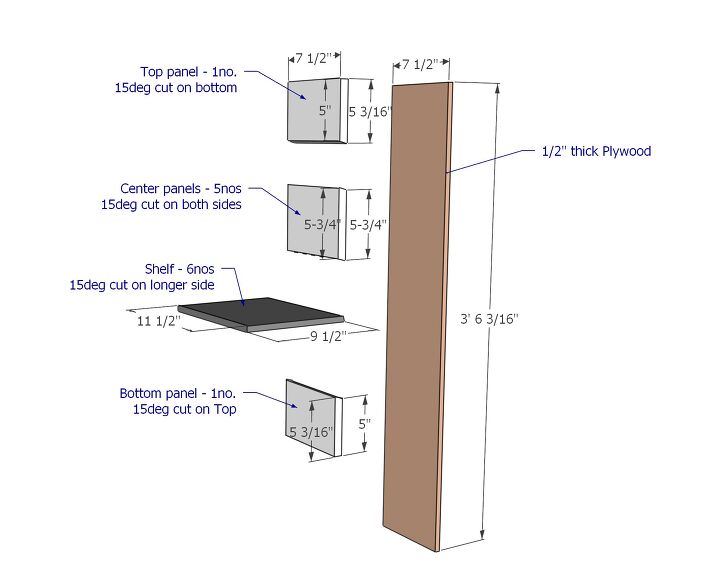
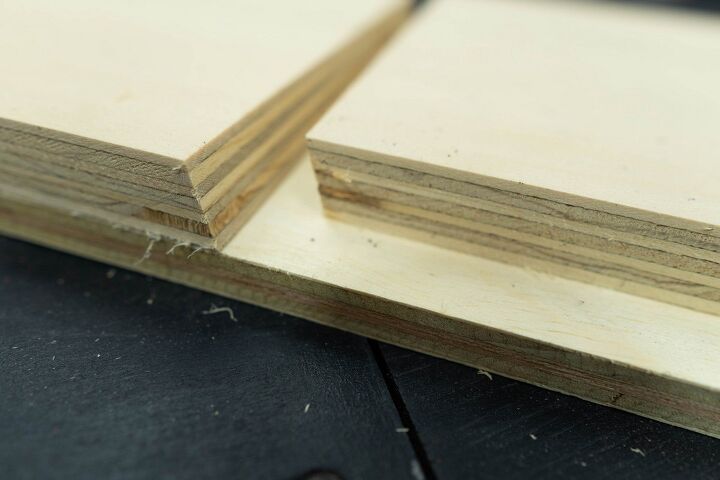
The back panel and the shelves are cut from half inch thick plywood / wood. The ones mentioned in above image as top panel, bottom panel and center panels are 3/4inch thick plywood. Center panels should have 15 degree angle cuts on both sides. The top and bottom plank have 15 degree angle cut only on one side. The other side should have right angle (90 degree) cut.
2: ASSEMBLE
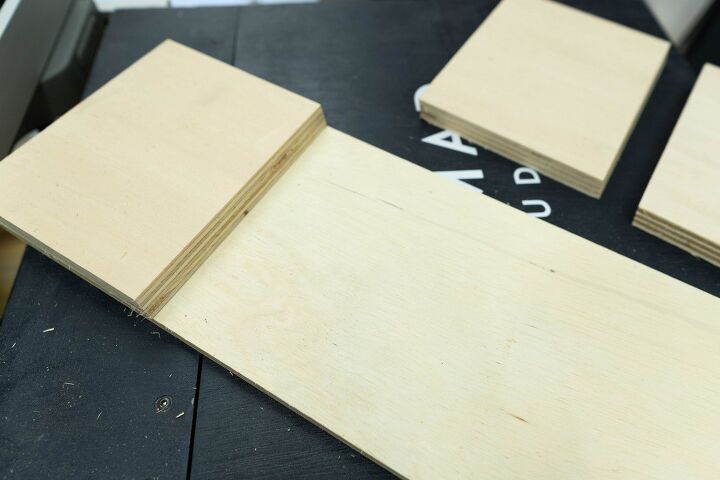
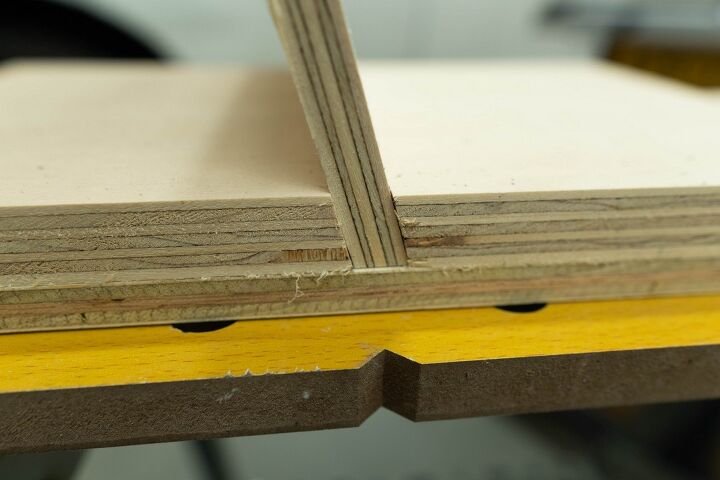
The 1/2inch thick plywood is the vertical back panel. 3/4inch panels that have 15 degree angle cuts go on top of this. Refer the images above to see how the panels are placed. These angle planks are spaced to the shelf thickness and are fixed with wood glue & brad nails. When you insert the shelf in this gap, the shelf should tilt up. Naturally, the tilt helps the shelf and the footwear to stay in place.
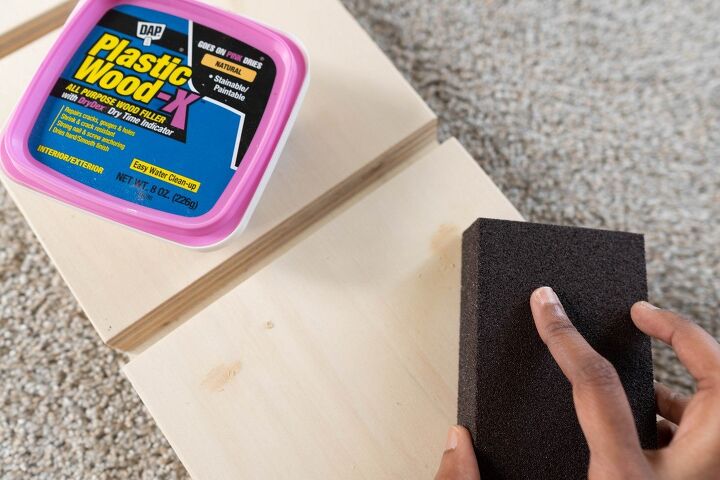
3: FILL & SAND
First, fill all nail holes with paintable wood filler and let it dry. Then, sand all sides and the filled areas with 220grit sandpaper. While you are at it, sand all the edges using 100 grit to smooth & curve the edges a bit.
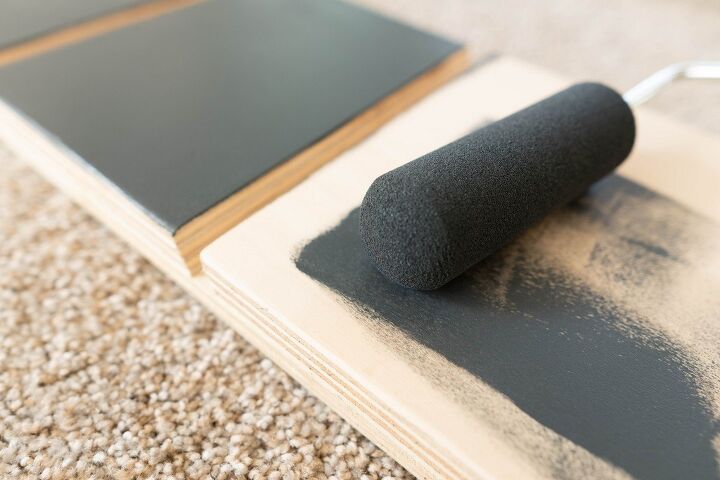
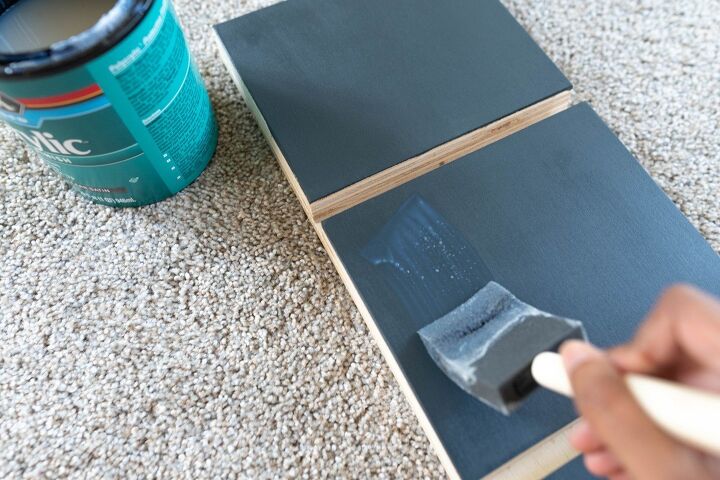
4: PAINT & SEAL
Next, paint the storage in any color of our choice. Before painting, clean up everything with tack cloth. Finally seal with polyacrylic clear sealer.
5: MOUNT
Depending upon the wall material, mount the storage with relevant screws and anchors. If you have drywall like I do, then identify the studs using stud finder and align the storage to its center. Check level and fix with at least 3 screws. Recess the screws and paint over it to get a clean look. However, the screws will hide behind the footwear, so it is not really necessary.

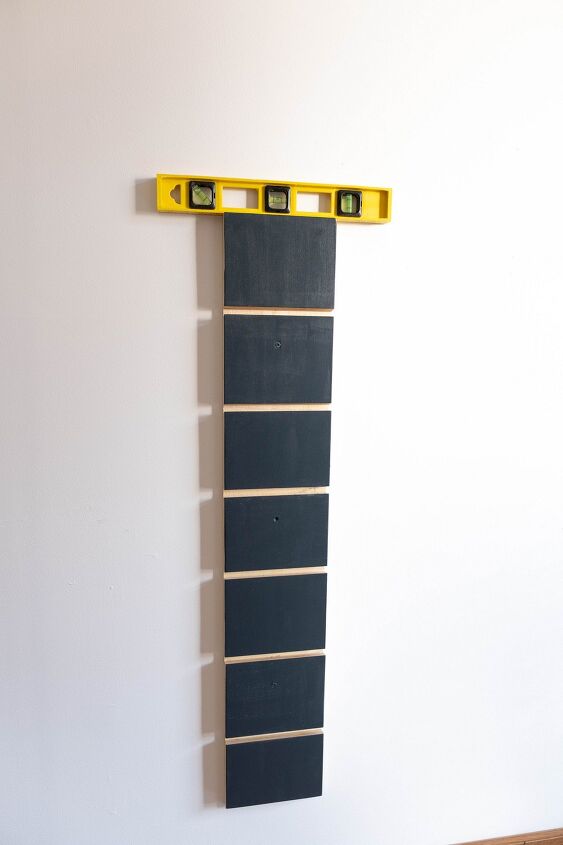
Insert the shelves through the 15 degree angle track
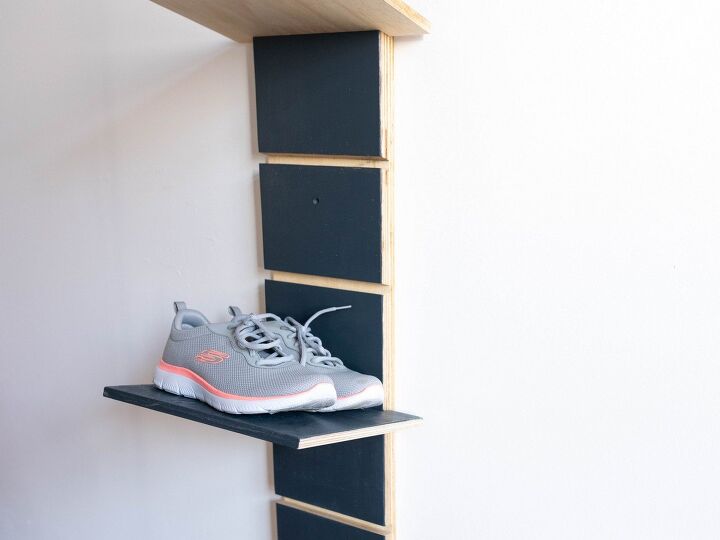
For tall footwears or boots, you can remove one shelf in between to get the required height.
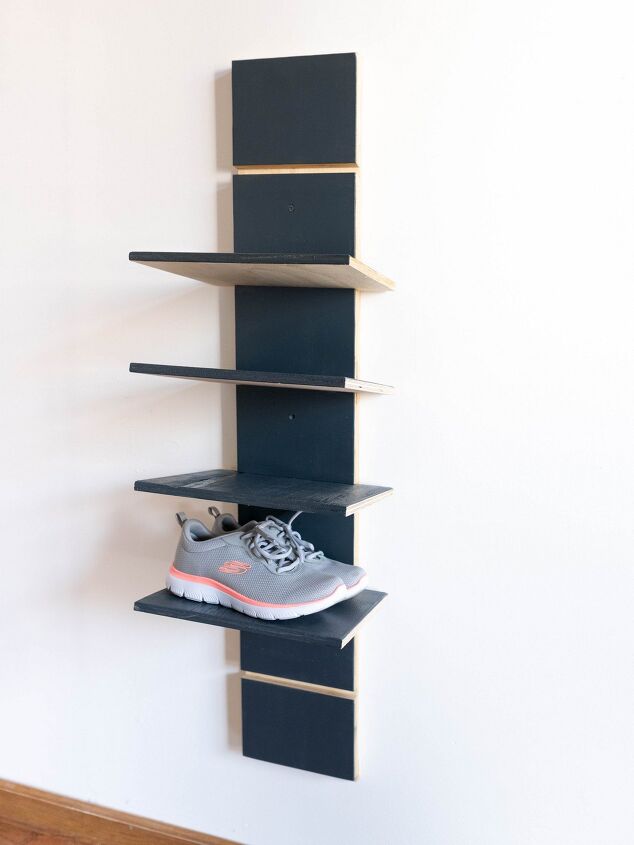
Like I mentioned before, you can make this storage taller or wider depending upon your wall space.
Resources for this project:
See all materials


Comments
Join the conversation
-
I have seen this type of 'shelving' in shoe stores, but had never thought about using it in a home. (until now) 👞Thanks for sharing your project.👟
-
Wow, this is the best. I live with three other adults and shoes are everywhere. This would be a godsend. Thank you fir the instructions!


Frequently asked questions
Have a question about this project?
Great idea. I'm wondering why you didn't paint the exposed ends of the boards???