


How I Made A Custom Rug for Under Our Dining Table
This post is sponsored by Floorigami. All opinions are my own.
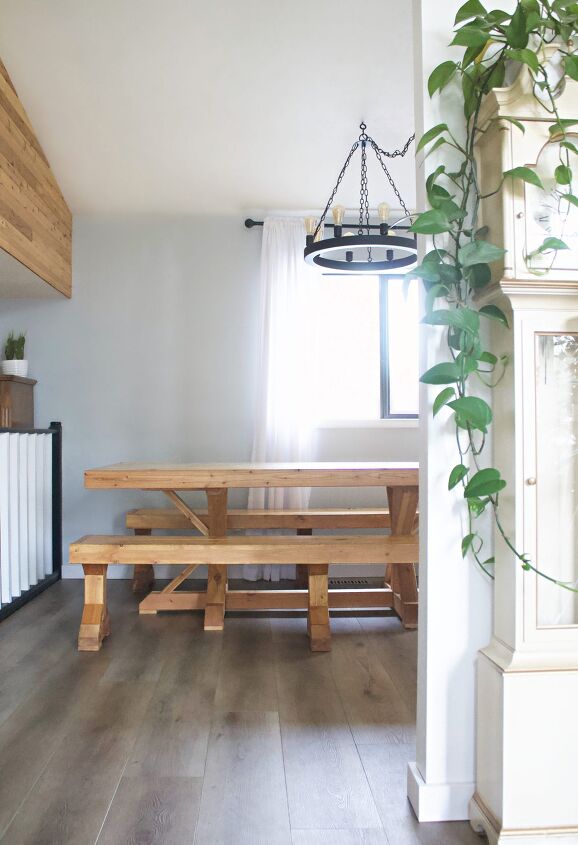
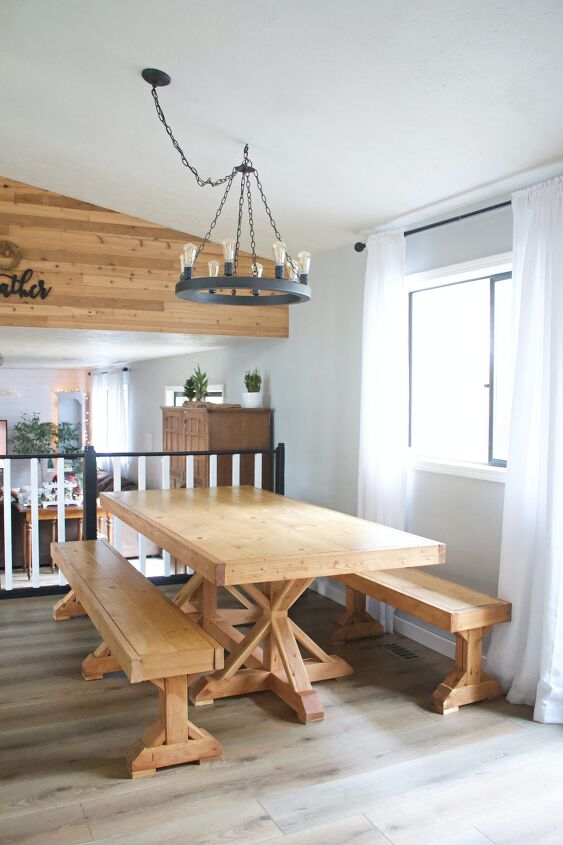
For too long I’ve been staring at the absolutely beautiful dining room table my husband made me, directly on top of our floor. They blended together and the design and craftsmanship of the table was lost in a sea of wood. Friends, I needed a rug. I needed Floorigami.You see, I knew that the table should have a rug under it. To place some separation between it and the and floors, which would soften the area, and help highlight the craftsmanship of the table. Aesthetically, it was a must. I just couldn’t find any rug that would fit the area well. They were all either just a bit too big or a tad too small.
But after months of thinking it over. . . I found the solution to my problem. Making my own rug!
We went from this:
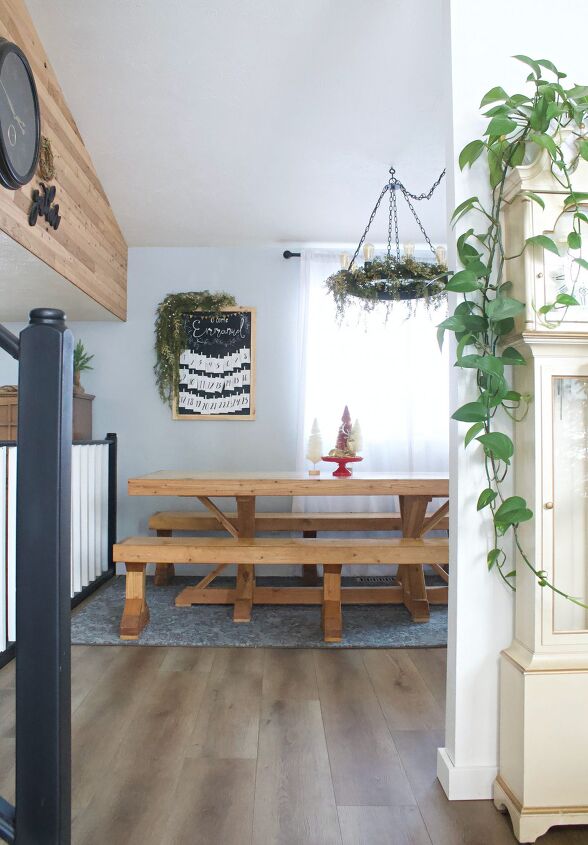
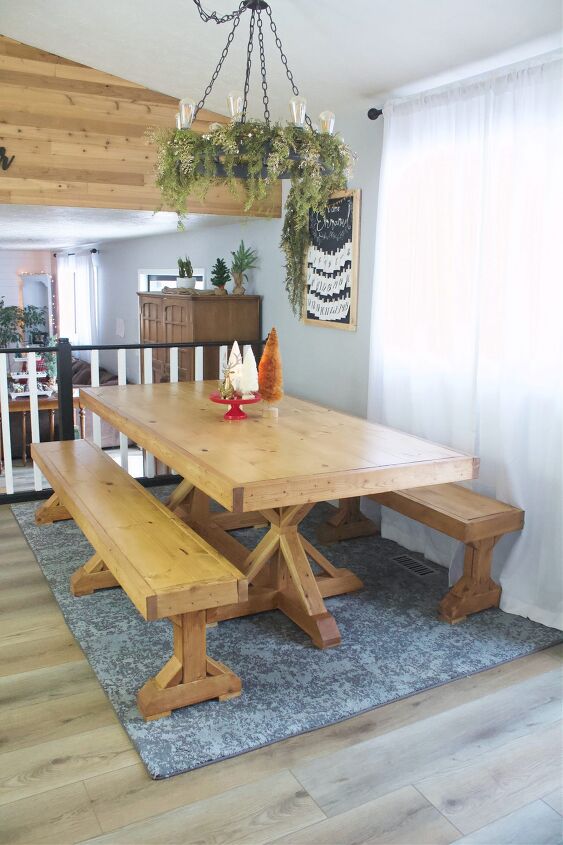
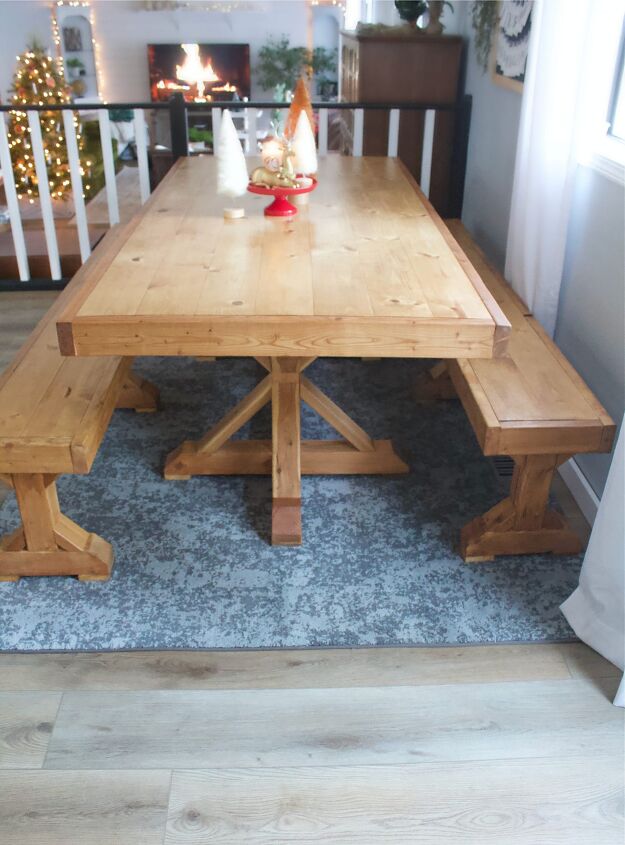
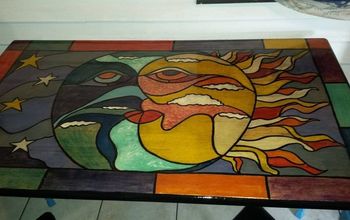
To this:
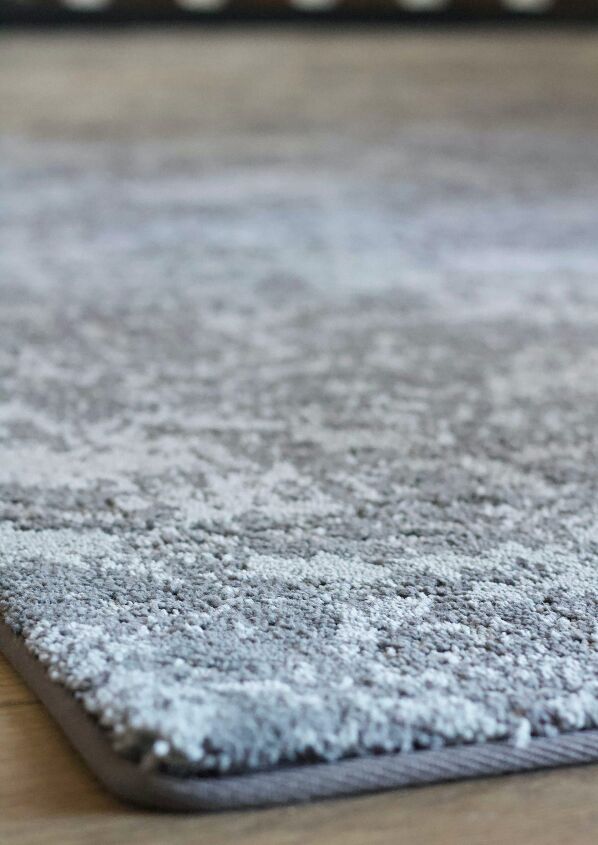
it’S CALLED Floorigami?
Floorigami makes beautiful, quality, peel and stick carpet tiles perfect for customizing any space. You can do a wall-to-wall install, or make a rug for a specific area like I did! The possibilities are truly endless with this product. It comes in all different patterns, plies, and colors. Anyone can find a carpet they love with Floorigami!
What you’ll need:
- Floorigami tiles (This is the color and style I chose)
- Floorigami Easy Edge ( I used this)
- Carpet knife (for trimming pieces if needed)
- Measuring tape to help with rug dimensions

Preparing the space
Make sure the surface you’re applying the Flooragami is clean. I vacuumed to remove larger dust bunnies and then mopped the area and allowed it to dry.
Playing with your space
Lay down your tiles and start playing. Figure out how far you want it from the walls, and how large of an area you’re looking to cover in a rug. This was the fun part and where I started getting excited.
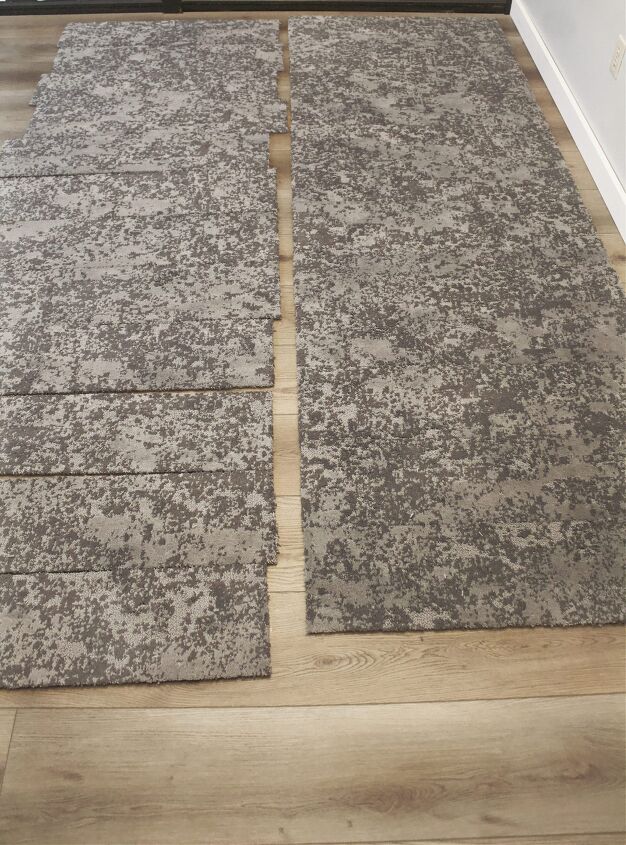
Once you find your sweet spot, start removing the backings and adhere the tiles to the floor. If needed, you can pull up the tiles and reposition them. But, the longer they’re on the floor, the stronger the bond becomes!
Adding the Easy Edge
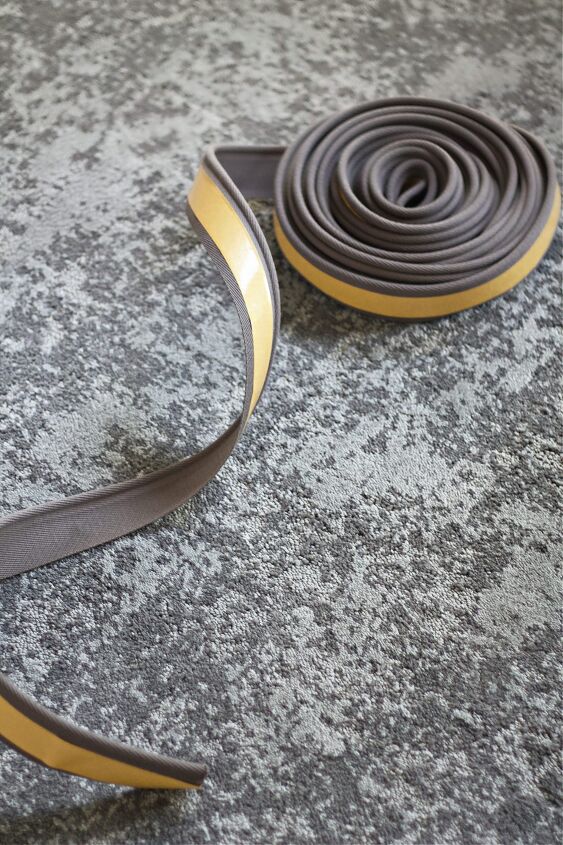
Easy edge is just that, easy to apply. Make sure to watch the video include with this post for how I did it. Basically, remove the backing, apply to the edge to the bottom of your new rug, and voila, it’s done! Start in an inconspicuous corner of the rug where the seams meeting up isn’t as apparent. And don’t start at a corner. See the video for how to do those.
The rug is done!
Then sit back and enjoy your beautiful, custom new rug!
It’s gorgeous! I can’t believe I made it! So simple, just took a little time and creativity.
You can’t tell me this rug hasn’t made a huge impact on this room. It’s crazy what something like a rug can truly do. Changes the whole feel of the space!
If you make your own rug, make sure to tag me over on Instagram! I’d love to see what you come up with!
Happy rug making friends!
Resources for this project:


Comments
Join the conversation
-
I think I'd adhere the carpet tiles to a large piece of canvas so I could move it if necessary. Sticking the tiles directly to the floor seems a bit chancey. But thanks for the information!
- See 1 previous
-
It looks great, enjoy ! Your dining area looks nice with the rug underneath the table. ( The colors you chose are good to hide the crumbs ).


Frequently asked questions
Have a question about this project?
I think it looks great, and is the perfect solution for you. I just wonder if you shouldn't have made it larger to accommodate the bench when sliding it back to get to the table...?