


How-To Install Vinyl Plank Flooring!!!

This was my third time installing vinyl plank flooring (VPF) in my home. You know what they say, third time is a charm! After making plenty of mistakes the previous two times, I have learned all of the tips and tricks on how to lay this type of flooring the easy way! I am loving the transformation and how it turned out in my kitchen. Continue reading for step by step instructions of how you can transform your own home with budget friendly and simple to install VPF!
Supplies & Cost (tax included):
- Vinyl Plank Flooring – $55.30 x 8 boxes = $442.40
- Installation kit (spacers, taping block & pull bar) = $21.58
- Mallet = $7.54
- Jig saw
- Speed square = $5.38
- Box cutter
- Measuring tape
The supplies listed without prices are because I already owned those supplies, so I did not need to buy them. This really was extremely cost effective and took me only 2 days to install. The entire project for new flooring in my kitchen cost me under $500, which is crazy!
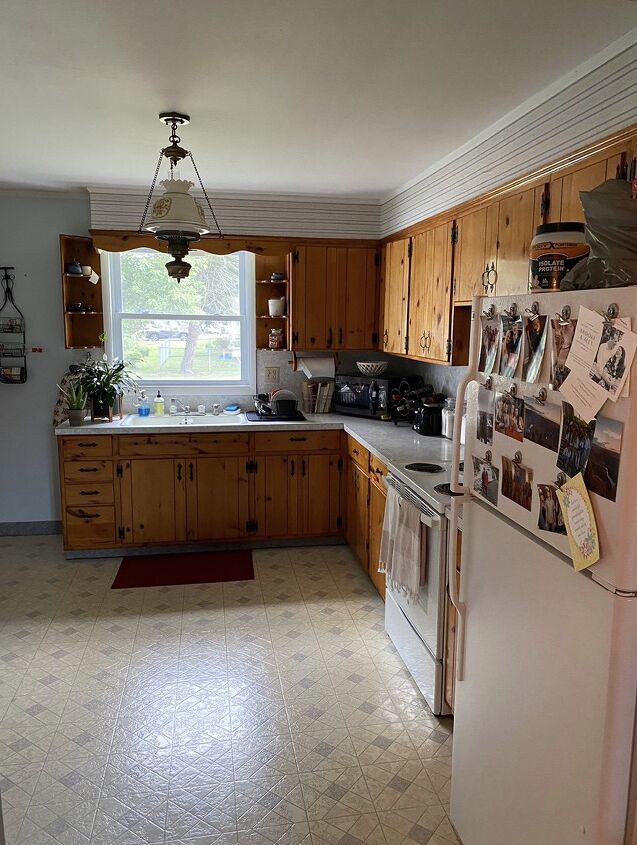
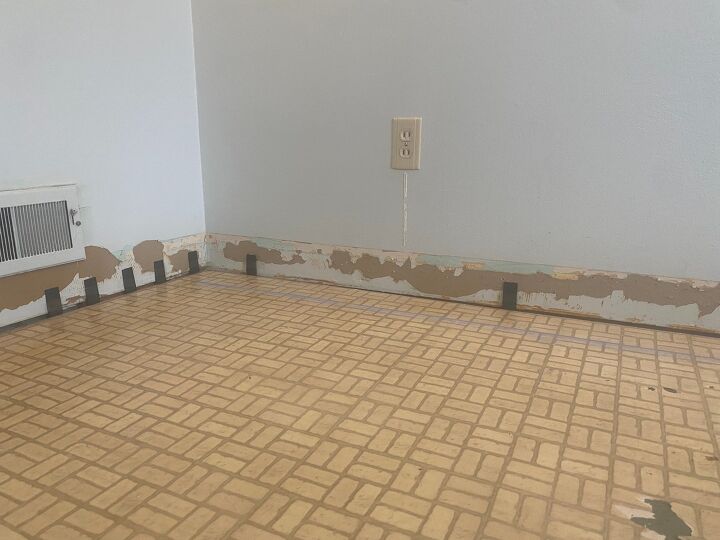
My flooring before was GROSS. I had old vinyl sheet flooring in desperate need of an update. Here is a picture.
In most cases you can lay the VPF directly on top of your old flooring as long as it is level and in fairly good condition. I decided to rip out this layer because I have a door to the left back corner of the above picture that would not have clearance with another layer of flooring underneath. I could have simply trimmed the door, but this flooring was grossing me out anyways so I just got rid of it. So, if you have a door in your room that you plan on installing VPF in, check on that first.
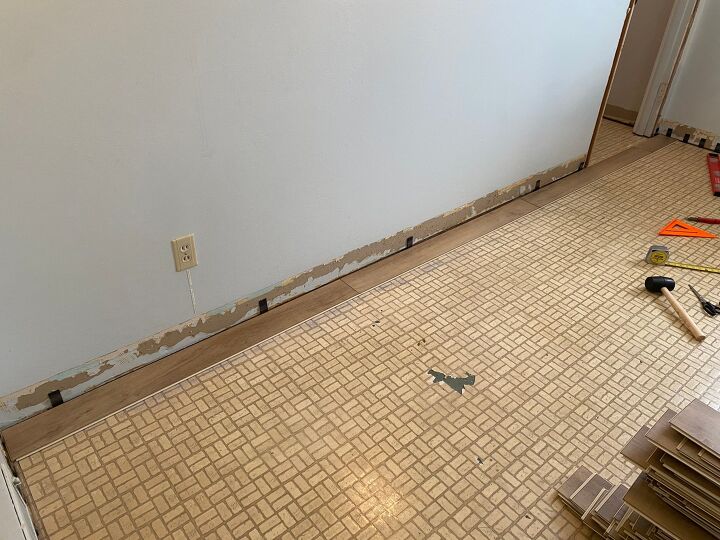
Here are a few pictures of the demolition. It was a pain in the butt removing all of those staples!!
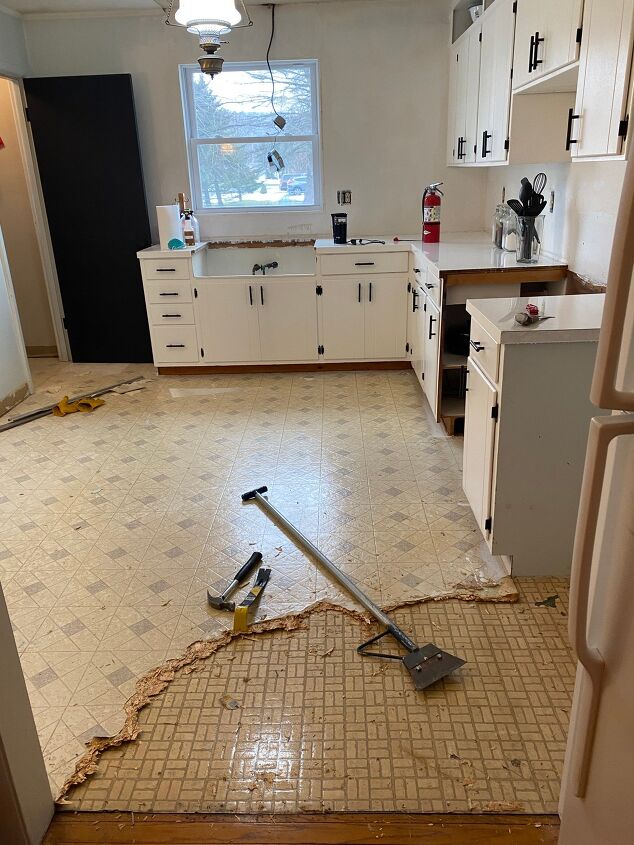

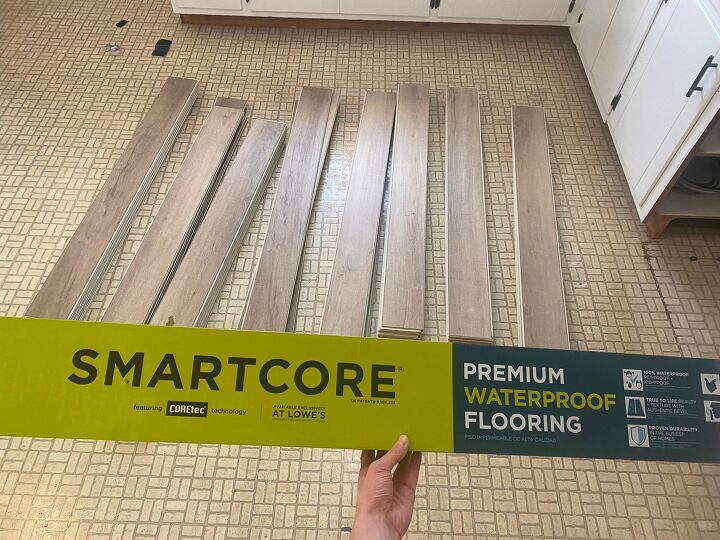
After, I cleaned thoroughly ensuring to clean up all dust and debris! As you can see in the picture, I had to remove my door and the door frame to get the flooring up. This also helped when laying the VPF. Next, I was ready to prepare the VPF for install. I ended up needing 8 boxes for this space. I emptied each box and mixed the planks together. Each box has a slightly different shade and pattern to it. So, I made a big pile to grab from that was well mixed.
I chose Smartcore, in the shade Barren Oak.
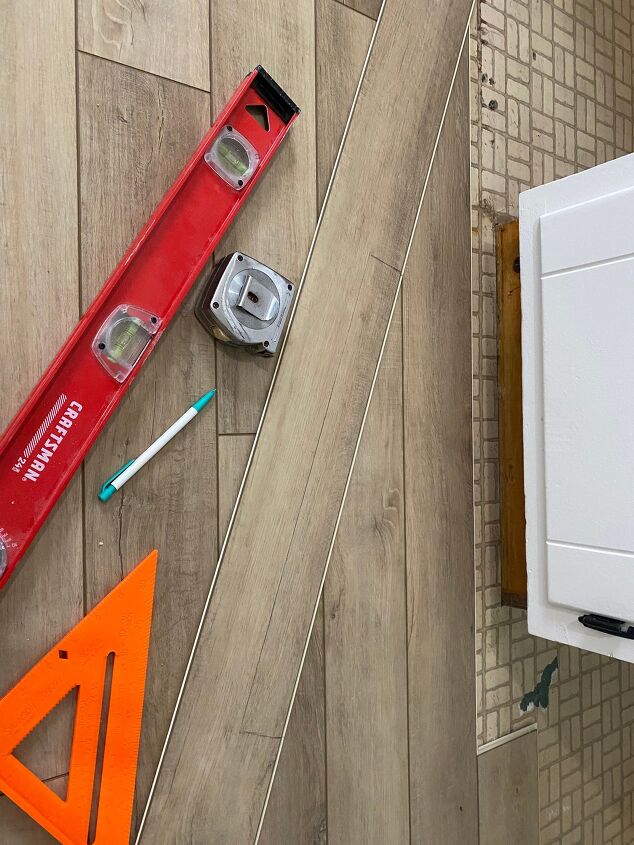
With this type of flooring, it is recommended to leave a 1/4in gap between the floor and wall. So, I taped spacers to the wall like below. The spacers were included in the installation kit that I bought.
I started my installation on my long wall. This is recommended and also looked the best in my opinion. Before you get started you’ll want to measure the width of the room divided by the width of your plank. This will help you determine the width of your last row. You don’t want your last row to be super skinny or it won’t look right. If your math gives you a small decimal, you might want to trim your first row slightly to balance out that last row from looking to wonky. In my case I did not have to do that thankfully. My first row I did not trim.
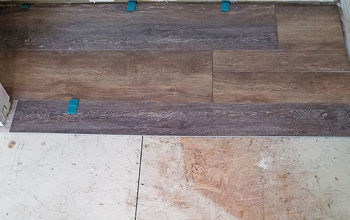
I started in the left hand corner of the kitchen. For the first piece, I placed the tongue side up against the wall . I kept the grove in the corner for the first piece, and left the tongue on the right side. I attached the second plank by placing the tongue into the grove and laying it down while locking it into place. Continue to install the first row. When you get to the final piece, trim the excess with a utility knife. Just remember to account for the expansion gap! This product easily scores and snaps with a little muscle power 🙂 I just used my speed square and utility knife and simply snapped the pieces apart over my knee.
For the first piece in your second row make sure that it is at least 8in long but at least 8in shorter than a full piece so that your seams are staggered and look cohesive in the end. Trim your first piece on the groove end. Place your first piece in the second row down by taking the long end tongue and locking it into the groove. For the second piece in the second row, angle the long end tongue into the groove in the first row and lock it down, while keeping the short end seam as close as possible. I then took two scrap pieces and marked big pink X’s in them.
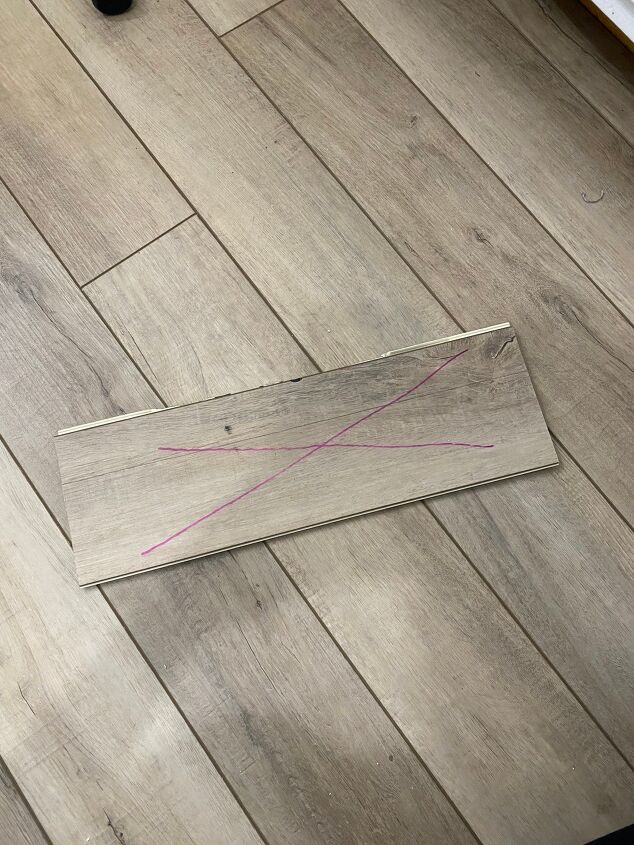
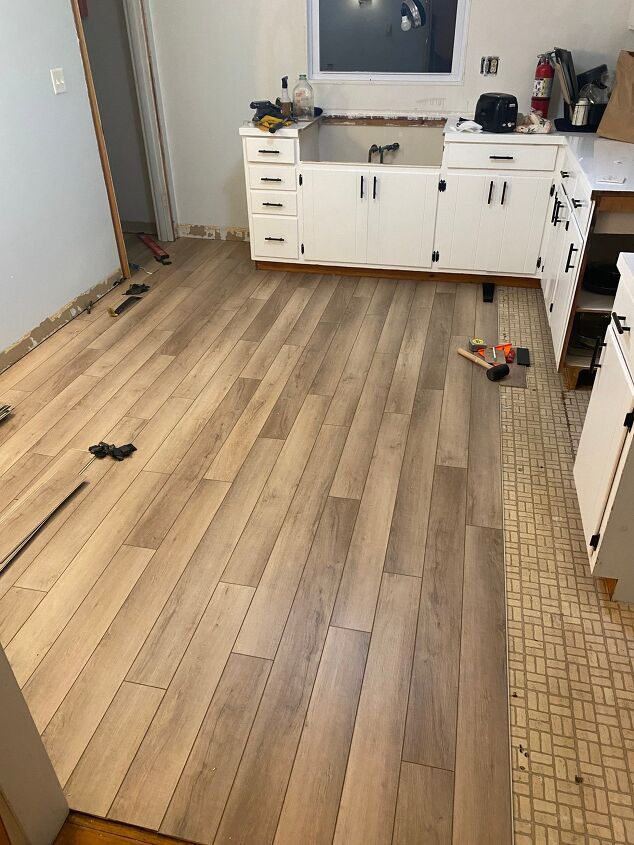
These you will use to attach to your planks when using your taping block and mallet to tap the ends and lock the planks into place. This will protect your planks. You will take the X piece and place it over the short seem, take your taping block, and gently tap it into place. Leave that X piece attached to your short seam. Then take your other scrap piece and attach it to the short end of the second piece. Take your taping block, and tap the short seams together into place. Repeat this process for the entire installation. You will get a hold of it in no time and zip right through it! Just remember to grab pieces from different boxes, keep 8in between your seams, and account for your expansion gap at the edges. Also ensure that each joint is tight on each piece, it’s way more difficult to go back to do this. Your taping block, pull bar and mallet will really come in handy!! Here is where I left off after my first day…
Sometimes you will have to make a weird cut…
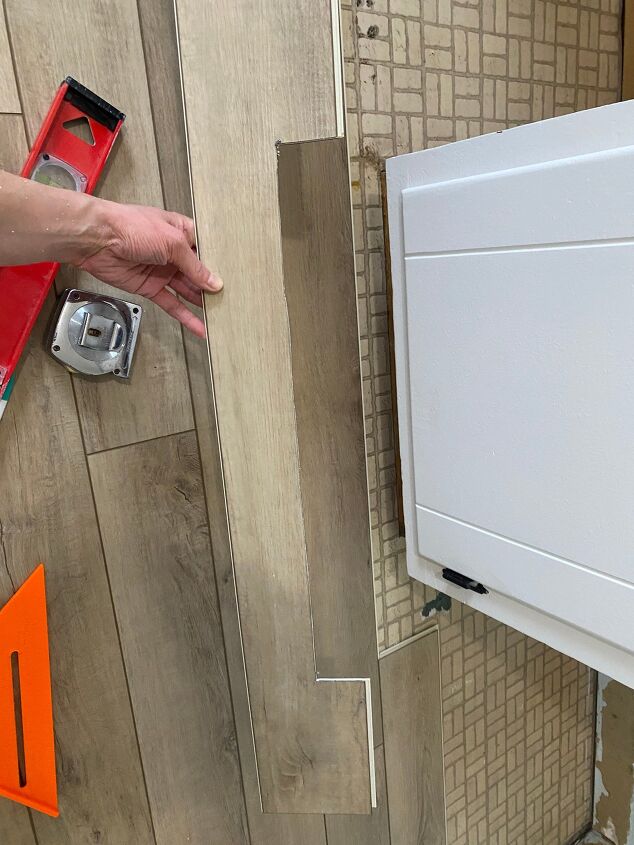
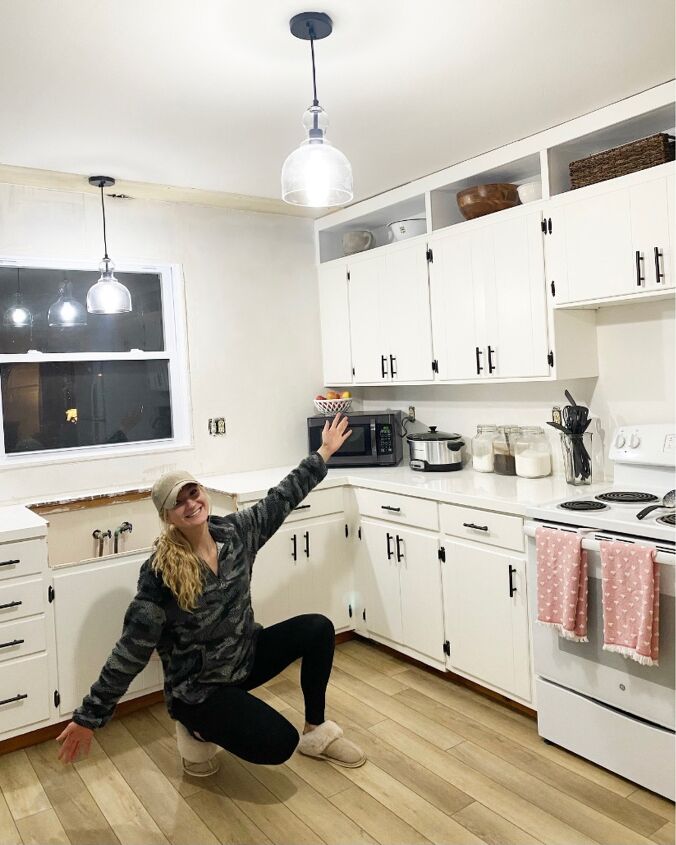
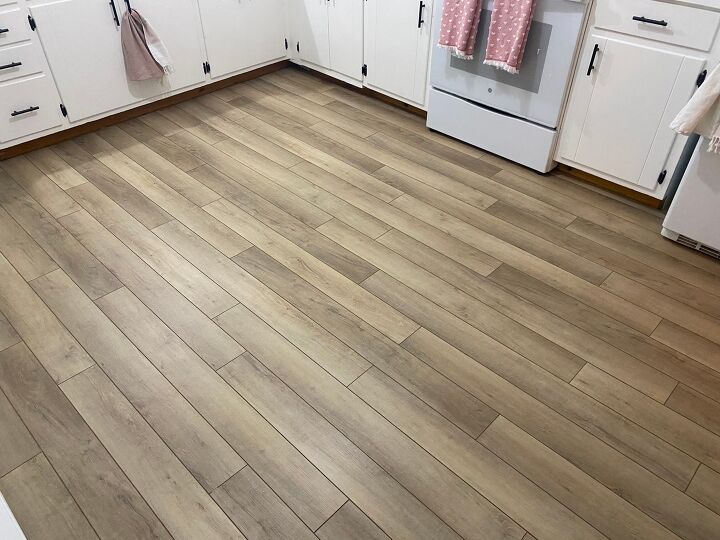
I simply used a straight edge and pencil and trimmed that section with my jigsaw! When you get to your last row, use your pull bar on both the long and short ends with your mallet to help adjoin the seams and lock the pieces into place. With some time and a little patience, this project can easily be installed by yourself and will save you lots of money! Forget the money part though, the satisfaction and feeling of installing VPF on your own is so rewarding! It’s the best feeling, and I love how it turned out! Here it is!

Thanks for reading, feel free to message me if you have any questions or check out my Instagram @abbbclark_homeee for videos of me installing this in my home! ❤
Comments
Join the conversation
-
Great job. You gave me great info.


Frequently asked questions
Have a question about this project?
great job. Just curious what your thoughts were for under cabinets and all around room. I know y'all must have used a baseboard, did you use quarter round on all the room or just under the cabinets, or no quarter round at all? Has it moved any and lastly, what was it your intention to have cabinets that far if you ever replaced with new ones or do you think it matters if you ever do change the cabinets, how the floor may end up in that edge? I am so nervous to start my projects cause my mind doubts so much. Great job again. I wish I could push my husband to save us the labor costs and get more for our money if we put our own work in. I'd like to tackle it without him if I was brave enough to tear up flooring without him while on a trip ;-) Just my luck I run into trouble and have to call for help and not have it done in time for his return. Thanks for posting