


How to Make Faux Beams: An Easy DIY Project to Upgrade Your Ceiling!
If you need some extra sprucing up in your home – without a huge construction project – faux beams are the way to go! And it isn’t as intimidating as it may sound!
Hometalk Recommends!
This post contains affiliate links. Please see my full disclosure policy for more details.
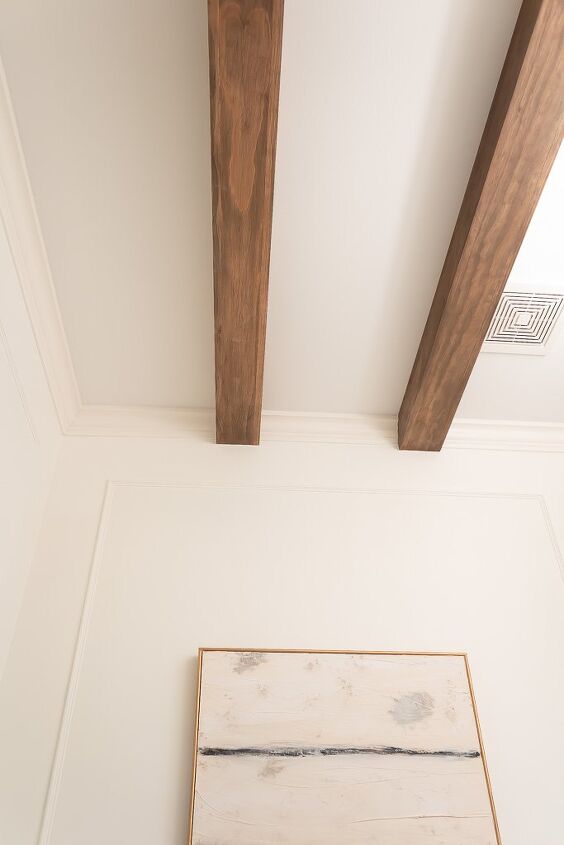
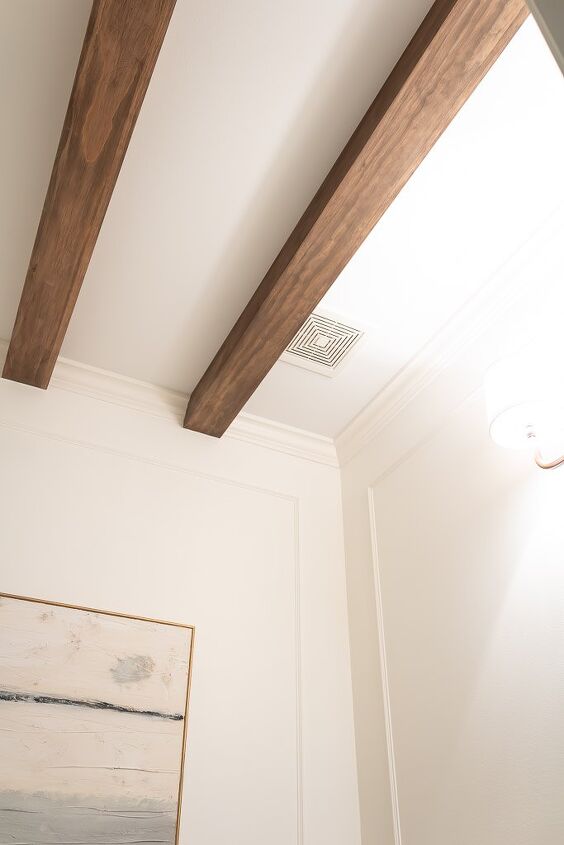
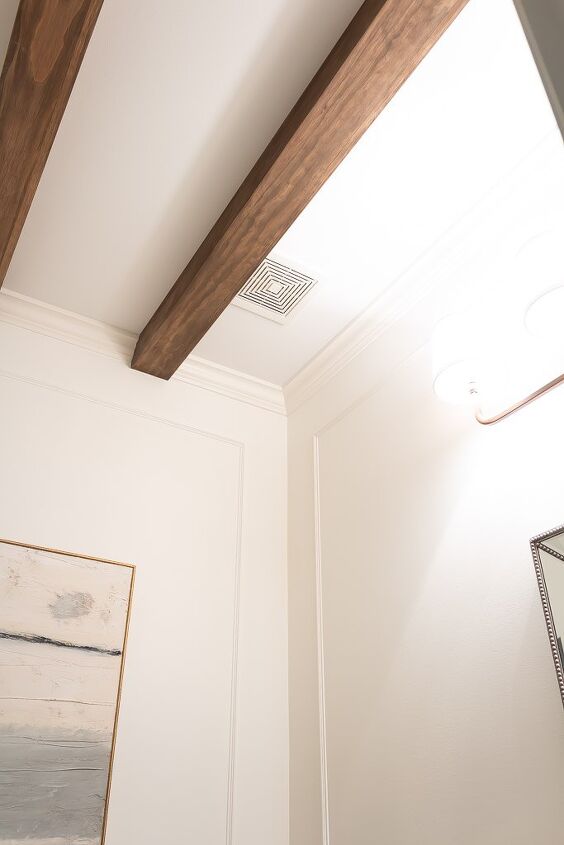
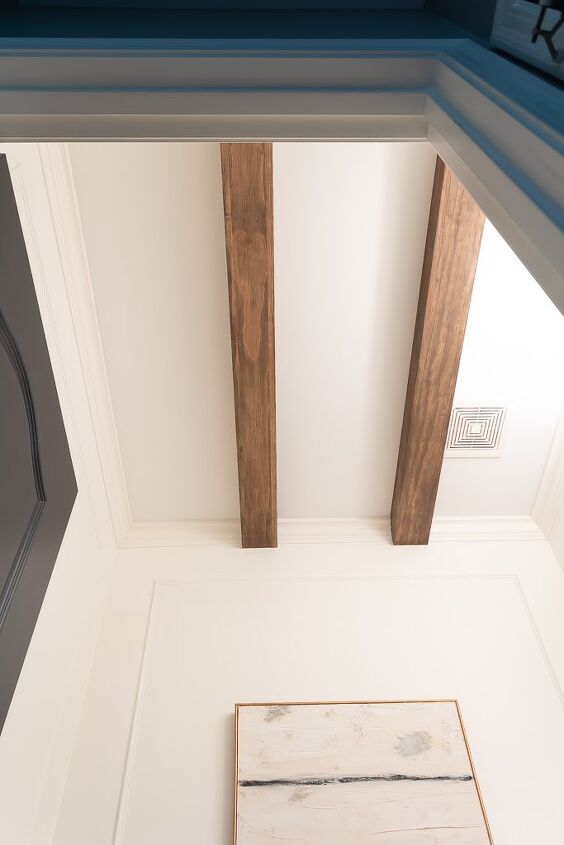
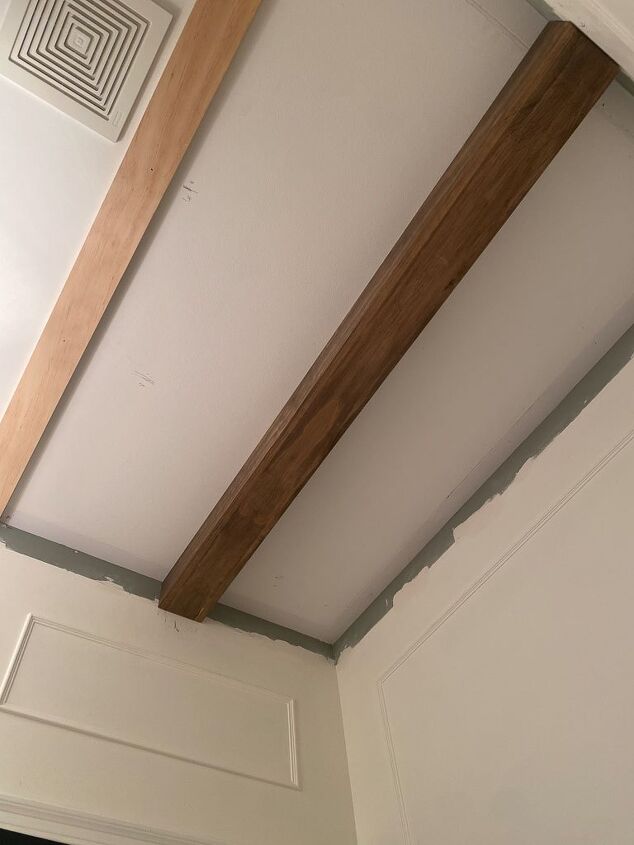
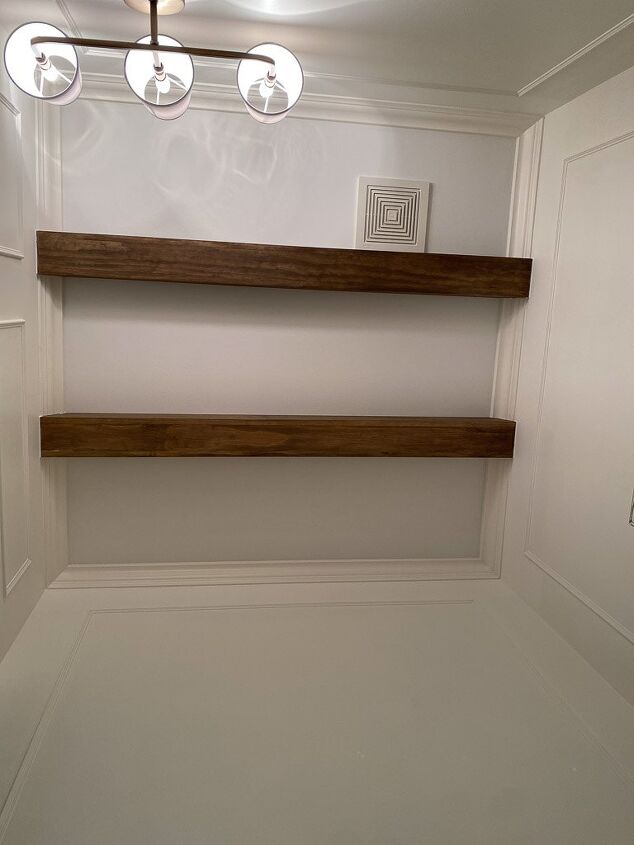
We completely remodeled this bathroom a few years ago when we installed gorgeous faux brick tile. I loved it, but something about it always felt unfinished. It needed some warmth and old-world charm. I settled on the idea of installing ceiling beams with a rustic look. After considering all my options, I chose to construct faux ceiling beams myself, and I’m so happy!
The project felt intimidating at first. Then, after researching and diving into the work, I realized it was easy, affordable, and, most importantly, gorgeous!
I’m sharing everything I learned and an in-depth how-to for you here!
What are faux beams exactly?
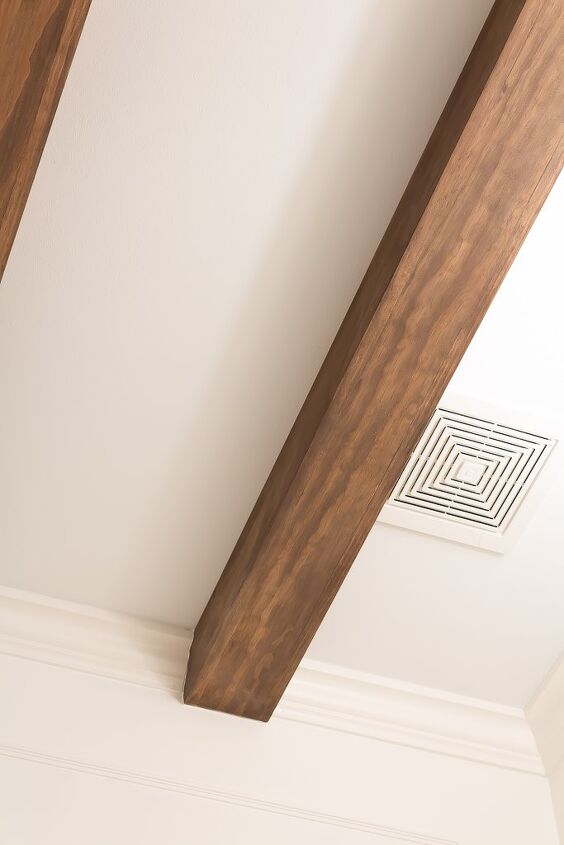
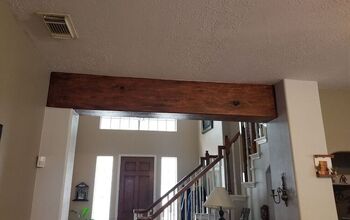
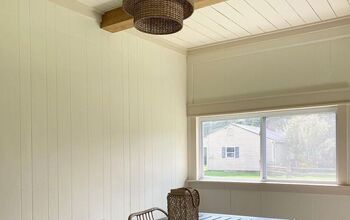
Faux beams are added to a ceiling for their design element instead of structural or support purposes. The beams are solid or hollow pieces of wood or foam materials that look like wood. Many are constructed as three-sided frames that form a hollow beam open on one side, all three sides stained or painted.
Using faux wood beams is a simple, cost-effective way to accentuate a ceiling while adding warmth and charm to your space! They are simple to make, lightweight, and easy to install.
Faux wood ceiling beams feel very permanent; however, they are easy to remove. Perfect for future redecorating! If you want to change the look of your room by removing them at some point, you can do so with minimal damage.
Overall Cost
Any DIY project will save you money. We saved hundreds of dollars even in a small bathroom with this faux ceiling beam project! A 12-foot ceiling beam with a faux box-beam construction costs $140 to over $300 per beam at a local home improvement store. Solid wood beams cost even more!
Our entire project cost about $60 in wood because we used tools and materials we already had at home. Constructing your own faux wood ceiling beams will save money, add character to your space and be very rewarding personally!
Now let’s move on to the fun part, making your own faux wood beams!
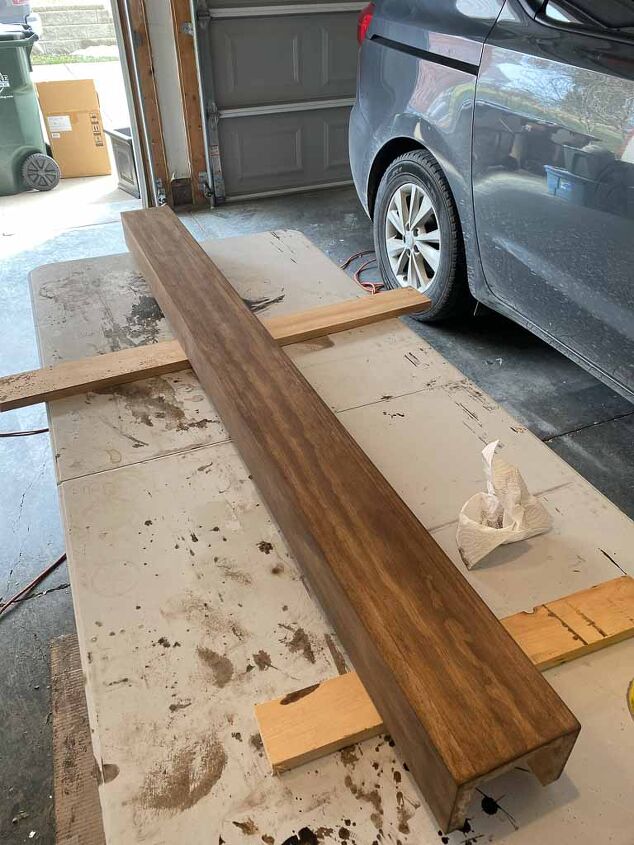
I chose the three-sided lightweight framing construction style.

Tools needed to make your own faux wood beams:
- stud finder
- nail gun/ brad nailer
- tape measure
- laser level (optional)
- degree angle finder (for angled ceilings only)
- belt sander/ palm sander
- 220 grit sandpaper
- miter saw/circular saw
- power drill/ screwdriver
- clamps
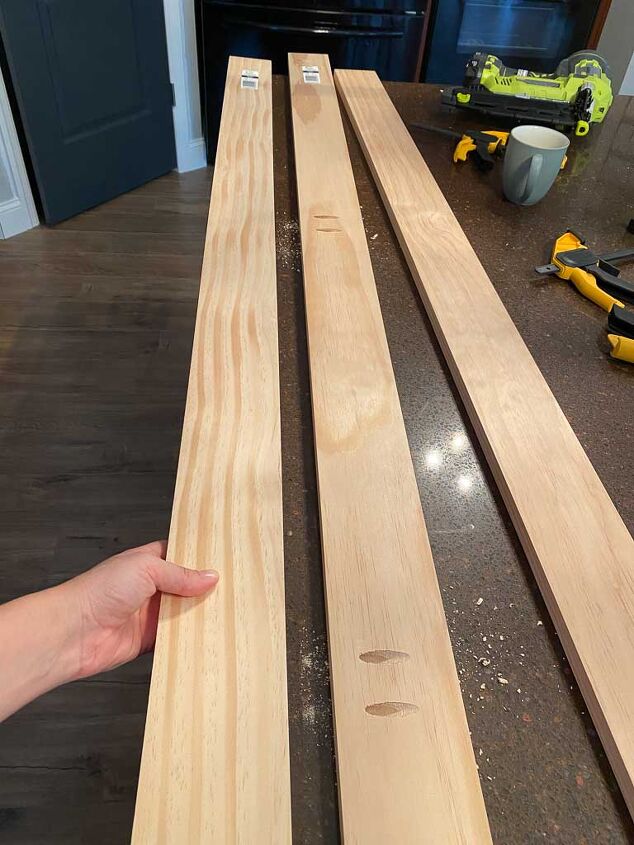
Materials needed to make fake beams:
All the supplies you need are easily found at local home improvement stores like Home Depot!
- scrap wood (optional for a rustic look)
- wood glue
- wood screws
- common board (I used straight edge pine boards, but be sure to select the straightest boards for whichever type of wood you choose)
- different stains
- wood putty / filler
- liquid nails (optional)
- brad nails/finish nails
- stain color
A note about wood choices:
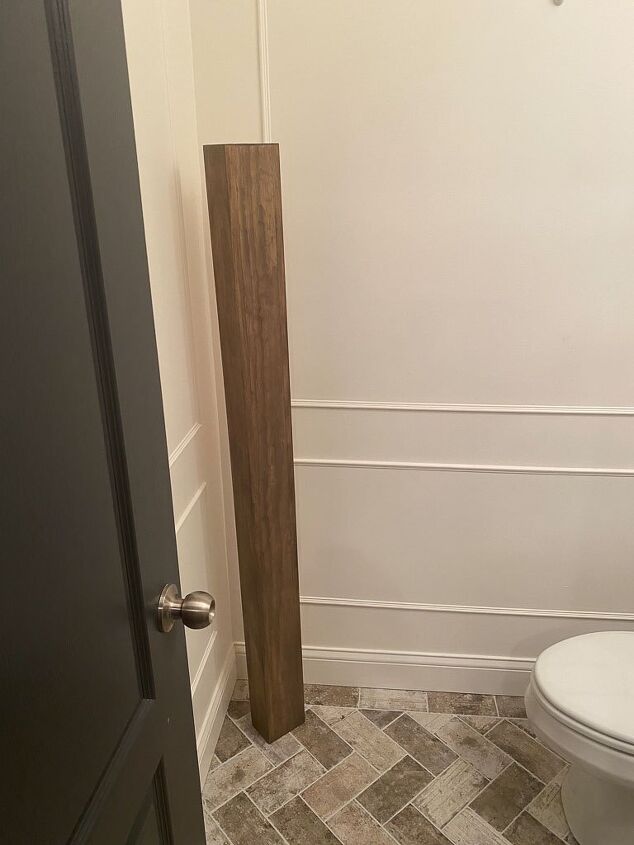
Before choosing wood for your ceiling beams, decide what look you want. Think about the design style of your room as you consider the texture and color of the wood. We decided to use a simple design using a dark wood finish for our bathroom. This simple design adds a lot of warmth and character to the room!
If you aren’t sure what to choose, you can always have a few wood samples cut at your local home improvement store. Then play around with different textures and finishes until you find one that fits your design style.
How to make faux box beams:
1. Remove Crown Molding(If this doesn’t apply to you, skip to step 2)
The first thing we had to do was remove the crown molding. I was 100% sure I wanted to add my new look but removing the crown molding gave me mixed feelings. That crown molding installation was a labor of love during our bathroom remodel!
A painstaking job that we were now undoing. Which, by the way, is a time-consuming process when you are trying to remove it without causing damage to the wall. Another labor love, but I knew it would be worth it.
Step for removing crown molding:
- You will need protective eyewear, gloves, a putty knife, hammer, and pry bar.
- To protect them from damage, remove any furniture from below the molding. If in a bathroom like I was, cover the toilet and sink.
- Score around the edges removing putty, caulk, and adhesives from the molding edges. Be careful to avoid damaging the drywall.
- Use a utility knife to cut joints where the molding meets.
- Hammer the pry bar at one corner, under the bottom edge, and pry up the molding. Again, be very careful to avoid damaging the wall.
- Work your way around the room, loosening up all the molding from the wall.
- Use your hands to remove the molding from the wall. You may still need to use your pry bar or a utility knife in some places.
2. Determine The Direction Of Your Faux Beams
There is no “right” answer for which direction your ceiling beams should run. Since your faux ceiling beams are being used only for design purposes, you have complete freedom to determine which way you want them to run.
Here are a few tips to use as a reference
- For authenticity – structural beams most often run across the shortest ceiling length. This is a safe design choice, especially for flat ceilings.
- Sloping or apex ceilings – beams can run either way. Crisscrossed beams are also a popular choice for this type of ceiling.
3. Locate Ceiling Joists
You have to locate your ceiling joists to know where you can hang your faux beams. Ceiling joists are part of the ceiling construction in conventional roof framing. Timber joists and beams are used across the width and length of the ceiling. Finding these joists to attach your faux beams to the ceiling is critical to the success of your project.
There are a few ways you can locate ceiling joists.
- Using a high-quality stud finder. Joists are not studs. Studs are wood beams that run vertically in walls. However, because ceiling joists are constructed of wood and hidden behind drywall, you can use a stud finder to locate them.
- Tapping, then testing holes – when doing this, you have to listen very carefully to the sound the ceiling makes as you tap with your knuckles. You can also tap lightly with a hammer. The ceiling will sound hollow between joists and more solid when you find one. Then you can hammer a nail to confirm you found one.
My preferred method is using a high-quality stud finder. Make sure you mark the location of your joists using a pen or chalk.
4. Measure The Length of the Ceiling
Determined the length of each beam by measuring the length of your ceiling. Make this measurement where your beams will be attached perpendicular to the wall.
How many beams you will need will require more measurements. For example, you will need to measure the width of each beam, determine how much space you want between each beam and how many beams total you need for your space.
To cut the beams to fit your room, the measurement your need is the length of the ceiling, from wall to wall, in the direction your beams will be installed.
5. The building process (per beam):
- Use a miter saw to cut 4 boards to identical lengths (3 to construct the beam and 1 to attach to ceiling drywall / joist)
- lay one board flat and add wood glue to its sides
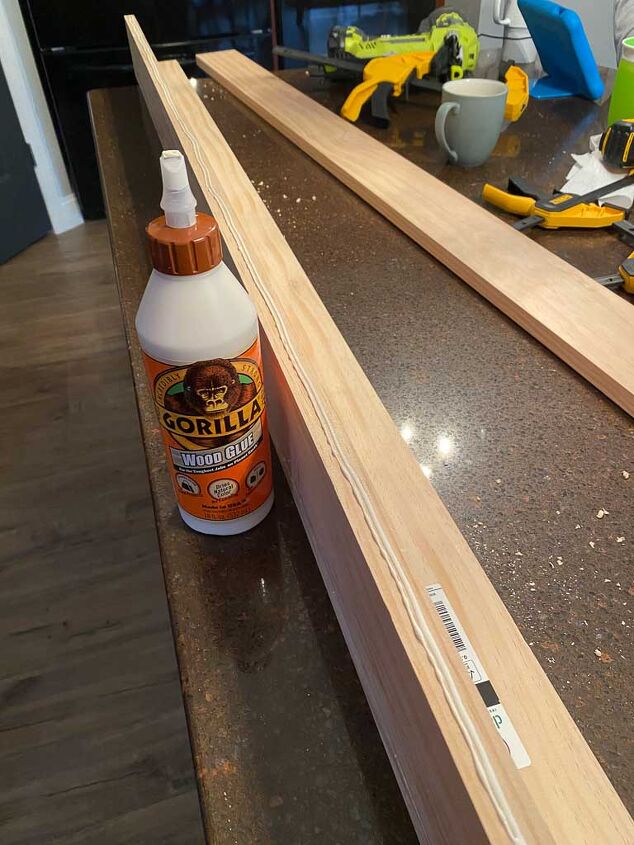
- line up and attach the first sideboard
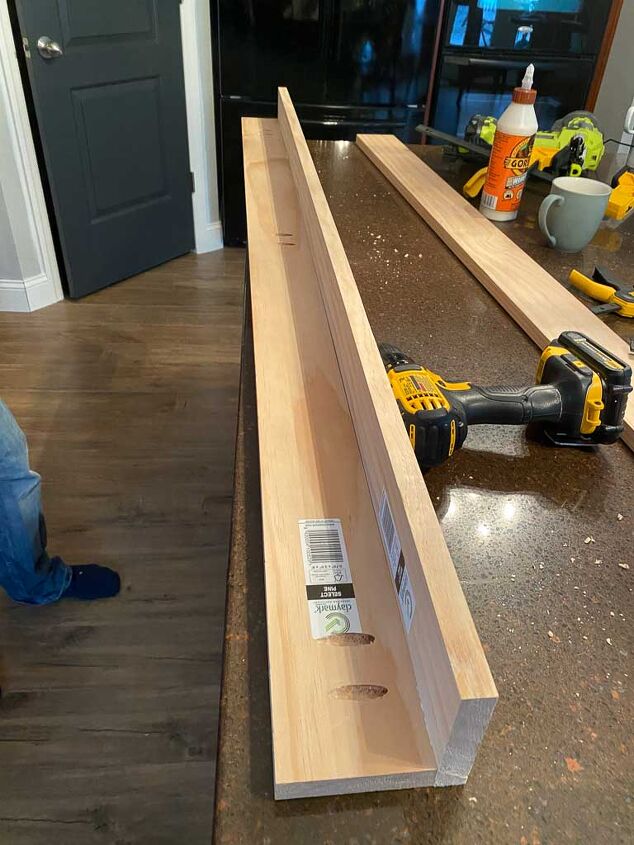
- Use a brad nailer to secure them

- fill holes and seams with wood filler
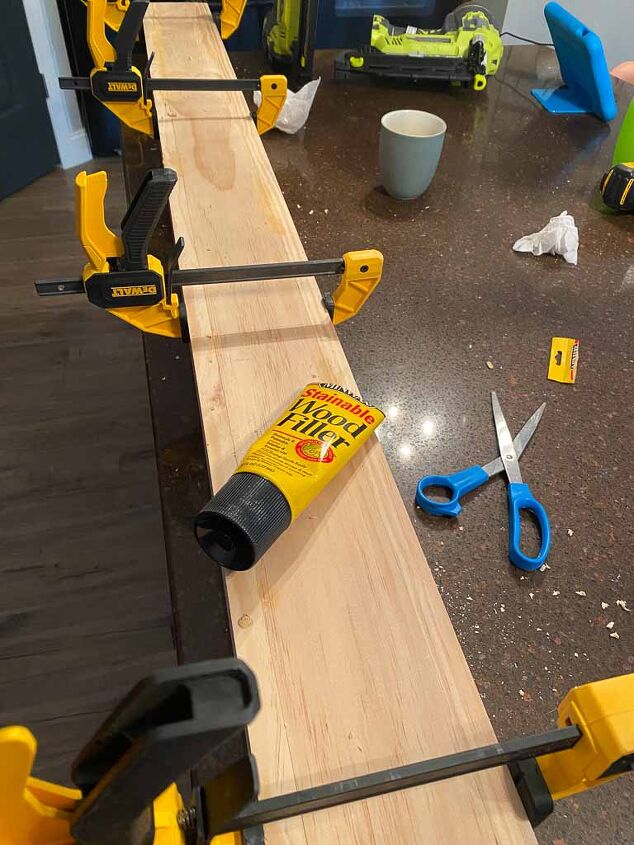
- leave clamped to allow the glue to dry overnight for stability
- It’s a good idea to leave a spare piece of wood from your cuts between the sides of your faux beam. As it dries overnight, it acts as a spacer and will stay in when you attach it to your ceiling.

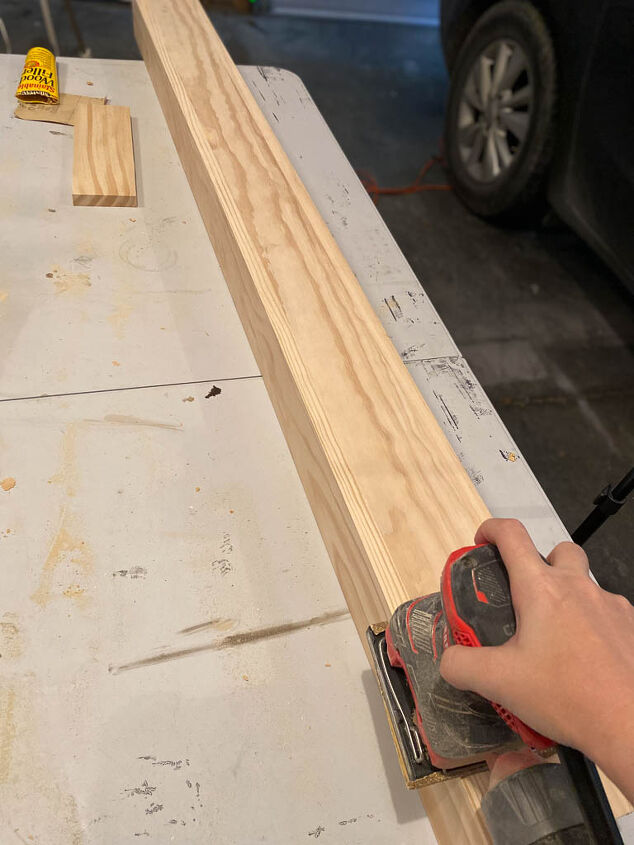
- Sand with 220 grit sandpaper and apply wood conditioner without wiping off. (This method worked best for me when staining pine.)
- Apply wood conditioner without wiping off (*I found this method to work best when staining pine)
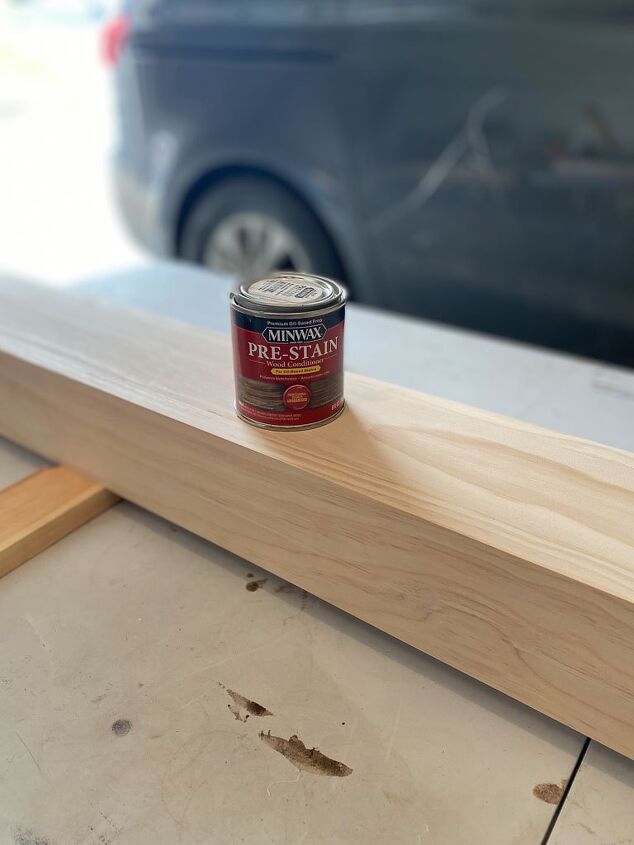
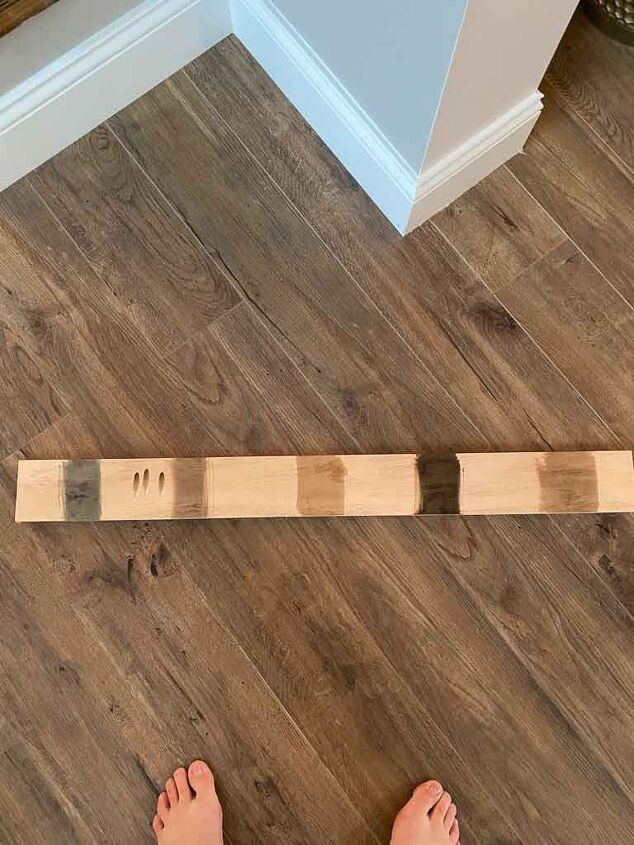
- Immediately apply your stain. I’d suggest doing a test run on the stain options.
- Allow it to dry overnight before installing
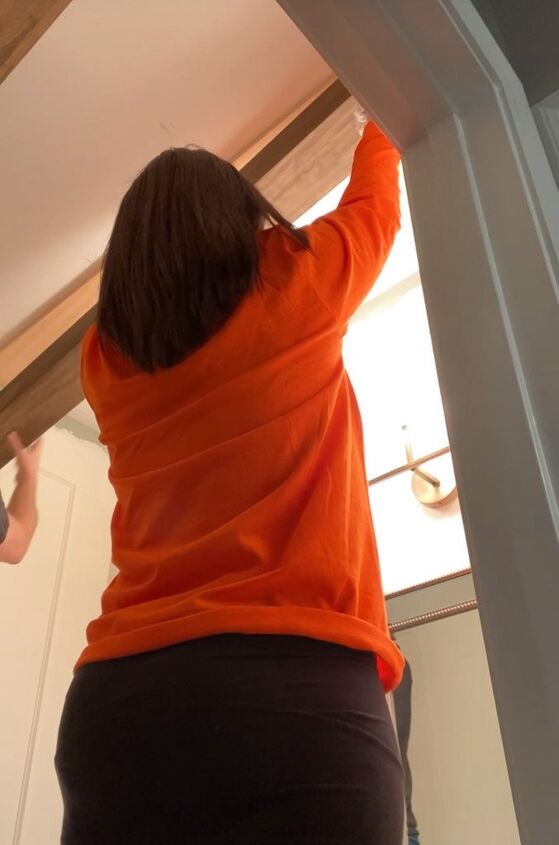
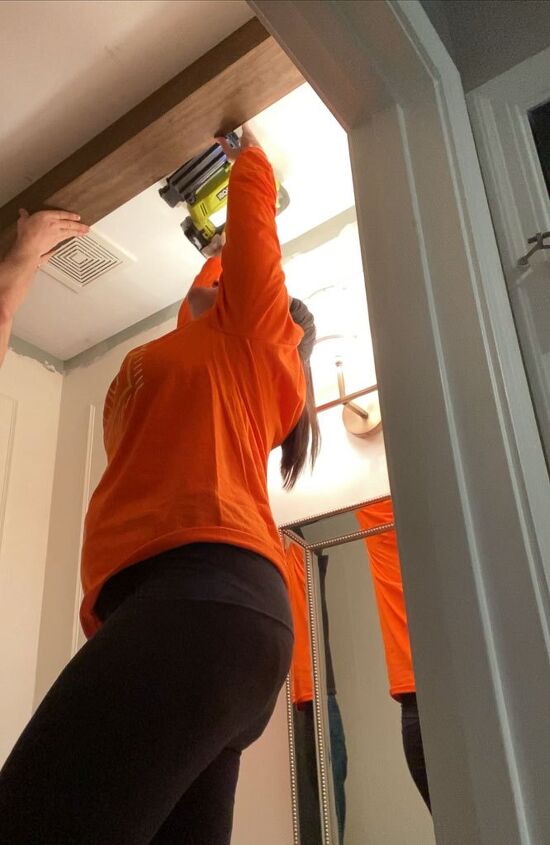
How are faux beams installed?
Now, here comes the main event: Installing the beams! Here is what we did:
- Secure spare board to a ceiling joist with a finish nailer (or wood screw)
- Slip faux around the board and nail into the sides to attach it (roughly every 6 inches). Not necessary to fill nail holes as they won’t be visible.
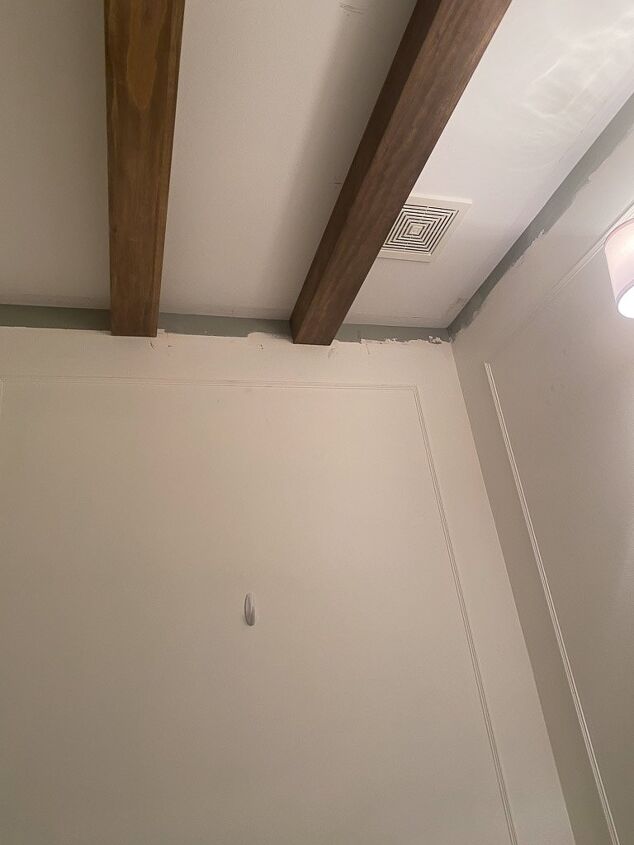
- We trimmed down our old crown molding and reattached it around the beams. This step is unnecessary if you don’t want a crown.

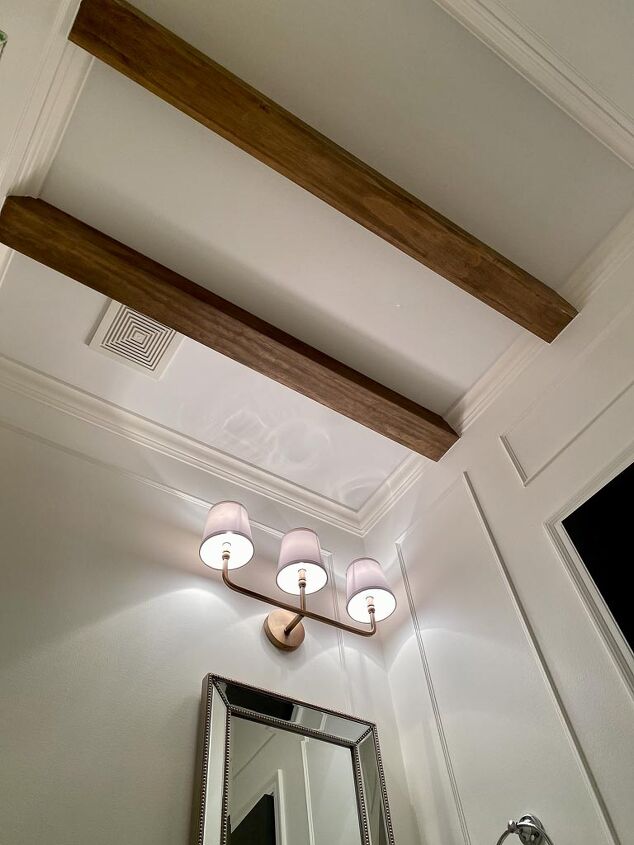
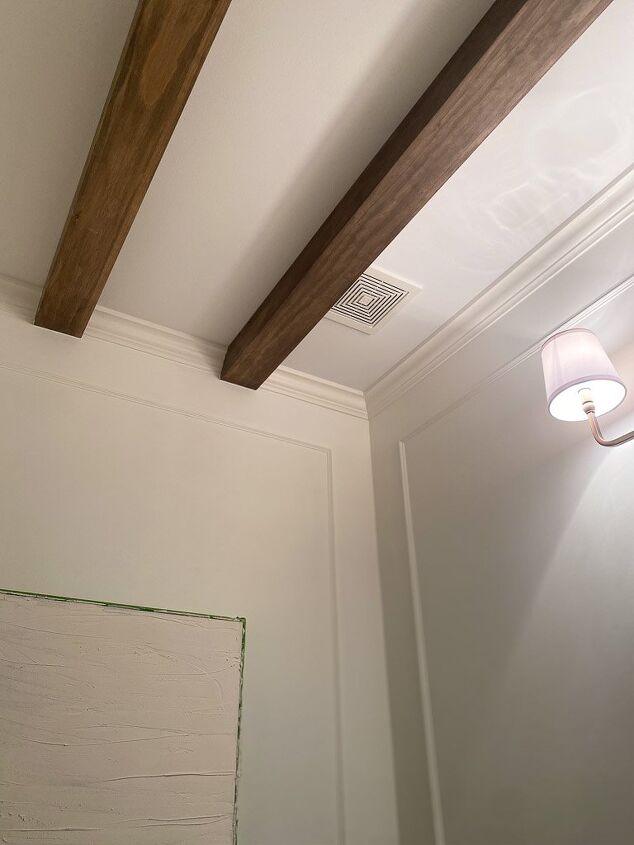

These faux wood beams were the perfect addition to our bathroom. Thinking about ceilings? Can You Have a Black Ceiling? And How to Create a Statement Ceiling may help get your creative juices flowing.
I’d love to hear about your ceiling projects! Comment and let me know what you decide to do!
Resources for this project:
See all materials


Comments
Join the conversation
-
OMG so surprised to see this. My then, first husband and I did the exact same thing, using sturdy dense foam pieces. Can't remember the brand or what it was called but bought at "Forest City", now called "Home Depot!" After I did a multicolor paint job to get the antiqued wood color, we installed it on our BEDROOM ceiling and changed ceiling fixture to an antiquated style. Looked absolutely fantastic! Didn't take it down when we put house up for sale and told new buyers we would remove it before they moved in....but new buyers said they LOVED it....so no removal and patching for us! On a different subject but related to the above post. I had purchased some very light wall art plaques so I bought Alien tape too. Instructions said it would hold up to 2# per inch of tape (maybe?) so my friend and I put an inch on top corners. Wall plaques didn't even weigh 1/2 lb so we were sure we may have added more than what was needed. Put them on the walls at 3 PM and next morning all 5 were lying on the floor! Did the same with another light weight photo, mounted on a thin fiberboard material and it fell on floor too! Re-hung all of them using tiny metal hooks and they are still hanging up today! Beyond the return period so that was a waste of $20.00
-
No, already did it in 1977! Was beautiful too!


Frequently asked questions
Have a question about this project?