


Planting a Hedge - Photinia Red Robin

by
Carole
We had a few privacy concerns from neighbours as we have a chain link dividing fence and so we decided to plant a garden hedge. We chose Photinia Red Robin and purchased 12 plants from our local nursery. These reach a good height and are quite fast growing. They have a 1 metre spread and were planted 1 metre apart. You need to allow sufficient space for them to grow in and form a hedge. If they are too crowded they can succumb to mould problems. We have very poor soil as we live in the mountains and the ground is very hard - lots of rocks and tree roots inhibited our digging efforts and the soil is very acidic and poor in nutrients. So first we had to prepare the soil to give the plants the best chance possible.
Firstly, we make our own compost and have a three bay compost bay. So this compost was going to be used to enrich the soil, along with several bags of aged cow manure purchased from the local nursery.
We began by digging out a 40cm deep trench - we should have gone deeper but the degree of difficulty meant that we stopped at 40cm. Just deep enough but if you can, go deeper. We started off digging using a mattock and spade. Hit so many rocks and roots that the going was slow and hard. Dug the trench just under a metre wide. The hedge will be too close to the compost bay, but we will shift the structure over a bit as the plants grow in. The compost bay will need to be empty before we can get some man power to help us lift the posts and shuffle the structure about a metre away to give the plants more room to spread. At present they have sufficient space.
Once the trench was complete, we added a mix of the home made compost and aged manure and mixed it in.
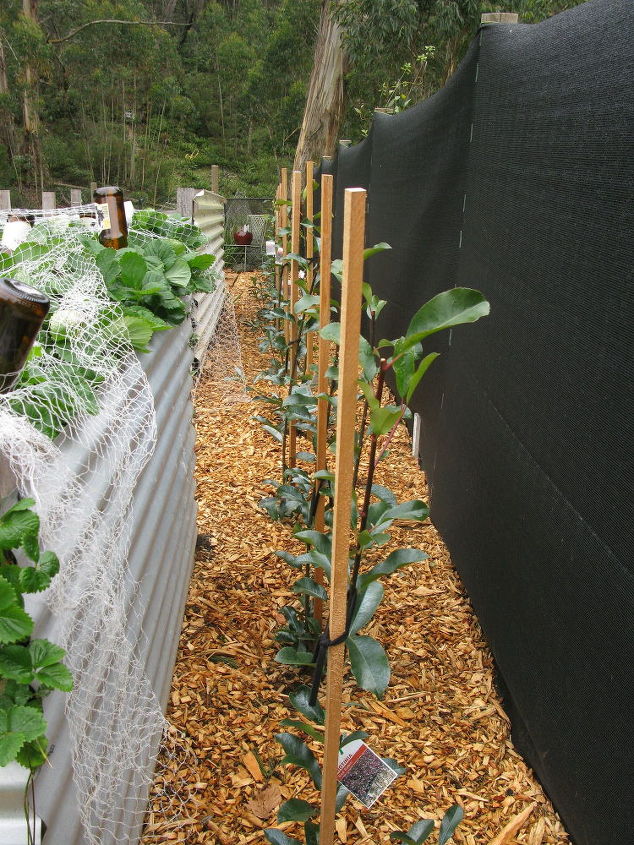
Then off to the nursery for the plants. I had to order mine in as they only had about 5 of the type I needed. When I picked them up we trimmed the top 8 inches or so off the plants to reduce their height so I could fit them in my vehicle and also to force them to spread. They were like tall sticks with one or two branches. If you prune them they will fill out. You don't want to end up with tall spindly plants with no branches or they won't form a proper hedge.
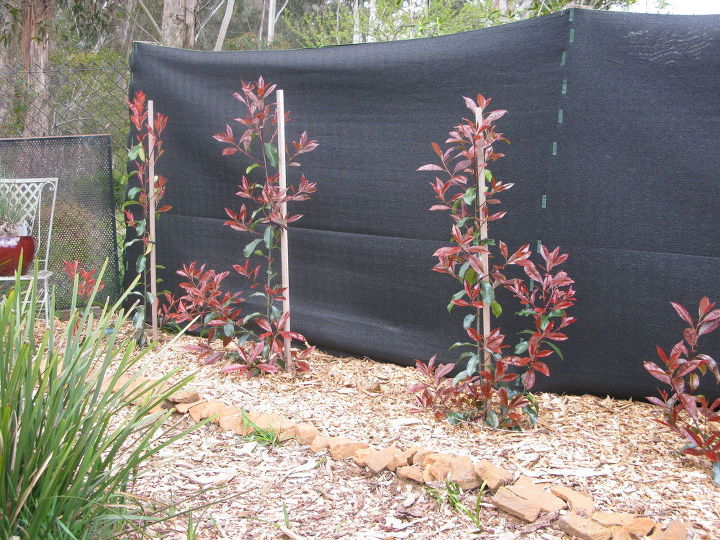
When I planted them up I watered them in with Seasol which is a seaweed solution to help settle the roots. Staked them and ensured to measure properly so that they have sufficient space between them and the fence to allow for growth. We used woodchip mulch to dress the area and as we had tons of bush rock, we used the rocks to define the border.
The Photinia have red foliage on the new growth. They are now taller than the fence and I recently trimmed them back to assist them in filling out. They are reaching the size where we need to shift the compost bay forward a metre to give them more room to reach their potential spread. These plants have clusters of small white flowers which are not that attractive when they do bloom but really they are grown mostly for their red foliage and rapid growth habits.
Firstly, we make our own compost and have a three bay compost bay. So this compost was going to be used to enrich the soil, along with several bags of aged cow manure purchased from the local nursery.
We began by digging out a 40cm deep trench - we should have gone deeper but the degree of difficulty meant that we stopped at 40cm. Just deep enough but if you can, go deeper. We started off digging using a mattock and spade. Hit so many rocks and roots that the going was slow and hard. Dug the trench just under a metre wide. The hedge will be too close to the compost bay, but we will shift the structure over a bit as the plants grow in. The compost bay will need to be empty before we can get some man power to help us lift the posts and shuffle the structure about a metre away to give the plants more room to spread. At present they have sufficient space.
Once the trench was complete, we added a mix of the home made compost and aged manure and mixed it in.
Then off to the nursery for the plants. I had to order mine in as they only had about 5 of the type I needed. When I picked them up we trimmed the top 8 inches or so off the plants to reduce their height so I could fit them in my vehicle and also to force them to spread. They were like tall sticks with one or two branches. If you prune them they will fill out. You don't want to end up with tall spindly plants with no branches or they won't form a proper hedge.
When I planted them up I watered them in with Seasol which is a seaweed solution to help settle the roots. Staked them and ensured to measure properly so that they have sufficient space between them and the fence to allow for growth. We used woodchip mulch to dress the area and as we had tons of bush rock, we used the rocks to define the border.
The Photinia have red foliage on the new growth. They are now taller than the fence and I recently trimmed them back to assist them in filling out. They are reaching the size where we need to shift the compost bay forward a metre to give them more room to reach their potential spread. These plants have clusters of small white flowers which are not that attractive when they do bloom but really they are grown mostly for their red foliage and rapid growth habits.
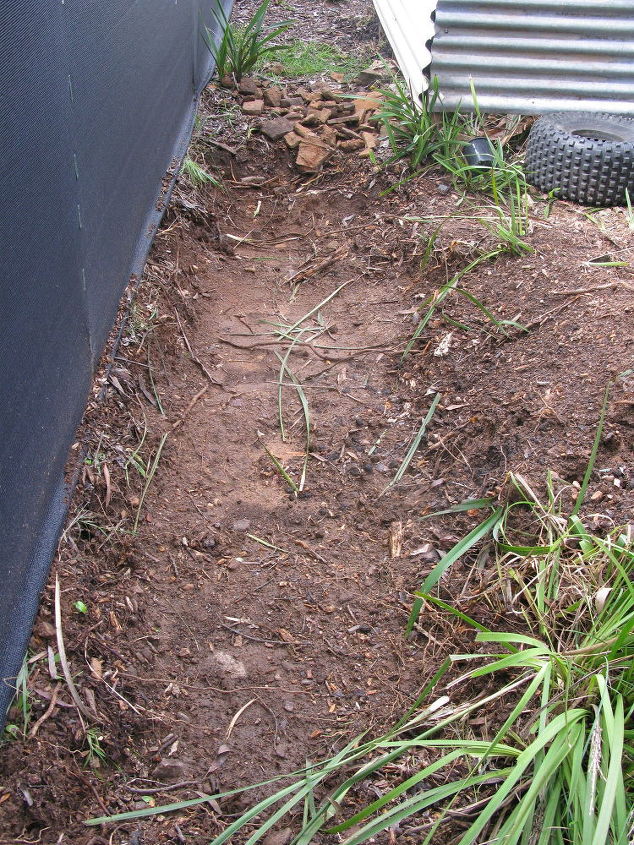
Trench in progress
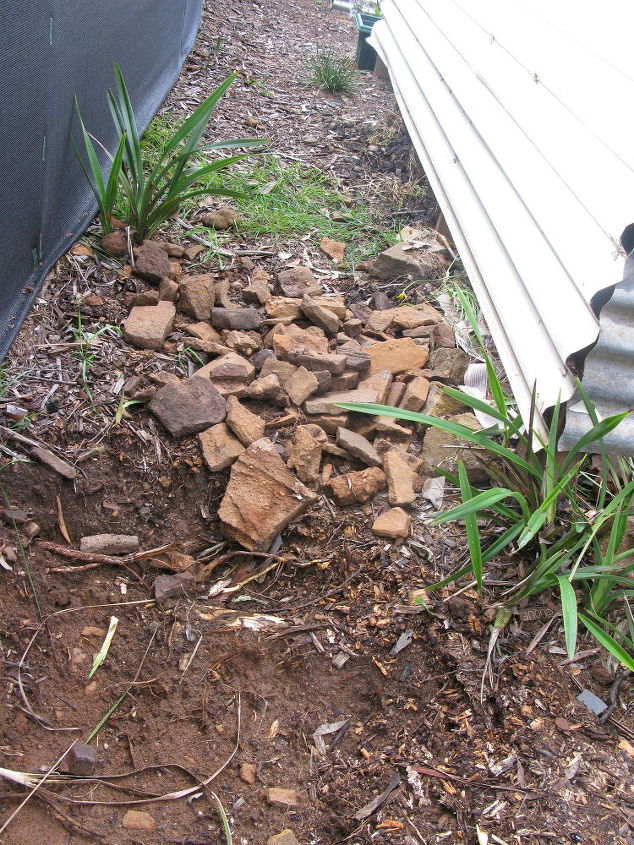
rocks dug out of the trench
Staked the plants
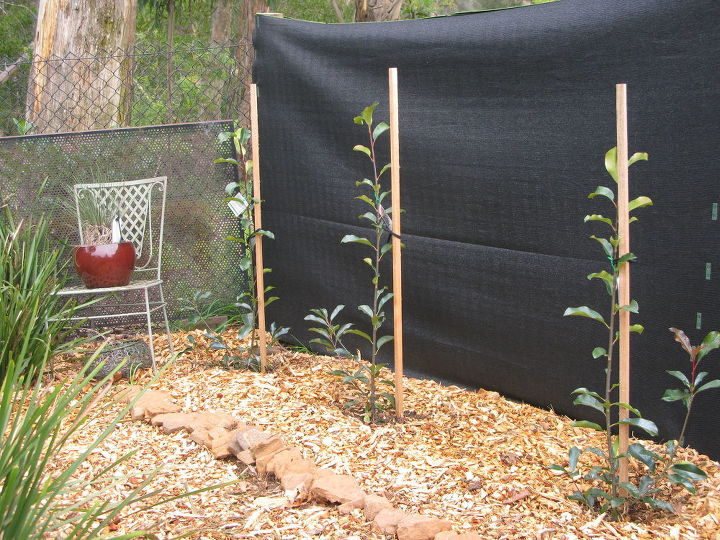
Used wood chip mulch to mulch the area
Comments
Join the conversation
3 comments
-
Very nice Carole!
-
when you shear the 'faces' of your hedge, always trim SLIGHTLY narrower at the top than at the bottom, or the bottom dies out from lack of sunlight! be careful when shearing to not do it too close to winter freezes - the new tender lovely red tips aren't as cold hardy as the established greened-up foliage! We also have a photinia hedge against a chain link fence to provide privacy from neighbors & it works great! The white flowers are lovely & scented in spring & make a nice inside informal bouquet if you must trim some in Spring! (leave blooms for bees & pollinators if you can!)


Frequently asked questions
Have a question about this project?