


A Complete Guide on How to Care for Aloe Vera Plants

By Alexa Erickson
For thousands of years, aloe vera has been revered for its medicinal properties. When applied topically, the juice from its leaves can be used to relieve pain from burns, scrapes, and mild open wounds. The familiarity you have with aloe might only reach the formulated drugstore gels that you reach for when you're sunburnt on spring break.
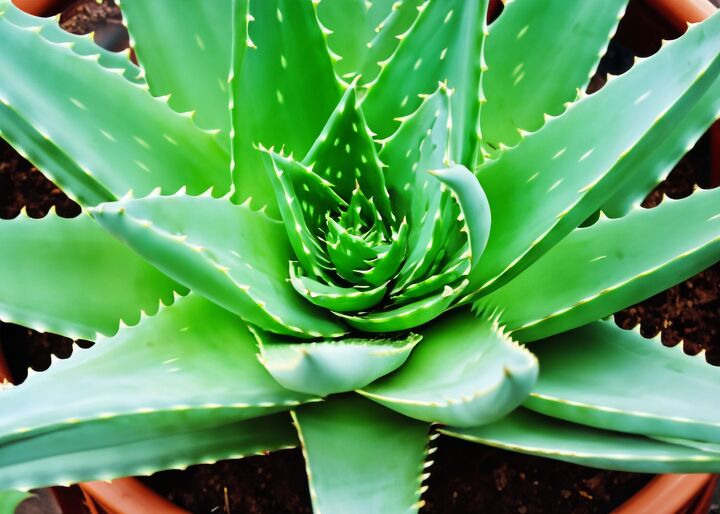
The aloe vera plant, a succulent, is recognizable by its stemless or very short-stemmed leaves and each leaf features a thick, fleshy body with a light green color and serrated edges.
What’s even better is that these amazing plants can be grown right in your own home—and caring for them is easy, so long as you’re vigilant in giving them the supervision that they need to thrive. Here’s what you need to know about how to care for aloe vera plants, how to propagate aloe, and how to repot aloe when it gets home from the nursery.
How to Repot Aloe Vera Plants
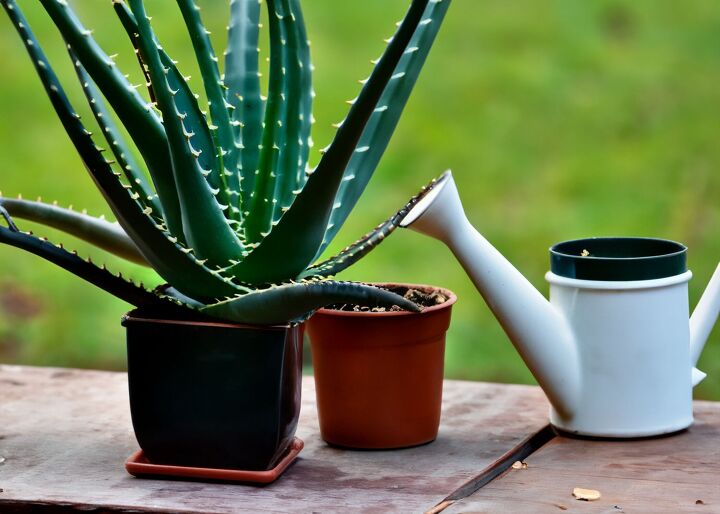
If you bring an aloe vera plant home from the garden nursery, chances are you’ll want to take it out of its plastic nursery pot and rehome into one that more closely matches your decor. It's also important to repot your plant when it outgrows its current pot. Here are the signs that it's getting too big for its home:
- The plant is getting top-heavy and is tilting to one side instead of growing up.
- Leaves are browning or dropping.
- You can spot mold on the surface of the soil.
To pot an aloe vera plant, seek out a pot made from terra cotta or a similar porous material. This will allow the soil to dry thoroughly between waterings and should be heavy enough to keep the plant from tipping over, since aloe’s leaves can get pretty heavy.
Tools and Materials Needed
- Terra cotta pot
- Succulent potting mix
Step 1: Remove Aloe Vera from Current Pot
Remove the aloe vera plant from its current pot by gently holding the base of the plant with one hand and wiggling the pot away from the root ball with the other. Set the old pot aside and gently brush away excess dirt from the roots using your hand. Remove any pups, or tiny aloe leaves growing separately from the base of the plant, with your hands and set aside (they can be potted separately).
Step 2: Plant the Aloe Vera
Fill the new pot one-third of the way with succulent potting mix. Place the aloe vera plant in the soil. Add additional soil around the plant, leaving ¾ of an inch of space between the top of the soil and the rim of the pot.
Step 3: Don’t Water
After planting, avoid watering for a week to decrease the chance of root rot. Place the plant in a warm location (above 60 degrees Fahrenheit) that receives bright, indirect sunlight.
How to Plant Aloe Vera in the Ground
If you live in USDA zones 8 to 11, you can safely grow aloe vera plants in the ground year-round. If you live outside of these zones, you can very well still plant aloe vera in the ground but must move it back into a pot (using the steps above) and bring it inside for the winter.
If you’d prefer to plant your aloe vera plants in the ground, just be sure to give them two to three feet of space between each other and any other plants in the area. Then, follow these steps.
Tools and Materials Needed
- Hand trowel
- Succulent potting mix
Step 1: Dig a Hole
Dig a hole the same size as the container the aloe plant currently lives in. Then, remove the plant from the pot and set it in the hole.
Step 2: Backfill and Water
Backfill the hole with succulent potting mix, then water thoroughly. Allow the top inch of soil to dry out between waterings after it’s been transplanted.
Step 3: Scale Back on Water
Check for the growth of new leaves. Once you notice them, scale back watering to once every two to three weeks in the summer, and once every four to six weeks in the winter. Allow the top two inches of soil to dry out between waterings.
How to Care for Aloe Vera
Now that your aloe vera is planted, it’s time to learn how to keep it alive and help it thrive. Here’s what you need to know about sunlight, watering, fertilizing, and more.
Sunlight
For indoor aloe vera plants, place the plant in an area that receives bright, indirect sunlight. An unshaded south- or west-facing window is best. If outdoors, plot the plant somewhere in your yard or garden that receives six to eight hours of sunlight per day.
Water
Water aloe vera plants thoroughly, but infrequently. Since these are succulents and store water in their leaves, they can handle moderate periods of drought. The soil should dry out at least one to two inches deep between waterings.
Fertilizing
Aloe vera doesn’t require regular fertilization. However, if you’d like to encourage flowers (yes, aloe can grow flowers!), fertilize no more than once a month and only in the spring and summer. Use a houseplant formula mixed at ½ strength.
Maintenance
Aloe vera plants are fairly low maintenance. The plant won’t produce flowers until it’s reached maturity, which usually takes place around when the plant is four years old. Keep the plant pruned in the meantime by removing broken leaves.
Pests and Diseases
Aloe vera plants aren’t subject to pests or diseases if tended to properly, but you can still run into issues as a result of overwatering and poor drainage. Diseases and pests to look out for include:
- Basal stem rot causes the base of the plant to turn from reddish-brown to black.
- Bacterial soft rot causes watery, rotting leaves that are darker in color and limp.
- Anthracnose disease results in small spots on the leaves. They begin as small, oval-shaped spots that are dark green. As they mature, the spots become reddish-brown to brown in color.
- Aloe rust can be identified by small, pale yellow spots on leaves which expand and turn brown.
- Aloe vera aphid feeds at the bases of the leaves or in rolled ends of damaged leaves, resulting in slow growth and stunting.
The best way to tackle rot issues is to clean the plant by following these steps:
- Remove the aloe plant from its pot.
- Rinse the root system under clean water from a sink or a gentle hose stream to strip away any rot.
- Trim away damaged roots with clean scissors or pruning shears. Telltale signs of ailing roots are roots that are mushy, brown, or black, or if they give off a rotten smell.
- Set the aloe plant down gently on a clean surface and, if you wish to use the same potting container, make sure you disinfect it by letting it soak in a 9:1 water-bleach solution for 10 minutes. After the time is up, rinse off the pot with clean water and let dry.
- Fill the container with fresh potting mix and put the plant back in, adding more potting soil as needed. Make sure the plant has proper drainage and that it’s placed in a well-lit area.
For aloe rust, anthracnose disease, and aloe vera aphid, remove and destroy any infected plants. Provide adequate sun, keep water off the leaves, and avoid crowding and over-watering.
How to Propagate Aloe Vera
When the plant is between two and four years old, you might notice that it’s growing lots of offshoots, or “pups.” These offshoots can be replanted, a process also known as propagation. Here’s how to propagate aloe vera.
Tools and Materials Needed
- Hand trowel
- Small nursery containers
- Potting mix
Step 1: Dig Up Plant
Remove the entire succulent from the pot or hole. Brush away dirt from the root ball.
Step 2: Disentangle Pups
Each pup will have its own stem, leaves, and root system. Disentangle each pup from the main root system using your hand, being careful not to rip any roots.
Step 3: Replace Plant, Pot Pups
Place the parent plant back in its pot or hole. Pot the pups in nursery containers with potting mix, then place them in a bright location out of direct sun. Allow the pups to settle in for a few days before watering thoroughly every 5-10 days. Once firmly rooted, then you can water every 10-14 days and repot into larger containers as they grow.
How to Harvest and Use Aloe Vera
To harvest your aloe vera plant, make sure it’s mature (at least a few years old). This way, you can rest assured you’re getting the highest concentration of active ingredients.
Tools and Materials Needed
- Knife
- Small container
- Blender (optional)
Step 1: Remove the Thickest Leaves
Find the thickest leaves from the outer sections of the plant, then remove three to four leaves at a time. Cut them off close to the stem with a knife, but avoid the roots. Wash and dry the leaves. and trim off the serrated edges with a knife.
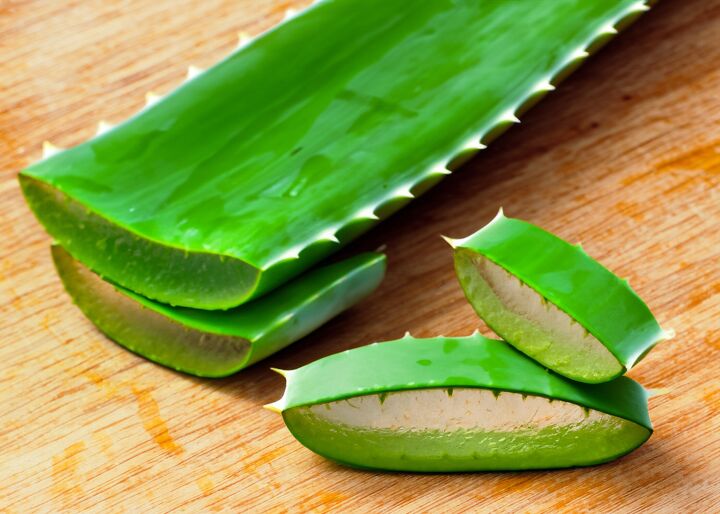
Step 2: Separate the Gel
Use your fingers or a knife to remove the clear gel from the inside of the leaf. Set the gel aside in a container. Then, allow the yellow sap to drain from the leaf into a garbage can. This is the aloe vera latex, which can be toxic if consumed in large quantities, so make sure it stays far away from children and pets.
Step 3: Cut the Gel
Use a knife to cut the gel into slices or cubes, or place in a blender until a pulp is formed.
Step 4: Use the Gel
Apply the fresh aloe gel directly to your skin to alleviate pain from a burn or scrape.
Do you have an aloe vera plant? What do you use its gel for?
Comments
Join the conversation
-
- In 2022, start earning cash from your home and getting paid(500$ to 700$ / hour ) by this job. These are the best online jobs I’ve made $84, 8254 so far this year working online and I’m a full time student. Join it today here........www.paybuzz.com


Frequently asked questions
Have a question about this project?
I enjoyed your post about aloe! Could you provide more information about how to "harvest" the gel to use for medicinal purposes. Can it be stored for any length of time and if so, how? Thank you.