Soil Blocking: Economical & Space Saving Seed Starting

I was recently introduced to a seed starting method that I am using this year. Soil blocking has been around forever it seems, but I hadn’t heard of it. But now that I have had my seed-starting eyes opened, this is a method I will be using from this point forward.
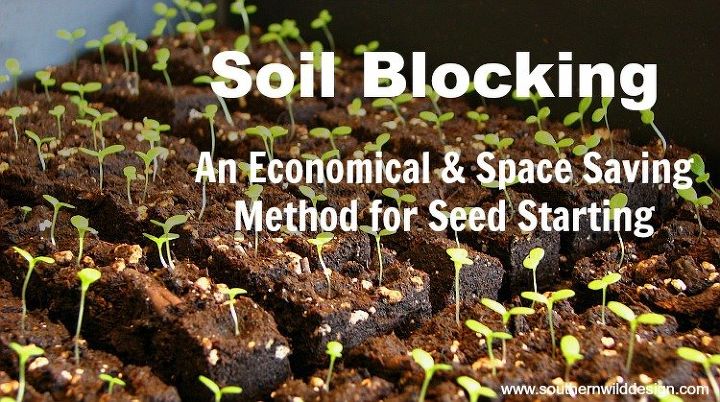
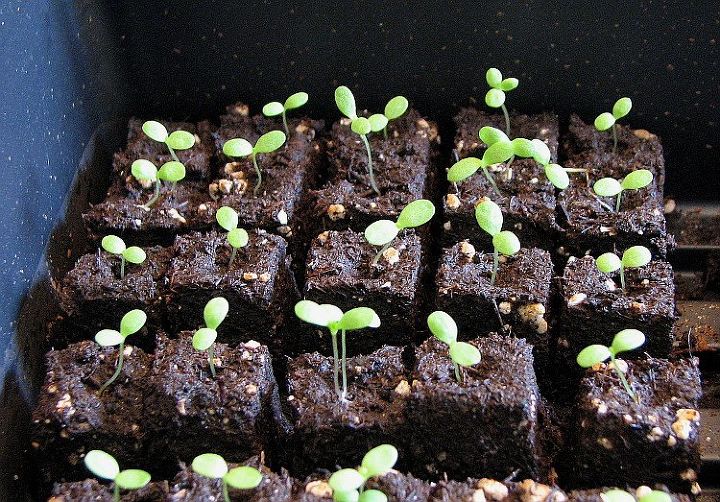
Soil blocking is just what it sounds like. Making small blocks of soil in which a single seed is planted. These blocks do not use a container but rather stand alone, therefore, requiring less space.


The plants benefit from this method because the roots receive more oxygen and do not get bound by a pot. This results in hardier plants for your garden that tend to bloom and fruit faster since there is no transplant shock.
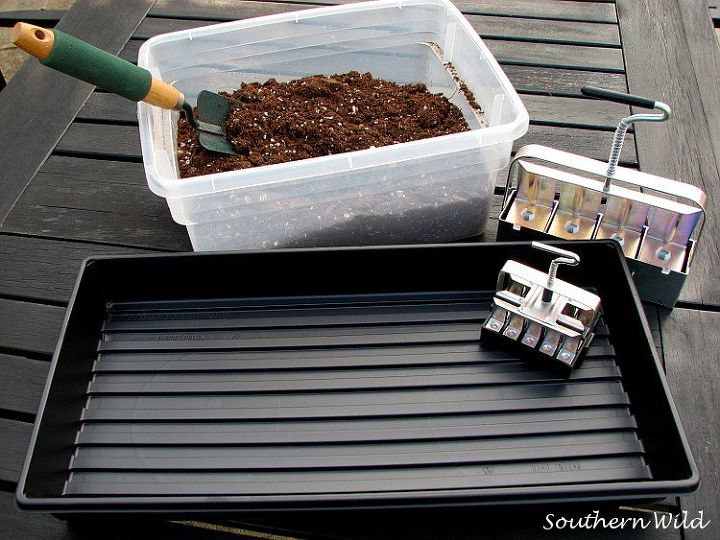
Gather Your Materials


Supplies needed:


Soil blocker


Seed starting soil mix for blocking


Tray for holding the blocks


Soil blockers are available to purchase in several sizes. After consulting with some very experienced gardeners, I purchased just two sizes; the small blocker that makes 20 blocks to a cluster for small seeds and the large blocker that makes 4 blocks to a cluster for large seeds. There are a number of places to purchase these including fellow flower grower Lisa Ziegler’s site The Gardener’s Workshop as well as places like Amazon and Johnny’s Seeds. Or if you want to get very industrious, there are some DIY soil blocker instructions out there. Just google “diy soil block maker.”


The seed starting mix you use must have fibrous material (peat) in it so that the block holds its form. There are many recipes for making your own mix but I chose to purchase Baccto Professional Grower’s Mix. By adding some organic compost and some water, this medium works very well. But beware! Not all grower’s mixes are good for this. Whatever mix you find, it must contain plenty of peat.


Finally, you will need a tray to put your soil blocks on. I used some plastic greenhouse trays that I can fit 300 mini-blocks on. I have seen other people use cafeteria type trays as well as the inexpensive styrofoam trays that you can purchase at the grocery store. Whatever type of tray you choose, make sure that it does not have holes in it.
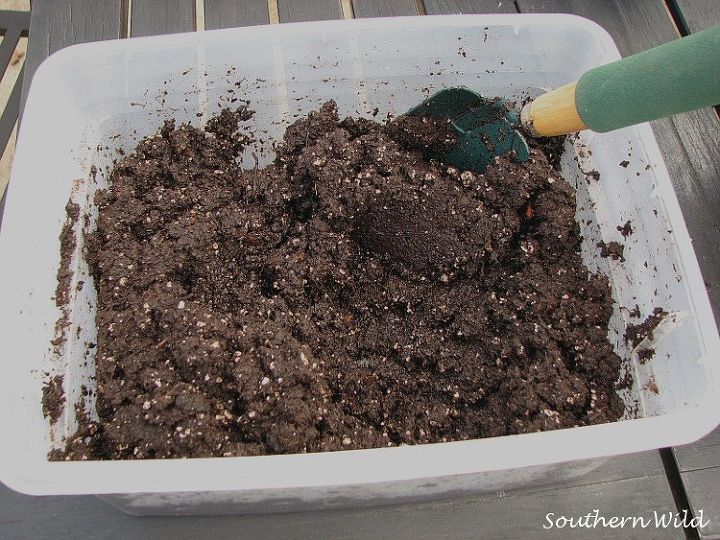
Step 1: Prepare the soil mix


If you purchase the ingredients to make your own mix, then follow the given recipe. Since I chose to purchase a grower’s mix I simply put several scoops of the mix in a container along with a couple of scoops of organic compost and plenty of water. The mix must be fairly wet. It reminded me of making mud pies at my grandmother’s house when I was a little girl!
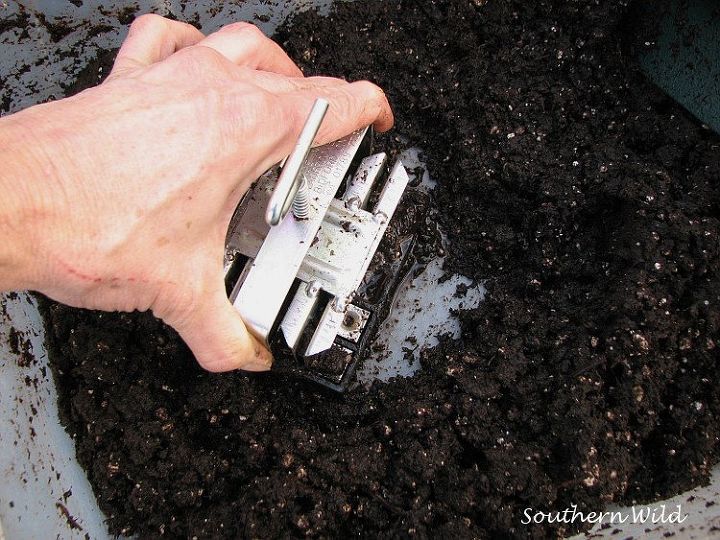
Step 2: Fill the blocker with soil


Now it’s time to get your hands dirty! Take the blocker of your choice and push it down into the mix to fill the block chambers with soil. Push the blocker down against the bottom of the container to press the soil firmly into the chambers.
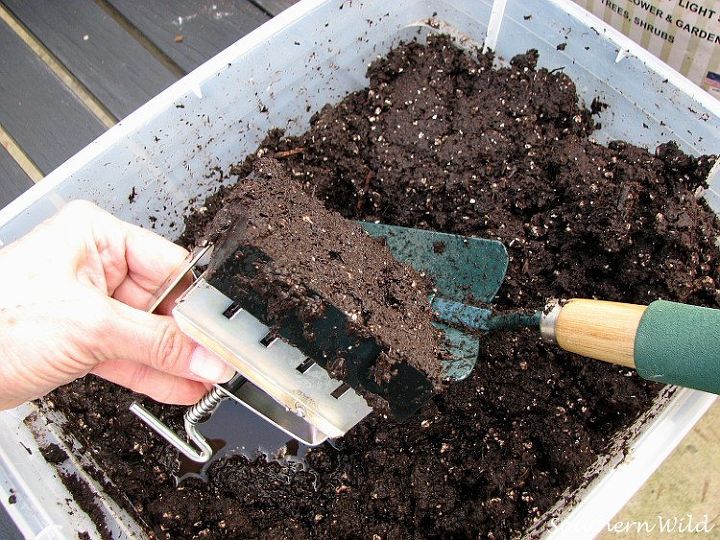
Lift the blocker up to see that all the chambers are full of soil mix. Using a trowel or some other tool, scrape off any excessive soil from the bottom of the blocker.
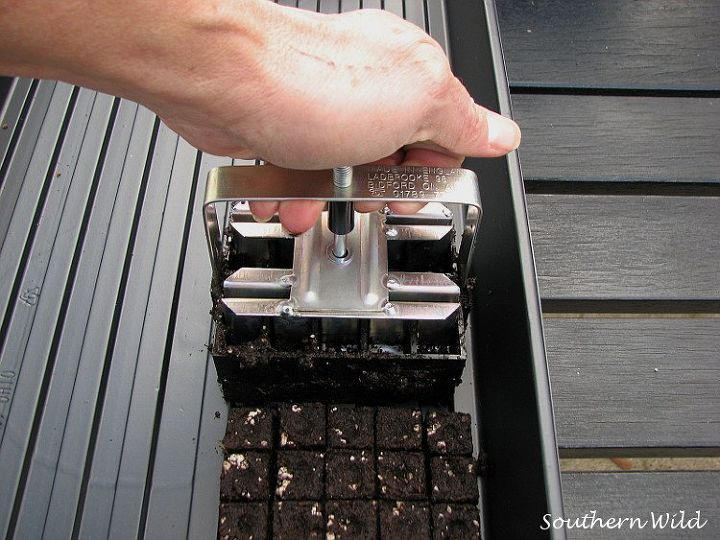
Step 3: Release the block


This is the best step because it provides that little rush of Wow! Place the block onto a tray and push down on the plunger handle. Lift the blocker up as you are plunging to fully release the soil. If your soil is not releasing from the blocker, you may need to add some water to the mix. Wow!
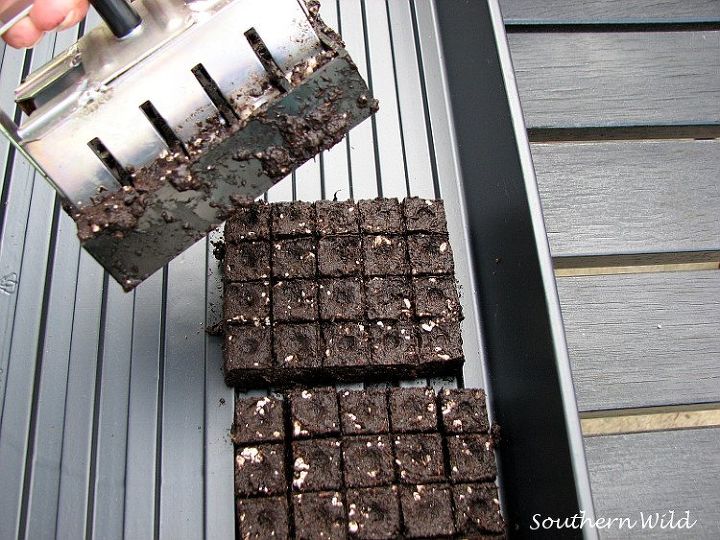
That’s it! These soil blocks are now ready to receive a single seed in the small indention on top of each block.
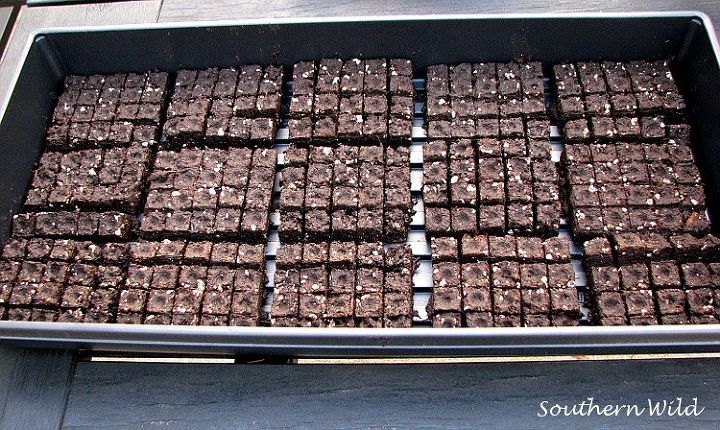
I was able to fill this tray with 300 soil blocks within a few minutes. This tray is the same size as the 72-cell planting trays. Had I used my old method of seed starting with an individual cell propagation tray, I would only be able to start 72 plants in this same-sized space.
See the blog on my website for more information about soil blocking! Spring is just around the corner! Have you started your seeds?
Frequently asked questions
Have a question about this project?
Comments
Join the conversation
Next