


What You Need to Know About Sowing Seeds Indoors
Are you starting a flower or vegetable garden from seed this year? Here’s what you need to know about sowing seeds indoors and what I learned along the way.
If you’ve been following along my seed starting journey, today we are chatting all about sowing seeds indoors.
In case you missed Parts 1-3 of this series:
- Overview of How to Start Seeds Indoors
- Supplies Needed to Start Seeds Indoors
- 7 Simple Tips to Getting Organized Before Starting Seeds Indoors
And today is the day we begin sowing seeds indoors. I am so excited to start growing new plants!
So let’s get started.
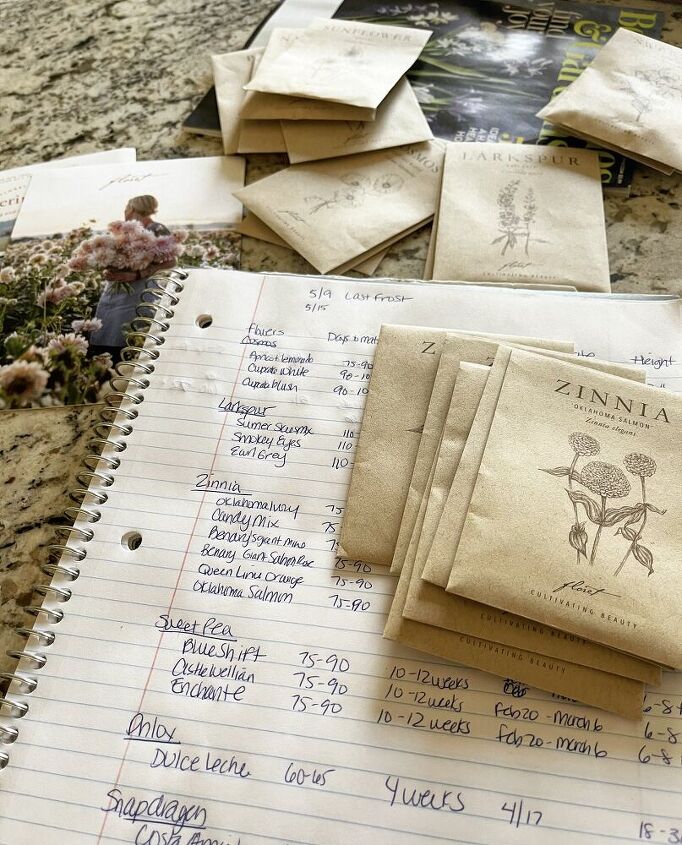
Sowing Seeds Indoors
Before beginning, read the seed package for sowing directions in case there’s anything you need to do beforehand.
I am starting sweet peas and it is recommended to soak them for 24 hours before sowing. Each seed variety may have their own requirements so prepare yourself ahead of time.
When you are ready to begin sowing seeds, here’s what to do.
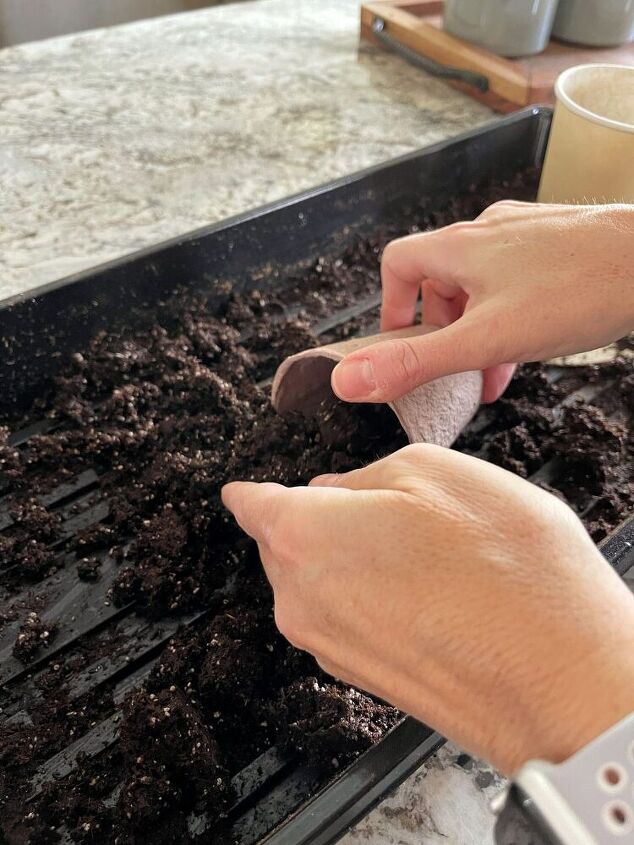
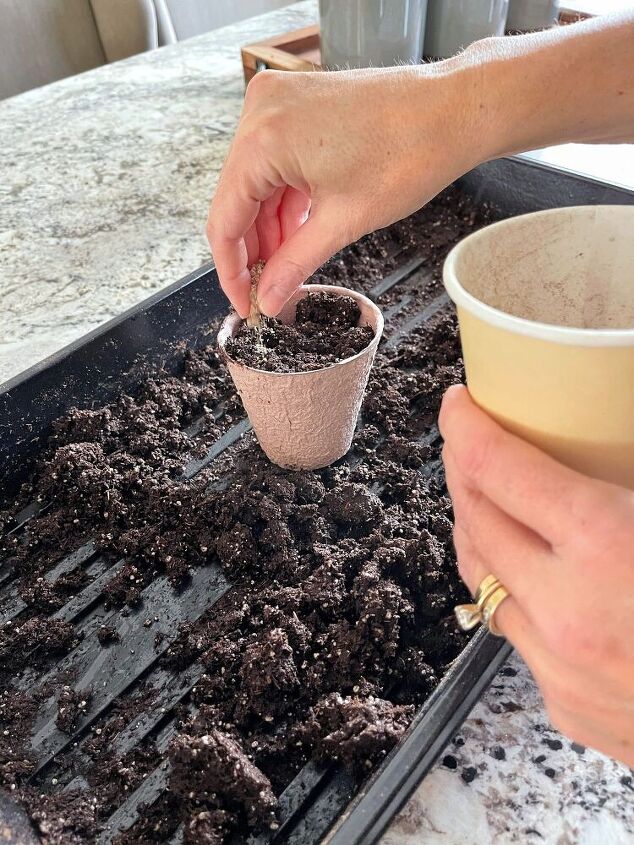
- Gather your seed starting supplies. If you don’t have a greenhouse like me, find a location in your home where you have room to work. I am sowing my seeds in the kitchen and will move the trays to the basement when finished.
- Fill each of the cell or pots with pre-moistened seed starting soil. Pack it down to remove any air bubbles and gaps.
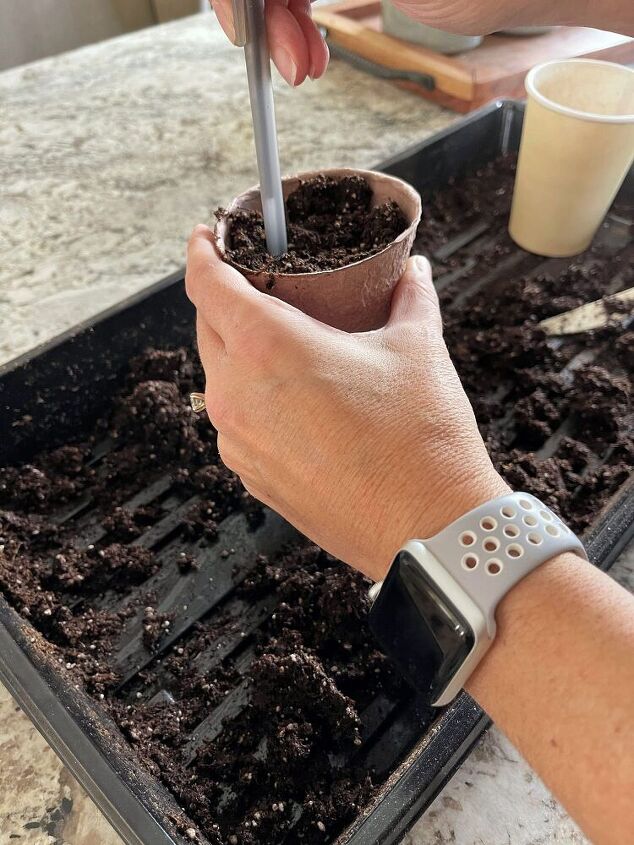
- Sow seeds according to seed packet directions. How deep you sow will depend on the seed variety. As a general rule, plant seeds twice their depth. For sweet peas, I used a pen to make a small hole and followed my good friend Kim from Shiplap and Shell’s advice to sow 2 sweet pea seeds at opposite sides of the pots. (Note: make sure you sow only one type of seed variety per tray because they germinate at different rates.)
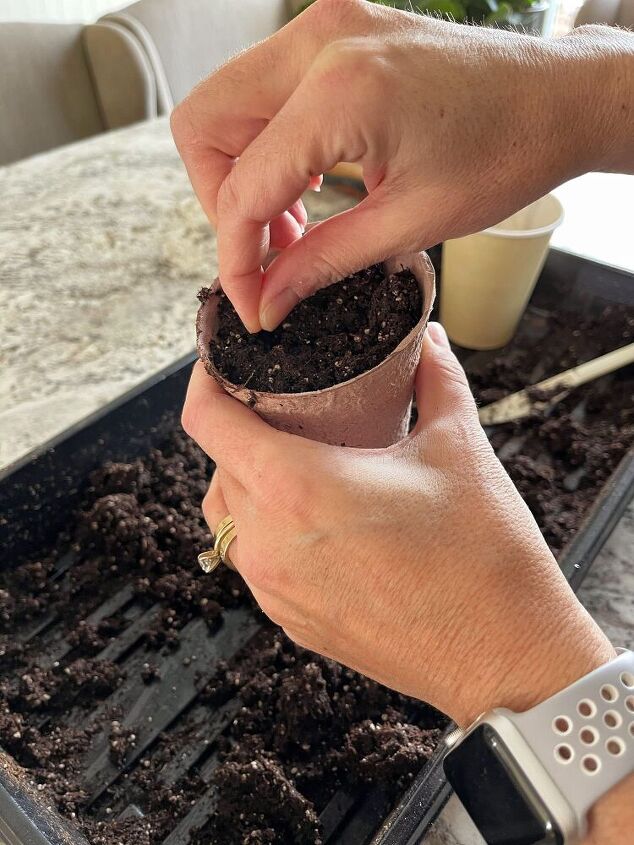
- Drop seed in hole then back fill with vermiculite. Depending on the type of seed, drop 1-2 seeds into each hole until the tray is completely full. It’s OK to cover with seed starting soil, but vermiculite is easier for seedlings to grow through.
- Label your seed trays and/or individual pots.
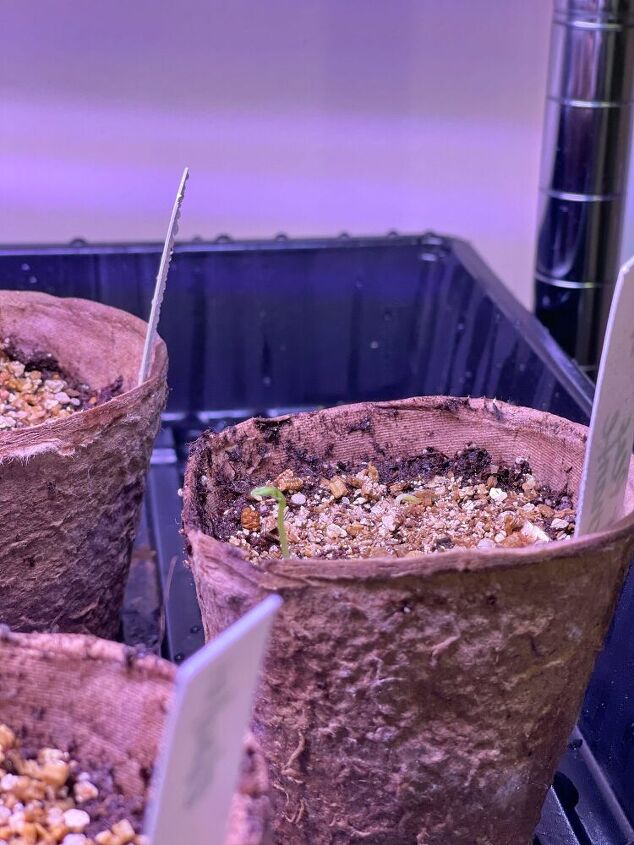
- Cover seed trays with plastic dome.
- Place trays on heat mats under grow lights. If you have a greenhouse like my friend Kim fro Shiplap and Shells, follow what this method.
- Set lights to be on for 14-16 hours per day. Using a timer works best for this.
- Check seedlings daily for germination.
- When seeds begin to sprout, uncover and remove from heat mats. Don’t worry if they didn’t all sprout because more will germinate after the dome is removed.
- Place trays under the lights and keep them fairly close – like an inch or so away from the tallest seedling. Keep any eye on seedling growth as you will need to adjust the lights while they grow.
- Make sure you keep the soil moist and always water from the bottom. If the seeds aren’t in a tray that has a water reservoir, sit them in a tray of water for about an hour so they can soak it up from the roots.

3 Lessons I Learned From Sowing Seeds Indoors
- As much as I love using biodegradable pots, they stay really moist and grew a little mold around the outside of them. I’ve been cleaning them off and it’s disappearing, but I will just use recycled and re-usable plastic moving forward. It’s less risky.
- Because I am only sowing one seed variety per tray, I should have bought more seeds of that same variety or would only need to use 36 cell trays vs 72 cell trays. Since my suburban garden can only fit so much, I bought only one seed packet of each variety.
- Turn heat mats around so the cord hangs down in the back of your shelving. Seems kind of obvious, but apparently not to me. I was so excited to start and get my sweet peas on the mats that I set it up without really thinking about it. So I’ll fix this with the next set of seeds that I start.
Watch It on YouTube
Check out my YouTube video demonstrating how to sow seeds indoors without a greenhouse.
For more gardening tips, tricks and inspiration, CLICK HERE.

If you like this post, please follow me @bricksnblooms on Pinterest, Facebook, Instagram, and TIk Tok. Subscribe to my YouTube Channel. Or join my Facebook Group.

Comments
Join the conversation
-
Thanks for sharing!
-
Thanks for this. On a whim I bought some seeds and had no idea of how to start them. After this TX freeze I am longing for some color other than dead brown.


Frequently asked questions
Have a question about this project?