


How I Painted My Kitchen Cabinets Using a HVLP Spray System

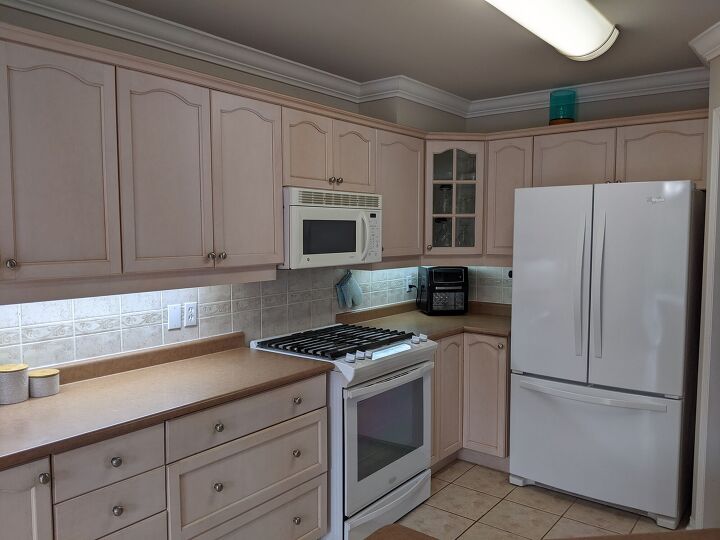
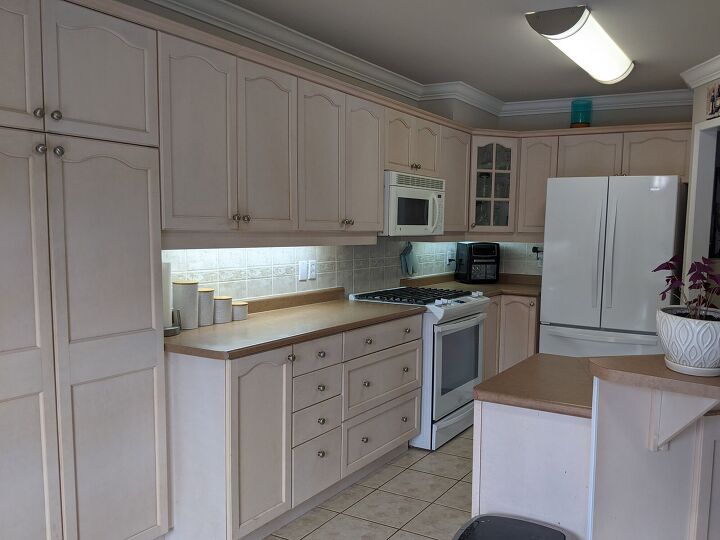
My kitchen cabinets were pink! Or is that salmon? Either way…why? Who does this! I decided, after living with it for eight years, the time had come to paint them. I did a LOT of research and decided to use a HVLP spray system to get as close to a factory fine finish as possible. If there is anything I would hate even more than the pink, it would be brush strokes (obvious DIY).
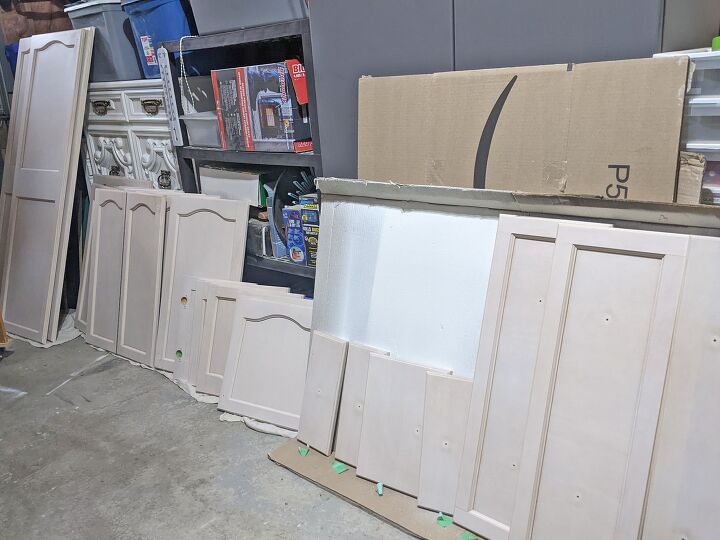
Replacing the doors would have been my first choice, but that is not in the budget. Another option would have been to have the doors sent out and painted professionally, but that would cost a few thousand $ I’m guessing, as I have a quite a few cabinets - 31 doors and drawers in this section. Still not in the budget.
For details on how I closed in the space at the top click here.
Alrighty then; Decision made. Courage harnessed. LET’S GO!
STEP 1: REMOVE, CLEAN & SAND
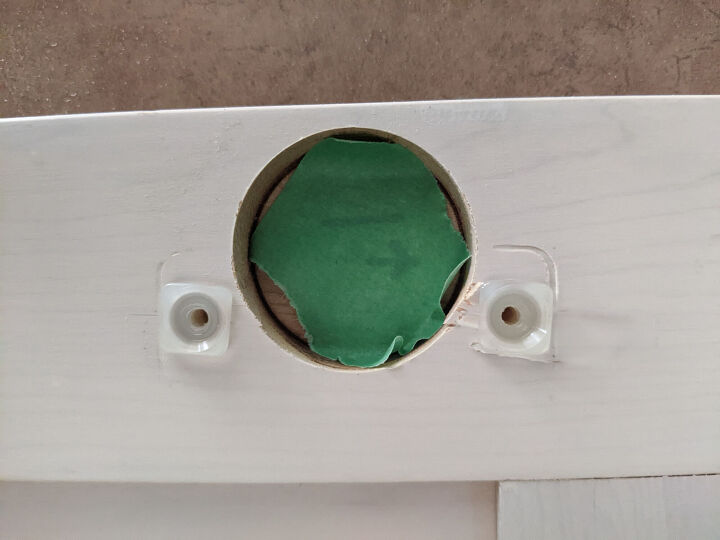
I removed the hinges from the doors, but left the hinges attached inside the cabinets. I drafted out the layout of my cabinets on paper and assigned each door and drawer a number. I wrote those numbers inside the hinge holes and covered with painters’ tape.
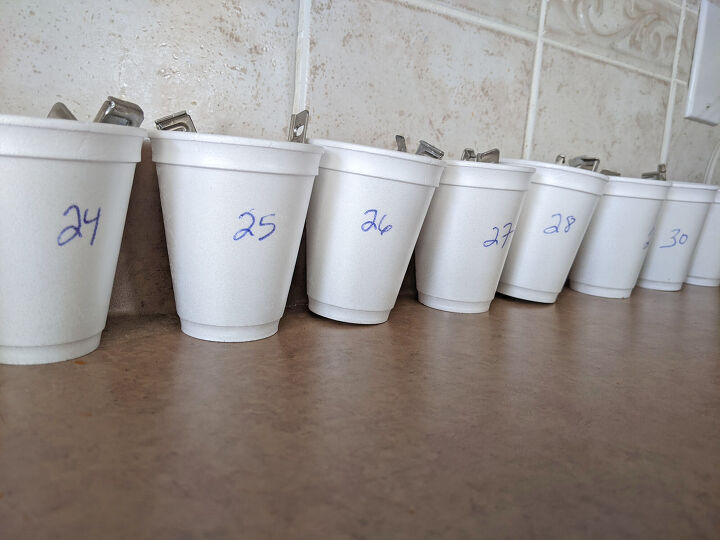
I stored the hardware for the drawers in numbered cups. Because there were no hinge holes to write my numbers on the drawers themselves, I used painters’ tape.
I brought everything to the garage and washed them using TSP degreaser, diluted in warm water, and then rinsed with clean water. I also removed the bumpers using a putty knife.
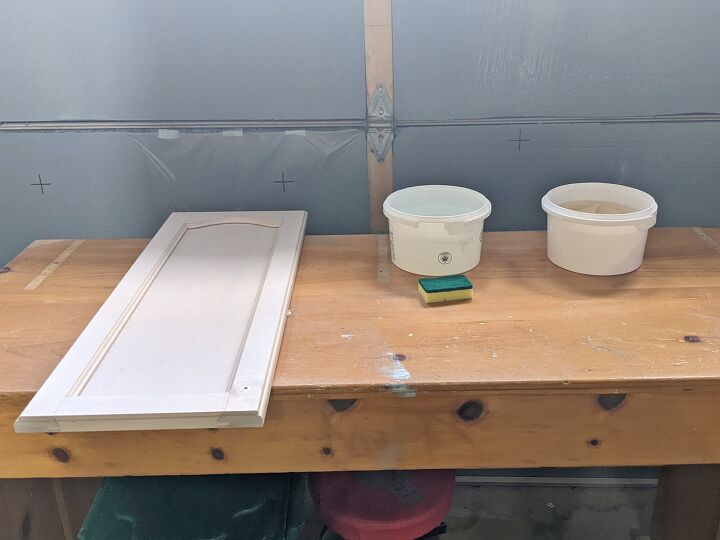
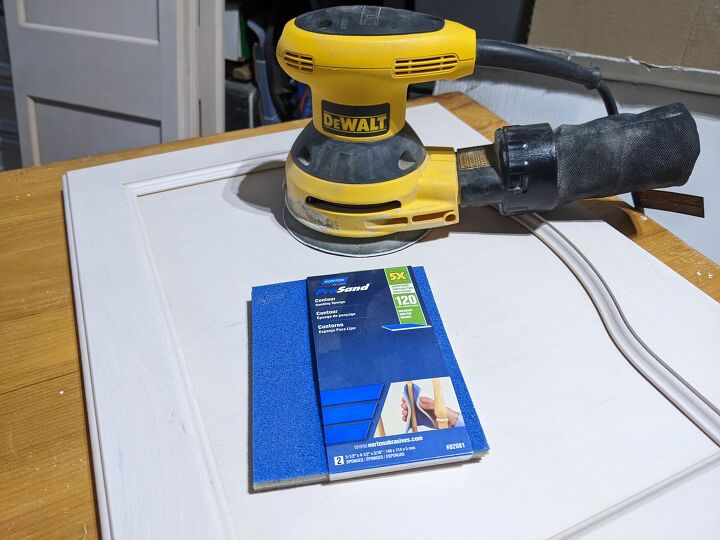
I sanded with 120 grit sandpaper, using an orbital sander and a sanding sponge. I didn’t go crazy sanding, just enough to rough up the surface and dull the shine.
STEP 2: PREPARE MY GARAGE
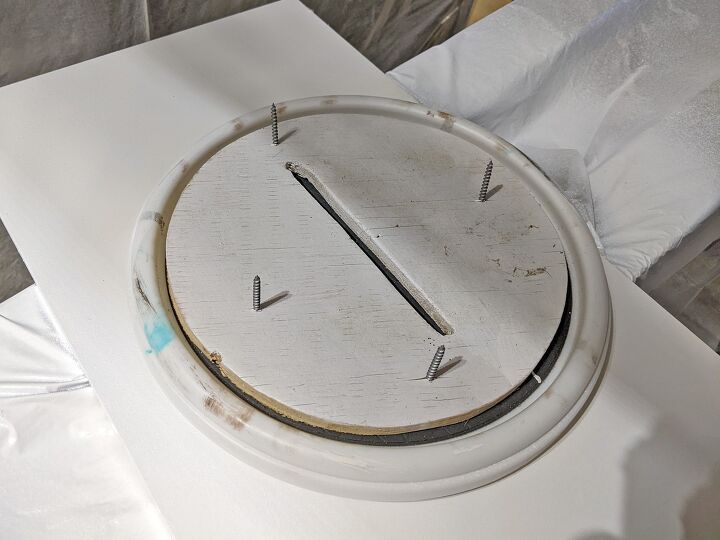
I built a paint tent in my garage. It was poorly constructed, using scrap wood and movers’ plastic, but it worked great for a free solution. I placed saw horses inside, covered with plastic, and placed a lazy Susan from the dollar store on top. I lined the floor with cardboard.
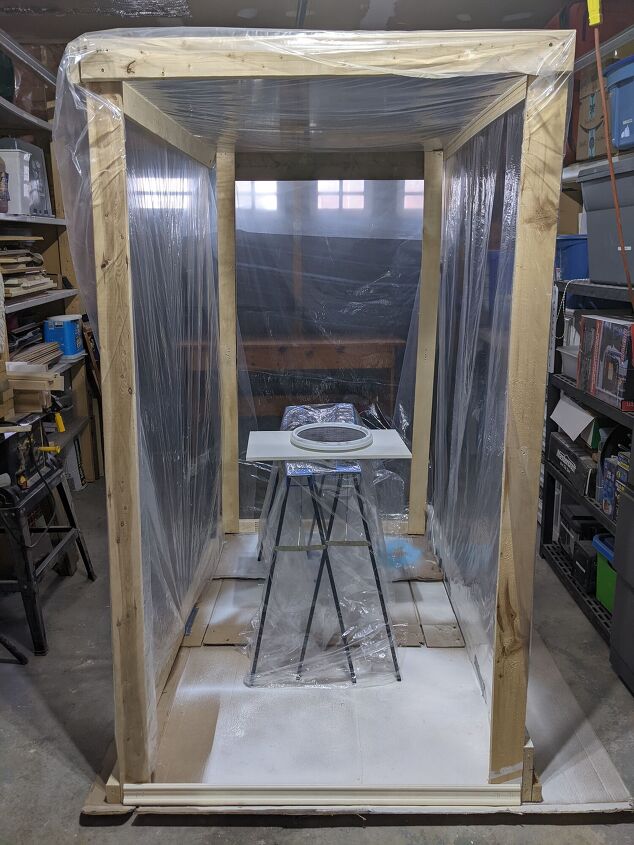
Coincidentally I found a round piece of wood in my scrap pile the perfect size to fit inside the lazy Susan!! This was a stroke of luck! I drilled screws through it, to hold up my doors while painting.
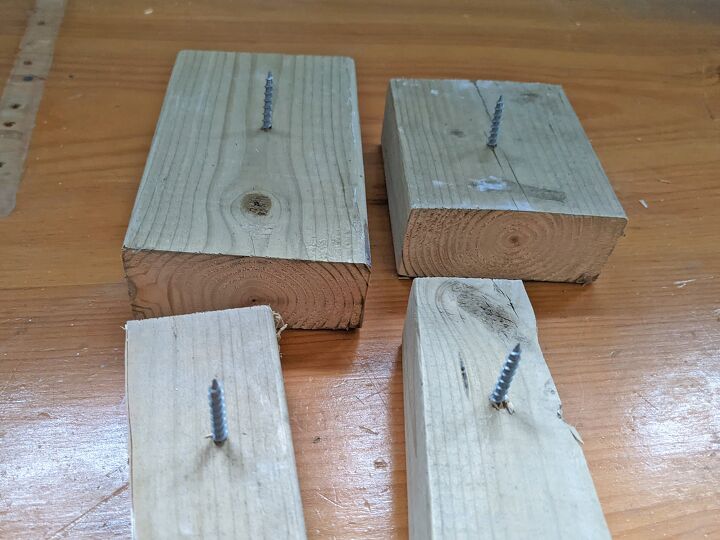
I drilled screws through pieces of scrap wood, to lay the doors on while drying.
I then vacuumed the garage and left it overnight for any dust to settle. I used a radiant heater to heat up my garage to a minimum of 12°C / 53.6°F (the minimum temperature for proper drying and curing). A few nights it dropped down to -26°C / -14.8° F so I also used a propane heater to keep the temp up.
PRIMING & PAINTING
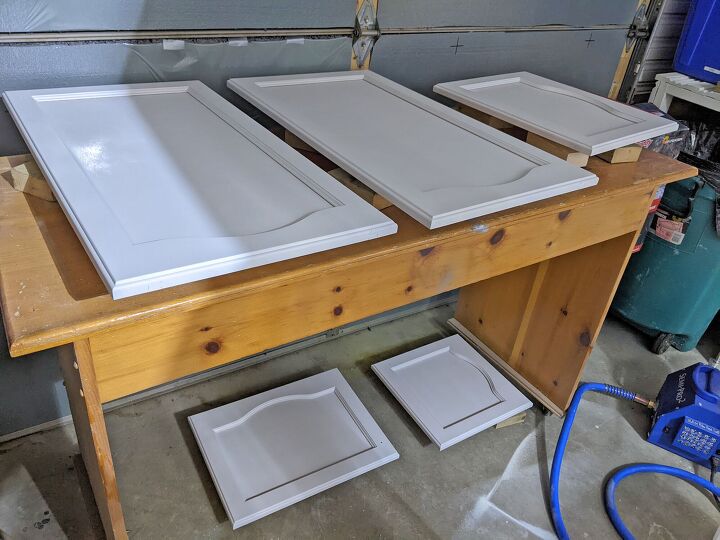
Now for the fun part! Due to limited space for drying, I worked on six doors/drawers at a time. I started with my top cabinets. I wiped each one with a tack cloth prior to painting. I spray painted the back of each door with primer, then waited for them to dry to the touch, which was around two hours, then I flipped the doors and primed the opposite sides. I didn’t clean the spray gun between sides. After priming the second side, I cleaned my spray gun (takes 10 minutes) and left the doors for 24 hours, so the primer would start the curing process. I wore a respirator while painting.

The following day I sprayed the paint, using the same method; spray the backs, wait two hours, flip over and spray the back. Wash the gun. I only did one coat on the back of the doors, but on the fronts I did a second coat. It looked perfectly fine with one coat, but I wanted to make sure it was durable and could hold up to kitchen grime and frequent washing. I waited 17 hours between the first and second coat, as per the instructions on the can. This particular paint is beautiful, but the time between coats is quite long and really slowed down the process. To complete each set of six doors, primed plus two coats of paint, took roughly three days!
A FEW TIPS ON HVLP SPRAYING
Watering down the paint:
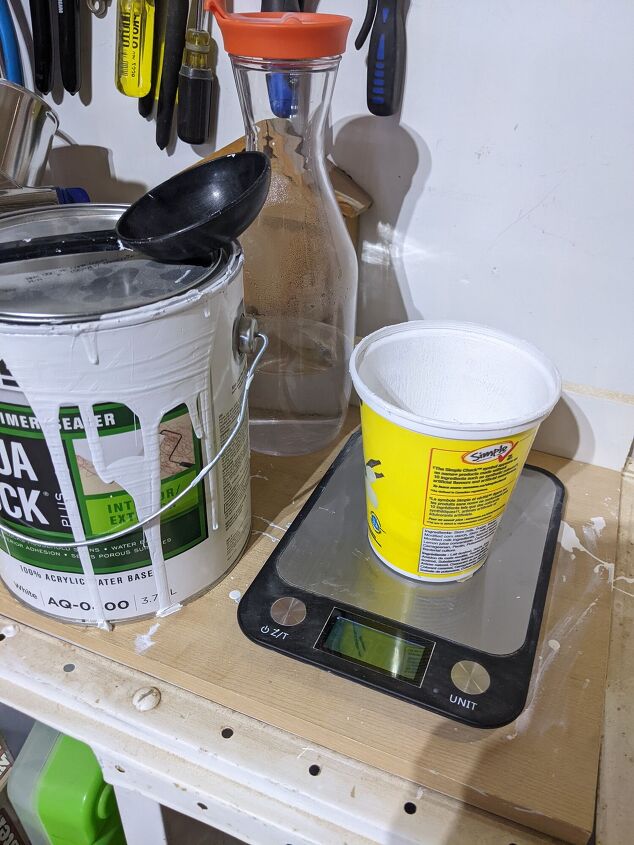
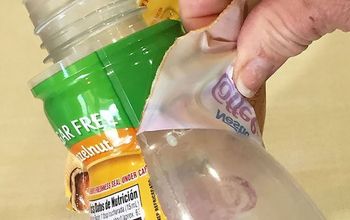
With a HVLP system, you need to add water to the paint so it will atomize properly. The system comes with a cup where, from my understanding, you pour the paint through it and time how long it takes to run through. Then you add water and keep running through until the suggested run-through time is reached in order to achieve the proper viscosity. That sounds pretty confusing to me…and also very time consuming! So I watered mine down by weight, using a kitchen scale! I added paint (or primer) to a yogurt container, using a big spoon, and calculated what that weight would be with an added 6%, as per the maximum water suggested on the paint can. So much easier!! For the primer, the can said not to add water, but I did add 5%, on the advice of Fuji’s customer support. That is such a small amount of water! But it atomized the thick primer perfectly.
It is also important that your paint has no lumps or clumps that could block the gun, so I used a paint strainer each time I refilled the gun cup.
Aircap set / tip:
I also purchased a separate 1.8 mm tip, as this larger tip is better suited for thick paints and primers than the aircap that comes with the gun.
Painting:
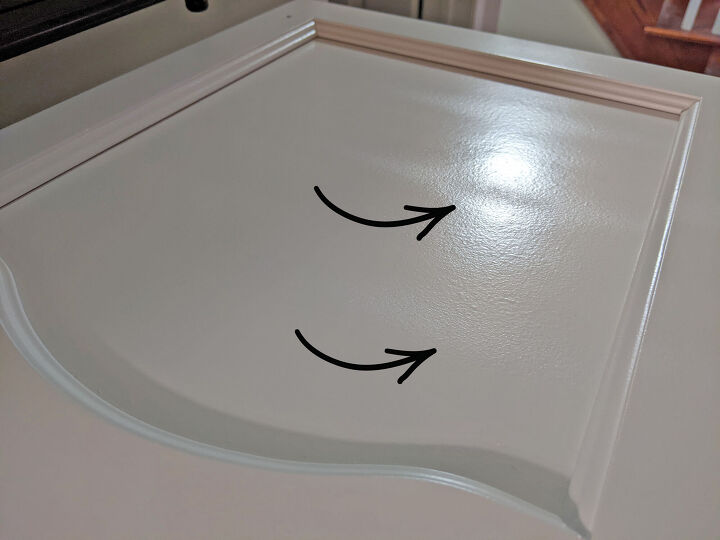
It’s very important that the entire surface is wet. Even though the paint is self-leveling, it will only level on the wet areas. If there is even a small spot missed – you will notice it when it dries. Here is a photo of what happens, not sure if you can see what I’m referring to? I had to add an additional coat to the first set of doors due to this issue. Afterwards I made sure to look closely, using a flashlight on each freshly painted surface, to make sure it was fully wet…and never had this issue again.
Hoses:
The hose on the system is heavy duty…and well, it’s heavy...and stiff! So I purchased a flexible whip hose for my particular system. It made a huge difference to the weight and flexibility while working with the gun. In my opinion, it’s a must have for a large project such as mine, or for anyone with carpal tunnel, like me. I read reviews that said a six- foot extension garden hose from a hardware store will work just as well (they have the same fittings), but it’s winter here in Canada, so garden hoses and accessories are hard to find. I just ordered the whip hose!
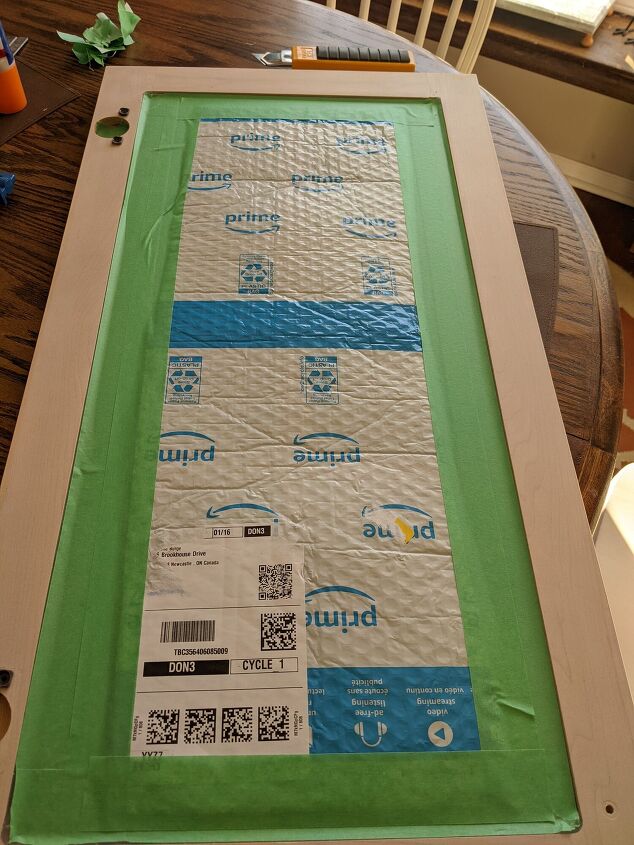
Ok, back to the project. For the glass corner cabinet, I applied painters’ tape to the edges and covered the center with a plastic bubble envelope.
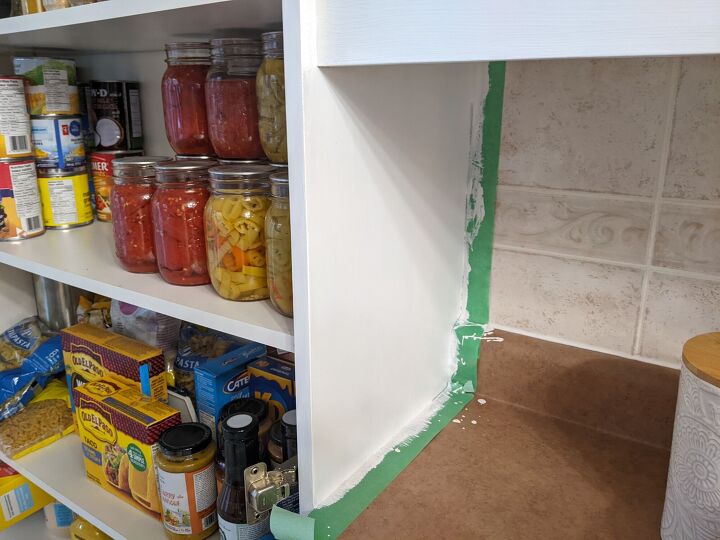
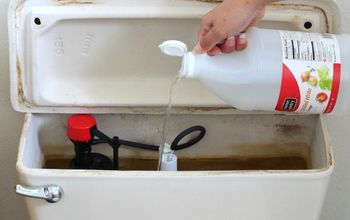
During the drying times, I also painted the trim and surfaces inside the kitchen that were pink. There wasn’t a lot of painting inside. I prepped the same way; TSP cleaner, rinse and a light sanding. I then taped off and used a brush on those areas. One coat of primer, two coats of paint.
I planned to change out some of the hardware styles, so during another one of the drying cycles I used wood filler and sanded the original holes and/or drilled new holes.
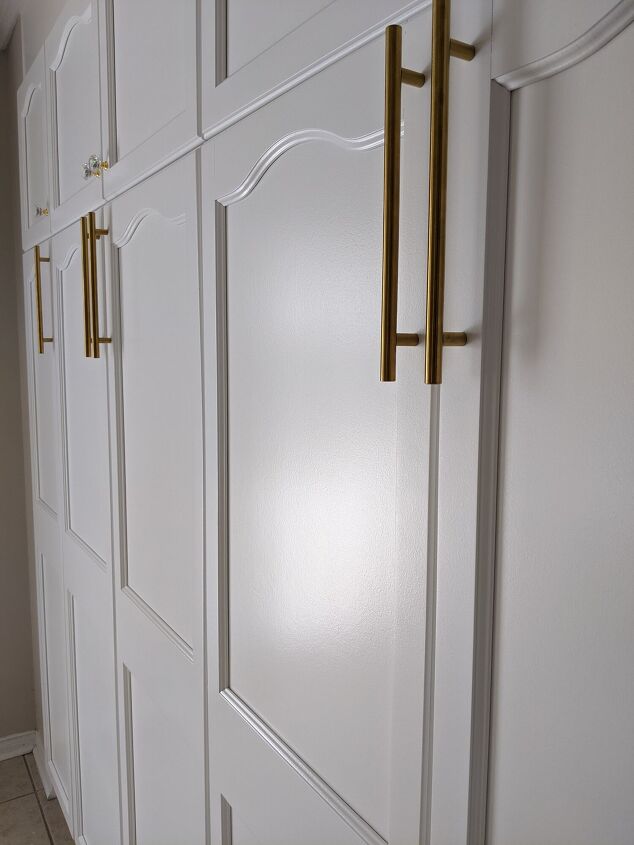
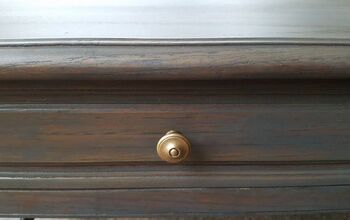
As each set dried, I re-installed the doors!! I used my drill, set to the lowest setting, to screw all the hinges back into the doors. I added new bumper pads and the new hardware. I went with three different styles of hardware to give it more visual interest. (I spent way too much time and effort choosing hardware!)
Piecing everything back together was very satisfying! Because the primer takes seven days to fully cure and the paint takes three to five days, my daughter and I were VERY careful until the curing process had finished. I would have liked to have them fully cured before re-installing, but I just didn’t have space for that.
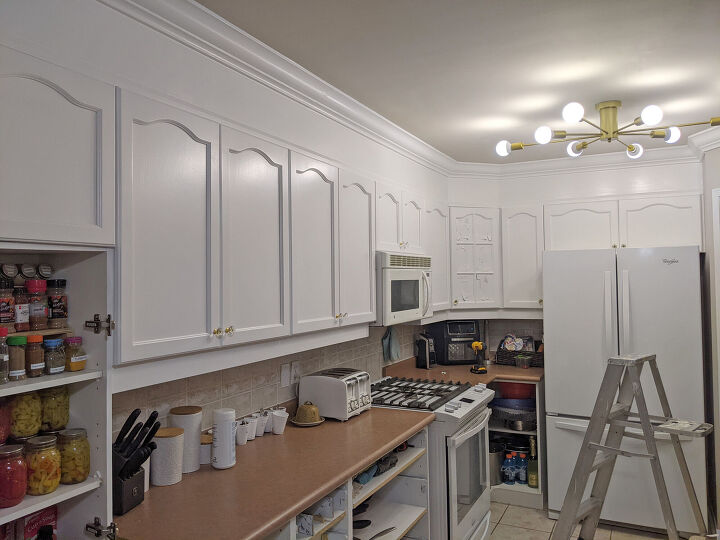
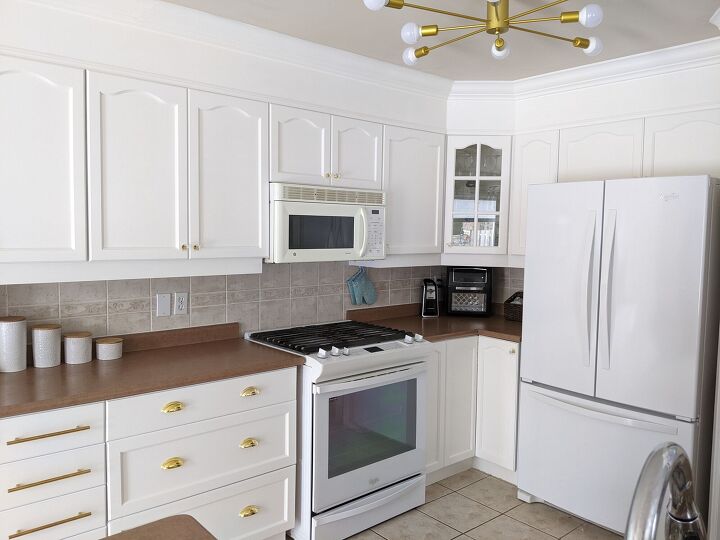
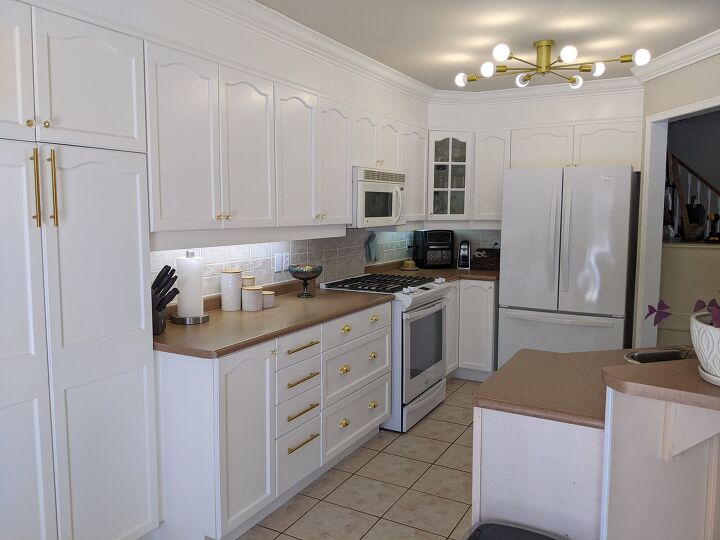
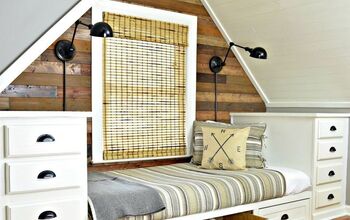
And done!

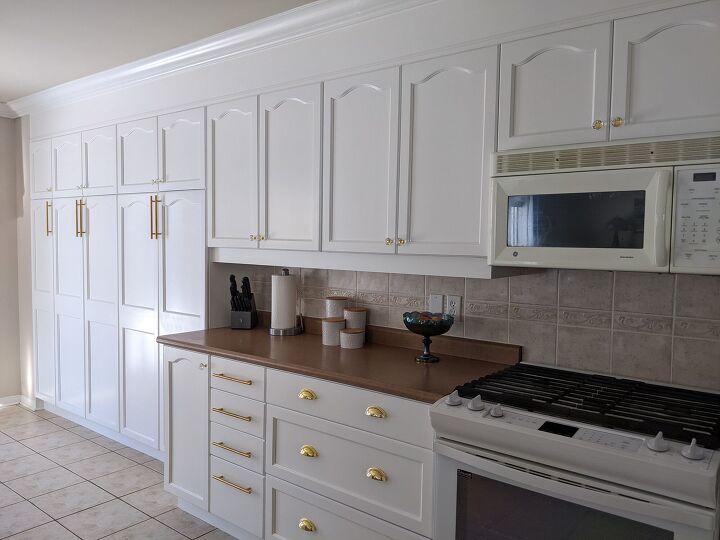
The finish is so beautiful, with no brush strokes (except where I painted the inside trim with a brush). I could have painted this entire project with a brush and posted photos and they probably would look pretty much the same in photos, but in person you can really see the difference! I’ve painted hundreds of times, and this is the best finish I’ve ever achieved.
While I spent a lot on this project ($1003), I included the cost for everything from the sprayer/accessories, paint, primer, sandpapers, strainers, door bumpers and new hardware pulls – everything I used for this project! And these are Canadian prices, so my fellow DIYers to the south would pay much less for these items. The sprayer alone is $100 less on amazon in the US vs amazon Canada.
I’ve used airless sprayers in the past and it somewhat resembled a fire-hose, spewing paint instead of water. I know many people achieve great results with airless sprayers, but I never have! I’ve tried both the cheaper ($185) and mid-range ($400) and I always wasted so much paint with overspray and never achieved the finish I was hoping for. And clean-up was a nightmare!
HVLP sprayers are a slower process, you wouldn’t want to paint your house with it, but for furniture and cabinet doors I think it’s far superior to any other process I’ve tried over the years. It's my favourite new tool!
I just love walking into my kitchen every morning to make coffee… and seeing my bright new kitchen. Next up, I need to tackle the ugly pink peninsula…although….maybe I’ll pause to paint out the dingy beige ceiling first!
I know I’ve rambled on more than normal about this project. But this is a post I would have LOVED to read years ago. 😊

Comments
Join the conversation
-
sorry I found you list missed it was so excited about try this in the spring.
-
wow, u r my hero 🦸♀️ looks fabulous….


Frequently asked questions
Have a question about this project?